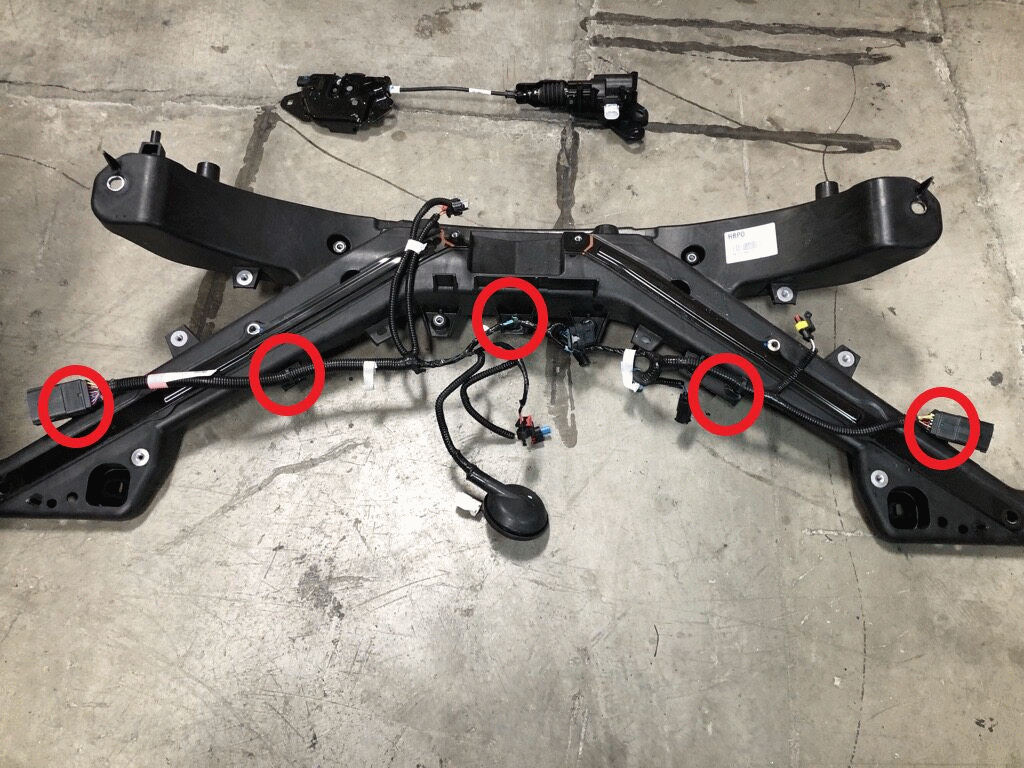
- Install FEM harness to front end carrier
NOTE:
5x clips
 Courtesy of TESLA, INC. Courtesy of TESLA, INC.
|
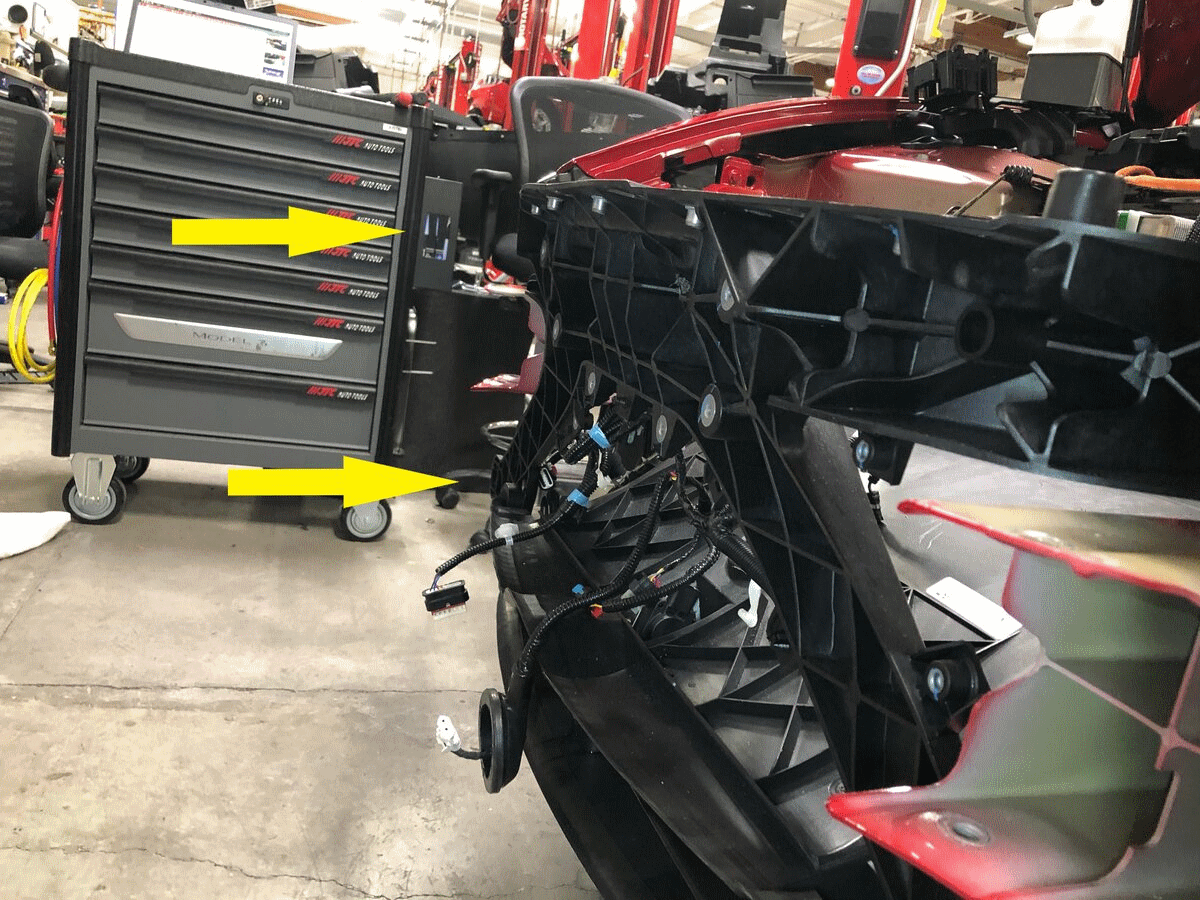
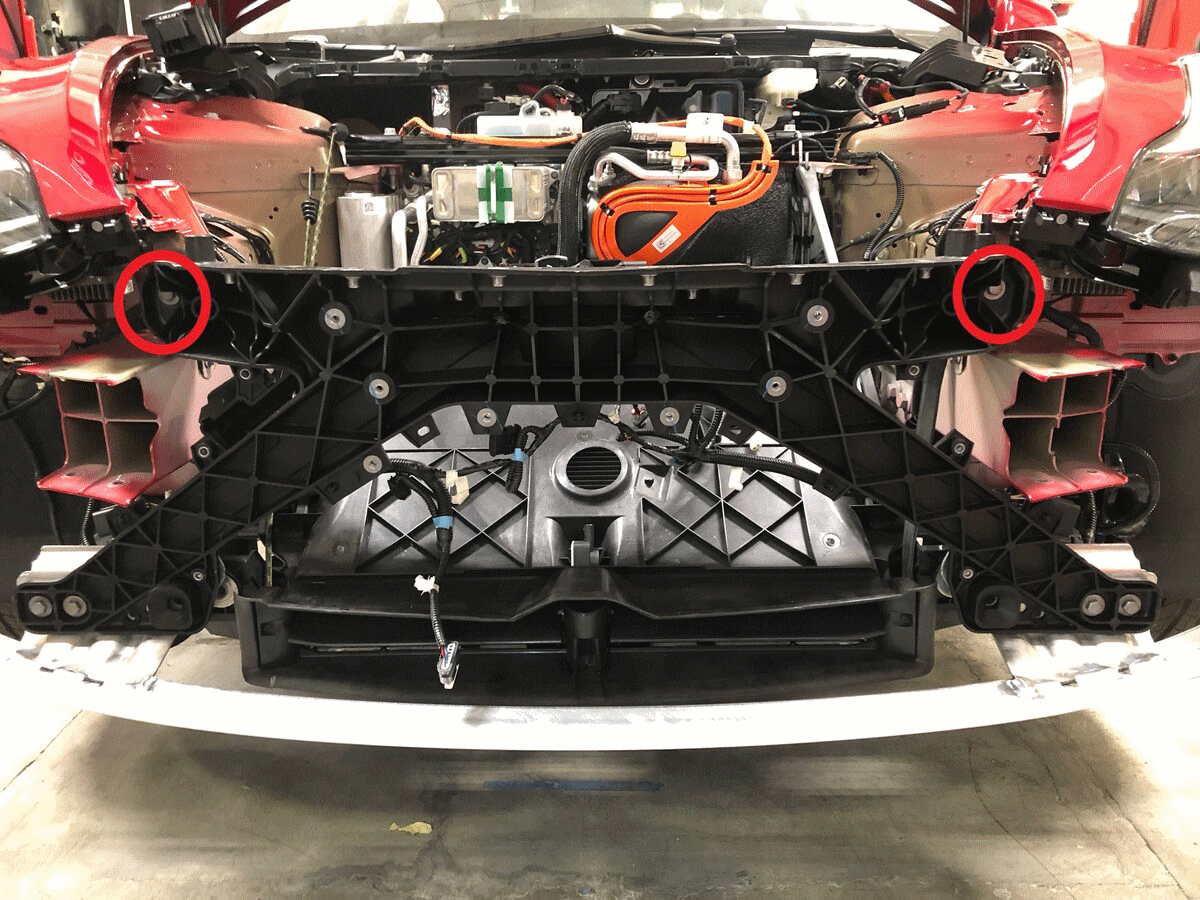
- Position front end carrier to vehicle and install upper bolts securing front end carrier hand tight
NOTE:
2x bolts, 13 mm, 16 N.m, Torque at later step
 Courtesy of TESLA, INC. Courtesy of TESLA, INC.
|
 Courtesy of TESLA, INC. Courtesy of TESLA, INC.
|
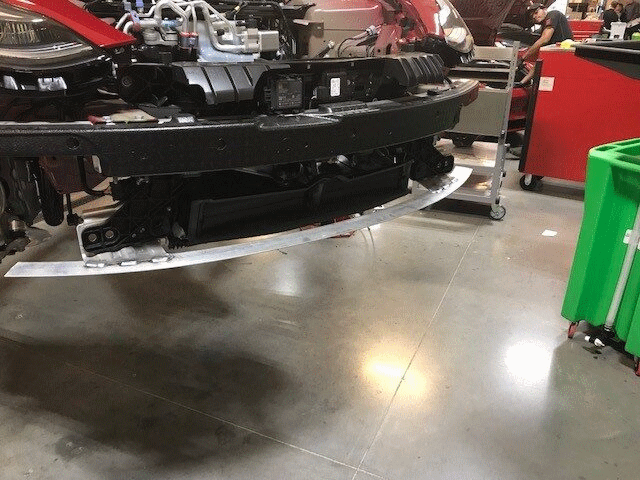
- Position the ankle catcher onto the front end carrier
NOTE:
2x datums, Slightly pull carrier outward to secure ankle catcher onto datums
 Courtesy of TESLA, INC. Courtesy of TESLA, INC.
|
- Install lower bolts securing front end carrier to vehicle
NOTE:
4x bolts, 13 mm, 16 N.m
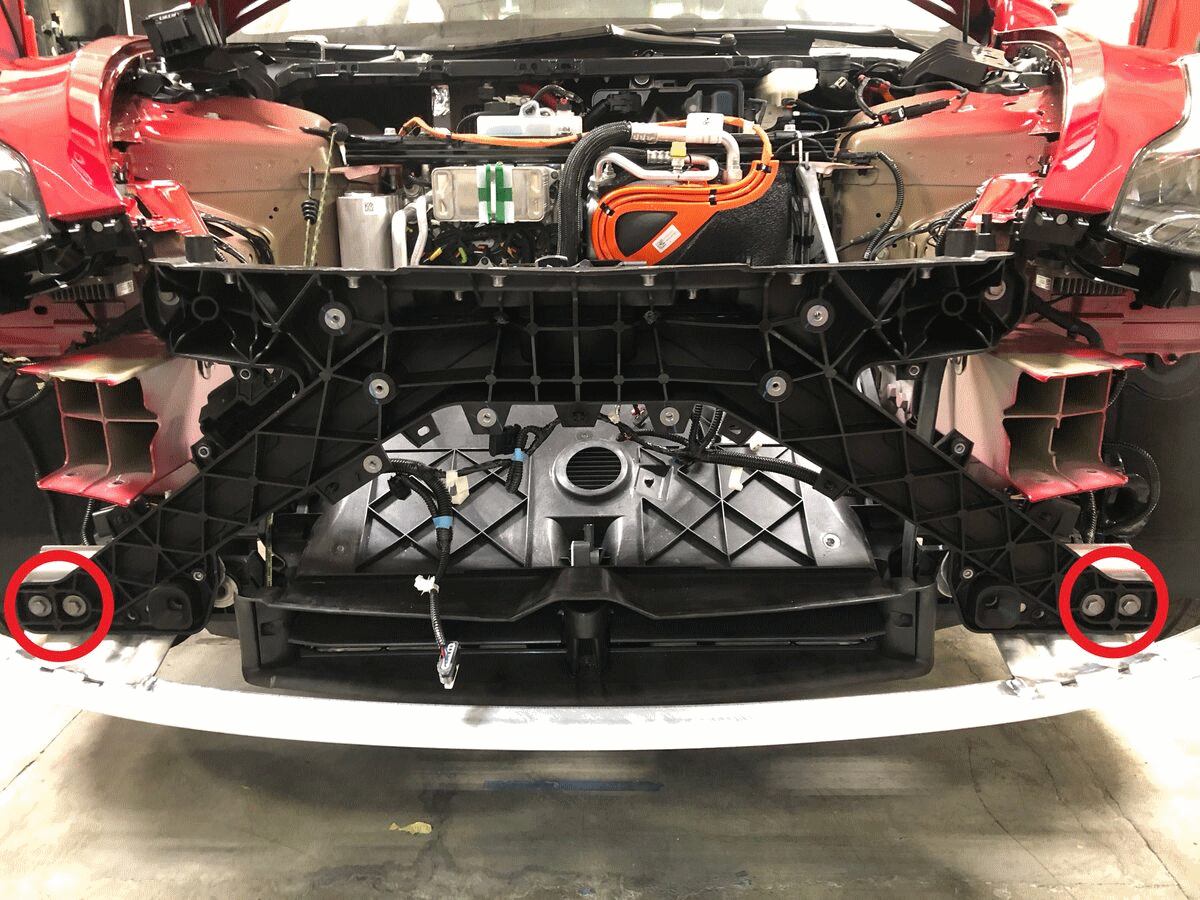 Courtesy of TESLA, INC. Courtesy of TESLA, INC.
|
- Torque upper bolts securing front end carrier to vehicle
NOTE:
2x bolts, 13 mm, 16 N.m
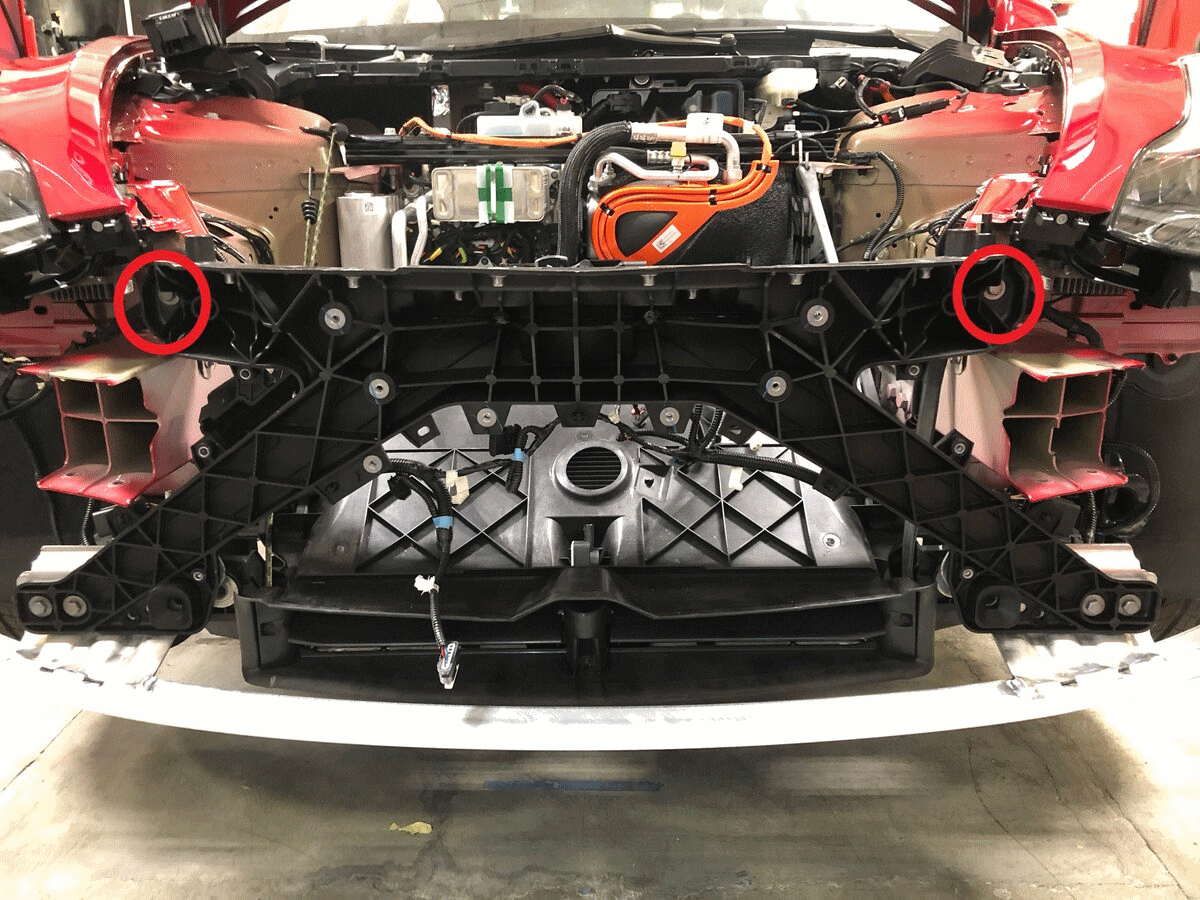 Courtesy of TESLA, INC. Courtesy of TESLA, INC.
|
- Install bolts securing cooling fan module to front end carrier
NOTE:
2x bolts, 8mm, 10 N.m
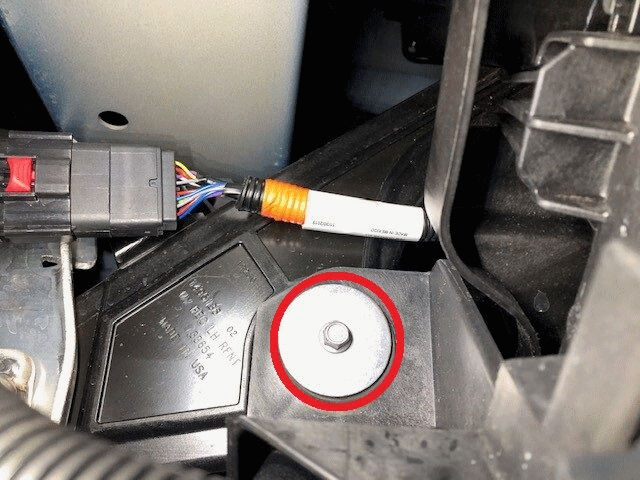 Courtesy of TESLA, INC. Courtesy of TESLA, INC.
|
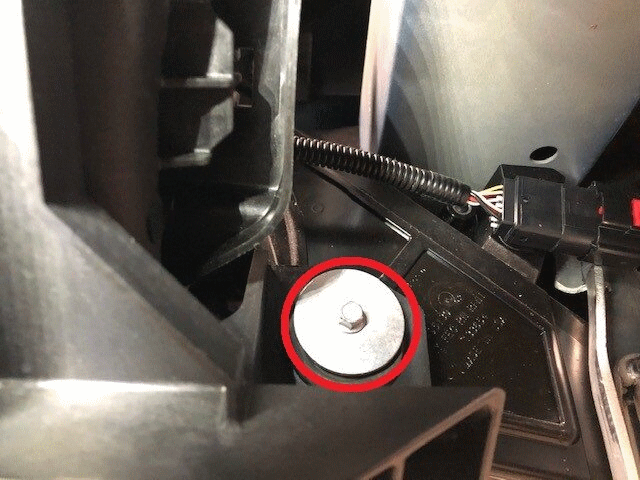 Courtesy of TESLA, INC. Courtesy of TESLA, INC.
|
- Remove bungee cords supporting cooling fan module assembly
NOTE:
2x bungee cords
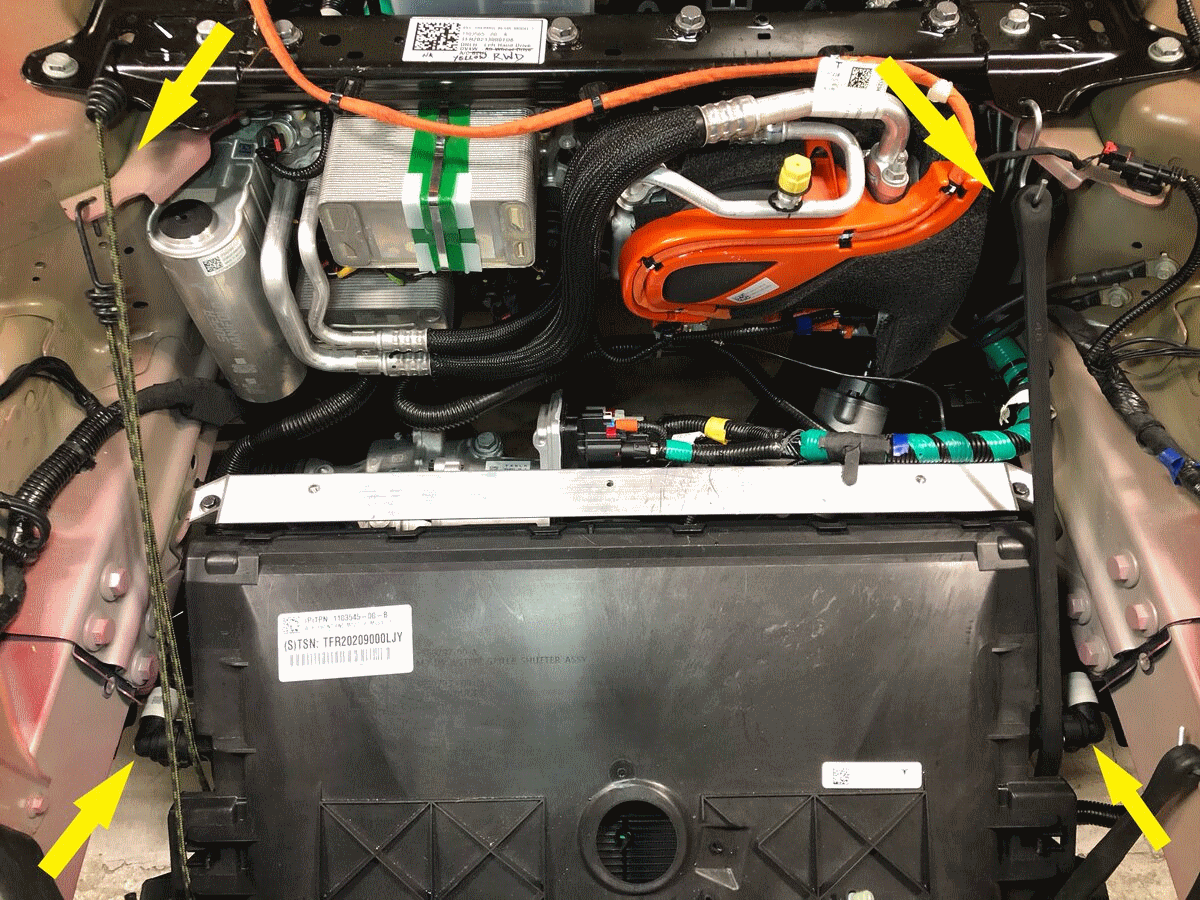 Courtesy of TESLA, INC. Courtesy of TESLA, INC.
|
- Install the FEM radar bracket to front end carrier
NOTE:
4x bolts, 10 mm, 8 N.m
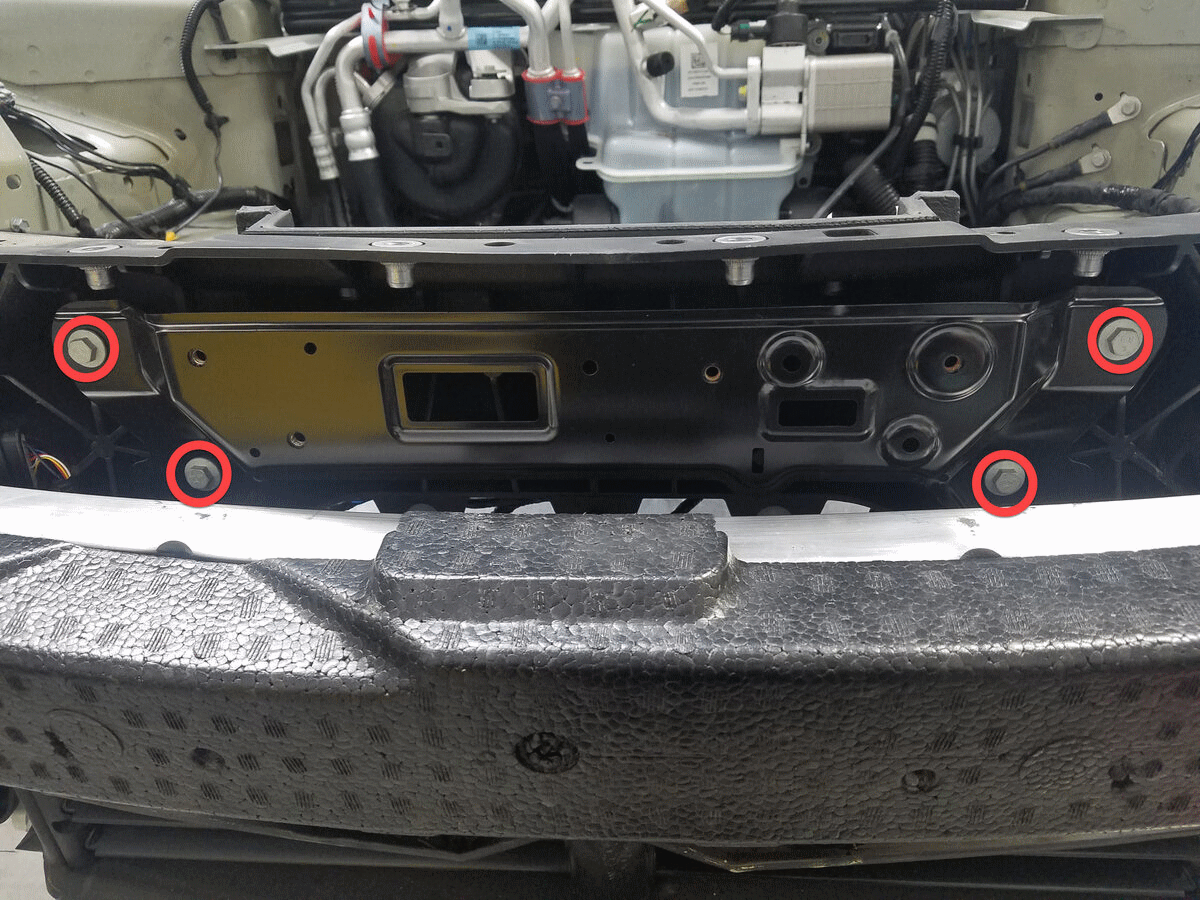 Courtesy of TESLA, INC. Courtesy of TESLA, INC.
|
- Connect radar assembly connector
NOTE:
1x connector
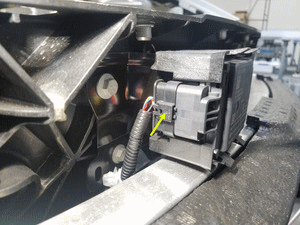 Courtesy of TESLA, INC. Courtesy of TESLA, INC.
|
- Install radar assembly harness clip to FEM radar bracket
NOTE:
1x clip
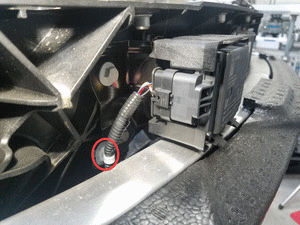 Courtesy of TESLA, INC. Courtesy of TESLA, INC.
|
- Connect RH FEM harness connector
NOTE:
1x connector, Engage locking tab
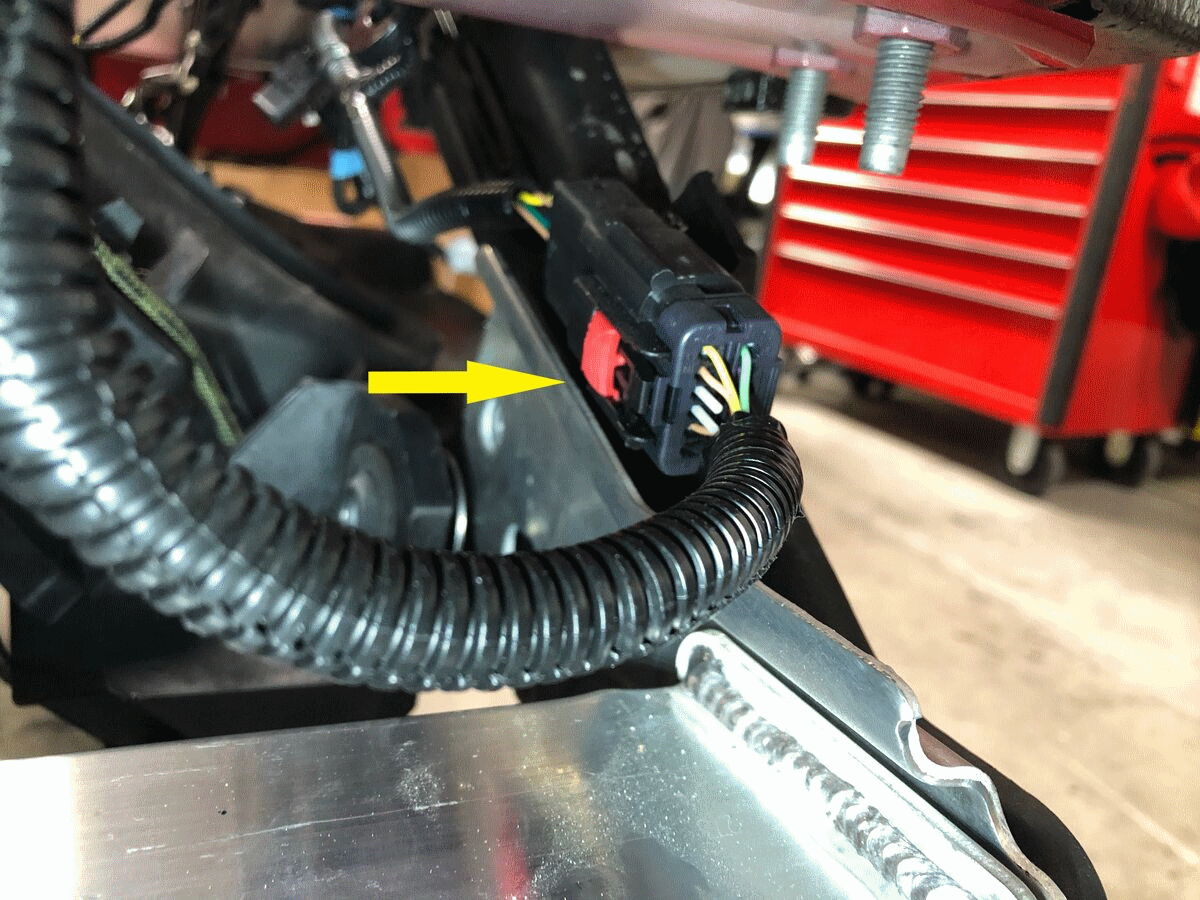 Courtesy of TESLA, INC. Courtesy of TESLA, INC.
|
- Connect LH FEM harness connector
NOTE:
1x connector, Engage locking tab
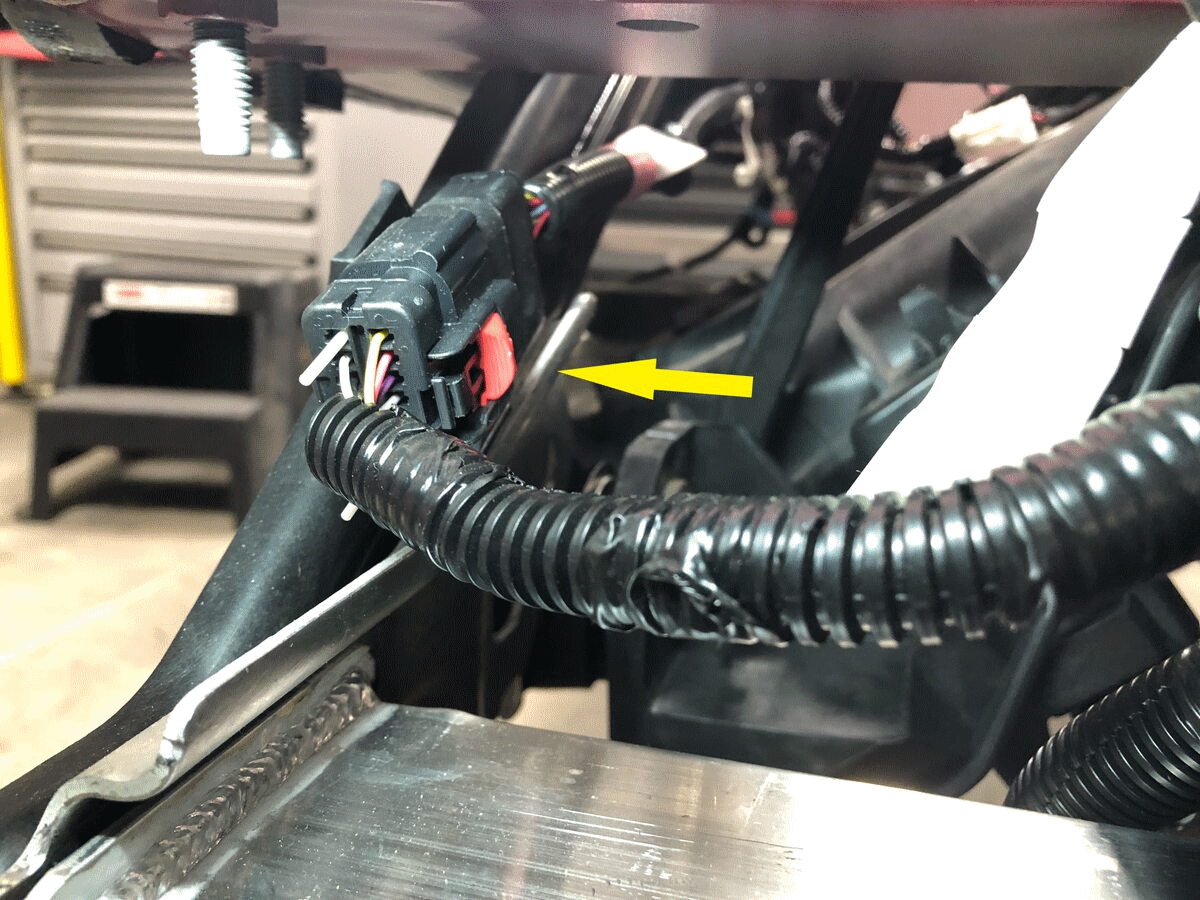 Courtesy of TESLA, INC. Courtesy of TESLA, INC.
|
- Position front bumper beam with energy absorber
NOTE:
Use a dead blow hammer as needed to install front bumper beam into front crush cans
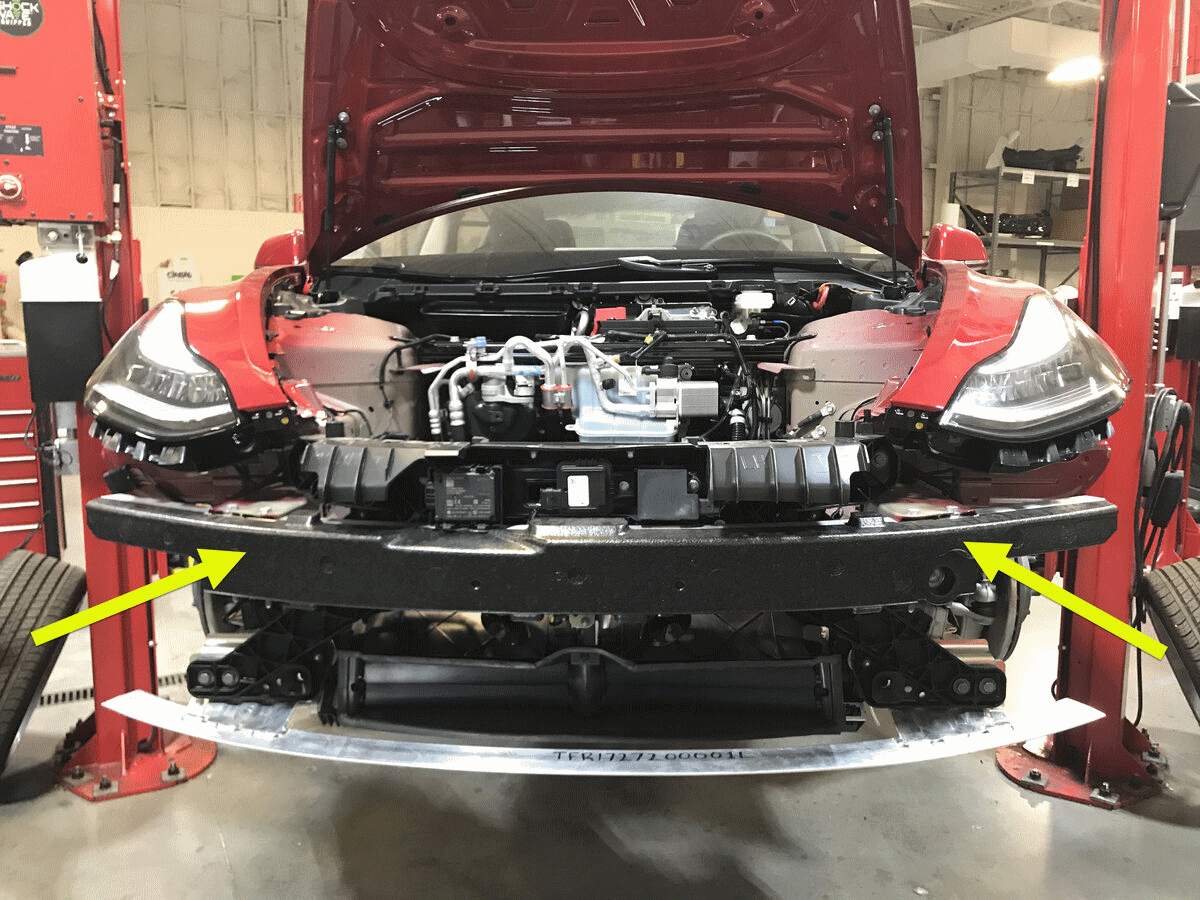 Courtesy of TESLA, INC. Courtesy of TESLA, INC.
|
- Install bolts securing front bumper beam with energy absorber to LH crush can
NOTE:
2x bolts, 15 mm, 75 N.m
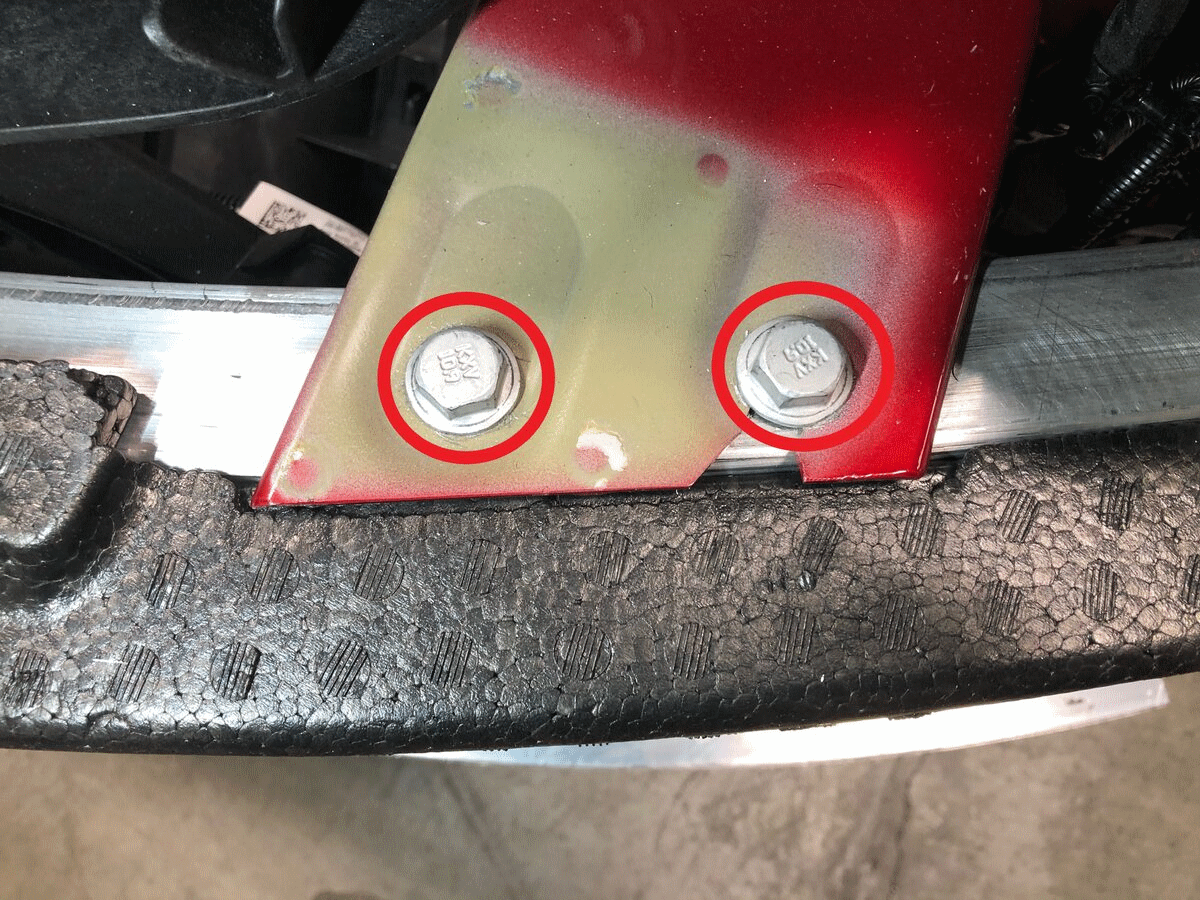 Courtesy of TESLA, INC. Courtesy of TESLA, INC.
|
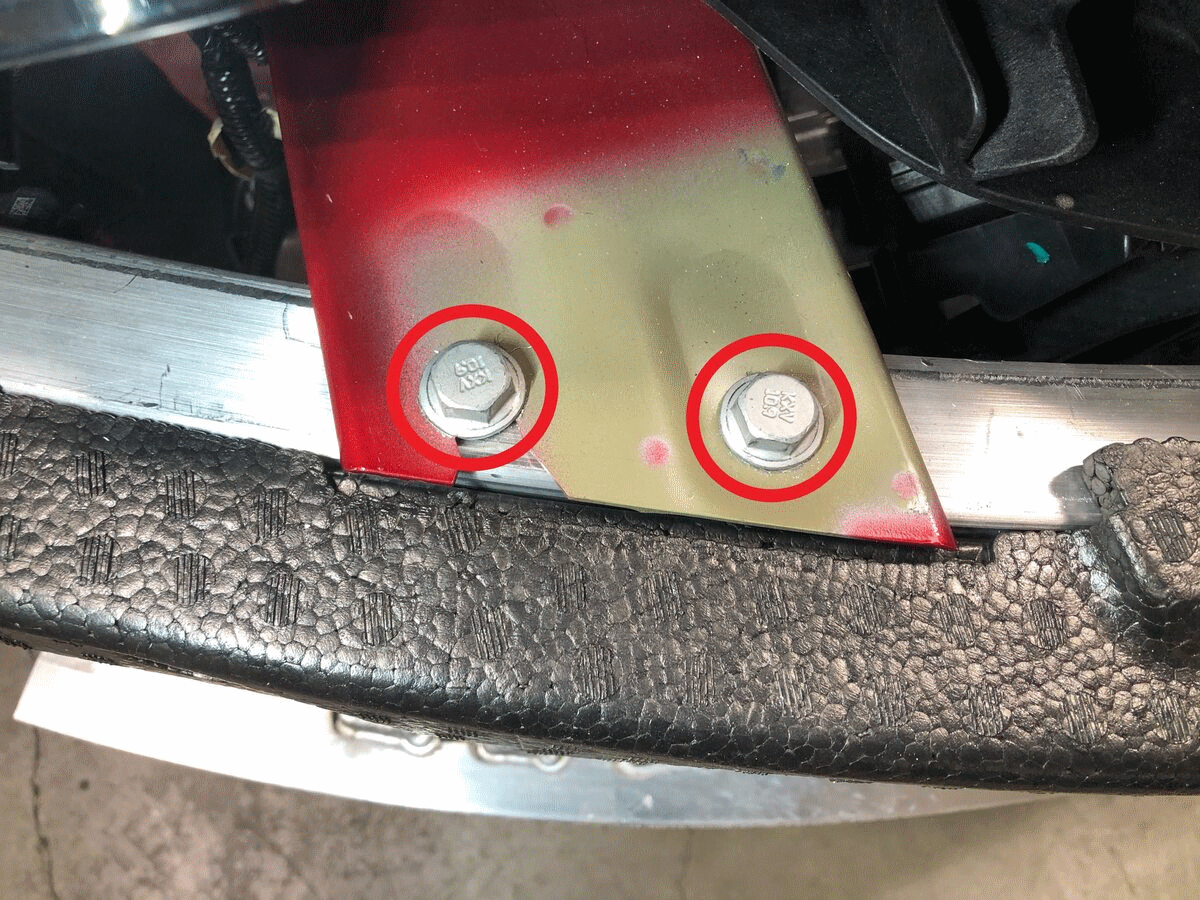
- Install bolts securing front bumper beam with energy absorber to RH crush can
NOTE:
2x bolts, 15 mm, 75 N.m
 Courtesy of TESLA, INC. Courtesy of TESLA, INC.
|
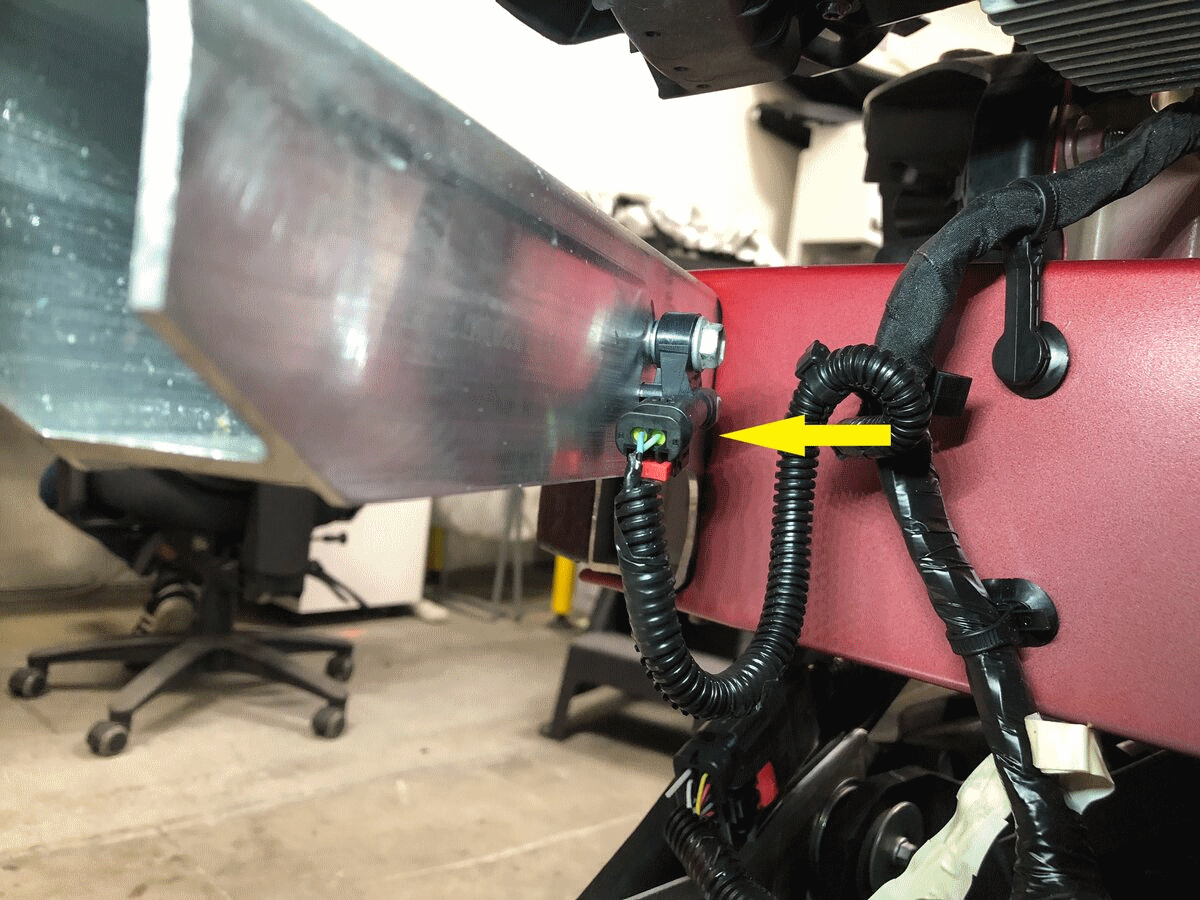
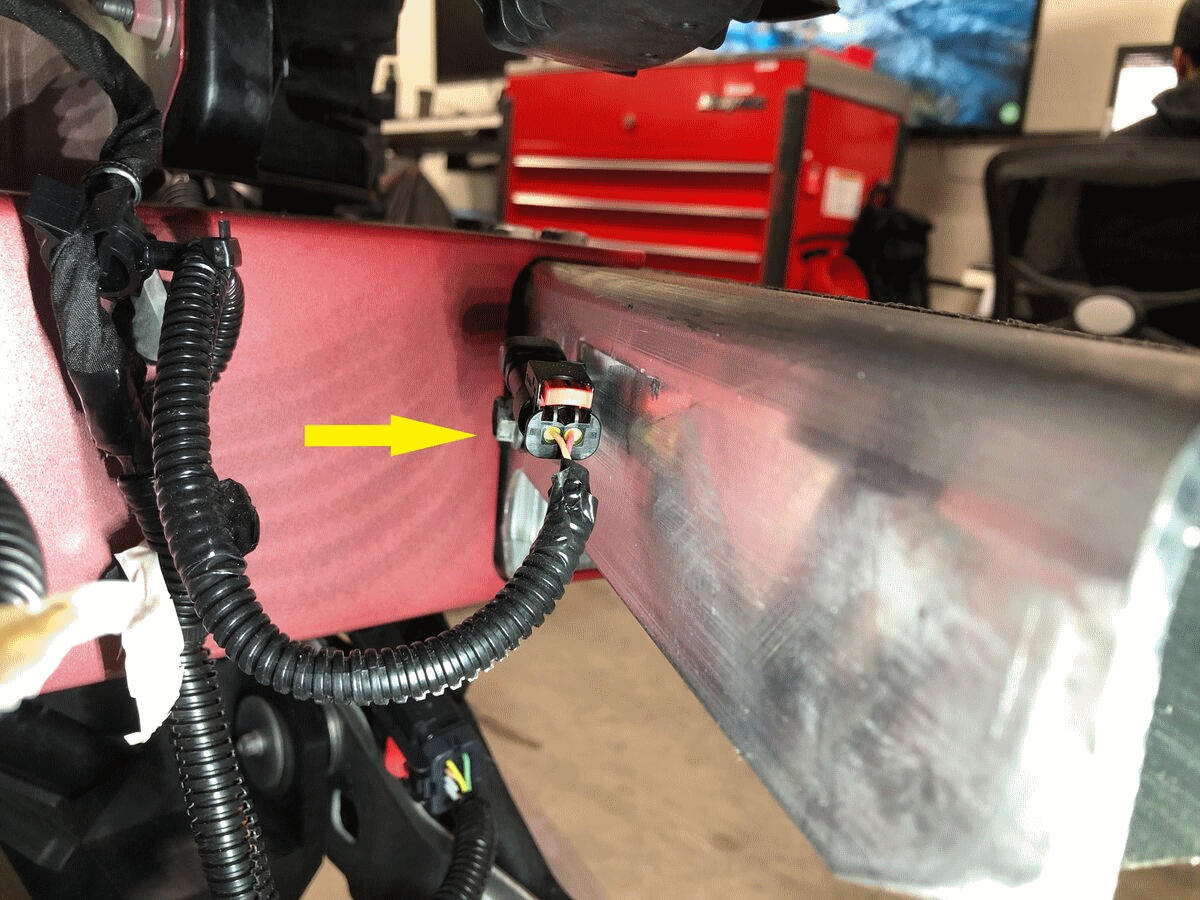
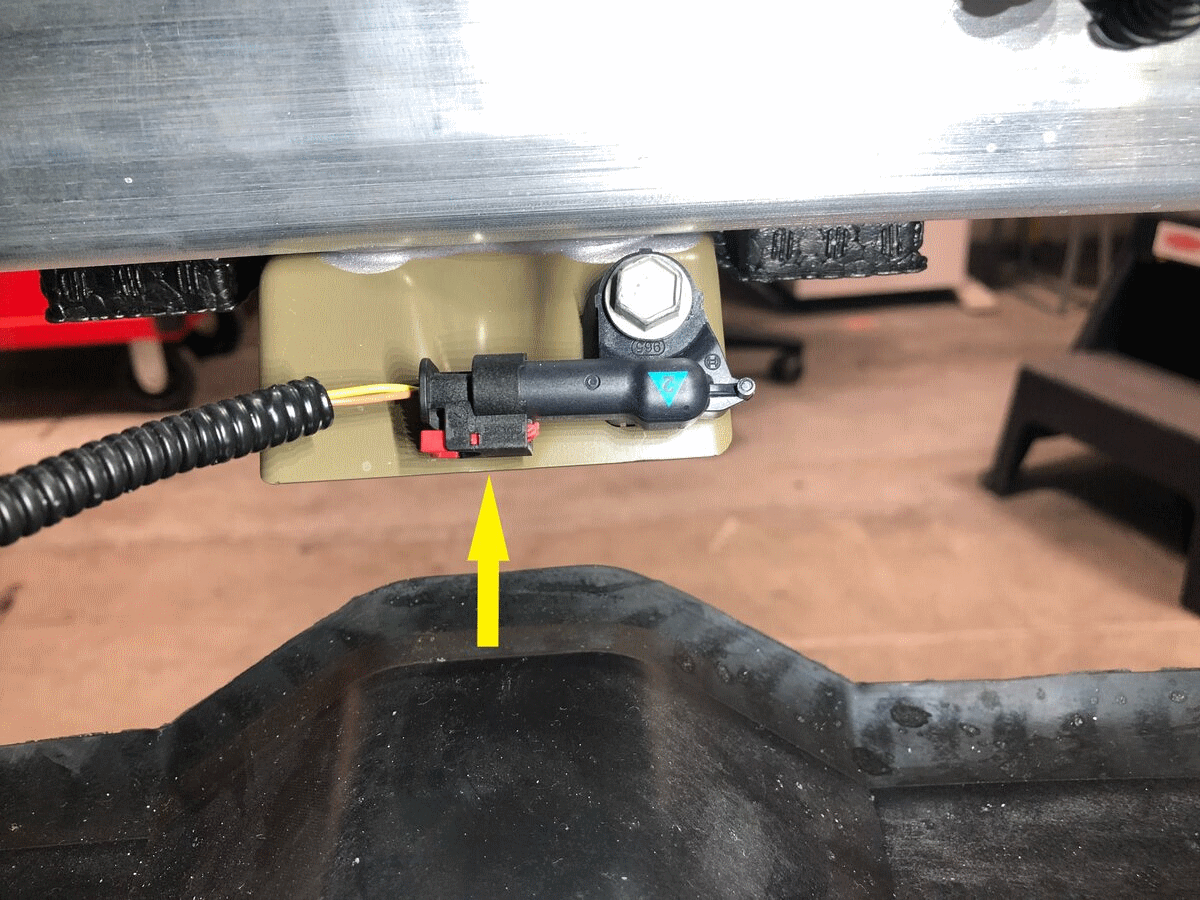
- Connect front acceleration sensors
NOTE:
3x connectors, Engage locking tab, Connect LH, RH, and center front acceleration sensors
 Courtesy of TESLA, INC. Courtesy of TESLA, INC.
|
 Courtesy of TESLA, INC. Courtesy of TESLA, INC.
|
 Courtesy of TESLA, INC. Courtesy of TESLA, INC.
|
- Install RH center fascia reinforcement to front end carrier
NOTE:
1x tab, 2x datums, Engage locking tab, Push straight down for installation
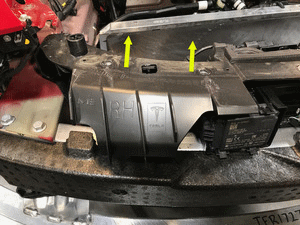 Courtesy of TESLA, INC. Courtesy of TESLA, INC.
|
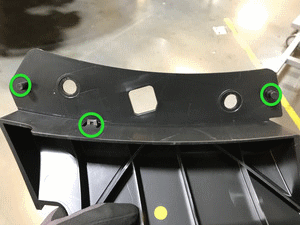 Courtesy of TESLA, INC. Courtesy of TESLA, INC.
|
- Install LH center fascia reinforcement to front end carrier
NOTE:
1x tab, 2x datums, Engage locking tab, Push straight down for installation
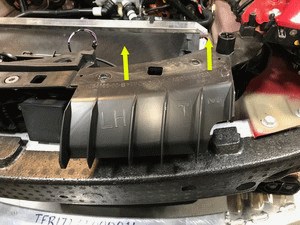 Courtesy of TESLA, INC. Courtesy of TESLA, INC.
|
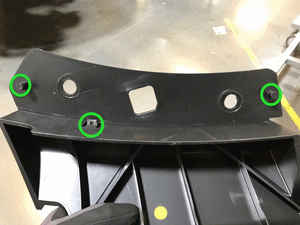 Courtesy of TESLA, INC. Courtesy of TESLA, INC.
|
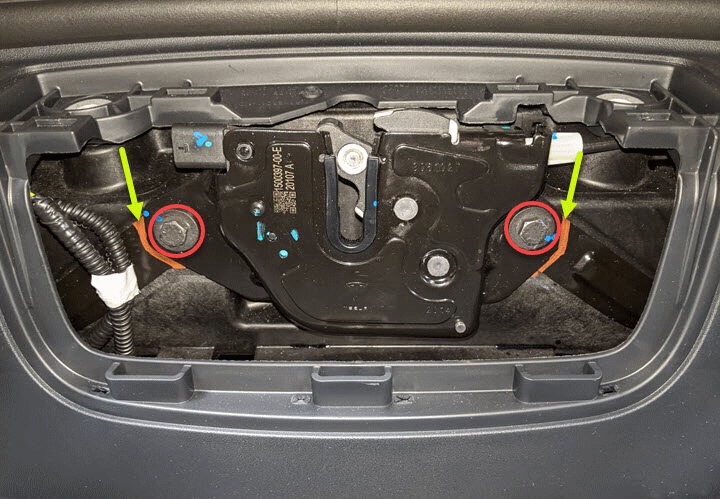
- Install hood latch to front end carrier
NOTE:
2x bolts, 10 mm, 8 N.m, Hand tighten bolts and make fine adjustments, Align hood latch with marked locations
 Courtesy of TESLA, INC. Courtesy of TESLA, INC.
|
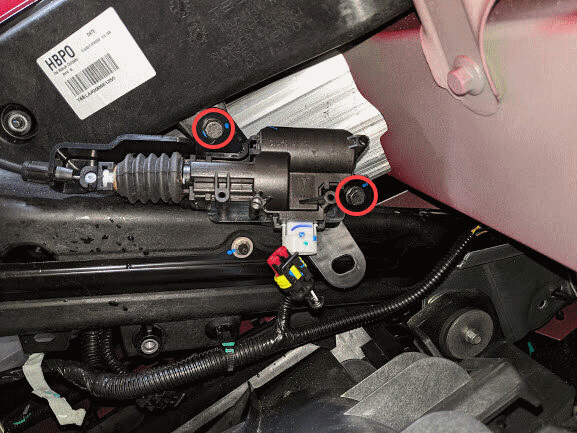
- Install hood latch actuator onto front end carrier
NOTE:
2x bolts, 10 mm, 5 N.m
 Courtesy of TESLA, INC. Courtesy of TESLA, INC.
|
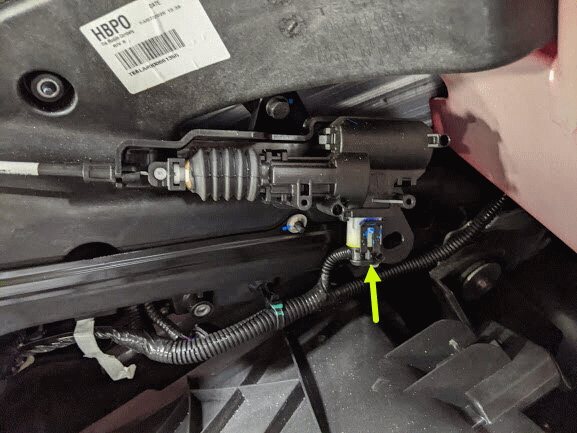
- Connect hood latch actuator
NOTE:
1x connector
 Courtesy of TESLA, INC. Courtesy of TESLA, INC.
|
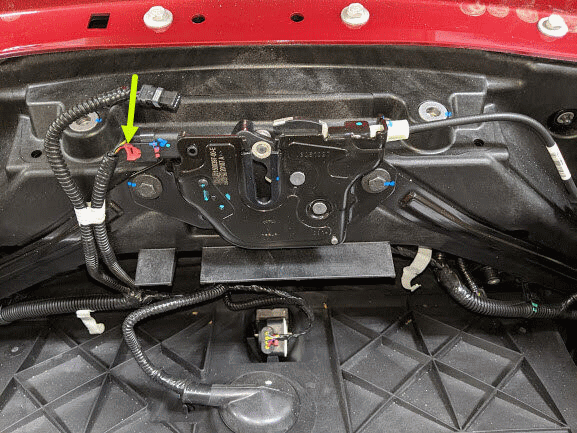
- Connect the hood latch open switch connector
NOTE:
1x connector, Engage locking tab
 Courtesy of TESLA, INC. Courtesy of TESLA, INC.
|
- Connect ambient temperature sensor connector
NOTE:
1x connector
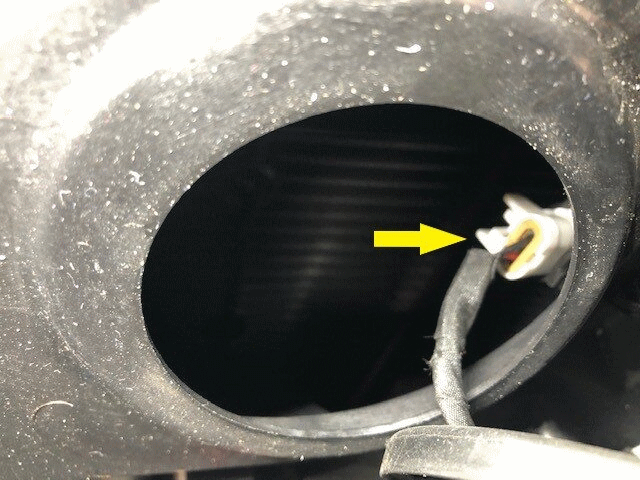 Courtesy of TESLA, INC. Courtesy of TESLA, INC.
|
- Install ambient temperature sensor cover into active grille shutter
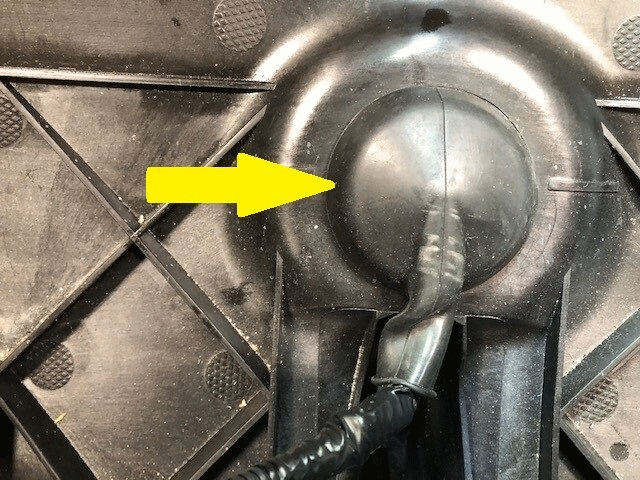 Courtesy of TESLA, INC. Courtesy of TESLA, INC.
|
- Install connector to active grille shutter actuator
NOTE:
1x connector, Engage locking tab
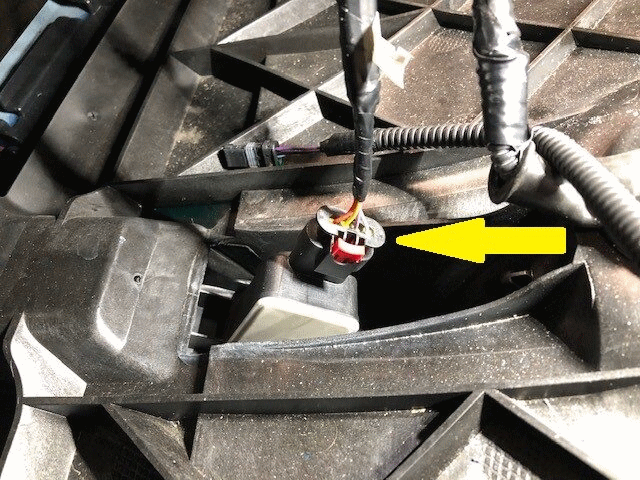 Courtesy of TESLA, INC. Courtesy of TESLA, INC.
|
- Install front fascia onto vehicle and secure front clips and both front corners Note
NOTE:
8x clips, Recommend assistance, Use caution not to damage headlamp or fender during installation
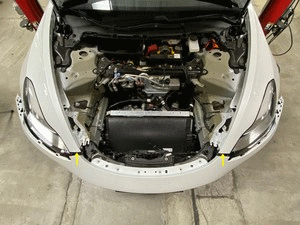 Courtesy of TESLA, INC. Courtesy of TESLA, INC.
|
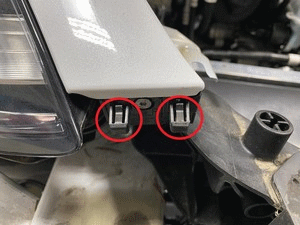 Courtesy of TESLA, INC. Courtesy of TESLA, INC.
|
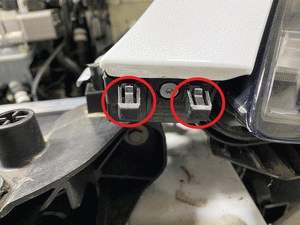 Courtesy of TESLA, INC. Courtesy of TESLA, INC.
|
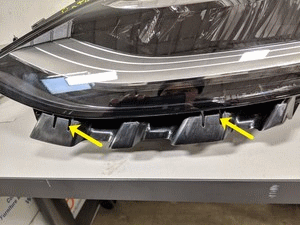 Courtesy of TESLA, INC. Courtesy of TESLA, INC.
|
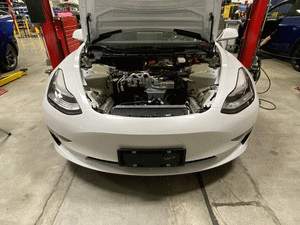 Courtesy of TESLA, INC. Courtesy of TESLA, INC.
|
- Secure 12V harness for front fascia
NOTE:
1x connector, Engage the locking tab
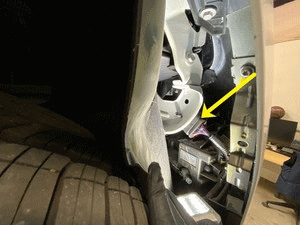 Courtesy of TESLA, INC. Courtesy of TESLA, INC.
|
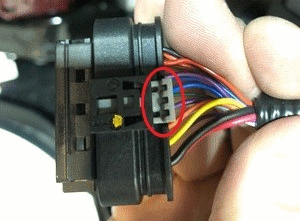 Courtesy of TESLA, INC. Courtesy of TESLA, INC.
|
- Install rear bolt and tighten all three bolts securing RH front corner of front fascia to fender
NOTE:
1x bolt, 10 mm, 3 N.m, 2x bolts, 10 mm, 4 N.m, Most forward bolts, Align fascia to fender before tightening
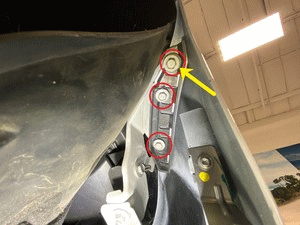 Courtesy of TESLA, INC. Courtesy of TESLA, INC.
|
- Install push clips securing RH front wheel liner to fascia
NOTE:
5x push clips
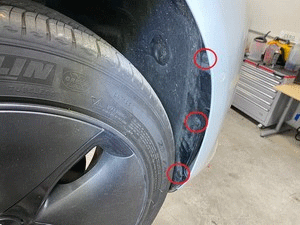 Courtesy of TESLA, INC. Courtesy of TESLA, INC.
|
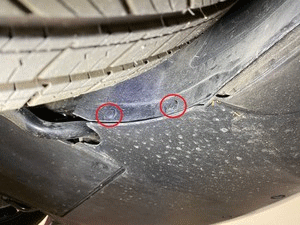 Courtesy of TESLA, INC. Courtesy of TESLA, INC.
|
- Install rear bolt and tighten all three bolts securing LH front corner of front fascia to fender
NOTE:
1x bolts, 10 mm, 3 N.m, 2x bolts, 10 mm, 4 N.m, Most forward bolts, Align fascia to fender before tightening
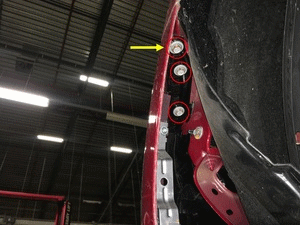 Courtesy of TESLA, INC. Courtesy of TESLA, INC.
|
- Install push clips securing LH front wheel liner to fascia
NOTE:
5x push clips
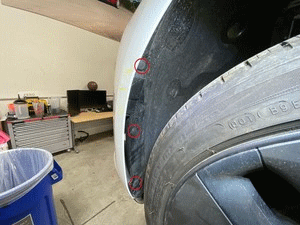 Courtesy of TESLA, INC. Courtesy of TESLA, INC.
|
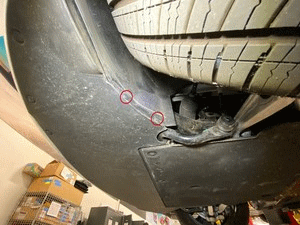 Courtesy of TESLA, INC. Courtesy of TESLA, INC.
|
- Apply Loctite 222 onto front aero shield forward bolts and install fasteners to front aero shield
NOTE:
4x bolts, 10 mm, 5 N.m
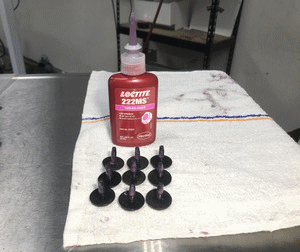 Courtesy of TESLA, INC. Courtesy of TESLA, INC.
|
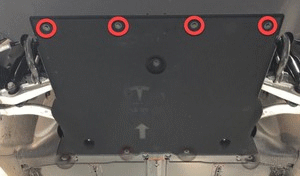 Courtesy of TESLA, INC. Courtesy of TESLA, INC.
|
- Install fasteners holding upper portion of front fascia to vehicle
NOTE:
6x bolts, 10 mm, 4 N.m
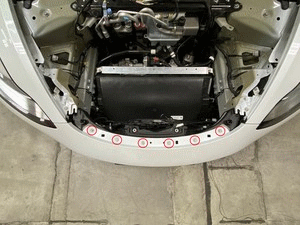 Courtesy of TESLA, INC. Courtesy of TESLA, INC.
|
- Install frunk assembly to vehicle
NOTE:
12x clips. Make sure frunk assembly is fully seated onto clips. Number of clips may vary on older vehicles. Ensure A/C compressor HVIL harness is not pinched between frunk assembly and thermal beam.
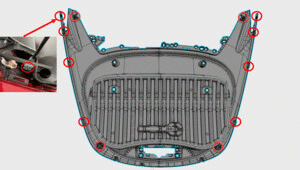 Courtesy of TESLA, INC. Courtesy of TESLA, INC.
|
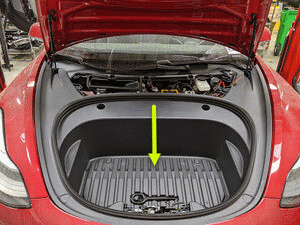 Courtesy of TESLA, INC. Courtesy of TESLA, INC.
|
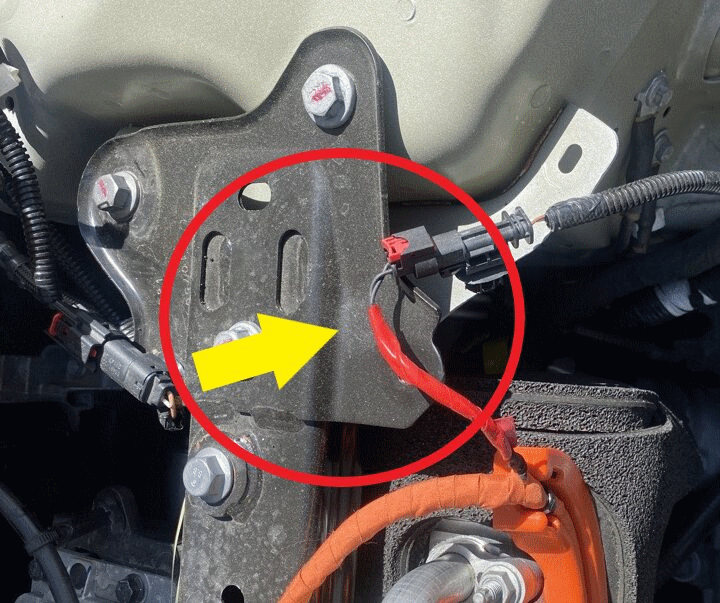 Courtesy of TESLA, INC. Courtesy of TESLA, INC.
|
- Install bolts securing frunk assembly
NOTE:
7x bolts, 10 mm, 5 N.m, Lower RBN covers after installing upper fasteners, Newer vehicles may not be equipped with covers
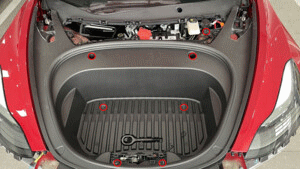 Courtesy of TESLA, INC. Courtesy of TESLA, INC.
|
- Close the hood to check the hood alignment with fascia/fender
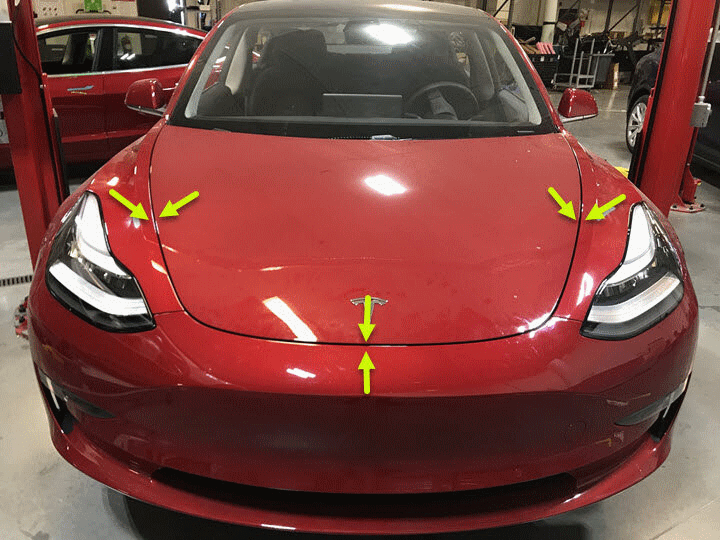 Courtesy of TESLA, INC. Courtesy of TESLA, INC.
|
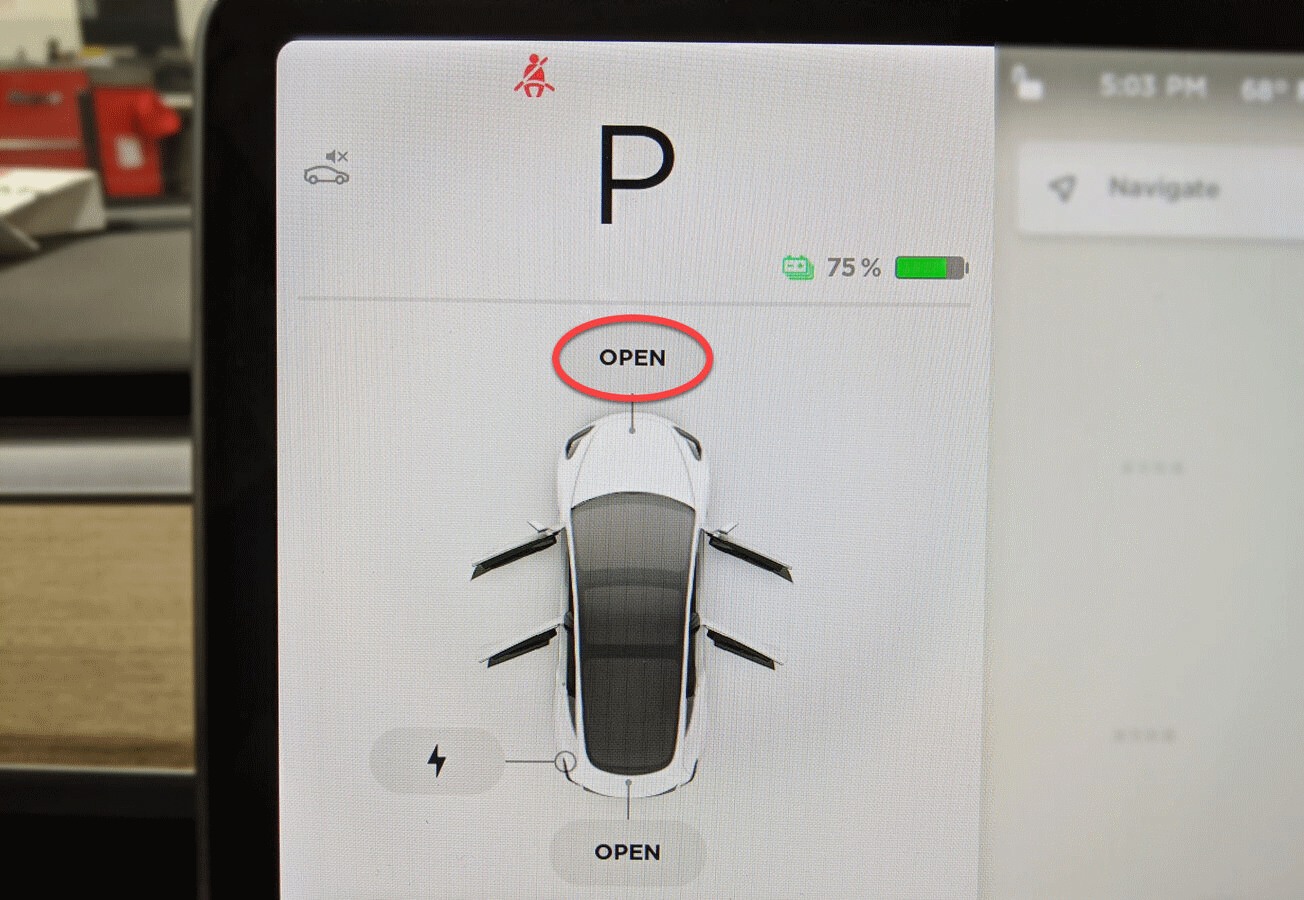
- Open hood and make adjustments if necessary
NOTE:
2x bolts, 10 mm, 8 N.m, If adjustments are not necessary, Torque bolts
 Courtesy of TESLA, INC. Courtesy of TESLA, INC.
|
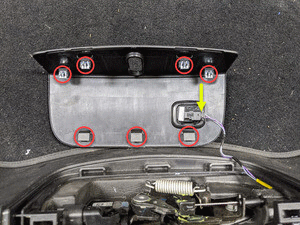
- Install frunk close out panel
NOTE:
4x clips, 1x connector, Frunk safety switch, 3x guide tabs, Align 3x tabs then push downward to secure clips
 Courtesy of TESLA, INC. Courtesy of TESLA, INC.
|
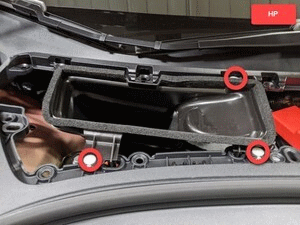
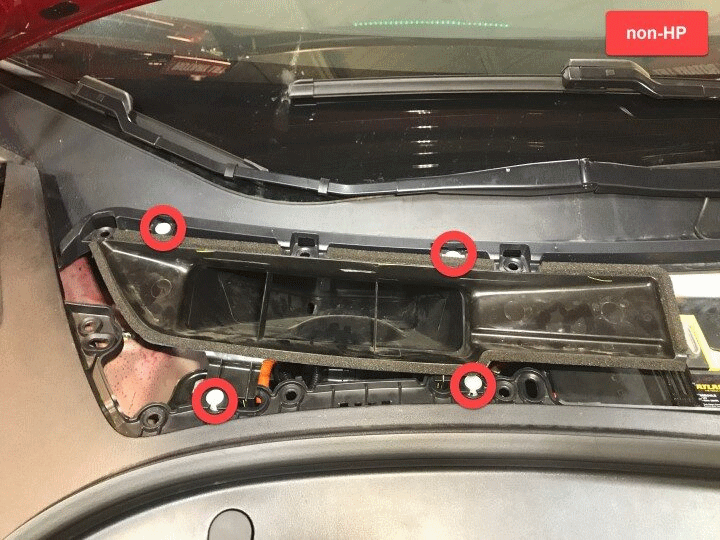
- Install cabin intake upper duct assembly
NOTE:
3x clips, Some configurations may come with 4x clips
 Courtesy of TESLA, INC. Courtesy of TESLA, INC.
|
 Courtesy of TESLA, INC. Courtesy of TESLA, INC.
|
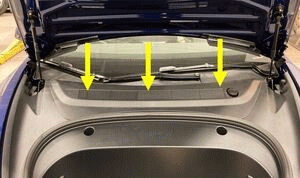
- Install rear apron
NOTE:
12x clips
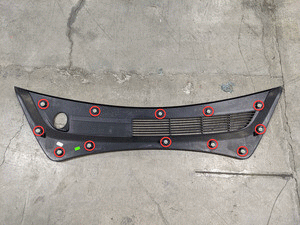 Courtesy of TESLA, INC. Courtesy of TESLA, INC.
|
 Courtesy of TESLA, INC. Courtesy of TESLA, INC.
|
- Close hood
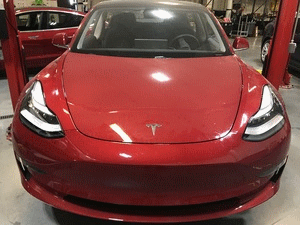 Courtesy of TESLA, INC. Courtesy of TESLA, INC.
|
- Close LH front door
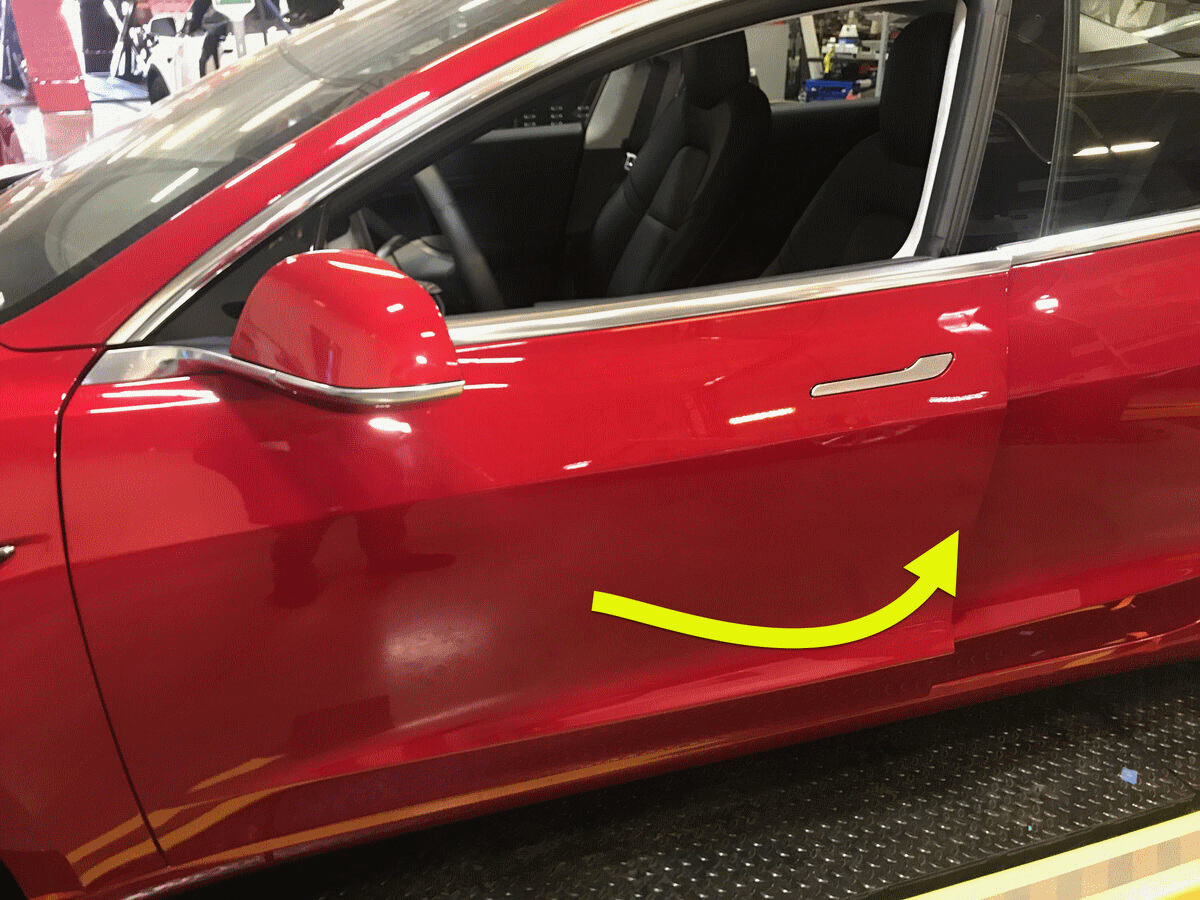 Courtesy of TESLA, INC. Courtesy of TESLA, INC.
|