- Open RH front door
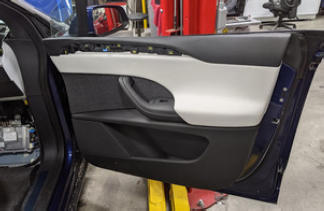 Courtesy of TESLA, INC. Courtesy of TESLA, INC.
|
- Move RH front seat forward
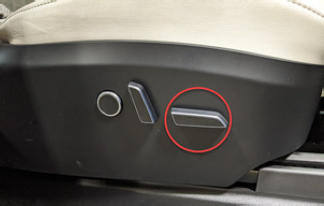 Courtesy of TESLA, INC. Courtesy of TESLA, INC.
|
- Open RH falcon wing door
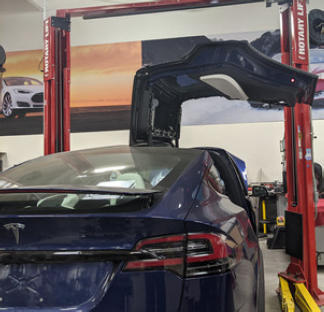 Courtesy of TESLA, INC. Courtesy of TESLA, INC.
|
- Move RH Monopost seat forward
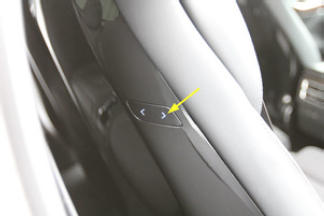 Courtesy of TESLA, INC. Courtesy of TESLA, INC.
|
- Remove RH rear sill assembly
NOTE:
8x clips, 1x datum
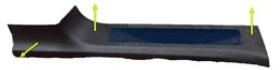 Courtesy of TESLA, INC. Courtesy of TESLA, INC.
|
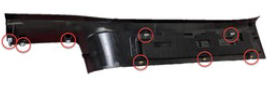 Courtesy of TESLA, INC. Courtesy of TESLA, INC.
|
- Open liftgate
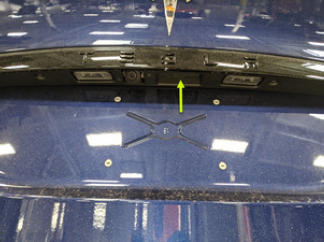 Courtesy of TESLA, INC. Courtesy of TESLA, INC.
|
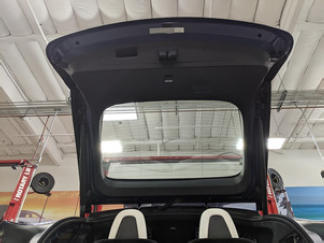 Courtesy of TESLA, INC. Courtesy of TESLA, INC.
|
- Remove trunk rear load floor
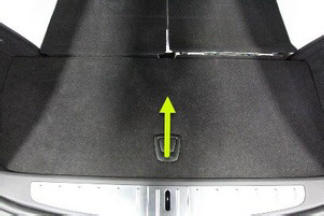 Courtesy of TESLA, INC. Courtesy of TESLA, INC.
|
- Remove trunk tub floor insulator
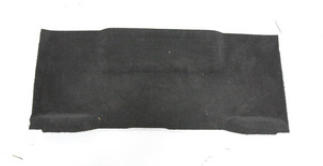 Courtesy of TESLA, INC. Courtesy of TESLA, INC.
|
- Remove trunk carpet
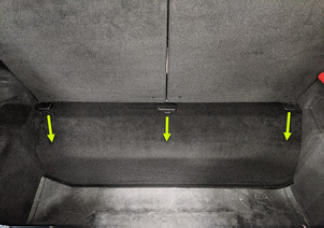 Courtesy of TESLA, INC. Courtesy of TESLA, INC.
|
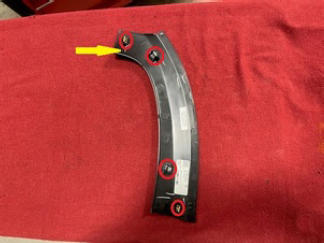
- Remove LH trunk sill side trim
NOTE:
4x clips, 1x datum
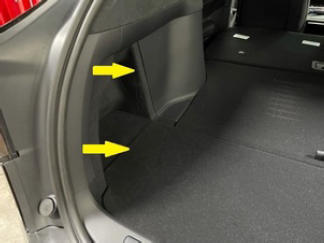 Courtesy of TESLA, INC. Courtesy of TESLA, INC.
|
 Courtesy of TESLA, INC. Courtesy of TESLA, INC.
|
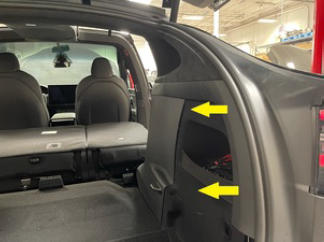
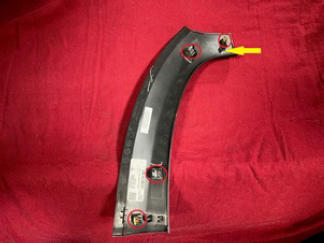
- Remove RH trunk sill side trim
NOTE:
4x clips, 1x datum
 Courtesy of TESLA, INC. Courtesy of TESLA, INC.
|
 Courtesy of TESLA, INC. Courtesy of TESLA, INC.
|
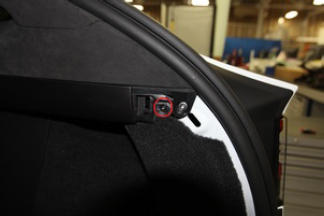
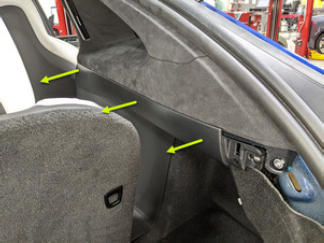
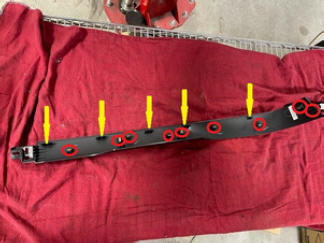
- Remove RH mid C-pillar trim
NOTE:
1x screw, T20, 2 N.m, 9x clips
 Courtesy of TESLA, INC. Courtesy of TESLA, INC.
|
 Courtesy of TESLA, INC. Courtesy of TESLA, INC.
|
 Courtesy of TESLA, INC. Courtesy of TESLA, INC.
|
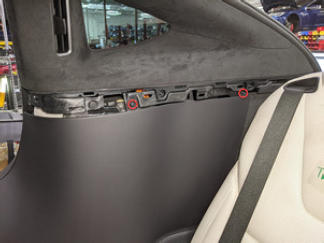
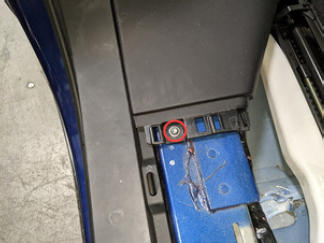
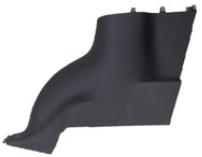
- Remove RH lower C-pillar
NOTE:
1x patch bolt, T25, 2.5 N.m, 2x screws, T20, 2 N.m, Discard patch bolt after removal
 Courtesy of TESLA, INC. Courtesy of TESLA, INC.
|
 Courtesy of TESLA, INC. Courtesy of TESLA, INC.
|
 Courtesy of TESLA, INC. Courtesy of TESLA, INC.
|
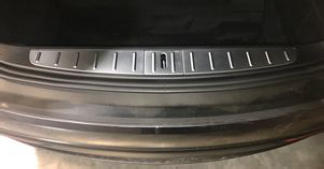
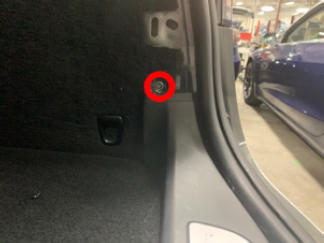
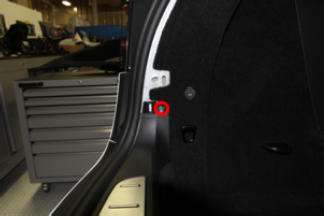
- Remove trunk sill trim
NOTE:
4x clips, 2x patch bolts, T25, 2.5 N.m, Discard patch bolts after removal
 Courtesy of TESLA, INC. Courtesy of TESLA, INC.
|
 Courtesy of TESLA, INC. Courtesy of TESLA, INC.
|
 Courtesy of TESLA, INC. Courtesy of TESLA, INC.
|
- Remove rear wall load support
NOTE:
4x push clips, 2x clips
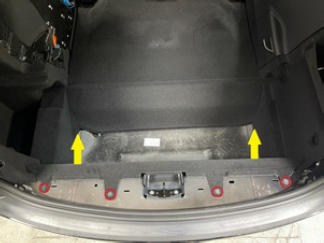 Courtesy of TESLA, INC. Courtesy of TESLA, INC.
|
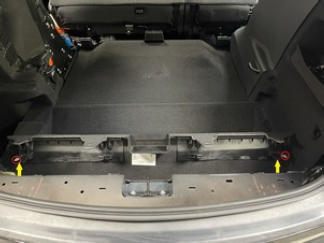 Courtesy of TESLA, INC. Courtesy of TESLA, INC.
|
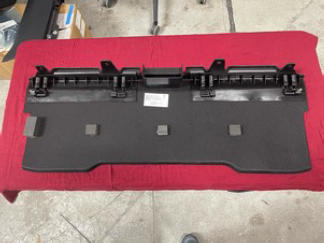 Courtesy of TESLA, INC. Courtesy of TESLA, INC.
|
- Fold RH 3rd row seat back into down position
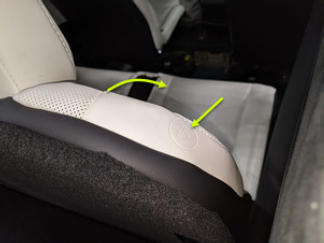 Courtesy of TESLA, INC. Courtesy of TESLA, INC.
|
- Remove fasteners securing RH upper C-pillar trim to bracket
NOTE:
3x screws, T20, 2 N.m, 1x patch bolt, T25, 3 N.m, Discard patch bolt after removal
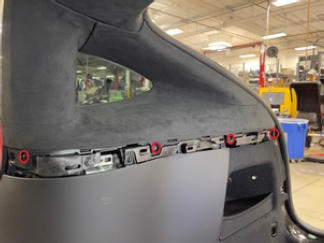 Courtesy of TESLA, INC. Courtesy of TESLA, INC.
|
- Remove RH upper C-pillar trim
NOTE:
6x clips, 1x datum
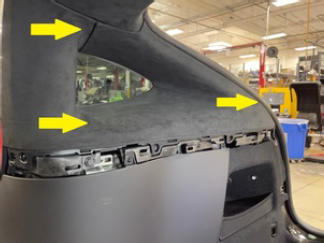 Courtesy of TESLA, INC. Courtesy of TESLA, INC.
|
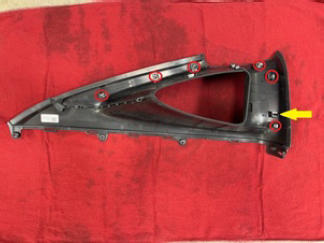 Courtesy of TESLA, INC. Courtesy of TESLA, INC.
|
- Release RH trunk tie down from RH side trim carpet
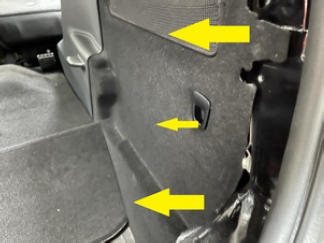 Courtesy of TESLA, INC. Courtesy of TESLA, INC.
|
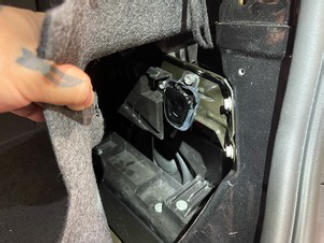 Courtesy of TESLA, INC. Courtesy of TESLA, INC.
|
- Remove RH trunk side trim
NOTE:
2x connectors, 4x push clips
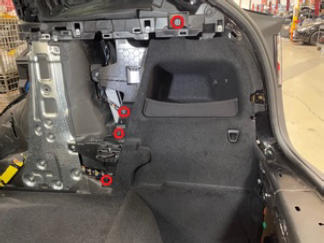 Courtesy of TESLA, INC. Courtesy of TESLA, INC.
|
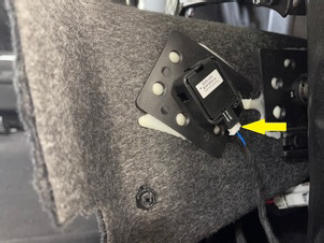 Courtesy of TESLA, INC. Courtesy of TESLA, INC.
|
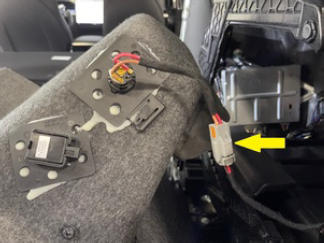 Courtesy of TESLA, INC. Courtesy of TESLA, INC.
|
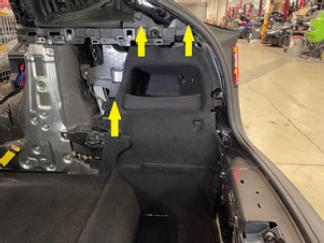 Courtesy of TESLA, INC. Courtesy of TESLA, INC.
|
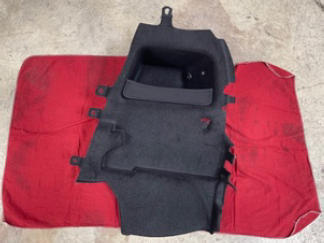 Courtesy of TESLA, INC. Courtesy of TESLA, INC.
|
- Remove RH trunk side trim bracket
NOTE:
3x bolts, T30, 2.5 N.m, 1x screw, T20, 2.5 N.m, 1x push clip
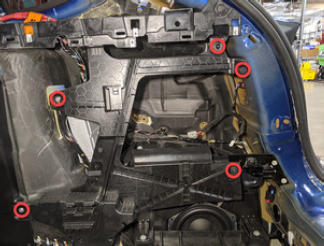 Courtesy of TESLA, INC. Courtesy of TESLA, INC.
|
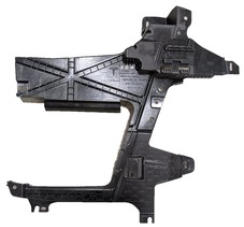 Courtesy of TESLA, INC. Courtesy of TESLA, INC.
|
- Disconnect RH body side tail lamp
NOTE:
1x connector, Disengage red locking tab
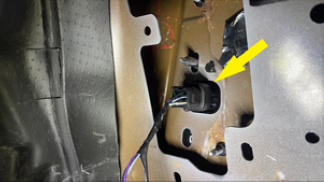 Courtesy of TESLA, INC. Courtesy of TESLA, INC.
|
- Remove nuts securing RH tail lamp to body
NOTE:
2x nuts, 8 mm, 3.5 N.m, Be cautious and do not drop the fasteners into vehicle body
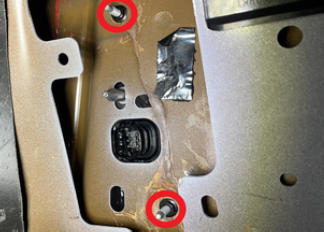 Courtesy of TESLA, INC. Courtesy of TESLA, INC.
|
- Remove RH body tail lamp from vehicle
NOTE:
2x datums, Note one datum clips into charge port door assembly
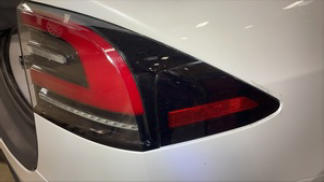 Courtesy of TESLA, INC. Courtesy of TESLA, INC.
|
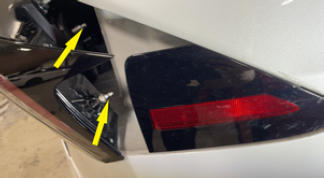 Courtesy of TESLA, INC. Courtesy of TESLA, INC.
|
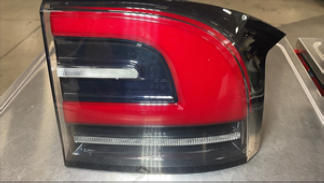 Courtesy of TESLA, INC. Courtesy of TESLA, INC.
|
- Remove nut securing RHS reflex lens assembly to body
NOTE:
1x nut, 8 mm, 1 N.m
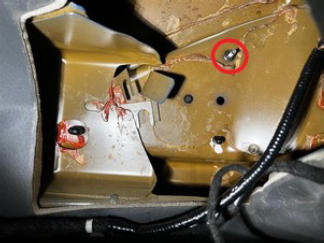 Courtesy of TESLA, INC. Courtesy of TESLA, INC.
|
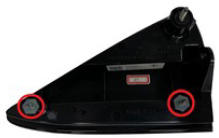
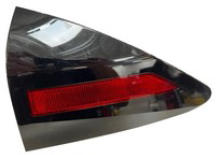
- Remove RHS reflex lens assembly from vehicle
NOTE:
2x datums, Carefully release the front datum next to locator pin before proceeding onto the rear datums to prevent damaging the surface of body
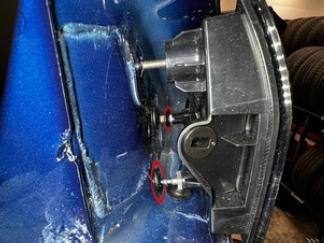 Courtesy of TESLA, INC. Courtesy of TESLA, INC.
|
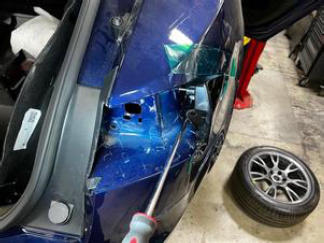 Courtesy of TESLA, INC. Courtesy of TESLA, INC.
|
 Courtesy of TESLA, INC. Courtesy of TESLA, INC.
|
 Courtesy of TESLA, INC. Courtesy of TESLA, INC.
|
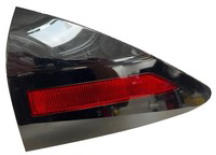
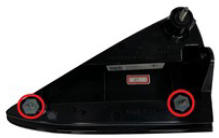
- Position RHS reflex lens assembly onto vehicle
NOTE:
2x datums, Press gently to ensure datums are fully seated into grommets
 Courtesy of TESLA, INC. Courtesy of TESLA, INC.
|
 Courtesy of TESLA, INC. Courtesy of TESLA, INC.
|
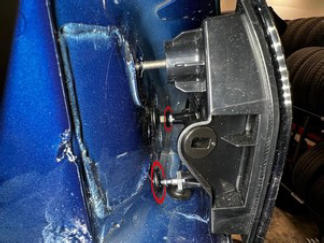 Courtesy of TESLA, INC. Courtesy of TESLA, INC.
|
- Install bolt securing RHS reflex lens assembly to body
NOTE:
1x nut, 8 mm, 1 N.m
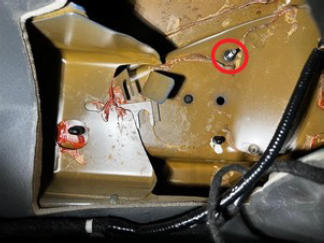 Courtesy of TESLA, INC. Courtesy of TESLA, INC.
|
- Secure RH body tail lamp onto vehicle
NOTE:
2x datums, Note one datum clips into charge port door assembly
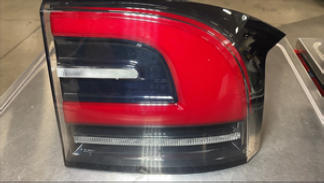 Courtesy of TESLA, INC. Courtesy of TESLA, INC.
|
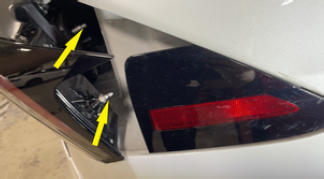 Courtesy of TESLA, INC. Courtesy of TESLA, INC.
|
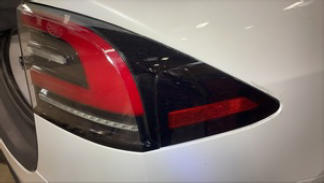 Courtesy of TESLA, INC. Courtesy of TESLA, INC.
|
- Install nuts securing RH tail lamp to body
NOTE:
2x nuts, 8 mm, 3.5 N.m, Be cautious and do not drop the fasteners into vehicle body
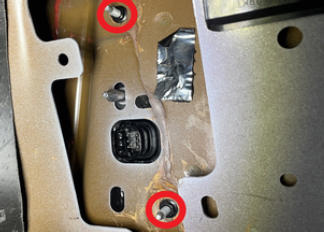 Courtesy of TESLA, INC. Courtesy of TESLA, INC.
|
- Connect body side tail lamp connector
NOTE:
1x connector, Engage red locking tab
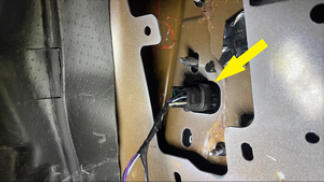 Courtesy of TESLA, INC. Courtesy of TESLA, INC.
|
- Install RH trunk side trim bracket
NOTE:
3x bolts, T30, 2.5 N.m, 1x screw, T20, 2.5 N.m, 1x push clip
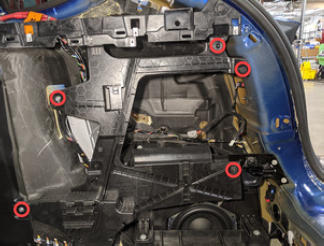 Courtesy of TESLA, INC. Courtesy of TESLA, INC.
|
- Install RH trunk side trim
NOTE:
2x connectors, 4x push clips
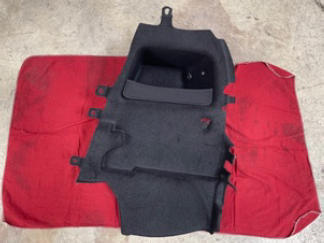 Courtesy of TESLA, INC. Courtesy of TESLA, INC.
|
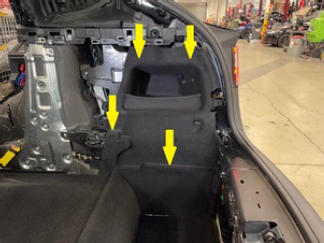 Courtesy of TESLA, INC. Courtesy of TESLA, INC.
|
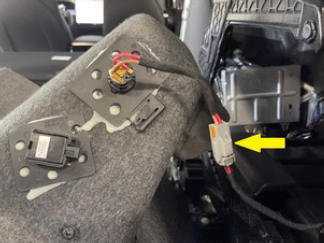 Courtesy of TESLA, INC. Courtesy of TESLA, INC.
|
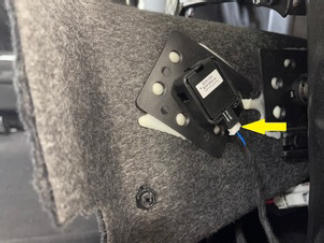 Courtesy of TESLA, INC. Courtesy of TESLA, INC.
|
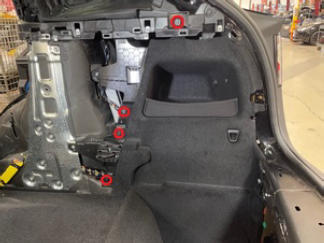 Courtesy of TESLA, INC. Courtesy of TESLA, INC.
|
- Insert RH trunk tie down into RH trunk side trim carpet
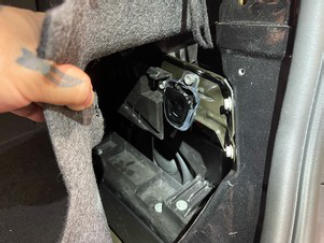 Courtesy of TESLA, INC. Courtesy of TESLA, INC.
|
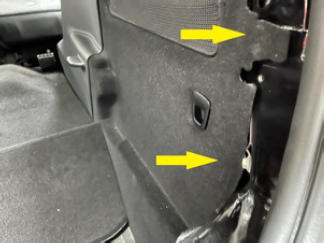 Courtesy of TESLA, INC. Courtesy of TESLA, INC.
|
- Install RH upper C-pillar trim
NOTE:
6x clips, 1x datum
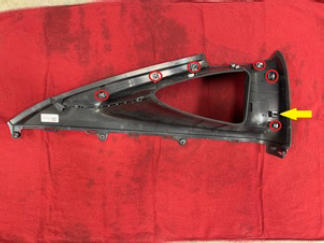 Courtesy of TESLA, INC. Courtesy of TESLA, INC.
|
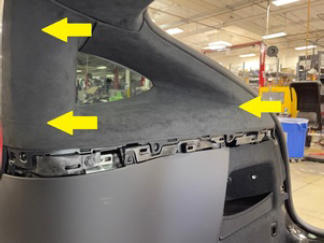 Courtesy of TESLA, INC. Courtesy of TESLA, INC.
|
- Install fasteners securing RH upper C-pillar trim to bracket
NOTE:
3x screws, T20, 2 N.m, 1x patch bolt, T25, 3 N.m, Install new patch bolt
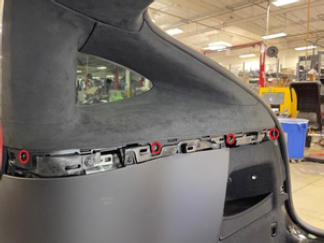 Courtesy of TESLA, INC. Courtesy of TESLA, INC.
|
- Raise RH 3rd row seat back into the upright position
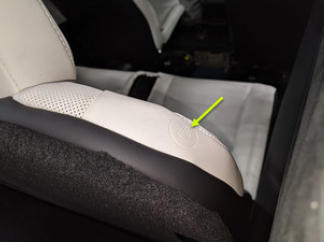 Courtesy of TESLA, INC. Courtesy of TESLA, INC.
|
- Install RH lower C-pillar trim
NOTE:
1x patch bolt, T25, 2.5 N.m, 2x screws, T20, 2 N.m, Install new patch bolt
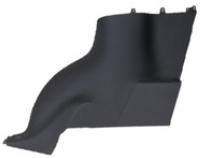 Courtesy of TESLA, INC. Courtesy of TESLA, INC.
|
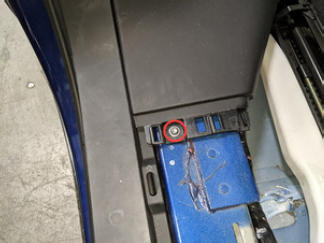 Courtesy of TESLA, INC. Courtesy of TESLA, INC.
|
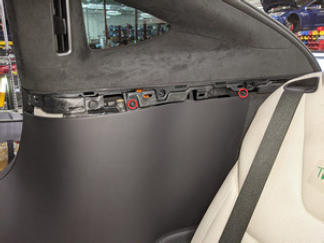 Courtesy of TESLA, INC. Courtesy of TESLA, INC.
|
- Install RH rear sill assembly
NOTE:
8x clips, 1x datum
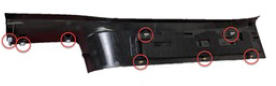 Courtesy of TESLA, INC. Courtesy of TESLA, INC.
|
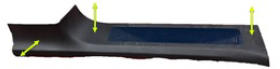 Courtesy of TESLA, INC. Courtesy of TESLA, INC.
|
- Install RH mid C-Pillar trim
NOTE:
1x screw, T20, 2 N.m, 9x clips
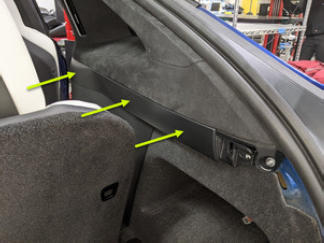 Courtesy of TESLA, INC. Courtesy of TESLA, INC.
|
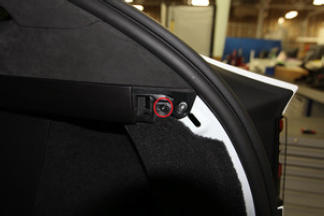 Courtesy of TESLA, INC. Courtesy of TESLA, INC.
|
- Install rear wall load floor support
NOTE:
4x push clips, 2x clips
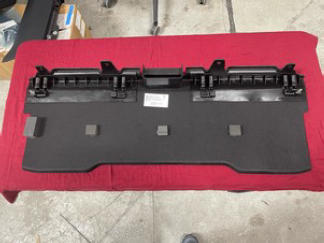 Courtesy of TESLA, INC. Courtesy of TESLA, INC.
|
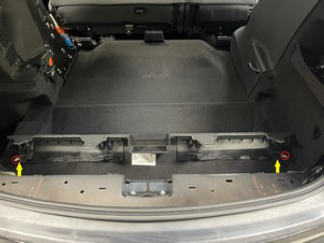 Courtesy of TESLA, INC. Courtesy of TESLA, INC.
|
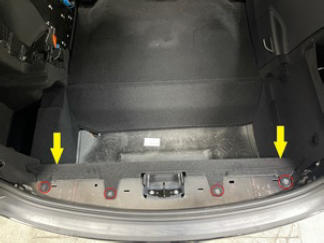 Courtesy of TESLA, INC. Courtesy of TESLA, INC.
|
- Install rear trunk sill trim
NOTE:
4x clips, 2x patch bolts, T25, 2.5 N.m, Make sure to seat liftgate seal properly, Install new patch bolts
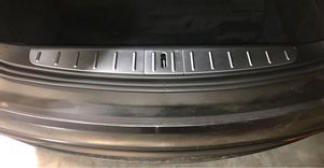 Courtesy of TESLA, INC. Courtesy of TESLA, INC.
|
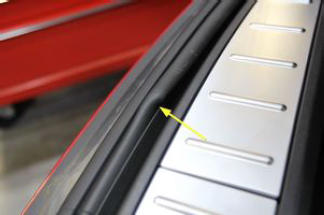 Courtesy of TESLA, INC. Courtesy of TESLA, INC.
|
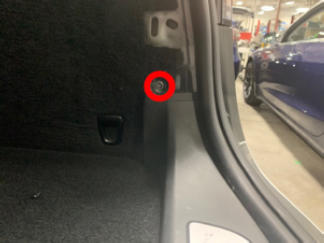 Courtesy of TESLA, INC. Courtesy of TESLA, INC.
|
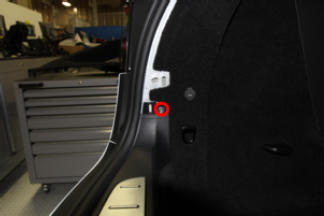 Courtesy of TESLA, INC. Courtesy of TESLA, INC.
|
- Install RH trunk sill side trim
NOTE:
4x clips, 1x datum
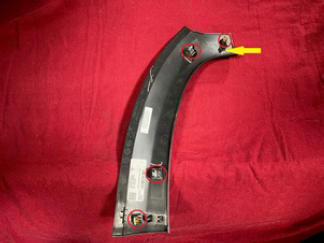 Courtesy of TESLA, INC. Courtesy of TESLA, INC.
|
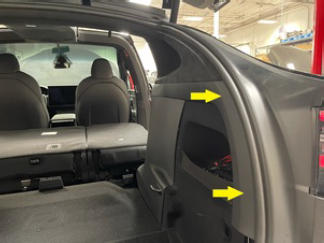 Courtesy of TESLA, INC. Courtesy of TESLA, INC.
|
- Install LH trunk sill side trim
NOTE:
4x clips, 1x datum
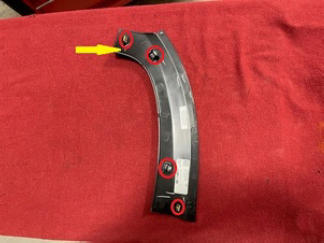 Courtesy of TESLA, INC. Courtesy of TESLA, INC.
|
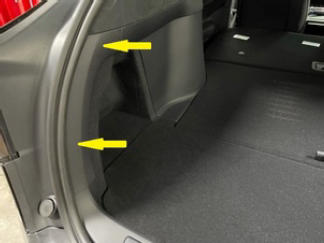 Courtesy of TESLA, INC. Courtesy of TESLA, INC.
|
- Install trunk carpet
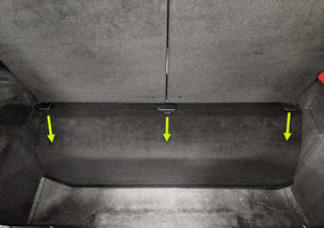 Courtesy of TESLA, INC. Courtesy of TESLA, INC.
|
- Install trunk tub floor insulator
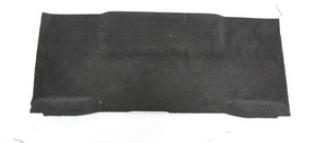 Courtesy of TESLA, INC. Courtesy of TESLA, INC.
|
- Install trunk rear load floor
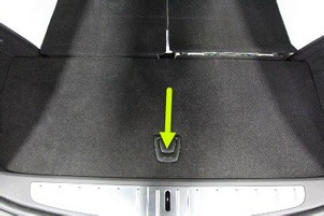 Courtesy of TESLA, INC. Courtesy of TESLA, INC.
|
- Close liftgate
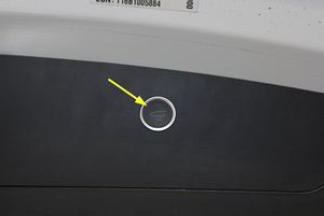 Courtesy of TESLA, INC. Courtesy of TESLA, INC.
|
- Move RH Monopost seat to original position
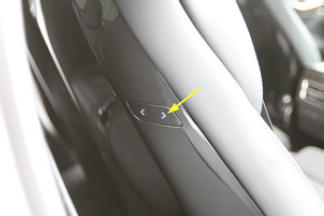 Courtesy of TESLA, INC. Courtesy of TESLA, INC.
|
- Close RH falcon wing door
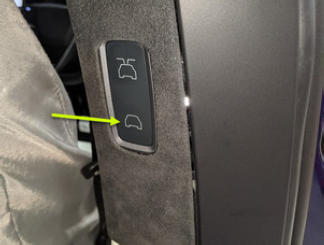 Courtesy of TESLA, INC. Courtesy of TESLA, INC.
|
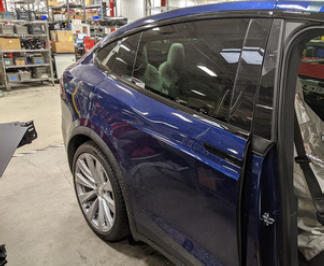 Courtesy of TESLA, INC. Courtesy of TESLA, INC.
|
- Move RH front seat to original position
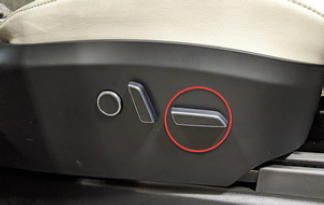 Courtesy of TESLA, INC. Courtesy of TESLA, INC.
|
- Close RH front door
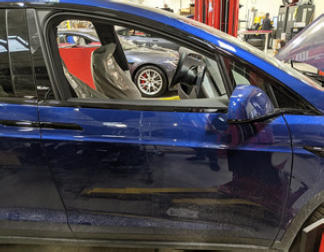 Courtesy of TESLA, INC. Courtesy of TESLA, INC.
|