- Open all four doors
- Lower LH and RH front windows
- Move LH front seat backward
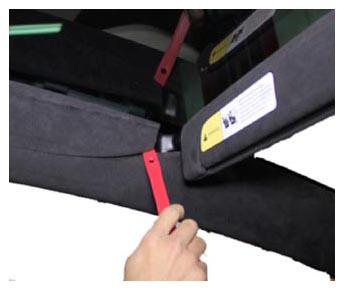
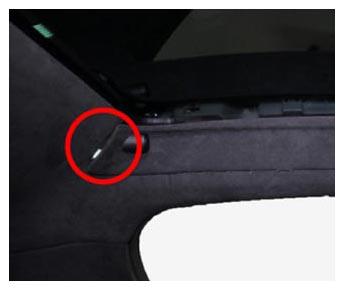
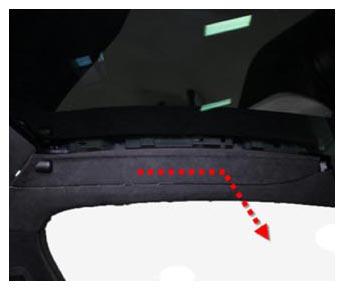
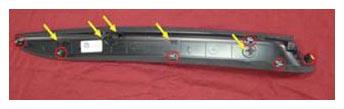
- Remove LH sunvisor bezel
NOTE:
6x clips, 5x tabs, Release clips, then slide bezel towards front of vehicle to release
 Courtesy of TESLA, INC. Courtesy of TESLA, INC.
|
 Courtesy of TESLA, INC. Courtesy of TESLA, INC.
|
 Courtesy of TESLA, INC. Courtesy of TESLA, INC.
|
 Courtesy of TESLA, INC. Courtesy of TESLA, INC.
|
- Remove bolts securing LH upper A-pillar to body
NOTE:
2x bolts, 10 mm, 5 N.m, 1x screw, T20, 2.5 N.m, 1x nyloc nut, 13 mm, 5 N.m, Discard nut after removal
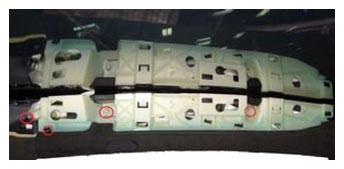 Courtesy of TESLA, INC. Courtesy of TESLA, INC.
|
- Move LH upper A-pillar for access to headliner
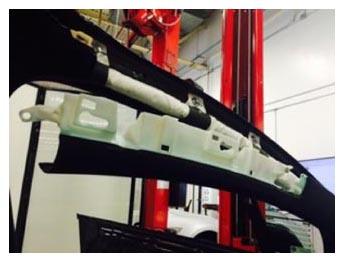 Courtesy of TESLA, INC. Courtesy of TESLA, INC.
|
- Remove screw securing LH front end of headliner to body
NOTE:
1x screw, T20, 2 N.m
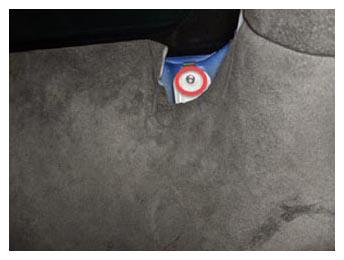 Courtesy of TESLA, INC. Courtesy of TESLA, INC.
|
- Move LH front seat forward
- Move LH front door seal away from B-pillar
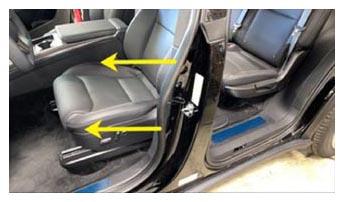 Courtesy of TESLA, INC. Courtesy of TESLA, INC.
|
- Release upper portion of LH lower B-pillar to LH upper B-pillar
NOTE:
5x clips
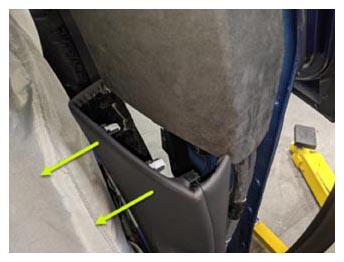 Courtesy of TESLA, INC. Courtesy of TESLA, INC.
|
- Release LH upper B-pillar from body
NOTE:
3x clips, 2x magnets, 1x connector
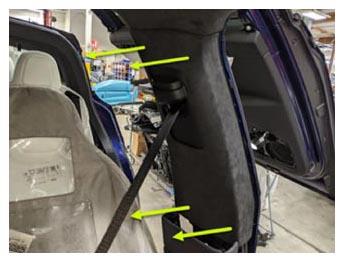 Courtesy of TESLA, INC. Courtesy of TESLA, INC.
|
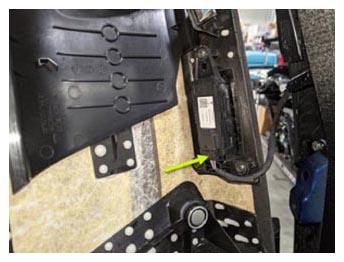 Courtesy of TESLA, INC. Courtesy of TESLA, INC.
|
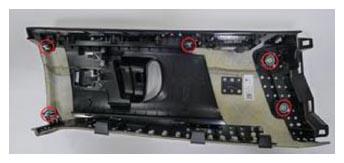 Courtesy of TESLA, INC. Courtesy of TESLA, INC.
|
- Move LH upper B-pillar aside
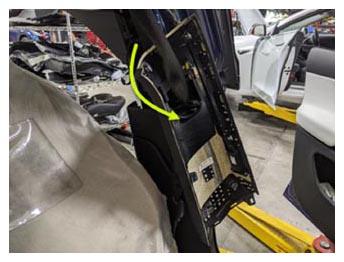 Courtesy of TESLA, INC. Courtesy of TESLA, INC.
|
- Open liftgate
- Fold LH 3rd row seat back into down position
- Remove LH trunk sill side trim
NOTE:
4x clips, 1x datum
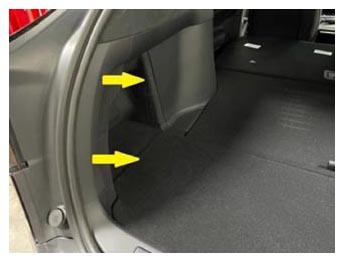 Courtesy of TESLA, INC. Courtesy of TESLA, INC.
|
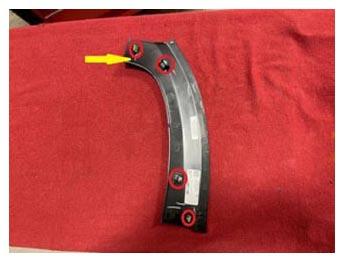 Courtesy of TESLA, INC. Courtesy of TESLA, INC.
|
- Remove LH mid C-pillar trim
NOTE:
1x screw, T20, 2 N.m, 9x clips, 5x tabs
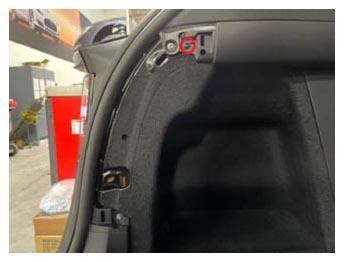 Courtesy of TESLA, INC. Courtesy of TESLA, INC.
|
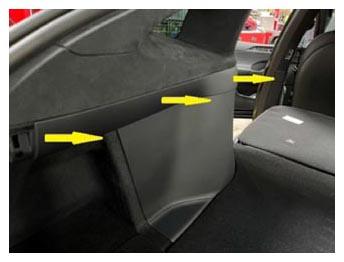 Courtesy of TESLA, INC. Courtesy of TESLA, INC.
|
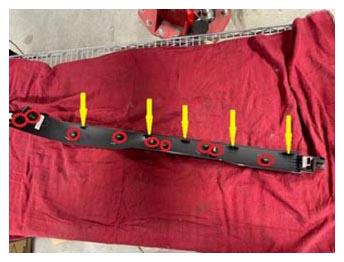 Courtesy of TESLA, INC. Courtesy of TESLA, INC.
|
- Remove fasteners securing LH upper C-pillar trim to bracket
NOTE:
3x screws, T20, 2 N.m, 1x patch bolt, T25, 3 N.m, Discard patch bolt after removal
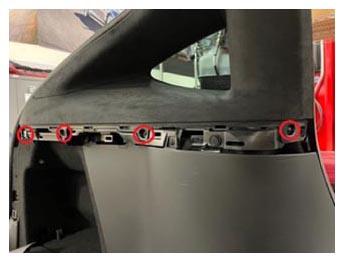 Courtesy of TESLA, INC. Courtesy of TESLA, INC.
|
- Remove LH upper C-pillar trim
NOTE:
6x clips, 1x datum
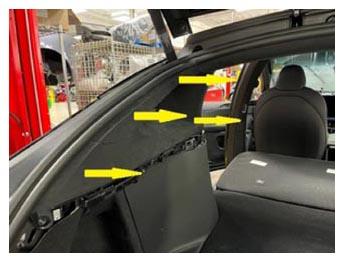 Courtesy of TESLA, INC. Courtesy of TESLA, INC.
|
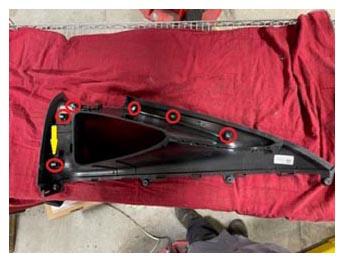 Courtesy of TESLA, INC. Courtesy of TESLA, INC.
|
- Fold RH 3rd row seat back into down position
- Remove RH trunk sill side trim
NOTE:
4x clips, 1x datum
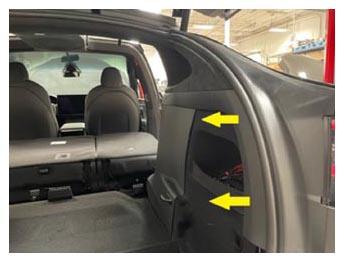 Courtesy of TESLA, INC. Courtesy of TESLA, INC.
|
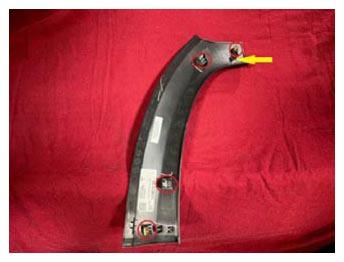 Courtesy of TESLA, INC. Courtesy of TESLA, INC.
|
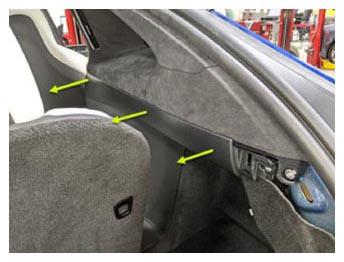
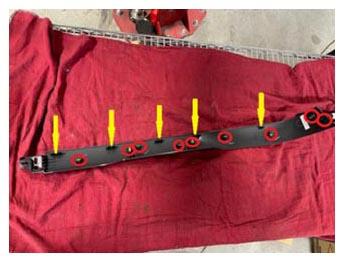
- Remove RH mid C-pillar trim
NOTE:
1x screw, T20, 2 N.m, 9x clips
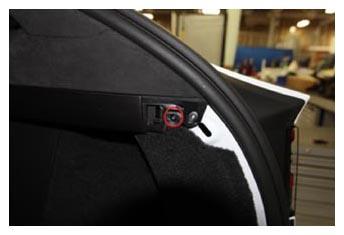 Courtesy of TESLA, INC. Courtesy of TESLA, INC.
|
 Courtesy of TESLA, INC. Courtesy of TESLA, INC.
|
 Courtesy of TESLA, INC. Courtesy of TESLA, INC.
|
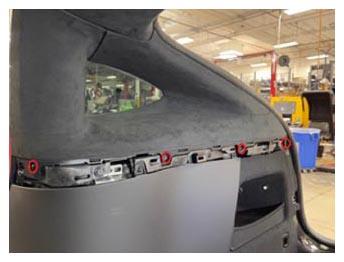
- Remove fasteners securing RH upper C-pillar trim to bracket
NOTE:
3x screws, T20, 2 N.m, 1x patch bolt, T25, 3 N.m, Discard patch bolt after removal
 Courtesy of TESLA, INC. Courtesy of TESLA, INC.
|
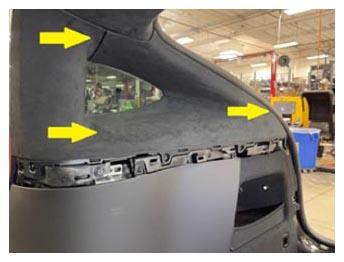
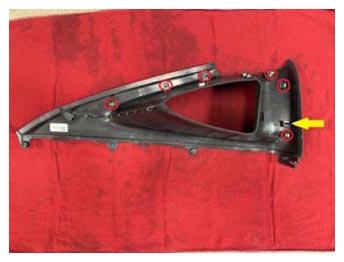
- Remove RH upper C-pillar trim
NOTE:
6x clips, 1x datum
 Courtesy of TESLA, INC. Courtesy of TESLA, INC.
|
 Courtesy of TESLA, INC. Courtesy of TESLA, INC.
|
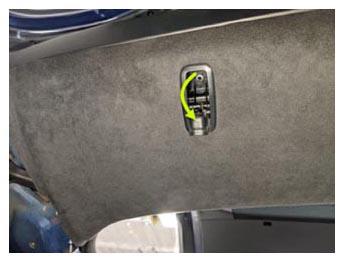
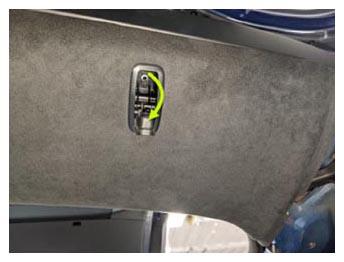
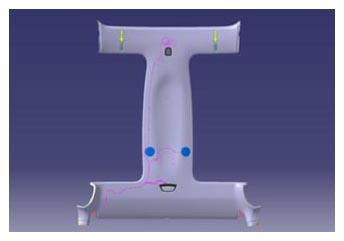
- Open LH and RH side rear coat hooks
NOTE:
Push inward and release to open
 Courtesy of TESLA, INC. Courtesy of TESLA, INC.
|
 Courtesy of TESLA, INC. Courtesy of TESLA, INC.
|
 Courtesy of TESLA, INC. Courtesy of TESLA, INC.
|
- Remove bolts securing LH and RH rear coat hooks to body
NOTE:
2x screws, T20, 2.5 N.m
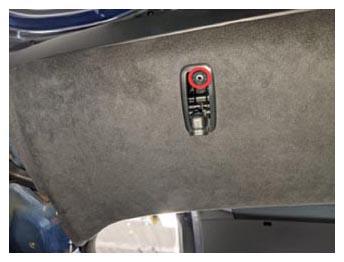 Courtesy of TESLA, INC. Courtesy of TESLA, INC.
|
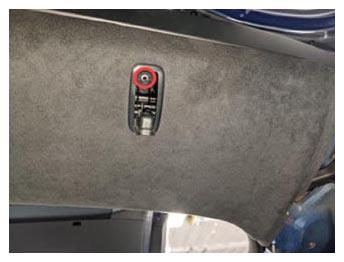 Courtesy of TESLA, INC. Courtesy of TESLA, INC.
|
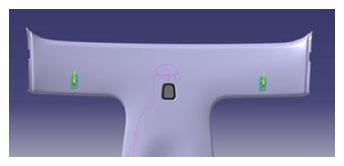 Courtesy of TESLA, INC. Courtesy of TESLA, INC.
|
- Move RH front seat backward
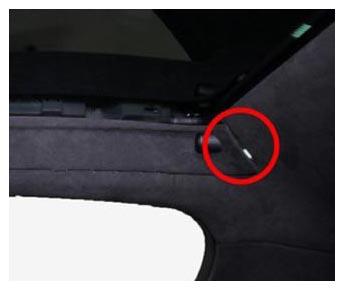
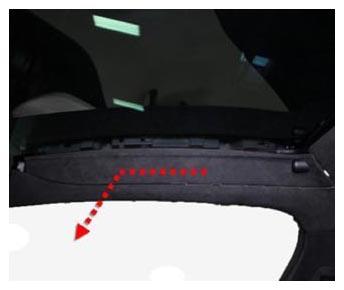
- Remove RH sunvisor bezel
NOTE:
6x clips, 1x tab, Release clips, then slide bezel towards front of vehicle to release
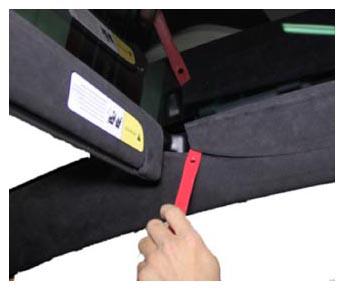 Courtesy of TESLA, INC. Courtesy of TESLA, INC.
|
 Courtesy of TESLA, INC. Courtesy of TESLA, INC.
|
 Courtesy of TESLA, INC. Courtesy of TESLA, INC.
|
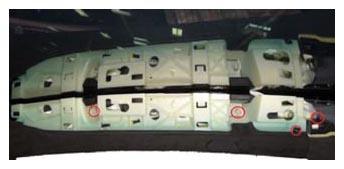
- Remove bolts securing RH upper A-pillar to body
NOTE:
2x bolts, 10 mm, 5 N.m, 1x screw, T20, 2.5 N.m, 1x nyloc nut, 13 mm, 5 N.m, Discard nut after removal
 Courtesy of TESLA, INC. Courtesy of TESLA, INC.
|
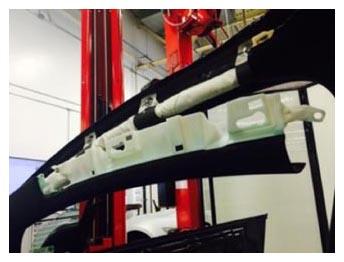
- Move RH A-pillar for access to headliner
 Courtesy of TESLA, INC. Courtesy of TESLA, INC.
|
- Remove screw securing RH front end of headliner to body
NOTE:
1x screw, T20, 2 N.m
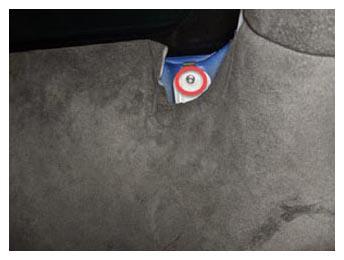 Courtesy of TESLA, INC. Courtesy of TESLA, INC.
|
- Move RH front seat forward
- Move RH front door seal away from B-pillar
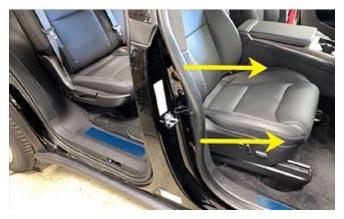 Courtesy of TESLA, INC. Courtesy of TESLA, INC.
|
- Release upper portion of RH lower B-pillar to RH upper B-pillar
NOTE:
5x clips
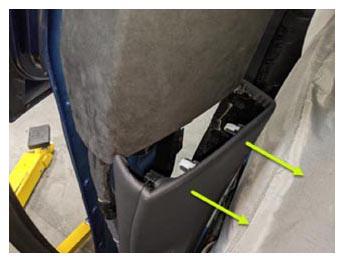 Courtesy of TESLA, INC. Courtesy of TESLA, INC.
|
- Release RH upper B-pillar from body
NOTE:
4x clips, 1 magnet, 1x connector
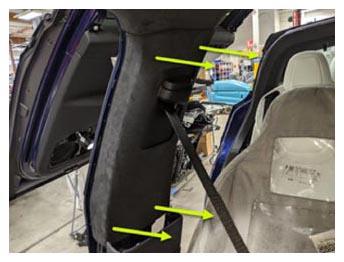 Courtesy of TESLA, INC. Courtesy of TESLA, INC.
|
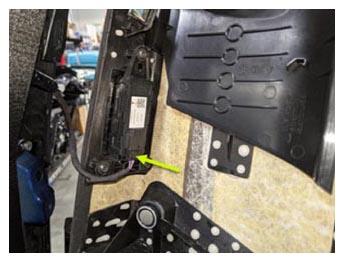 Courtesy of TESLA, INC. Courtesy of TESLA, INC.
|
- Move RH upper B-pillar aside
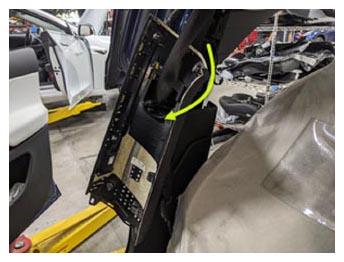 Courtesy of TESLA, INC. Courtesy of TESLA, INC.
|
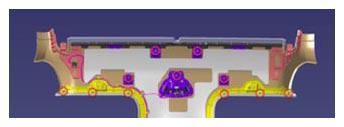
- Release front portion of headliner from body
NOTE:
11x clips
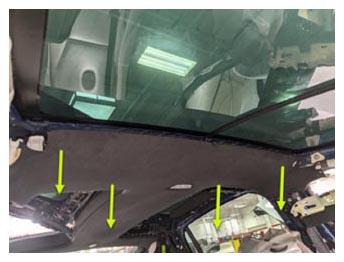 Courtesy of TESLA, INC. Courtesy of TESLA, INC.
|
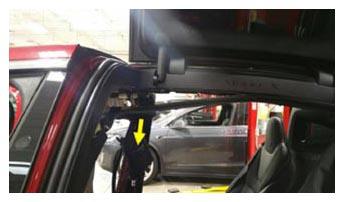 Courtesy of TESLA, INC. Courtesy of TESLA, INC.
|
 Courtesy of TESLA, INC. Courtesy of TESLA, INC.
|
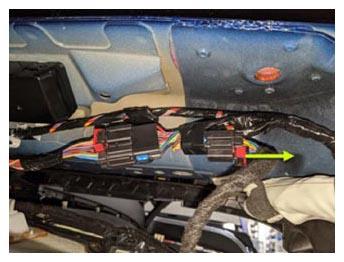
- Disconnect headliner from body harness
NOTE:
1x connector, Release red locking tab
 Courtesy of TESLA, INC. Courtesy of TESLA, INC.
|
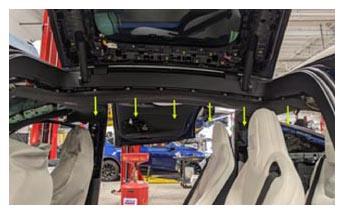
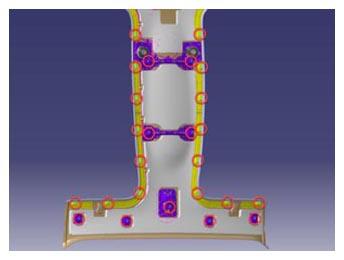
- Release headliner from body
NOTE:
25x clips
 Courtesy of TESLA, INC. Courtesy of TESLA, INC.
|
 Courtesy of TESLA, INC. Courtesy of TESLA, INC.
|
- Remove headliner assembly from vehicle
NOTE:
Recommend assistance, Maneuver headliner past head rests and remove through LH or RH falcon wing door opening
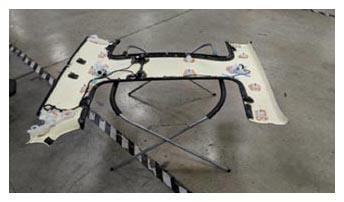 Courtesy of TESLA, INC. Courtesy of TESLA, INC.
|
- Disconnect ultrasonic sensor from center spine applique
NOTE:
1x connector, carefully release connector to ultrasonic sensor
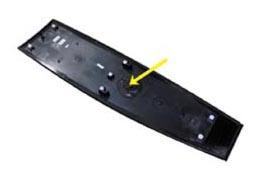 Courtesy of TESLA, INC. Courtesy of TESLA, INC.
|
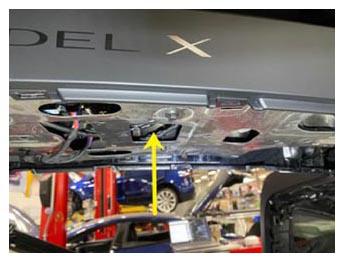 Courtesy of TESLA, INC. Courtesy of TESLA, INC.
|
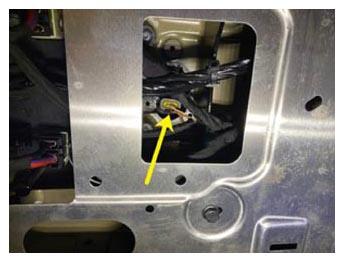 Courtesy of TESLA, INC. Courtesy of TESLA, INC.
|
- Remove connectors for LH and RH EM controllers
NOTE:
4x connectors, push tab inward to release
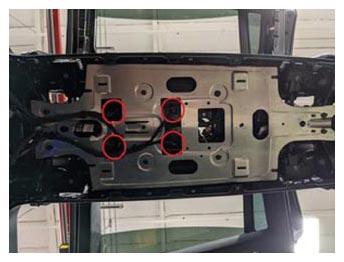 Courtesy of TESLA, INC. Courtesy of TESLA, INC.
|
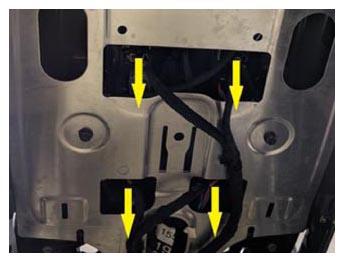 Courtesy of TESLA, INC. Courtesy of TESLA, INC.
|
- Remove coaxial connector from center spine close out panel and separate connector
NOTE:
1x connector
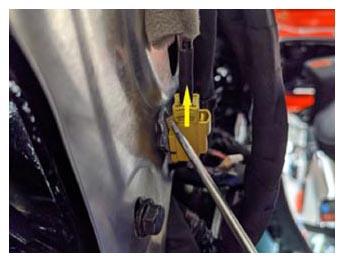 Courtesy of TESLA, INC. Courtesy of TESLA, INC.
|
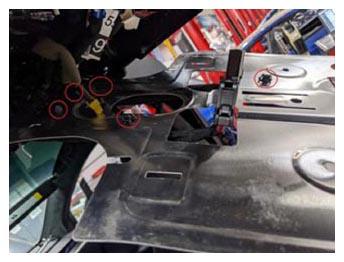
- Remove bolts from center spine close out panel and lower closing plate slightly
NOTE:
8x bolts, 10 mm, 3.5 N.m, Do not allow closing plate to hang on harness
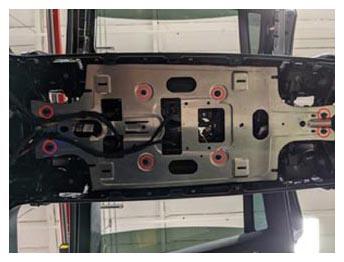 Courtesy of TESLA, INC. Courtesy of TESLA, INC.
|
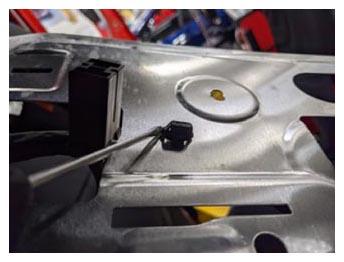
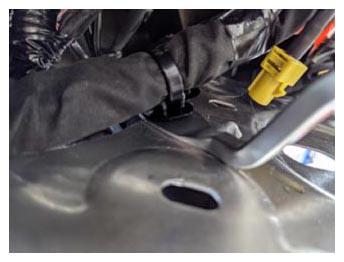
- Release clips from center spine close out panel and remove closing panel
NOTE:
5x clips
 Courtesy of TESLA, INC. Courtesy of TESLA, INC.
|
 Courtesy of TESLA, INC. Courtesy of TESLA, INC.
|
 Courtesy of TESLA, INC. Courtesy of TESLA, INC.
|
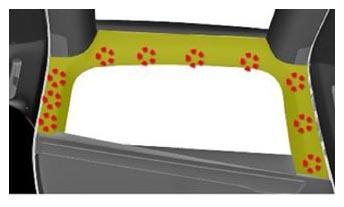
- Remove LH falcon door lower garnish
NOTE:
9x V-clips, Replace any damaged or missing V-clips, Take care not to damage door trim panel during removal
 Courtesy of TESLA, INC. Courtesy of TESLA, INC.
|
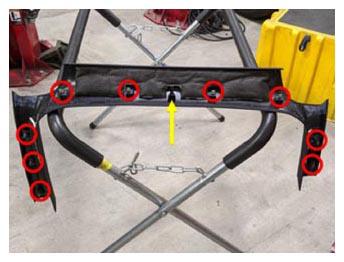 Courtesy of TESLA, INC. Courtesy of TESLA, INC.
|
- Remove LH upper falcon door trim
NOTE:
17x clips, 1x connector may be present on early production vehicles
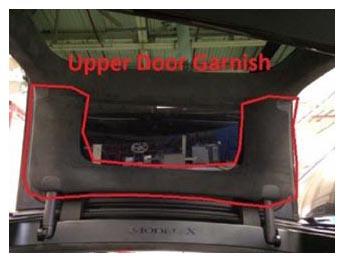 Courtesy of TESLA, INC. Courtesy of TESLA, INC.
|
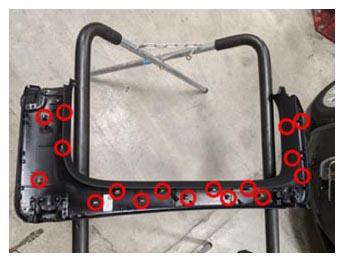 Courtesy of TESLA, INC. Courtesy of TESLA, INC.
|
- Remove LH falcon rear upper bracket
NOTE:
5x bolts, T25, 2.5 N.m, 4.0 N.m, 1x harness clip, Fastener count may vary
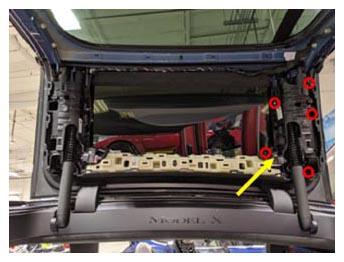 Courtesy of TESLA, INC. Courtesy of TESLA, INC.
|
- Remove LH falcon front upper bracket
NOTE:
5x bolts, T25, 2.5 N.m, 4.0 N.m, 1x harness clip
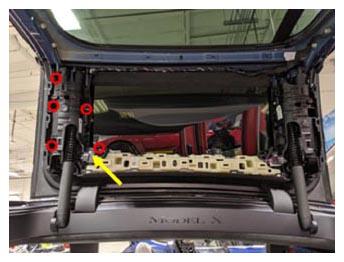 Courtesy of TESLA, INC. Courtesy of TESLA, INC.
|
- Remove LH upper outer falcon door middle trim
NOTE:
7x bolts, T25, 3.0 N.m, 4.0 N.m, Fastener count may vary
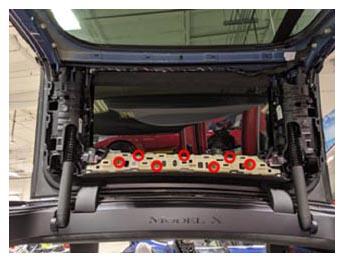 Courtesy of TESLA, INC. Courtesy of TESLA, INC.
|
- Remove LH upper gap hider trim
NOTE:
4x clips
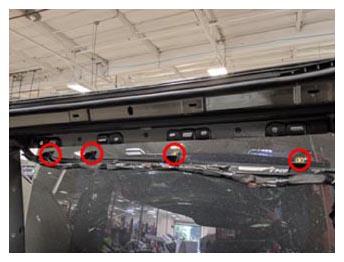 Courtesy of TESLA, INC. Courtesy of TESLA, INC.
|
- Remove fastener securing the LH B-pillar racetrack to spine racetrack
NOTE:
1x screw, T20, 2.5 N.m
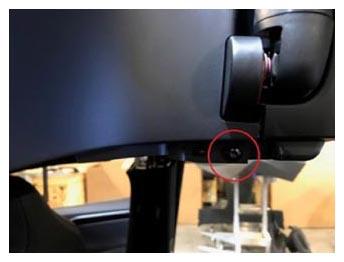 Courtesy of TESLA, INC. Courtesy of TESLA, INC.
|
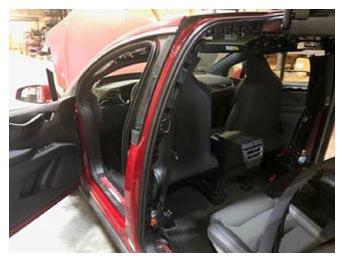
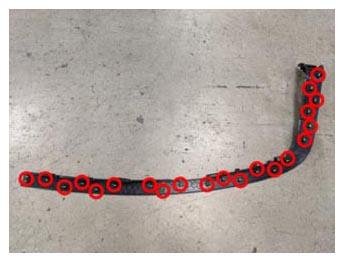
- Remove the LH B-pillar racetrack from vehicle
NOTE:
22x clips, Start from the bottom and work your way up
 Courtesy of TESLA, INC. Courtesy of TESLA, INC.
|
 Courtesy of TESLA, INC. Courtesy of TESLA, INC.
|
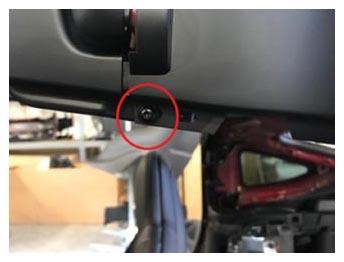
- Remove fasteners securing the LH C-pillar racetrack to spine racetrack
NOTE:
1x screw, T20, 2.5 N.m
 Courtesy of TESLA, INC. Courtesy of TESLA, INC.
|
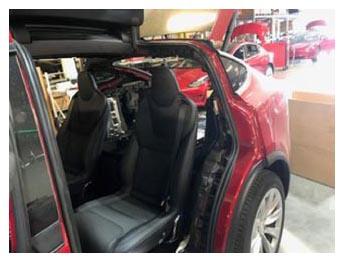
- Remove the LH C-pillar racetrack from vehicle
NOTE:
21x clips, Start from the bottom and work your way up
 Courtesy of TESLA, INC. Courtesy of TESLA, INC.
|
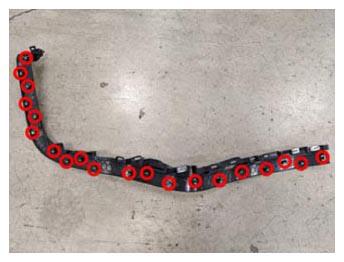 Courtesy of TESLA, INC. Courtesy of TESLA, INC.
|
- Remove the LH sill racetrack from vehicle
NOTE:
6x clips, Release sill racetrack from the rear and rotate upward, Then release 2x clips from B-pillar racetrack and remove sill racetrack
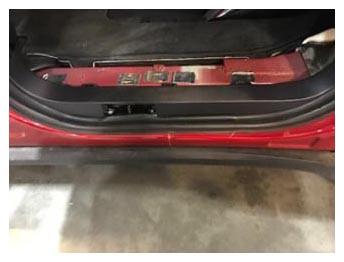 Courtesy of TESLA, INC. Courtesy of TESLA, INC.
|
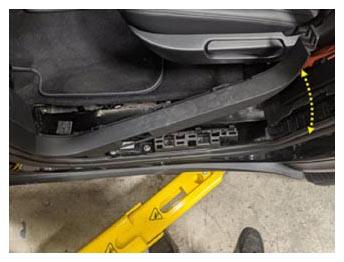 Courtesy of TESLA, INC. Courtesy of TESLA, INC.
|
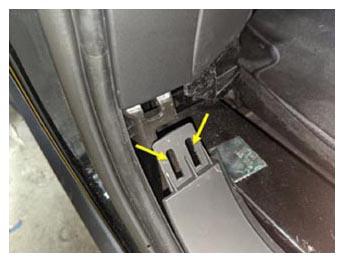 Courtesy of TESLA, INC. Courtesy of TESLA, INC.
|
- Remove the LH falcon door primary strut covers
NOTE:
2x covers
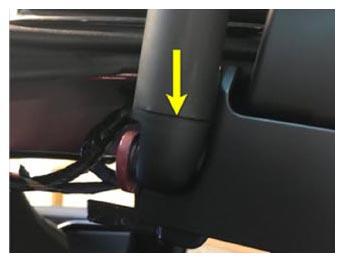 Courtesy of TESLA, INC. Courtesy of TESLA, INC.
|
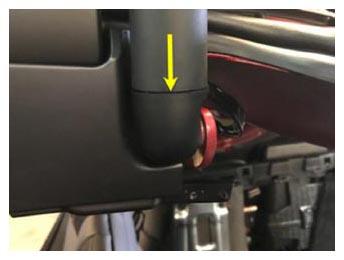 Courtesy of TESLA, INC. Courtesy of TESLA, INC.
|
- Remove the LH spine racetrack from vehicle
NOTE:
8x clips
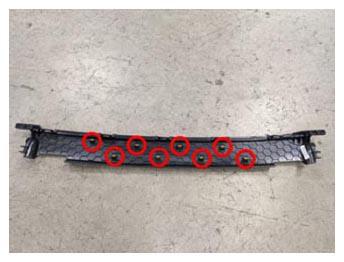 Courtesy of TESLA, INC. Courtesy of TESLA, INC.
|
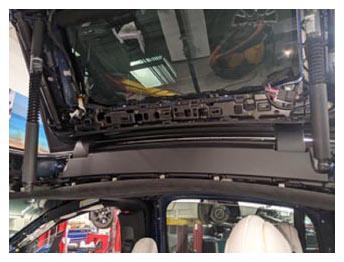 Courtesy of TESLA, INC. Courtesy of TESLA, INC.
|
- Remove LH rear door primary body side seal
NOTE:
2x rows of double sided tape, Pull seal sideways (inward) to remove as much tape as possible from the body, Shift seal up and over falcon door to fully remove
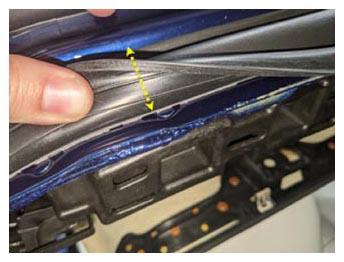 Courtesy of TESLA, INC. Courtesy of TESLA, INC.
|
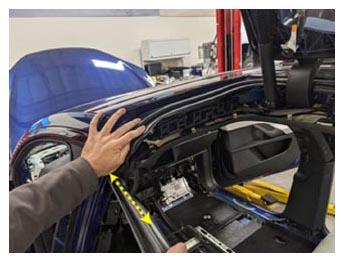 Courtesy of TESLA, INC. Courtesy of TESLA, INC.
|
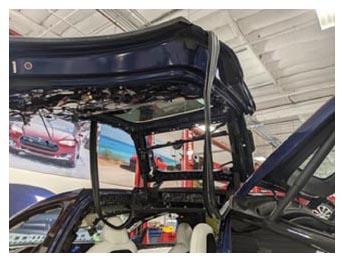 Courtesy of TESLA, INC. Courtesy of TESLA, INC.
|
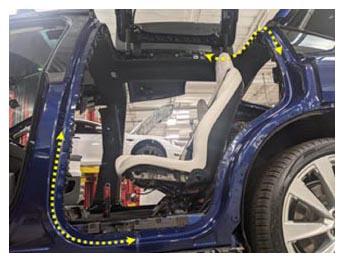
- Remove residual adhesive from body
NOTE:
Remove the majority of the residual adhesive with the eraser wheel then wipe with IPA, Removal may be more difficult when exposed to heat, Allow 1 minute dry time
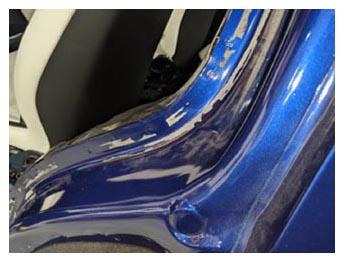 Courtesy of TESLA, INC. Courtesy of TESLA, INC.
|
 Courtesy of TESLA, INC. Courtesy of TESLA, INC.
|
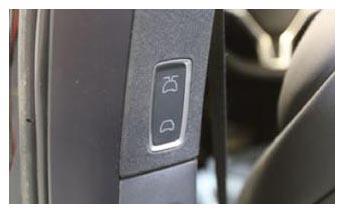
- Lower LH falcon door
NOTE:
May need to assist the door to close
 Courtesy of TESLA, INC. Courtesy of TESLA, INC.
|
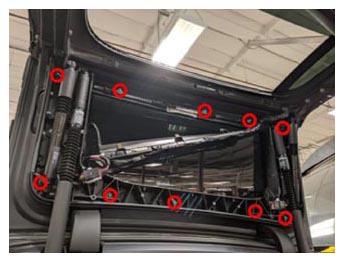
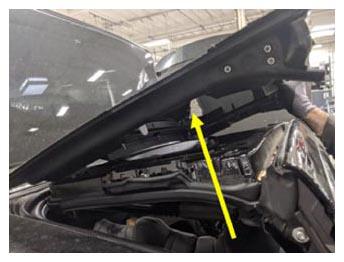
- Remove LH falcon door upper glass
NOTE:
10x nuts, 10 mm, 6 N.m, Recommend assistance
 Courtesy of TESLA, INC. Courtesy of TESLA, INC.
|
 Courtesy of TESLA, INC. Courtesy of TESLA, INC.
|
- Place suitable protective cover on the 2nd row seats
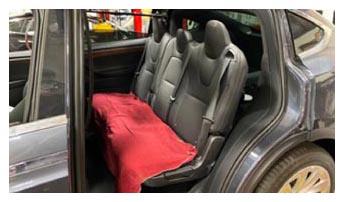 Courtesy of TESLA, INC. Courtesy of TESLA, INC.
|
- Enter vehicle and close LH falcon door from the inside
NOTE:
Access to roof top through upper falcon door opening
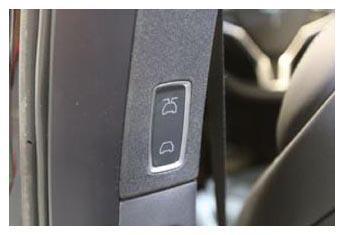 Courtesy of TESLA, INC. Courtesy of TESLA, INC.
|
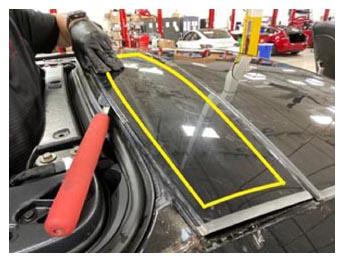
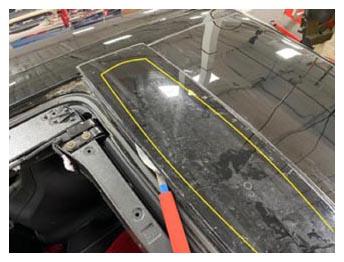
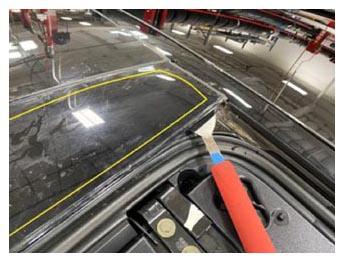
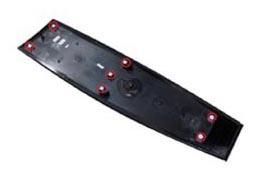
- Release center spine applique from vehicle
NOTE:
7x clips, Starting from the front use a hydro blade to cut through and work around applique assembly, Separate urethane from center spine applique, Partially lift the LH side of the applique to gain access to the RH side, Use glass cleaner to lubricate the blade, Carefully release the clips from applique and do not damage the seal on RH upper glass
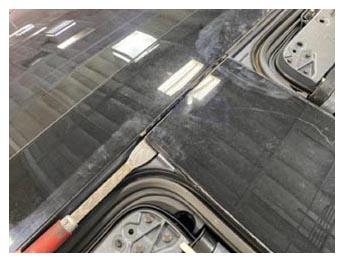 Courtesy of TESLA, INC. Courtesy of TESLA, INC.
|
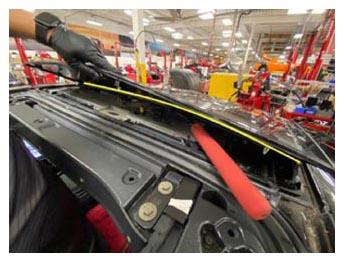 Courtesy of TESLA, INC. Courtesy of TESLA, INC.
|
 Courtesy of TESLA, INC. Courtesy of TESLA, INC.
|
 Courtesy of TESLA, INC. Courtesy of TESLA, INC.
|
 Courtesy of TESLA, INC. Courtesy of TESLA, INC.
|
 Courtesy of TESLA, INC. Courtesy of TESLA, INC.
|
- Remove excess urethane from roof, center spine applique carrier and prepare for installation
NOTE:
Clean roof surface area with IPA wipes, Allow 1 minute for dry time
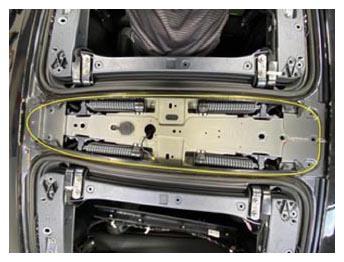 Courtesy of TESLA, INC. Courtesy of TESLA, INC.
|
- Open LH falcon wing door
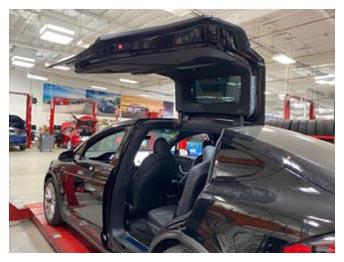 Courtesy of TESLA, INC. Courtesy of TESLA, INC.
|
- Remove screws securing LH center spine applique carrier onto roof-top of body
NOTE:
2x screws, T20, 2 N.m
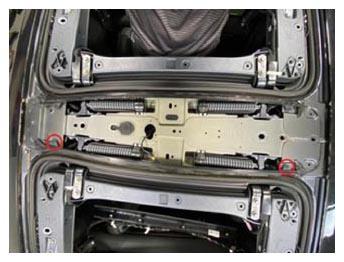 Courtesy of TESLA, INC. Courtesy of TESLA, INC.
|
- Remove LH center spine applique carrier onto vehicle
NOTE:
2x clips, 2x screws, 8 mm, 3 N.m, Discard nuts after removal
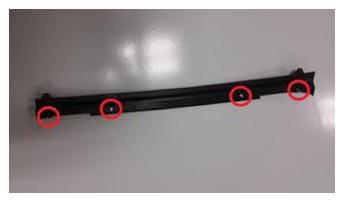 Courtesy of TESLA, INC. Courtesy of TESLA, INC.
|
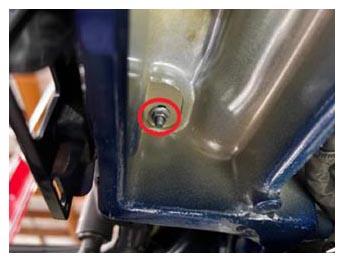 Courtesy of TESLA, INC. Courtesy of TESLA, INC.
|
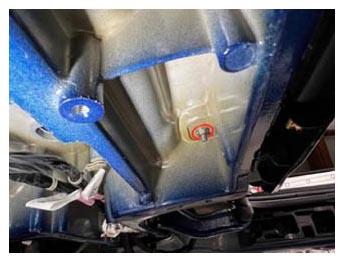 Courtesy of TESLA, INC. Courtesy of TESLA, INC.
|
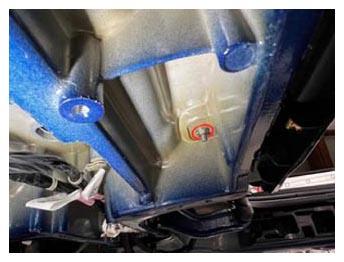
- Install LH center spine applique carrier onto vehicle
NOTE:
2x clips, 2x screws, 8 mm, 3 N.m, Ensure clips are fully engaged onto the body, Install new nylon nuts
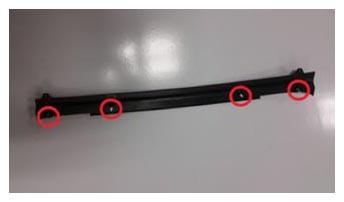 Courtesy of TESLA, INC. Courtesy of TESLA, INC.
|
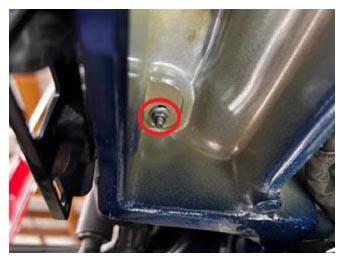 Courtesy of TESLA, INC. Courtesy of TESLA, INC.
|
 Courtesy of TESLA, INC. Courtesy of TESLA, INC.
|
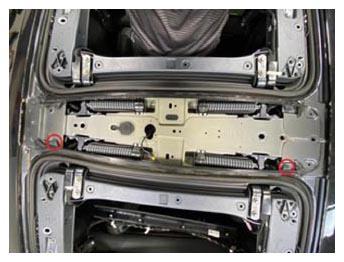
- Install screws securing LH center spine applique carrier onto roof-top of body
NOTE:
2x screws, T20, 2 N.m
 Courtesy of TESLA, INC. Courtesy of TESLA, INC.
|
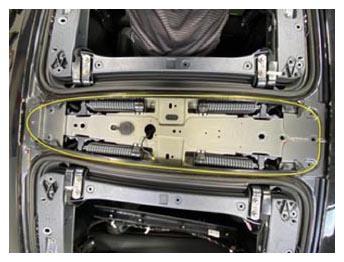
- Apply primer onto the roof and center spine applique carrier
NOTE:
Apply primer onto roof and center spine applique carrier following the urethane path
 Courtesy of TESLA, INC. Courtesy of TESLA, INC.
|
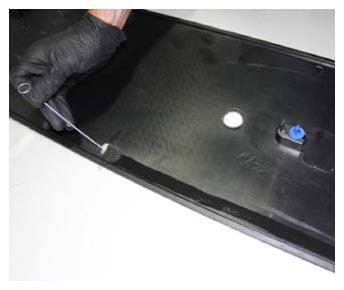
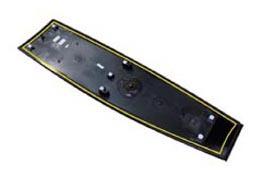
- Apply primer onto center spine applique assembly
NOTE:
Apply primer onto center spine applique following the urethane path
 Courtesy of TESLA, INC. Courtesy of TESLA, INC.
|
 Courtesy of TESLA, INC. Courtesy of TESLA, INC.
|
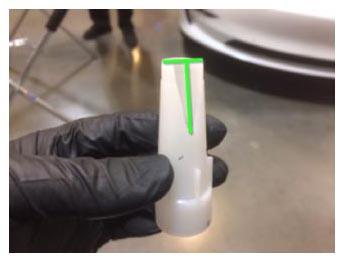
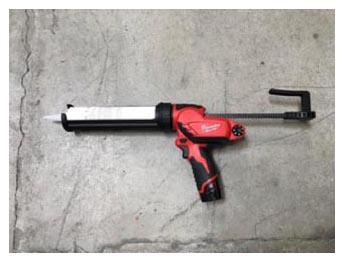
- Prepare caulking gun and urethane
NOTE:
Opening must be 8 mm wide and 14 mm tall
 Courtesy of TESLA, INC. Courtesy of TESLA, INC.
|
 Courtesy of TESLA, INC. Courtesy of TESLA, INC.
|
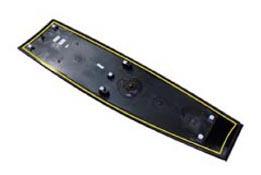
- Apply urethane to center spine applique following the primer patch
NOTE:
Fill any gaps in urethane to ensure consistent bead
 Courtesy of TESLA, INC. Courtesy of TESLA, INC.
|
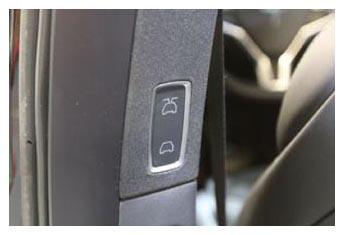
- Enter vehicle and close LH falcon door from the inside
NOTE:
Access to roof top through upper falcon door opening
 Courtesy of TESLA, INC. Courtesy of TESLA, INC.
|
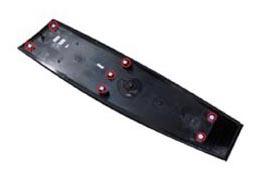
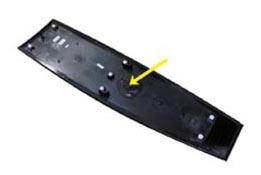
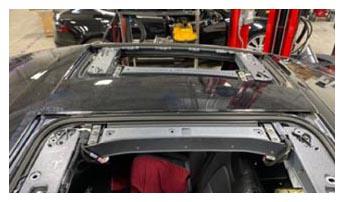
- Install center spine applique
NOTE:
7x clips, 1x connector, Align center spine applique onto vehicle, Connect the ultrasonic sensor, press down firmly and ensure all the clips are fully engaged, Recommend assistance
 Courtesy of TESLA, INC. Courtesy of TESLA, INC.
|
 Courtesy of TESLA, INC. Courtesy of TESLA, INC.
|
 Courtesy of TESLA, INC. Courtesy of TESLA, INC.
|
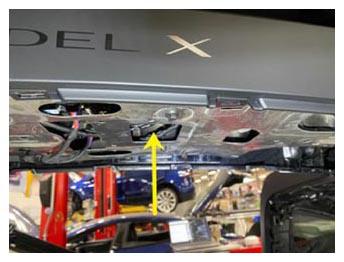 Courtesy of TESLA, INC. Courtesy of TESLA, INC.
|
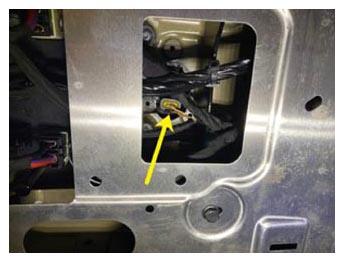 Courtesy of TESLA, INC. Courtesy of TESLA, INC.
|
- Open LH rear falcon door partially
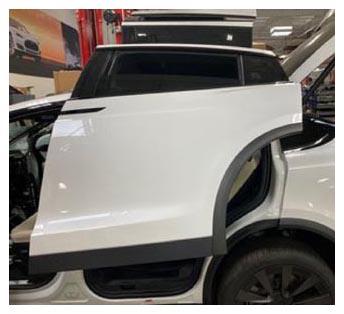 Courtesy of TESLA, INC. Courtesy of TESLA, INC.
|
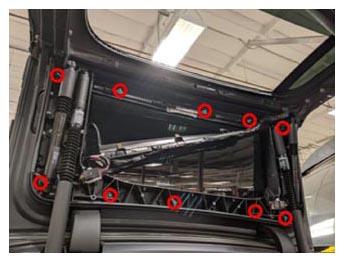
- Install LH falcon door upper glass
NOTE:
10x nuts, 10 mm, 6 N.m, Recommend assistance
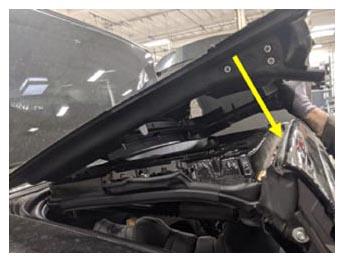 Courtesy of TESLA, INC. Courtesy of TESLA, INC.
|
 Courtesy of TESLA, INC. Courtesy of TESLA, INC.
|
- Open LH falcon wing door
NOTE:
Adjust position as required
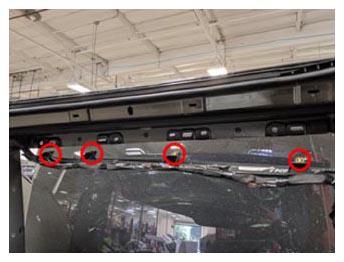
- Install LH upper gap hider trim
NOTE:
4x clips
 Courtesy of TESLA, INC. Courtesy of TESLA, INC.
|
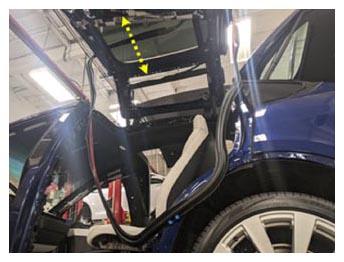
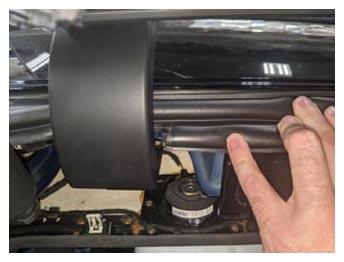
- Position LH rear door primary body side seal for installation
NOTE:
Position flange in seal between primary hinges
 Courtesy of TESLA, INC. Courtesy of TESLA, INC.
|
 Courtesy of TESLA, INC. Courtesy of TESLA, INC.
|
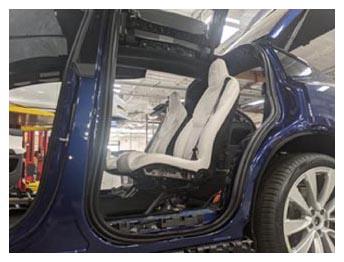 Courtesy of TESLA, INC. Courtesy of TESLA, INC.
|
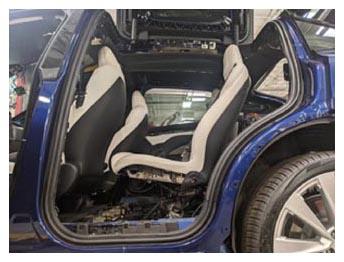
- Install LH rear door primary body side seal to body
NOTE:
Set the inner seal tape first as it sits flat on the body seam, The inner tape should follow the body seam about 1 cm from the edge, Then seat the outer seal tape and sill tape, Wet out the adhesive applying pressure along the entirety of the seal once set in desired position
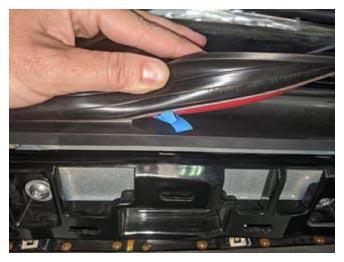 Courtesy of TESLA, INC. Courtesy of TESLA, INC.
|
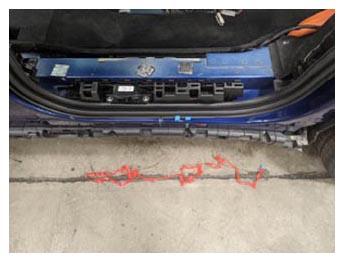 Courtesy of TESLA, INC. Courtesy of TESLA, INC.
|
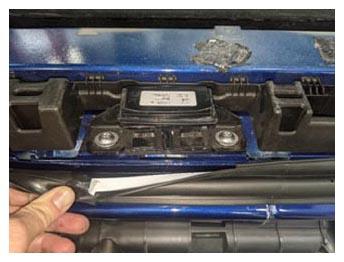 Courtesy of TESLA, INC. Courtesy of TESLA, INC.
|
 Courtesy of TESLA, INC. Courtesy of TESLA, INC.
|
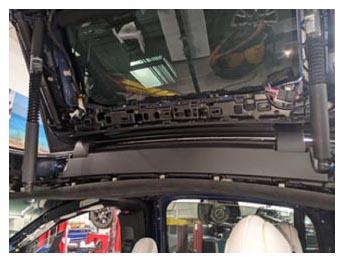
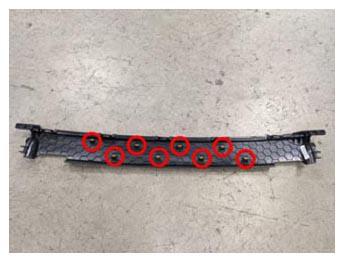
- Install the LH spine racetrack to vehicle
NOTE:
8x clips
 Courtesy of TESLA, INC. Courtesy of TESLA, INC.
|
 Courtesy of TESLA, INC. Courtesy of TESLA, INC.
|
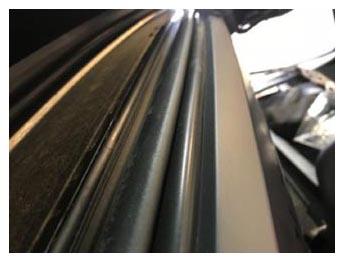
- Ensure the LH falcon door seal is seated behind the spine racetrack
 Courtesy of TESLA, INC. Courtesy of TESLA, INC.
|
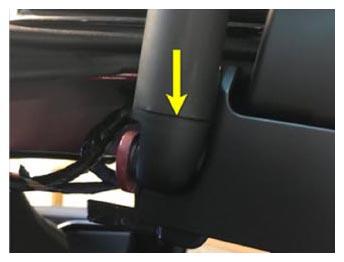
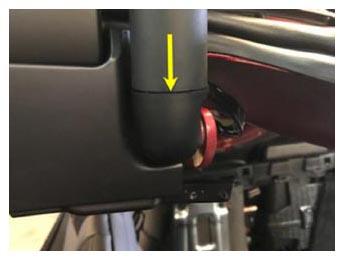
- Install the LH falcon door primary strut covers
NOTE:
2x covers
 Courtesy of TESLA, INC. Courtesy of TESLA, INC.
|
 Courtesy of TESLA, INC. Courtesy of TESLA, INC.
|
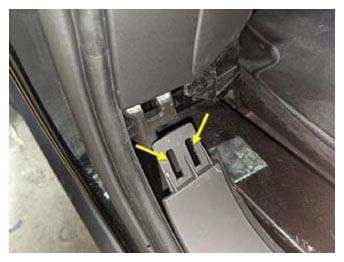
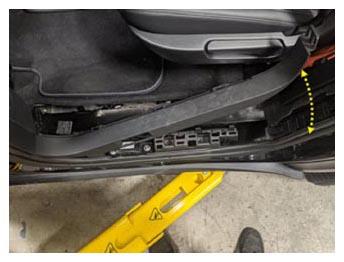
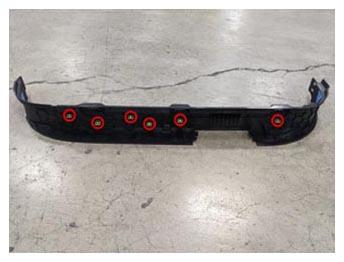
- Install the LH sill racetrack
NOTE:
6x clips, Secure sill racetrack underneath B-pillar racetrack then rotate down and secure to sill
 Courtesy of TESLA, INC. Courtesy of TESLA, INC.
|
 Courtesy of TESLA, INC. Courtesy of TESLA, INC.
|
 Courtesy of TESLA, INC. Courtesy of TESLA, INC.
|
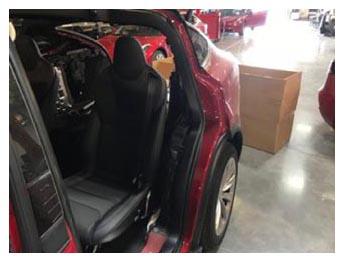
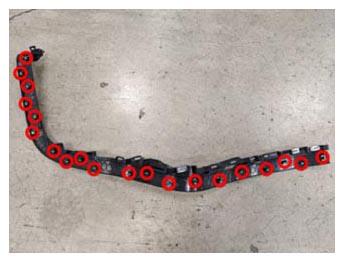
- Install the LH C-pillar racetrack
NOTE:
21x clips, Start from the top make sure the top of the racetrack is engaged with spine racetrack
 Courtesy of TESLA, INC. Courtesy of TESLA, INC.
|
 Courtesy of TESLA, INC. Courtesy of TESLA, INC.
|
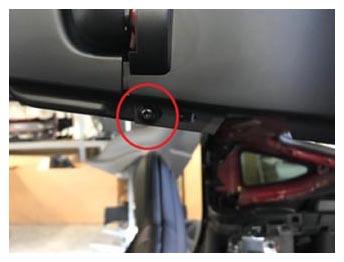
- Install fastener securing the LH C-pillar racetrack to the spine racetrack
NOTE:
1x screw, T20, 2.5 N.m
 Courtesy of TESLA, INC. Courtesy of TESLA, INC.
|
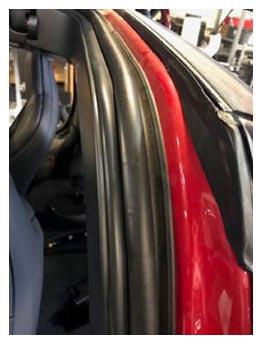
- Ensure falcon door seal is seated behind the LH C-pillar racetrack
 Courtesy of TESLA, INC. Courtesy of TESLA, INC.
|
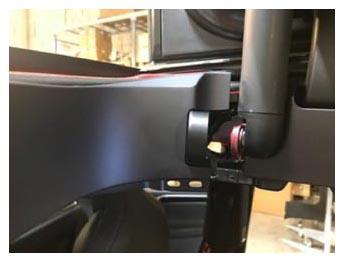
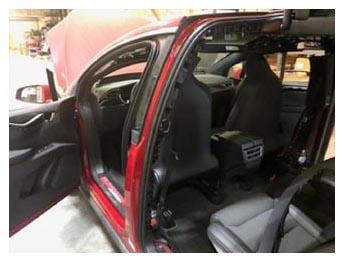
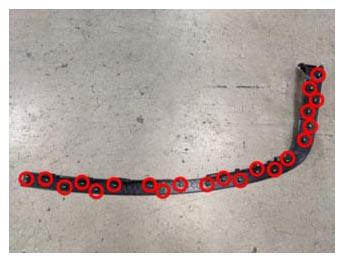
- Install the LH B-pillar racetrack
NOTE:
22x clips, Start from the top make sure the top of the racetrack is engaged with spine racetrack
 Courtesy of TESLA, INC. Courtesy of TESLA, INC.
|
 Courtesy of TESLA, INC. Courtesy of TESLA, INC.
|
 Courtesy of TESLA, INC. Courtesy of TESLA, INC.
|
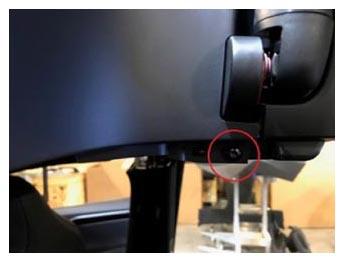
- Install fastener securing the LH B-pillar racetrack to the spine racetrack
NOTE:
1x screw, T20, 2.5 N.m
 Courtesy of TESLA, INC. Courtesy of TESLA, INC.
|
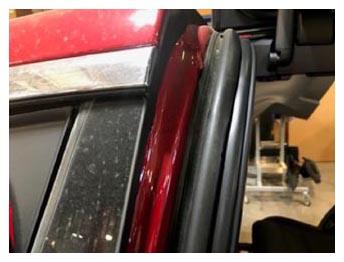
- Ensure the LH falcon door seal is seated behind the B-pillar racetrack
 Courtesy of TESLA, INC. Courtesy of TESLA, INC.
|
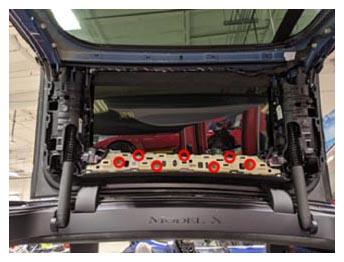
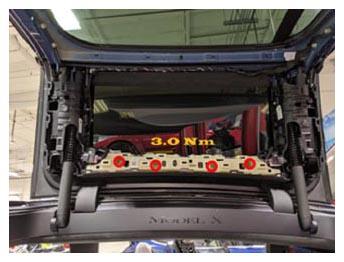
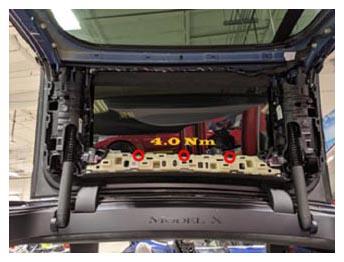
- Install LH upper outer falcon door middle trim
NOTE:
7x bolts, T25, 3.0 N.m, 4.0 N.m, Fastener count may vary
 Courtesy of TESLA, INC. Courtesy of TESLA, INC.
|
 Courtesy of TESLA, INC. Courtesy of TESLA, INC.
|
 Courtesy of TESLA, INC. Courtesy of TESLA, INC.
|
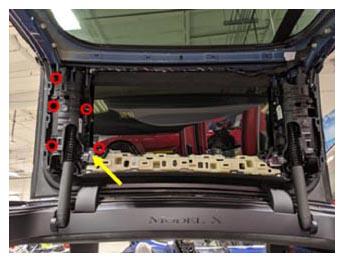
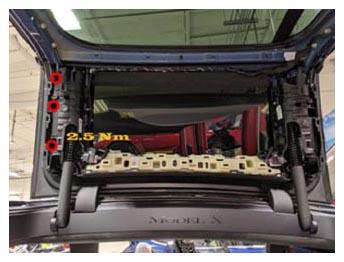
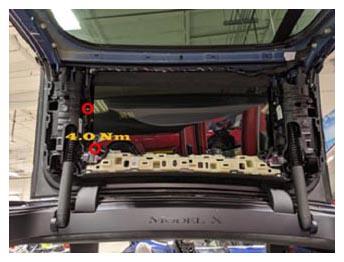
- Install LH falcon front upper bracket
NOTE:
5x bolts, T25, 2.5 N.m, 4.0 N.m, 1x harness clip, Fastener count may vary
 Courtesy of TESLA, INC. Courtesy of TESLA, INC.
|
 Courtesy of TESLA, INC. Courtesy of TESLA, INC.
|
 Courtesy of TESLA, INC. Courtesy of TESLA, INC.
|
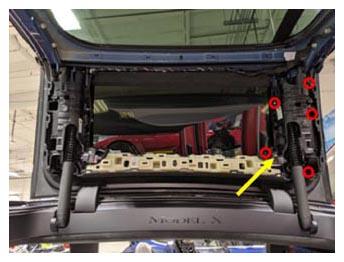
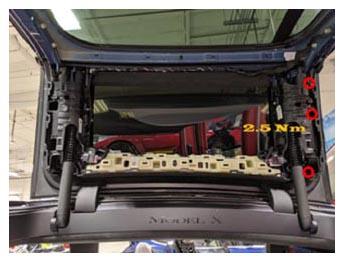
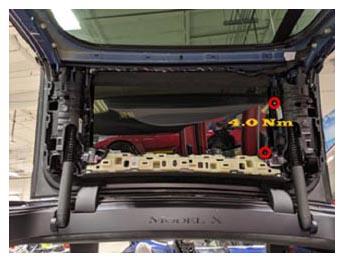
- Install LH falcon rear upper bracket
NOTE:
5x bolts, T25, 2.5 N.m, 4.0 N.m, 1x harness clip, Fastener count may vary
 Courtesy of TESLA, INC. Courtesy of TESLA, INC.
|
 Courtesy of TESLA, INC. Courtesy of TESLA, INC.
|
 Courtesy of TESLA, INC. Courtesy of TESLA, INC.
|
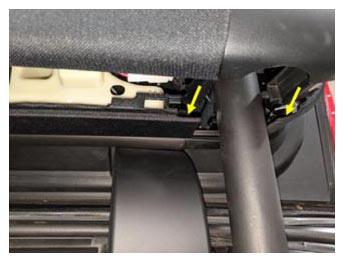
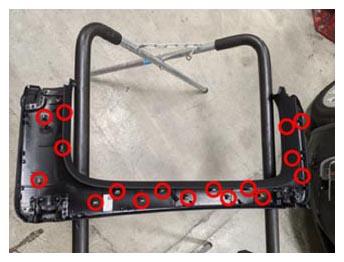
- Install LH upper falcon door trim
NOTE:
17x clips, Align strut cover first, 1x connector may be present on early production vehicles
 Courtesy of TESLA, INC. Courtesy of TESLA, INC.
|
 Courtesy of TESLA, INC. Courtesy of TESLA, INC.
|
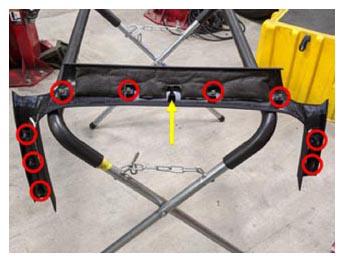
- Install LH falcon door lower garnish
NOTE:
9x V-clips, 1x guide tab
 Courtesy of TESLA, INC. Courtesy of TESLA, INC.
|
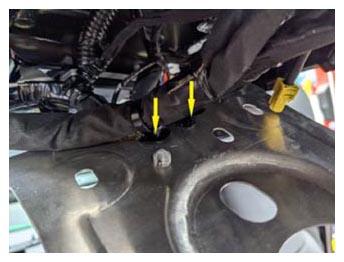
- Attach clips to front of center spine close out panel
NOTE:
2x clips
 Courtesy of TESLA, INC. Courtesy of TESLA, INC.
|
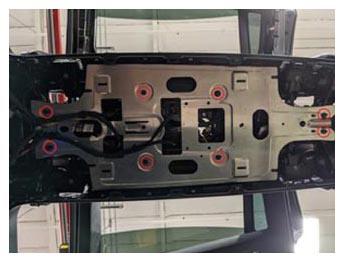
- Reinstall closing center spine close out panel
NOTE:
8x bolts, 10 mm, 3.5 N.m
 Courtesy of TESLA, INC. Courtesy of TESLA, INC.
|
- Reattach harnesses to center spine close out panel
NOTE:
3x clips
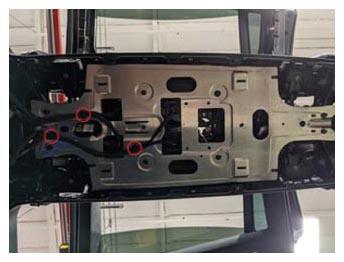 Courtesy of TESLA, INC. Courtesy of TESLA, INC.
|
- Install connectors to EM controllers
NOTE:
4x connectors
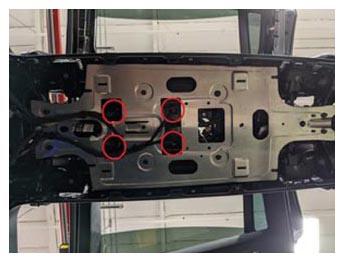 Courtesy of TESLA, INC. Courtesy of TESLA, INC.
|
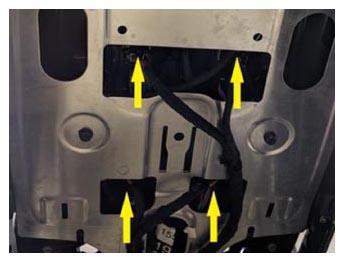 Courtesy of TESLA, INC. Courtesy of TESLA, INC.
|
- Position headliner assembly into vehicle for installation
NOTE:
Recommend assistance, Install through LH or RH falcon wing door opening, Maneuver headliner past head rests and position
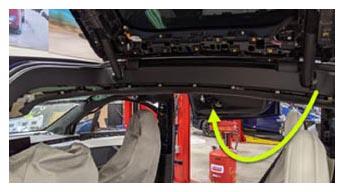 Courtesy of TESLA, INC. Courtesy of TESLA, INC.
|
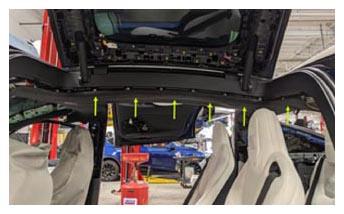
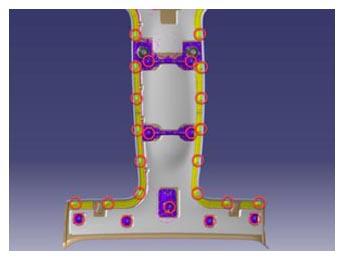
- Engage rear portion of headliner to body
NOTE:
25x clips, Leave front portion disengaged to make headliner connection
 Courtesy of TESLA, INC. Courtesy of TESLA, INC.
|
 Courtesy of TESLA, INC. Courtesy of TESLA, INC.
|
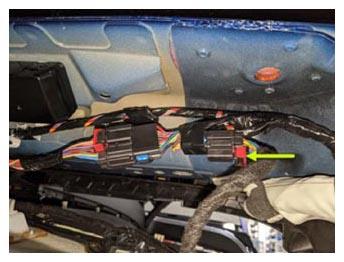
- Connect headliner to body harness
NOTE:
1x connector, Engage red locking tab
 Courtesy of TESLA, INC. Courtesy of TESLA, INC.
|
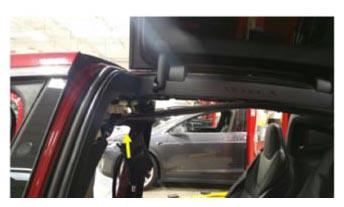
- Engage front portion of headliner to body
NOTE:
11x clips
 Courtesy of TESLA, INC. Courtesy of TESLA, INC.
|
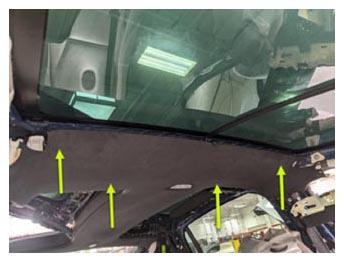 Courtesy of TESLA, INC. Courtesy of TESLA, INC.
|
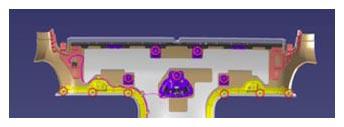 Courtesy of TESLA, INC. Courtesy of TESLA, INC.
|
- Install screw securing RH front end of headliner to body
NOTE:
1x screw, T20, 2 N.m
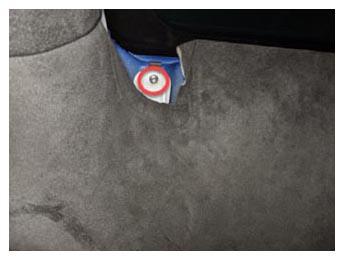 Courtesy of TESLA, INC. Courtesy of TESLA, INC.
|
- Install RH upper B-pillar to body
NOTE:
4x clips, 1 magnet, 1x connector, Replace clips if damaged
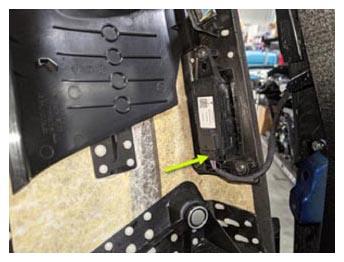 Courtesy of TESLA, INC. Courtesy of TESLA, INC.
|
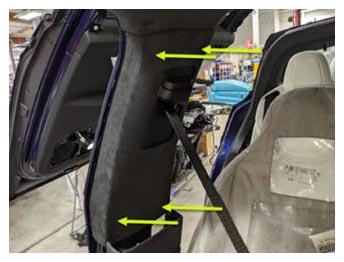 Courtesy of TESLA, INC. Courtesy of TESLA, INC.
|
- Secure upper portion of RH lower B-pillar to RH upper B-pillar
NOTE:
5x clips
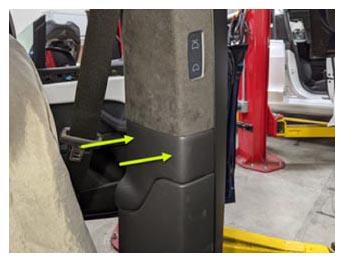 Courtesy of TESLA, INC. Courtesy of TESLA, INC.
|
- Fully seat RH front door seal along RH B-pillar trims
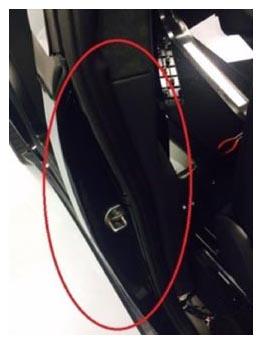 Courtesy of TESLA, INC. Courtesy of TESLA, INC.
|
- Move RH front seat backward
- Position RH upper A-pillar for installation
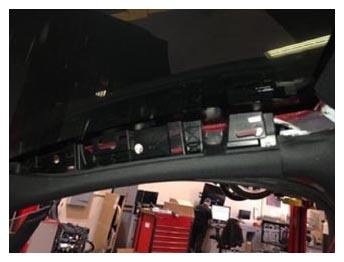 Courtesy of TESLA, INC. Courtesy of TESLA, INC.
|
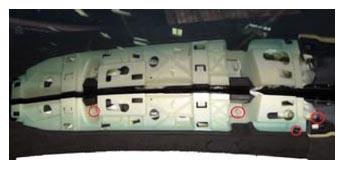
- Install bolts securing RH upper A-pillar to body
NOTE:
2x bolts, 10 mm, 5 N.m, 1x screw, T20, 2.5 N.m, 1x nyloc nut, 13 mm, 5 N.m, Install new nut
 Courtesy of TESLA, INC. Courtesy of TESLA, INC.
|
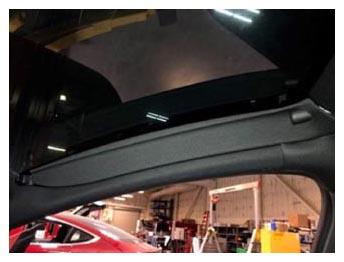
- Install RH sunvisor bezel
NOTE:
6x clips, 1x tab, Insert tab and slide bezel towards rear of vehicle, then secure clips
 Courtesy of TESLA, INC. Courtesy of TESLA, INC.
|
- Move RH front seat to original position
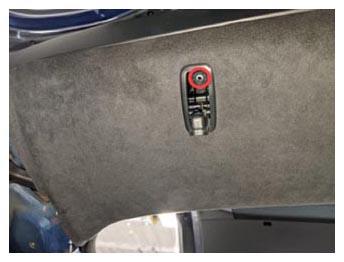
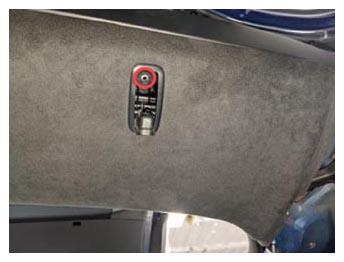
- Install screws securing LH and RH rear coat hooks to body
NOTE:
2x screws, T20, 2.5 N.m
 Courtesy of TESLA, INC. Courtesy of TESLA, INC.
|
 Courtesy of TESLA, INC. Courtesy of TESLA, INC.
|
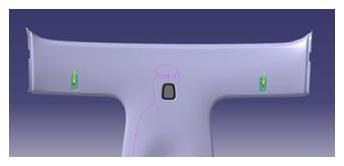 Courtesy of TESLA, INC. Courtesy of TESLA, INC.
|
- Close LH and RH rear coat hooks
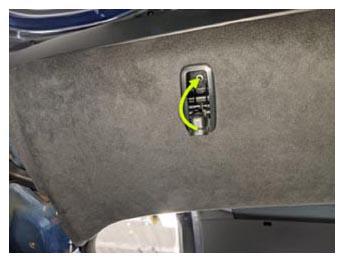 Courtesy of TESLA, INC. Courtesy of TESLA, INC.
|
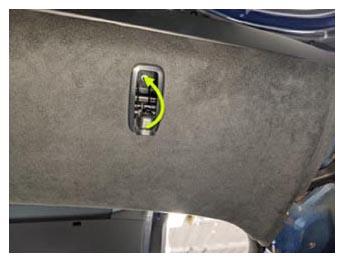 Courtesy of TESLA, INC. Courtesy of TESLA, INC.
|
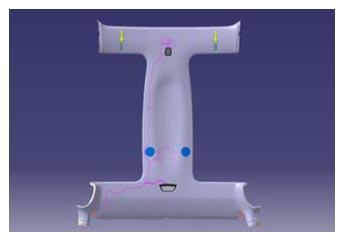 Courtesy of TESLA, INC. Courtesy of TESLA, INC.
|
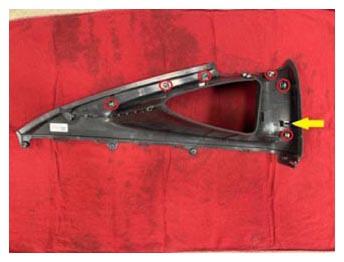
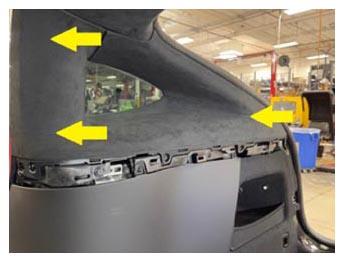
- Install RH upper C-pillar trim
NOTE:
6x clips, 1x datum
 Courtesy of TESLA, INC. Courtesy of TESLA, INC.
|
 Courtesy of TESLA, INC. Courtesy of TESLA, INC.
|
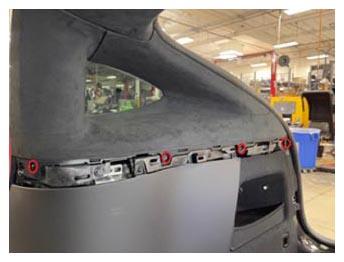
- Install fasteners securing RH upper C-pillar trim to bracket
NOTE:
3x screws, T20, 2 N.m, 1x patch bolt, T25, 3 N.m, Install new patch bolt
 Courtesy of TESLA, INC. Courtesy of TESLA, INC.
|
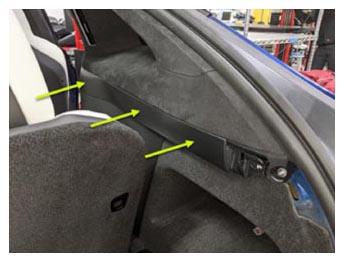
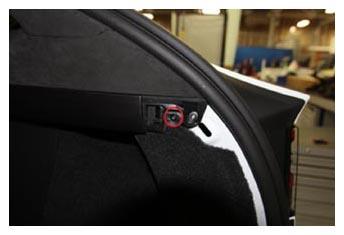
- Install RH mid C-Pillar trim
NOTE:
1x screw, T20, 2 N.m, 9x clips
 Courtesy of TESLA, INC. Courtesy of TESLA, INC.
|
 Courtesy of TESLA, INC. Courtesy of TESLA, INC.
|
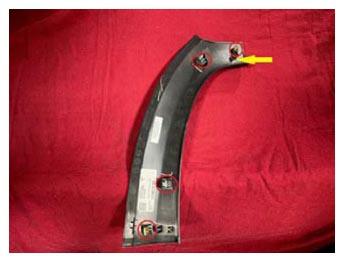
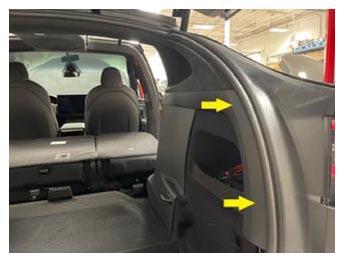
- Install RH trunk sill side trim
NOTE:
4x clips, 1x datum
 Courtesy of TESLA, INC. Courtesy of TESLA, INC.
|
 Courtesy of TESLA, INC. Courtesy of TESLA, INC.
|
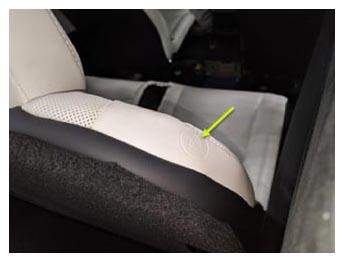
- Raise RH 3rd row seat back into the upright position
 Courtesy of TESLA, INC. Courtesy of TESLA, INC.
|
- Install LH upper C-pillar trim
NOTE:
6x clips, 1x datum
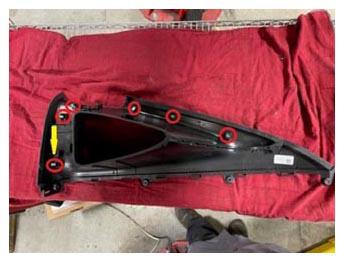 Courtesy of TESLA, INC. Courtesy of TESLA, INC.
|
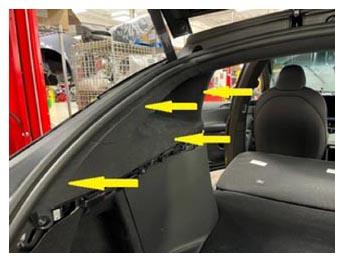 Courtesy of TESLA, INC. Courtesy of TESLA, INC.
|
- Install fasteners securing LH upper C-pillar trim to bracket
NOTE:
3x screws, T20, 2 N.m, 1x patch bolt, T25, 2 N.m, Install new patch bolt
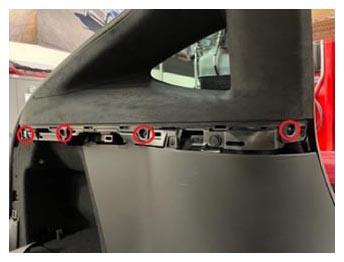 Courtesy of TESLA, INC. Courtesy of TESLA, INC.
|
- Install LH mid C-pillar trim
NOTE:
9x clips, 5x tabs, 1x screw, T20, 2 N.m
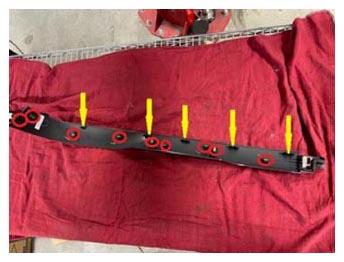 Courtesy of TESLA, INC. Courtesy of TESLA, INC.
|
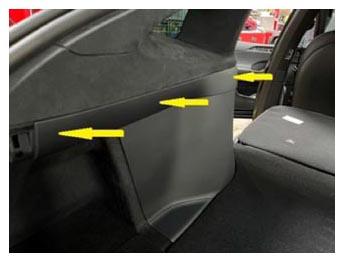 Courtesy of TESLA, INC. Courtesy of TESLA, INC.
|
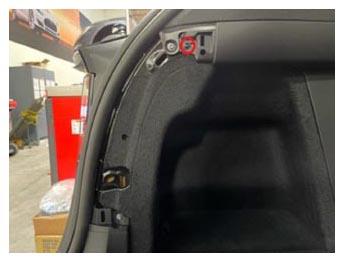 Courtesy of TESLA, INC. Courtesy of TESLA, INC.
|
- Install LH trunk sill side trim
NOTE:
4x clips, 1x datum
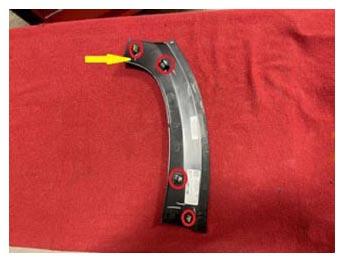 Courtesy of TESLA, INC. Courtesy of TESLA, INC.
|
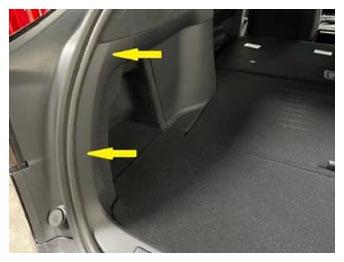 Courtesy of TESLA, INC. Courtesy of TESLA, INC.
|
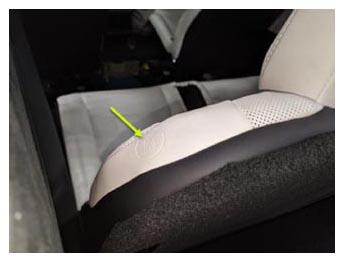
- Raise LH 3rd row seat back into the upright position
 Courtesy of TESLA, INC. Courtesy of TESLA, INC.
|
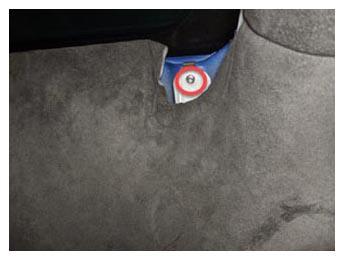
- Close liftgate
- Install screw securing LH front end of headliner to body
NOTE:
1x screw, T20, 2 N.m
 Courtesy of TESLA, INC. Courtesy of TESLA, INC.
|
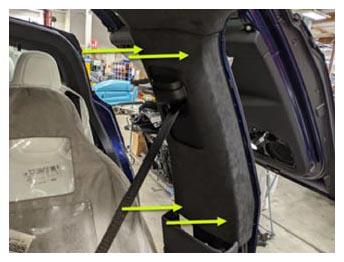
- Install LH upper B-pillar to body
NOTE:
4x clips, 1 magnet, 1x connector, Replace clips if damaged
 Courtesy of TESLA, INC. Courtesy of TESLA, INC.
|
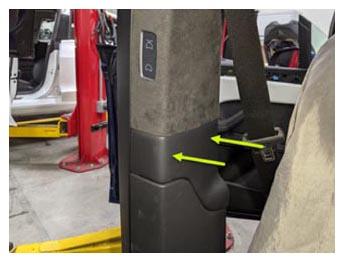
- Secure upper portion of LH lower B-pillar to LH upper B-pillar
NOTE:
5x clips, Replace clips if damaged
 Courtesy of TESLA, INC. Courtesy of TESLA, INC.
|
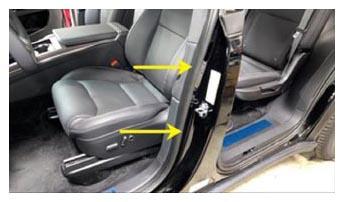
- Fully seat LH front door seal along LH B-pillar trims
 Courtesy of TESLA, INC. Courtesy of TESLA, INC.
|
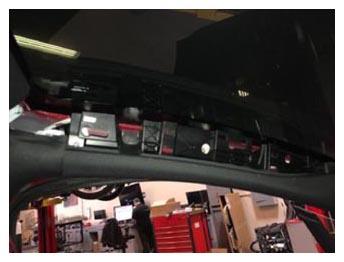
- Move LH front seat backward
- Position LH upper A-pillar for installation
 Courtesy of TESLA, INC. Courtesy of TESLA, INC.
|
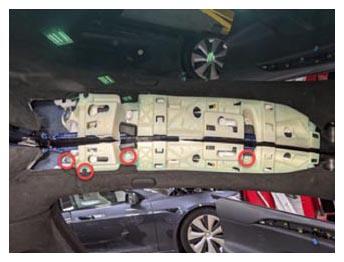
- Install bolts securing LH upper A-pillar to body
NOTE:
2x bolts, 10 mm, 5 N.m, 1x screw, T20, 2.5 N.m, 1x nyloc nut, 13 mm, 5 N.m, Install new nut
 Courtesy of TESLA, INC. Courtesy of TESLA, INC.
|
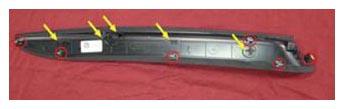
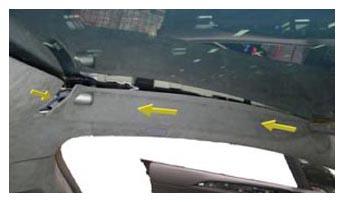
- Install LH sunvisor bezel
NOTE:
6x clips, 5x tabs, Insert tabs and slide bezel towards rear of vehicle, then secure clips
 Courtesy of TESLA, INC. Courtesy of TESLA, INC.
|
 Courtesy of TESLA, INC. Courtesy of TESLA, INC.
|
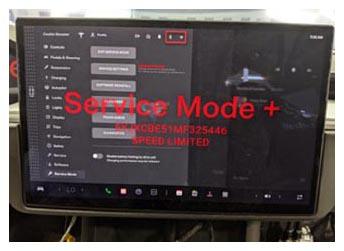
- Verify BT, Wi-Fi, and LTE are functioning properly
 Courtesy of TESLA, INC. Courtesy of TESLA, INC.
|
- Move LH front seat to original position
- Raise LH and RH front windows
- Close all four doors