- Open all four doors and trunk
NOTE:
Via center display > Controls > Trunk > Open Passenger > Open Driver > Open LH FWD > Open RH FWD
- Lower LH and RH front windows
- Move LH front seat forward
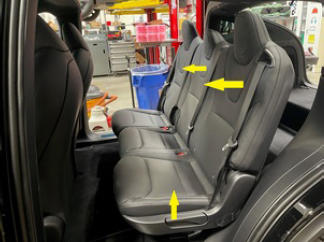
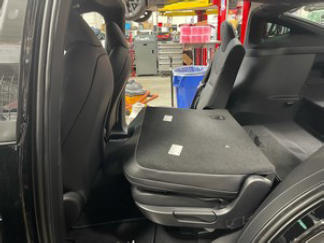
- Fold 2nd row 60 seat into down position
 Courtesy of TESLA, INC. Courtesy of TESLA, INC.
|
 Courtesy of TESLA, INC. Courtesy of TESLA, INC.
|
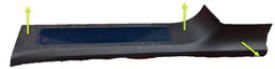
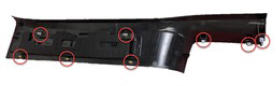
- Remove LH rear sill assembly
NOTE:
8x clips, 1x datum
 Courtesy of TESLA, INC. Courtesy of TESLA, INC.
|
 Courtesy of TESLA, INC. Courtesy of TESLA, INC.
|
- Apply tape to LH racetrack to avoid damage
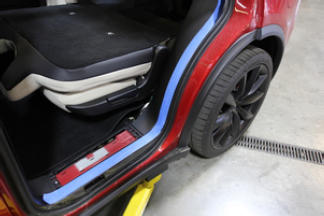 Courtesy of TESLA, INC. Courtesy of TESLA, INC.
|
- Move RH front seat forward
- Fold 2nd row 40 seat into down position
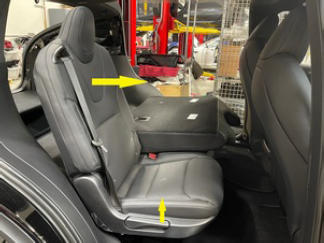 Courtesy of TESLA, INC. Courtesy of TESLA, INC.
|
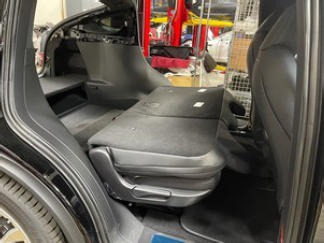 Courtesy of TESLA, INC. Courtesy of TESLA, INC.
|
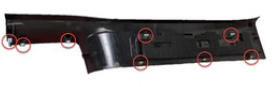
- Remove RH rear sill assembly
NOTE:
8x clips, 1x datum
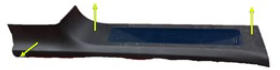 Courtesy of TESLA, INC. Courtesy of TESLA, INC.
|
 Courtesy of TESLA, INC. Courtesy of TESLA, INC.
|
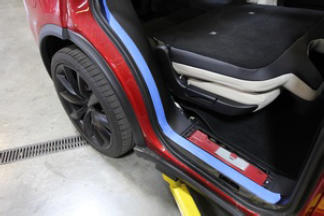
- Apply tape to RH racetrack to avoid damage
 Courtesy of TESLA, INC. Courtesy of TESLA, INC.
|
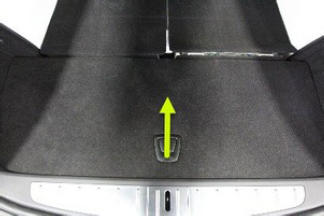
- Remove trunk rear load floor
 Courtesy of TESLA, INC. Courtesy of TESLA, INC.
|
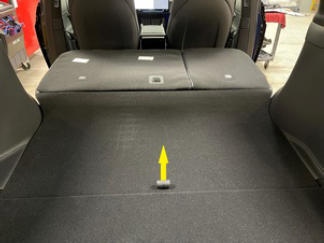
- Remove flat trunk load floor
 Courtesy of TESLA, INC. Courtesy of TESLA, INC.
|
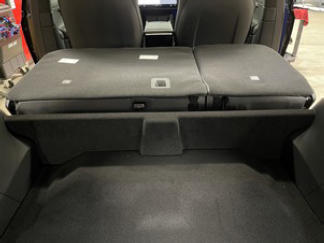 Courtesy of TESLA, INC. Courtesy of TESLA, INC.
|
- Remove trunk gap hider
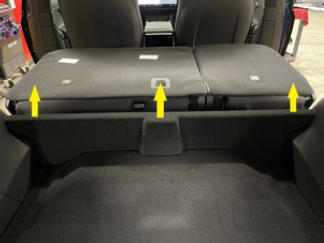 Courtesy of TESLA, INC. Courtesy of TESLA, INC.
|
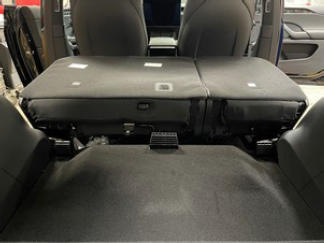 Courtesy of TESLA, INC. Courtesy of TESLA, INC.
|
- Remove RH trunk sill side trim
NOTE:
4x clips, 1x datum
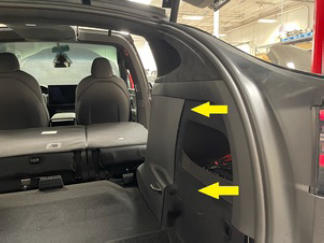 Courtesy of TESLA, INC. Courtesy of TESLA, INC.
|
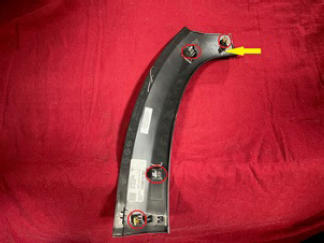 Courtesy of TESLA, INC. Courtesy of TESLA, INC.
|
- Remove RH mid C-pillar trim
NOTE:
1x screw, T20, 2 N.m, 9x clips
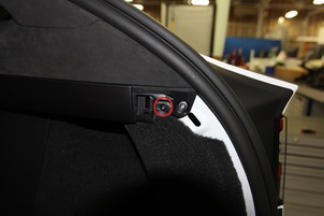 Courtesy of TESLA, INC. Courtesy of TESLA, INC.
|
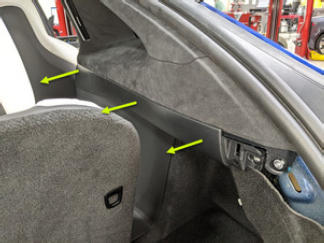 Courtesy of TESLA, INC. Courtesy of TESLA, INC.
|
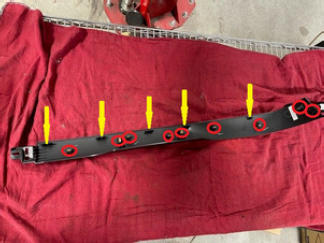 Courtesy of TESLA, INC. Courtesy of TESLA, INC.
|
- Remove RH trunk side mini nub
NOTE:
1x clip, 3x tabs
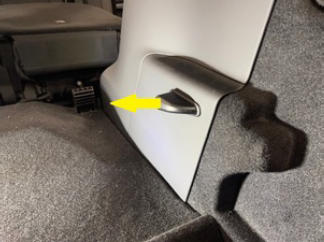 Courtesy of TESLA, INC. Courtesy of TESLA, INC.
|
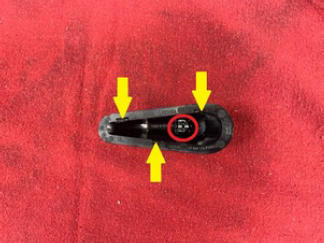 Courtesy of TESLA, INC. Courtesy of TESLA, INC.
|
- Remove RH lower C-pillar
NOTE:
1x patch bolt, T25, 2.5 N.m, 2x screws, T20, 2 N.m, 12x clips, Discard patch bolt after removal
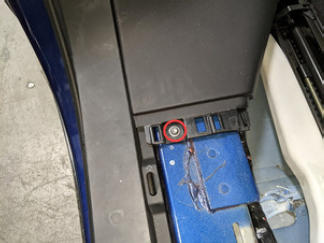 Courtesy of TESLA, INC. Courtesy of TESLA, INC.
|
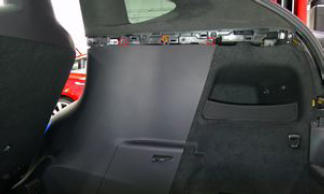 Courtesy of TESLA, INC. Courtesy of TESLA, INC.
|
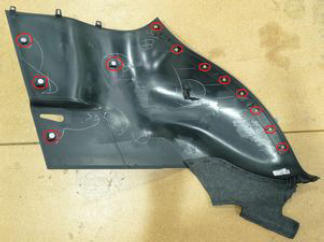 Courtesy of TESLA, INC. Courtesy of TESLA, INC.
|
- Remove LH trunk sill side trim
NOTE:
4x clips, 1x datum
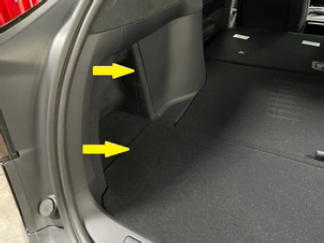 Courtesy of TESLA, INC. Courtesy of TESLA, INC.
|
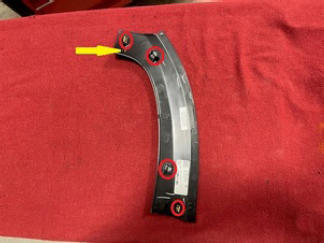 Courtesy of TESLA, INC. Courtesy of TESLA, INC.
|
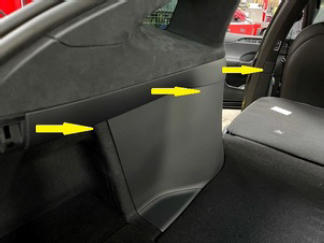
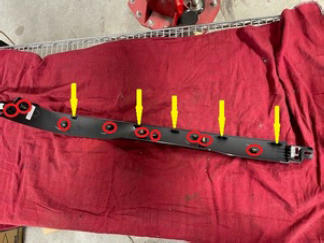
- Remove LH mid C-pillar trim
NOTE:
1x screw, T20, 2 N.m, 9x clips, 5x tabs
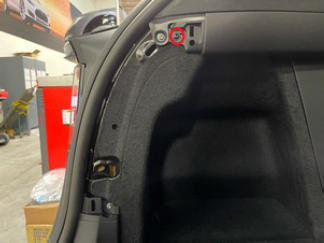 Courtesy of TESLA, INC. Courtesy of TESLA, INC.
|
 Courtesy of TESLA, INC. Courtesy of TESLA, INC.
|
 Courtesy of TESLA, INC. Courtesy of TESLA, INC.
|
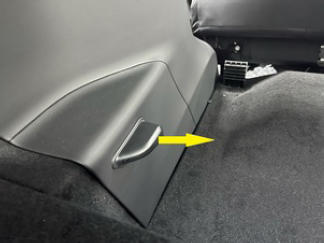
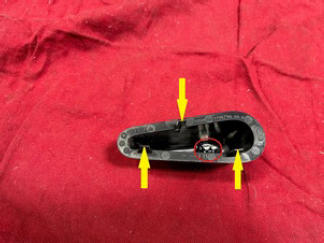
- Remove LH trunk side mini nub
NOTE:
1x clip, 3x tabs
 Courtesy of TESLA, INC. Courtesy of TESLA, INC.
|
 Courtesy of TESLA, INC. Courtesy of TESLA, INC.
|
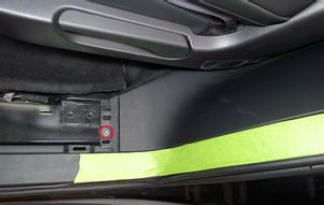
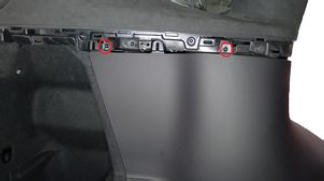
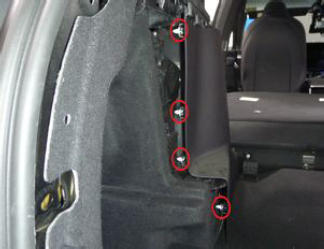
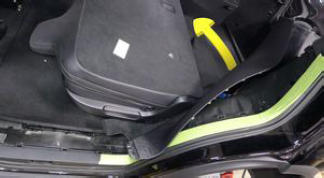
- Remove LH lower C-pillar
NOTE:
1x patch bolt, T25, 2.5 N.m, 2x screws, T20, 2 N.m, 13x clips, Discard patch bolt after removal
 Courtesy of TESLA, INC. Courtesy of TESLA, INC.
|
 Courtesy of TESLA, INC. Courtesy of TESLA, INC.
|
 Courtesy of TESLA, INC. Courtesy of TESLA, INC.
|
 Courtesy of TESLA, INC. Courtesy of TESLA, INC.
|
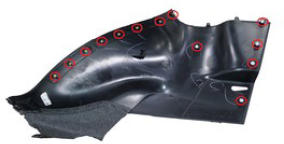 Courtesy of TESLA, INC. Courtesy of TESLA, INC.
|
- Remove 2nd row mid floor board
NOTE:
5x clips, Tilt front edge upwards and remove in vertical position
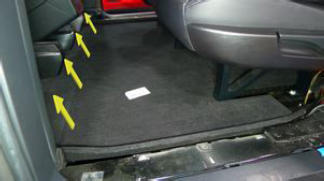 Courtesy of TESLA, INC. Courtesy of TESLA, INC.
|
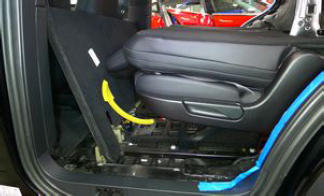 Courtesy of TESLA, INC. Courtesy of TESLA, INC.
|
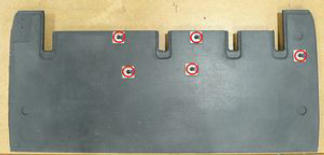 Courtesy of TESLA, INC. Courtesy of TESLA, INC.
|
- Remove RH bench seat floor support
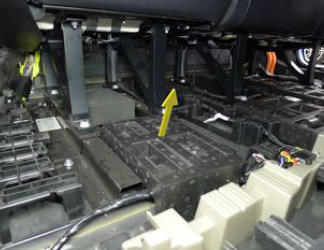 Courtesy of TESLA, INC. Courtesy of TESLA, INC.
|
- Fold trunk carpet rearward
NOTE:
Starting from the front, lift carpet over harpoon brackets, Fold back enough to access rear seat components
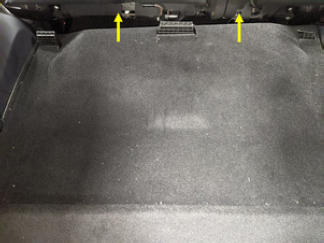 Courtesy of TESLA, INC. Courtesy of TESLA, INC.
|
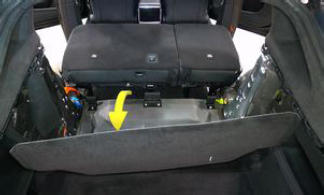 Courtesy of TESLA, INC. Courtesy of TESLA, INC.
|
- Remove 2nd row rear floor board
NOTE:
2x clips, Lift front of panel up to release clips, Lift rear of panel and slide out from behind seats
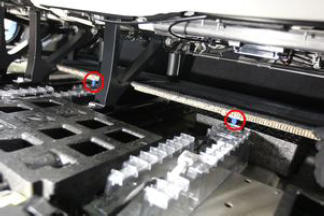 Courtesy of TESLA, INC. Courtesy of TESLA, INC.
|
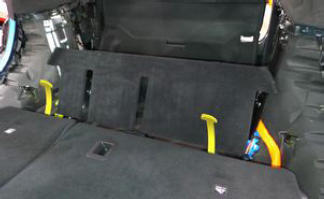 Courtesy of TESLA, INC. Courtesy of TESLA, INC.
|
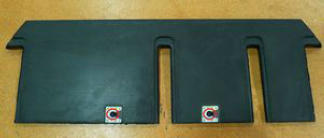 Courtesy of TESLA, INC. Courtesy of TESLA, INC.
|
- Remove bolts securing 40 rear seat track to body
NOTE:
4x patch bolts, 11 mm, 45 N.m, Discard patch bolts after removal
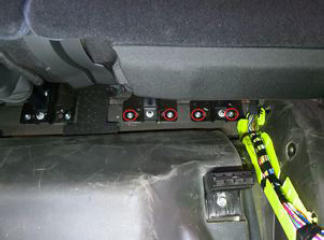 Courtesy of TESLA, INC. Courtesy of TESLA, INC.
|
- Remove bolts securing 40 front seat track to body
NOTE:
6x patch bolts, 11 mm, 45 N.m, Discard patch bolts after removal
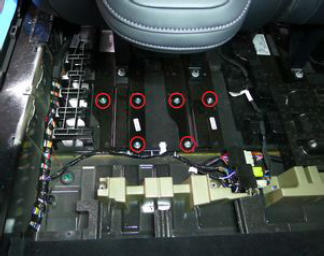 Courtesy of TESLA, INC. Courtesy of TESLA, INC.
|
- Remove RH 2nd row seat carpet support bracket
NOTE:
2x bolts, 10 mm, 5 N.m
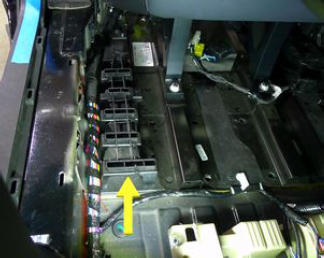 Courtesy of TESLA, INC. Courtesy of TESLA, INC.
|
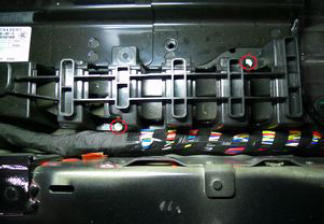 Courtesy of TESLA, INC. Courtesy of TESLA, INC.
|
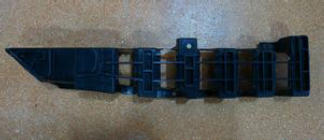 Courtesy of TESLA, INC. Courtesy of TESLA, INC.
|
- Power off vehicle via center display
NOTE:
Controls > Safety & Security > Power Off
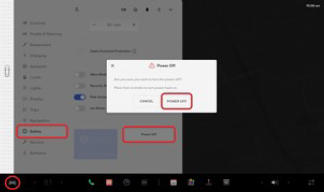 Courtesy of TESLA, INC. Courtesy of TESLA, INC.
|
- Remove rear underhood apron
NOTE:
11x clips, 2x datums
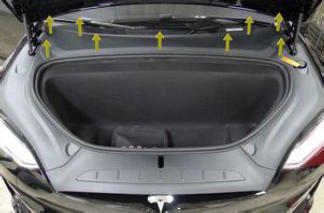 Courtesy of TESLA, INC. Courtesy of TESLA, INC.
|
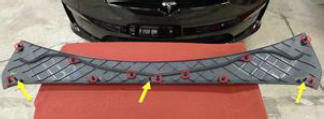 Courtesy of TESLA, INC. Courtesy of TESLA, INC.
|
- Disconnect LV battery connector and First Responder Loop
NOTE:
2x connectors, Lift up and release green locking tab, Pull black connector lock outwards to release connection, Release red lock tab on FRL
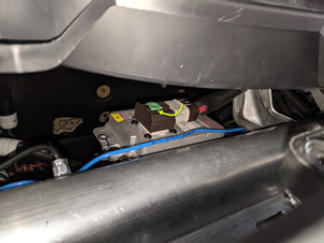 Courtesy of TESLA, INC. Courtesy of TESLA, INC.
|
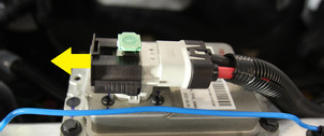 Courtesy of TESLA, INC. Courtesy of TESLA, INC.
|
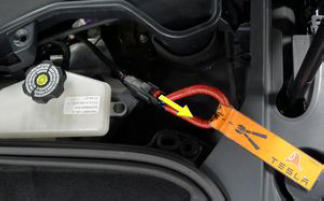 Courtesy of TESLA, INC. Courtesy of TESLA, INC.
|
- Release harness from RH floor support bracket
NOTE:
2x clips, 1 datum
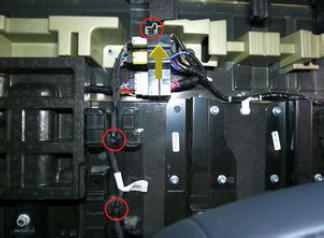 Courtesy of TESLA, INC. Courtesy of TESLA, INC.
|
- Disconnect 40 seat harness
NOTE:
4x connectors, Release connectors from bracket for better access by depressing bracket locks, Release locking tabs before disconnecting
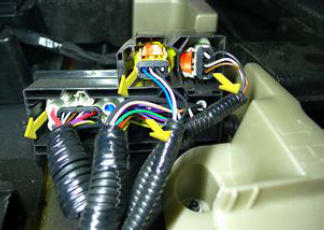 Courtesy of TESLA, INC. Courtesy of TESLA, INC.
|
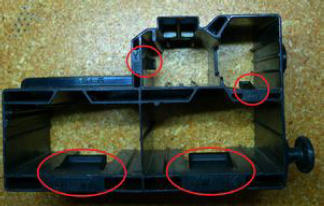 Courtesy of TESLA, INC. Courtesy of TESLA, INC.
|
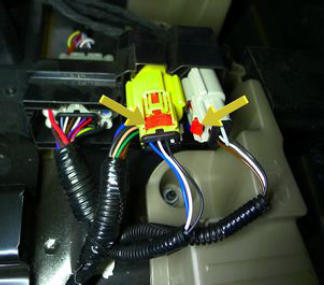 Courtesy of TESLA, INC. Courtesy of TESLA, INC.
|
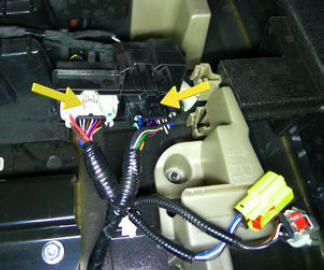 Courtesy of TESLA, INC. Courtesy of TESLA, INC.
|
- Remove 40 seat assembly from vehicle
NOTE:
Recommend assistance
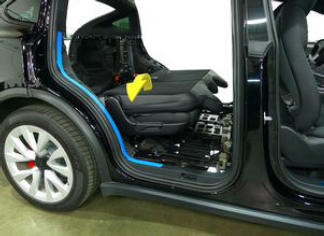 Courtesy of TESLA, INC. Courtesy of TESLA, INC.
|
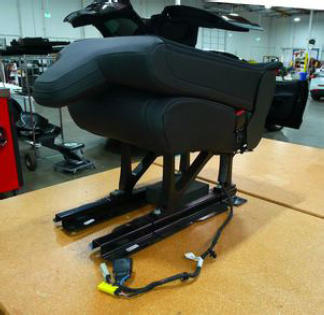 Courtesy of TESLA, INC. Courtesy of TESLA, INC.
|
- Unfold 40 seat assembly
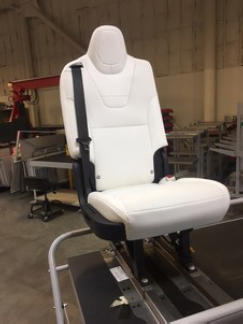 Courtesy of TESLA, INC. Courtesy of TESLA, INC.
|
- Insert wedge to RH seat to gain access
NOTE:
Carefully insert wedge between RH 2nd row seat and 2nd row outer recliner cover to gain access
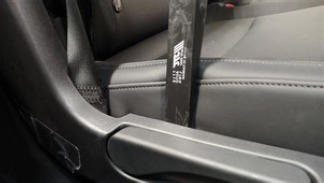 Courtesy of TESLA, INC. Courtesy of TESLA, INC.
|
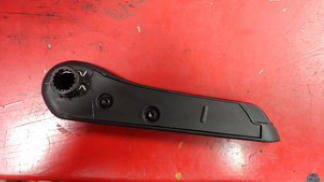
- Release clip and remove RH recliner lever
NOTE:
1x clip, carefully release clip from insert and remove RH recliner lever by pulling outward
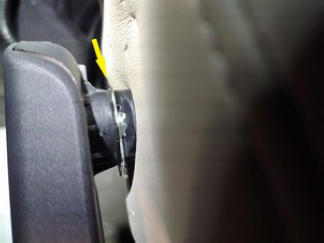 Courtesy of TESLA, INC. Courtesy of TESLA, INC.
|
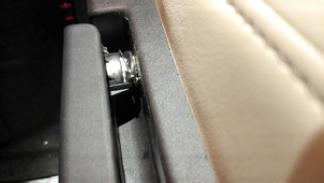 Courtesy of TESLA, INC. Courtesy of TESLA, INC.
|
 Courtesy of TESLA, INC. Courtesy of TESLA, INC.
|
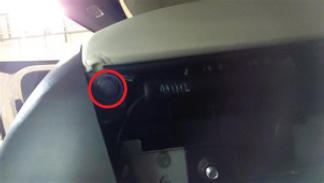
- Remove clip holding RH seat outer recliner cover
NOTE:
1x clip
 Courtesy of TESLA, INC. Courtesy of TESLA, INC.
|
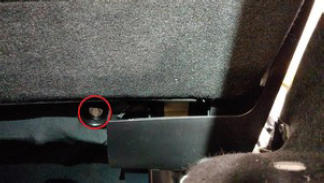
- Remove bolt holding RH seat outer recliner cover
NOTE:
1x bolt, 10 mm, 4 N.m
 Courtesy of TESLA, INC. Courtesy of TESLA, INC.
|
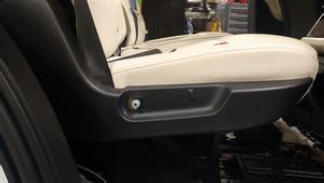
- Release clips and remove RH seat outer recliner cover from seat
NOTE:
4x clips, release clips and lift upward to remove from vehicle
 Courtesy of TESLA, INC. Courtesy of TESLA, INC.
|
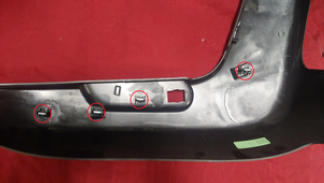 Courtesy of TESLA, INC. Courtesy of TESLA, INC.
|
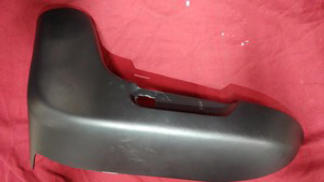 Courtesy of TESLA, INC. Courtesy of TESLA, INC.
|
- Remove the seat belt from the RH 40 seat
NOTE:
1x bolt, T50, 45 N.m, Discard patch bolt
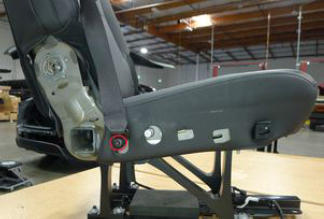 Courtesy of TESLA, INC. Courtesy of TESLA, INC.
|
- Release 2nd row RH seat belt buckle harness
NOTE:
1x connector, 1x edge clip, 1x clip, Release clips after disconnecting harness
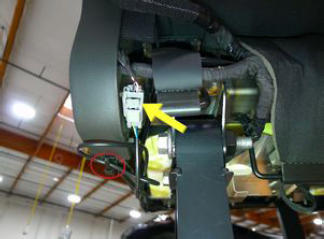 Courtesy of TESLA, INC. Courtesy of TESLA, INC.
|
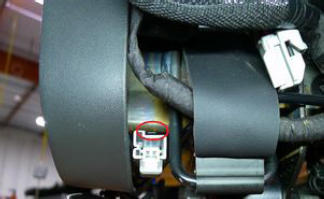 Courtesy of TESLA, INC. Courtesy of TESLA, INC.
|
- Remove 2nd row RH seat belt buckle
NOTE:
1x bolt, T50, 45 N.m
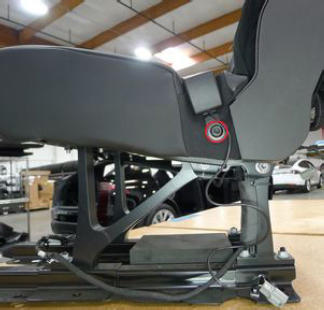 Courtesy of TESLA, INC. Courtesy of TESLA, INC.
|
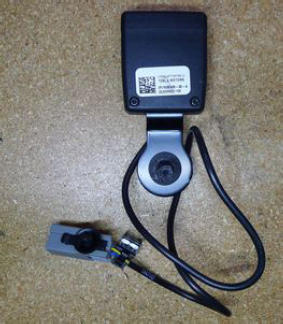 Courtesy of TESLA, INC. Courtesy of TESLA, INC.
|
- Remove 2nd row 40 seat inner hinge cover
NOTE:
1x clip, 4x tabs, Pull away from seat to release clips, then release tabs from bottom up, Lift to release top edge from seat frame
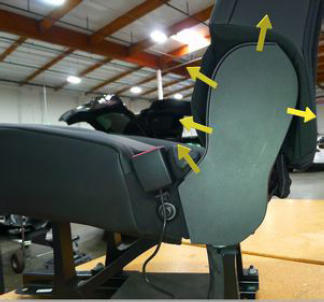 Courtesy of TESLA, INC. Courtesy of TESLA, INC.
|
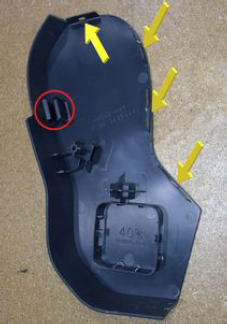 Courtesy of TESLA, INC. Courtesy of TESLA, INC.
|
- Release seat cushion trim from 40 seat bracket assembly
NOTE:
6x J-clips
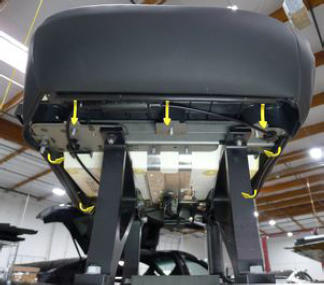 Courtesy of TESLA, INC. Courtesy of TESLA, INC.
|
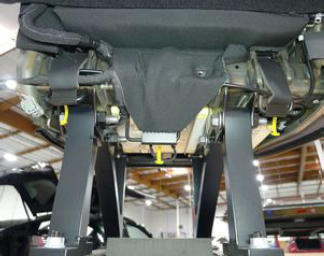 Courtesy of TESLA, INC. Courtesy of TESLA, INC.
|
- Release 40 seat assembly heater and seat belt reminder connections
NOTE:
2x connectors, 1x clip, Release clip at seat belt reminder harness
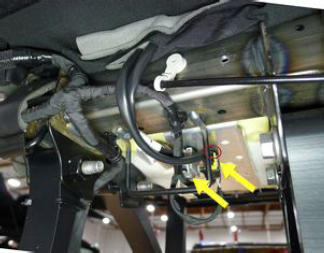 Courtesy of TESLA, INC. Courtesy of TESLA, INC.
|
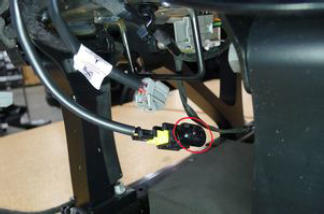 Courtesy of TESLA, INC. Courtesy of TESLA, INC.
|
- Remove 40 seat cushion
NOTE:
Guide harness and tension flaps underneath backrest
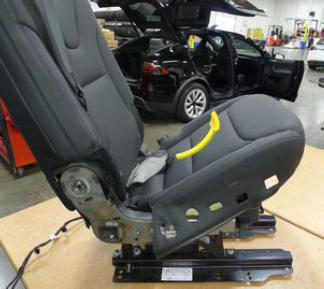 Courtesy of TESLA, INC. Courtesy of TESLA, INC.
|
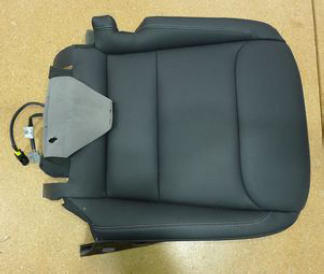 Courtesy of TESLA, INC. Courtesy of TESLA, INC.
|
- Release 40 seat back upholstery
NOTE:
1x J-hook
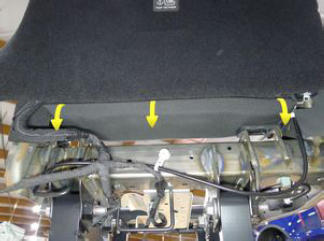 Courtesy of TESLA, INC. Courtesy of TESLA, INC.
|
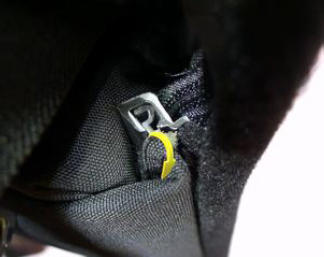 Courtesy of TESLA, INC. Courtesy of TESLA, INC.
|
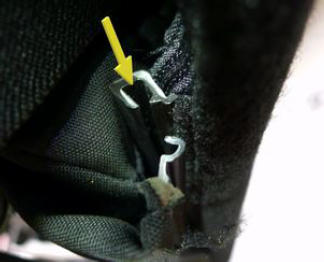 Courtesy of TESLA, INC. Courtesy of TESLA, INC.
|
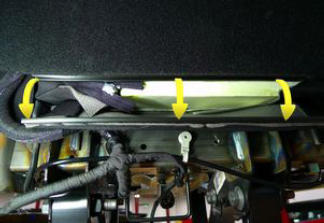 Courtesy of TESLA, INC. Courtesy of TESLA, INC.
|
- Unzip 40 seat back upholstery on LH and RH sides of backrest cover
NOTE:
Ends of zippers are tucked underneath upholstery, Using a pick will aid in moving the zipper
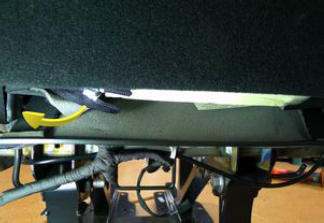 Courtesy of TESLA, INC. Courtesy of TESLA, INC.
|
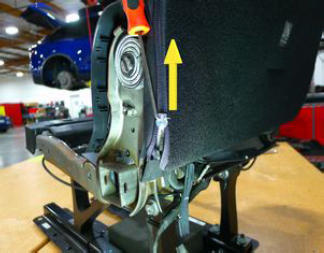 Courtesy of TESLA, INC. Courtesy of TESLA, INC.
|
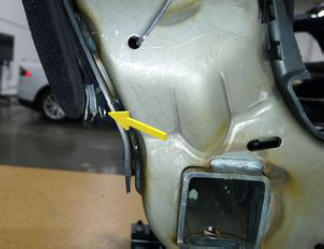 Courtesy of TESLA, INC. Courtesy of TESLA, INC.
|
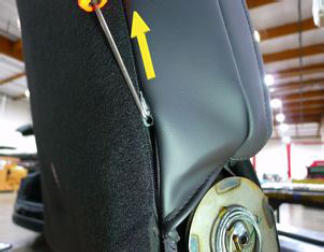 Courtesy of TESLA, INC. Courtesy of TESLA, INC.
|
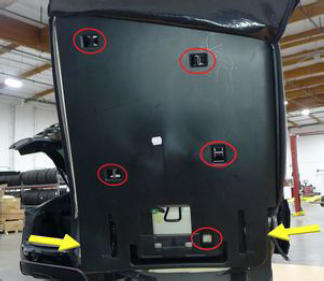
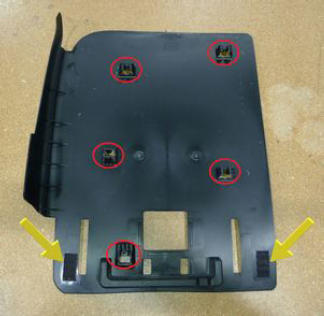
- Remove plastic seat back from 40 seat assembly
NOTE:
5x clips, 2x Velcro strips, Fold backrest cover over the headrest for access
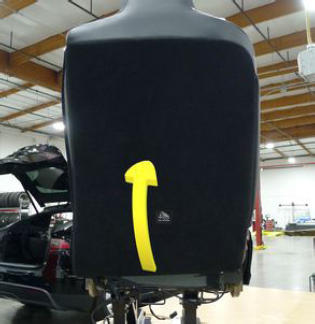 Courtesy of TESLA, INC. Courtesy of TESLA, INC.
|
 Courtesy of TESLA, INC. Courtesy of TESLA, INC.
|
 Courtesy of TESLA, INC. Courtesy of TESLA, INC.
|
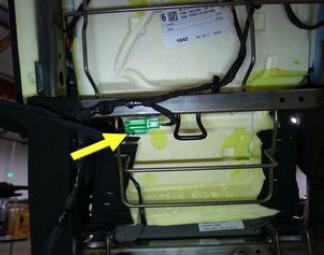
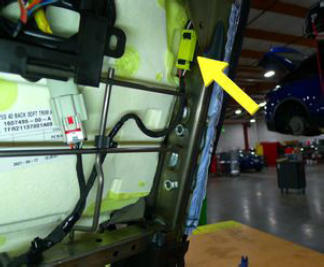
- Disconnect 40 seat heater and side airbag connectors
NOTE:
2x connectors, 1x clip, Side airbag clipped to backrest frame
 Courtesy of TESLA, INC. Courtesy of TESLA, INC.
|
 Courtesy of TESLA, INC. Courtesy of TESLA, INC.
|
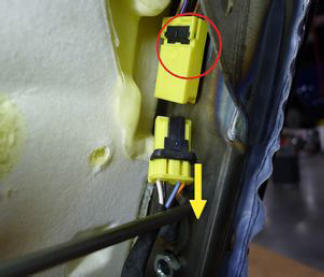 Courtesy of TESLA, INC. Courtesy of TESLA, INC.
|
- Release 40 seat side airbag
NOTE:
2x nuts, 13 mm, 20 N.m, Discard nuts after removal, Pull side airbag away from backrest frame and clear of mounting studs
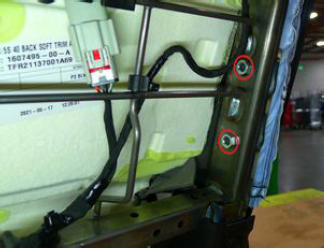 Courtesy of TESLA, INC. Courtesy of TESLA, INC.
|
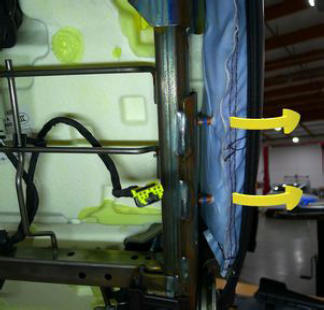 Courtesy of TESLA, INC. Courtesy of TESLA, INC.
|
- Release the lower part of the 40 seat back cushion from seat frame
NOTE:
Guide harness and tension flaps through seat back frame
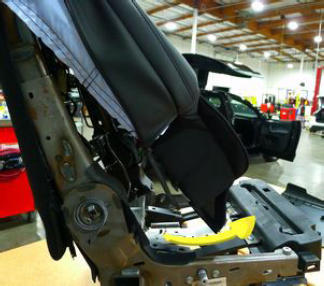 Courtesy of TESLA, INC. Courtesy of TESLA, INC.
|
- Remove 40 seat back trim subassembly from the backrest frame
NOTE:
Lift trim subassembly to release from the frame
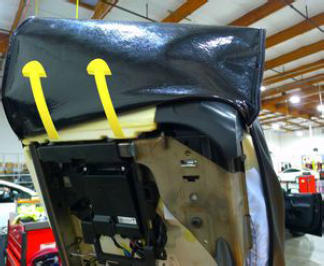 Courtesy of TESLA, INC. Courtesy of TESLA, INC.
|
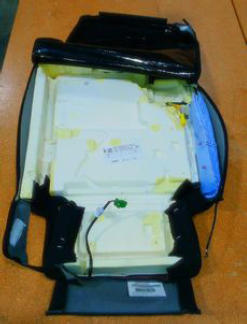 Courtesy of TESLA, INC. Courtesy of TESLA, INC.
|
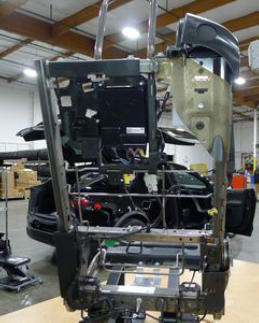 Courtesy of TESLA, INC. Courtesy of TESLA, INC.
|
- Install 40 seat back trim subassembly to the backrest frame
NOTE:
Slide trim subassembly over headrest bracket down to seat controller bracket
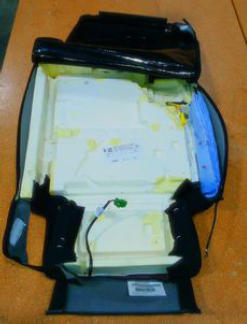 Courtesy of TESLA, INC. Courtesy of TESLA, INC.
|
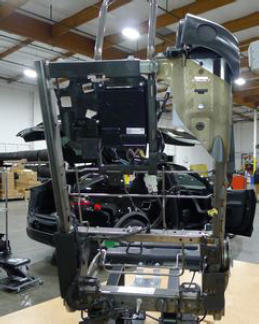 Courtesy of TESLA, INC. Courtesy of TESLA, INC.
|
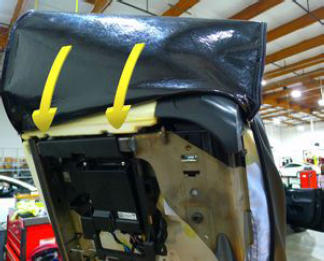 Courtesy of TESLA, INC. Courtesy of TESLA, INC.
|
- Secure the lower part of the 40 seat back cushion to seat frame
NOTE:
Guide harness and tension flaps through seat back frame
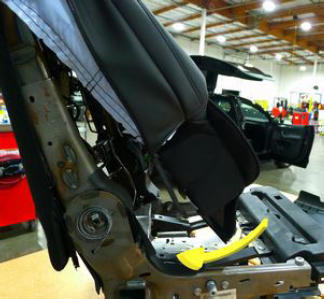 Courtesy of TESLA, INC. Courtesy of TESLA, INC.
|
- Secure 40 seat side airbag
NOTE:
2x nuts, 13 mm, 20 N.m, Position side airbag mounting studs through backrest frame, Install new bolts
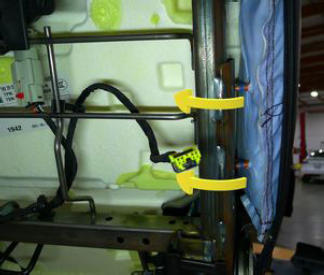 Courtesy of TESLA, INC. Courtesy of TESLA, INC.
|
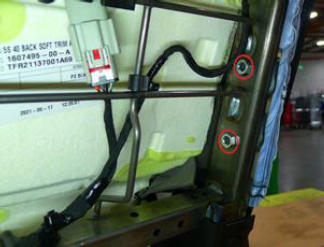 Courtesy of TESLA, INC. Courtesy of TESLA, INC.
|
- Connect 40 seat heater and side airbag connectors
NOTE:
2x connectors, 1x clip, Side airbag clipped to backrest frame
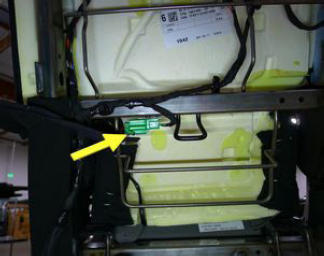 Courtesy of TESLA, INC. Courtesy of TESLA, INC.
|
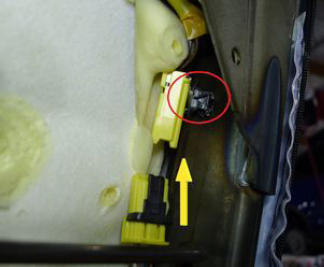 Courtesy of TESLA, INC. Courtesy of TESLA, INC.
|
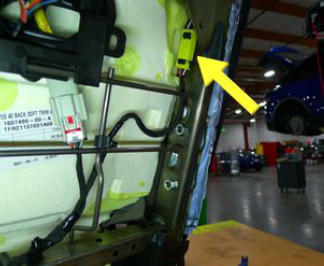 Courtesy of TESLA, INC. Courtesy of TESLA, INC.
|
- Secure plastic seat back to 40 seat frame
NOTE:
5x clips, 2x Velcro strips, Fold backrest cover over the headrest for access
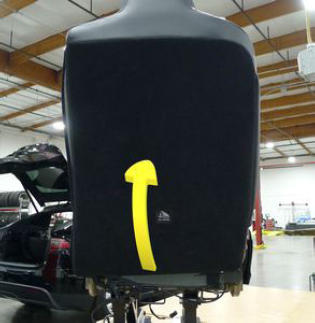 Courtesy of TESLA, INC. Courtesy of TESLA, INC.
|
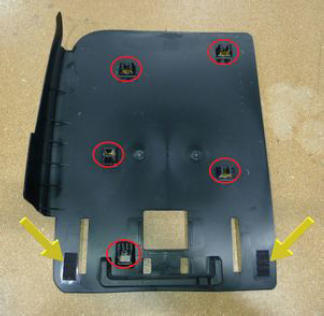 Courtesy of TESLA, INC. Courtesy of TESLA, INC.
|
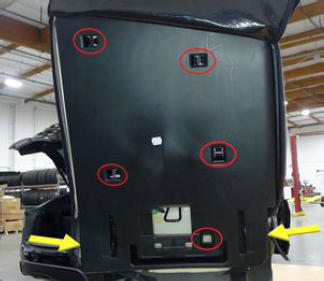 Courtesy of TESLA, INC. Courtesy of TESLA, INC.
|
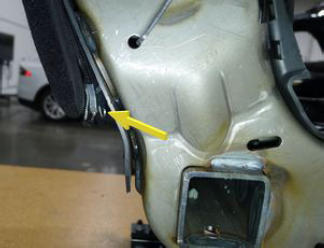
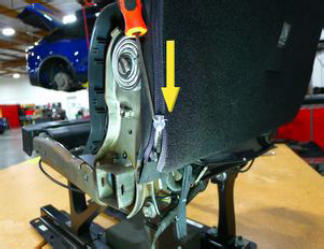
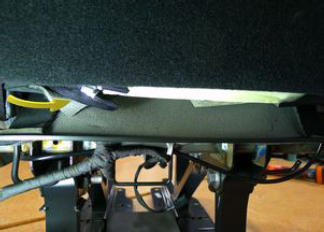
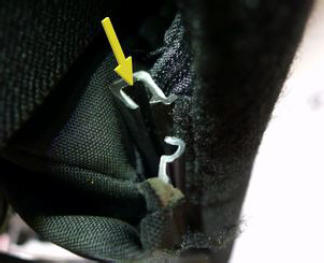
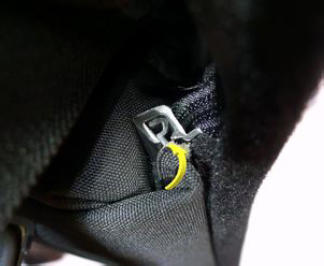
- Zip 40 seat back upholstery on LH and RH sides of backrest cover
NOTE:
Ensure ends of zippers are tucked underneath upholstery, Using a pick will aid in moving the zipper
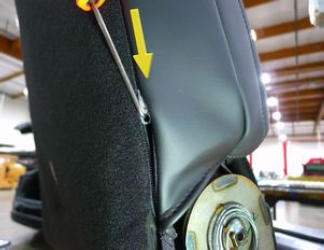 Courtesy of TESLA, INC. Courtesy of TESLA, INC.
|
 Courtesy of TESLA, INC. Courtesy of TESLA, INC.
|
 Courtesy of TESLA, INC. Courtesy of TESLA, INC.
|
 Courtesy of TESLA, INC. Courtesy of TESLA, INC.
|
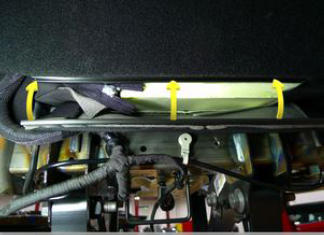
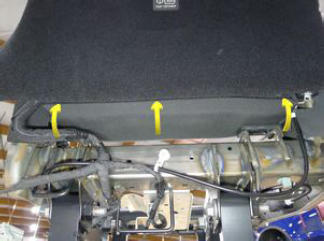
- Secure 40 seat back upholstery to backrest cover
NOTE:
1x J-hook
 Courtesy of TESLA, INC. Courtesy of TESLA, INC.
|
 Courtesy of TESLA, INC. Courtesy of TESLA, INC.
|
 Courtesy of TESLA, INC. Courtesy of TESLA, INC.
|
 Courtesy of TESLA, INC. Courtesy of TESLA, INC.
|
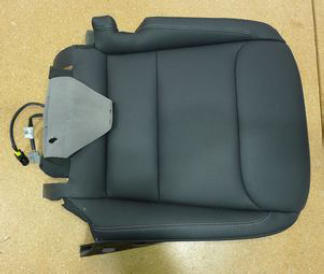
- Install 40 seat cushion
NOTE:
Guide harness and tension flaps underneath backrest
 Courtesy of TESLA, INC. Courtesy of TESLA, INC.
|
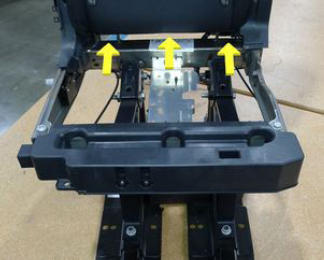 Courtesy of TESLA, INC. Courtesy of TESLA, INC.
|
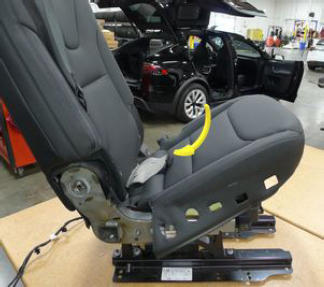 Courtesy of TESLA, INC. Courtesy of TESLA, INC.
|
- Secure 40 seat assembly heater and seat belt reminder connections
NOTE:
2x connectors, 1x clip, Secure clip at seat belt reminder harness
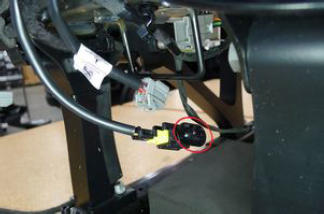 Courtesy of TESLA, INC. Courtesy of TESLA, INC.
|
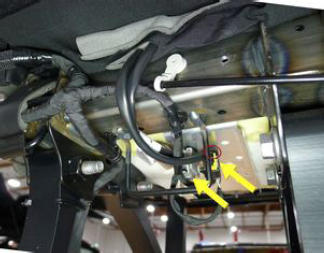 Courtesy of TESLA, INC. Courtesy of TESLA, INC.
|
- Secure seat cushion trim to 40 seat bracket assembly
NOTE:
6x J-clips
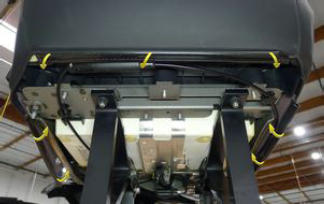 Courtesy of TESLA, INC. Courtesy of TESLA, INC.
|
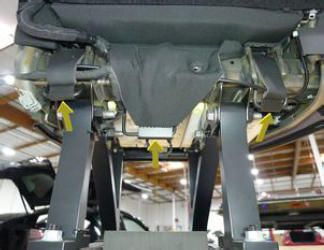 Courtesy of TESLA, INC. Courtesy of TESLA, INC.
|
- Install 2nd row 40 seat inner hinge cover
NOTE:
1x clip, 4x tabs, Slide upper tabs down onto seat frame, then secure clips and tabs
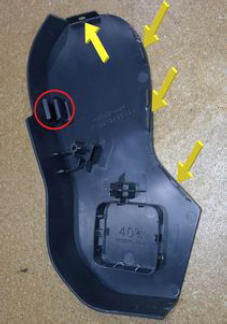 Courtesy of TESLA, INC. Courtesy of TESLA, INC.
|
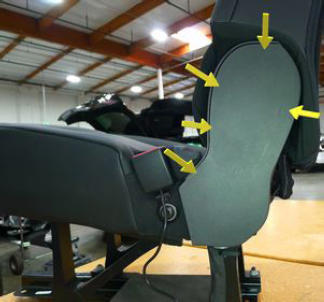 Courtesy of TESLA, INC. Courtesy of TESLA, INC.
|
- Install 2nd row RH seat belt buckle
NOTE:
1x bolt, T50, 45 N.m
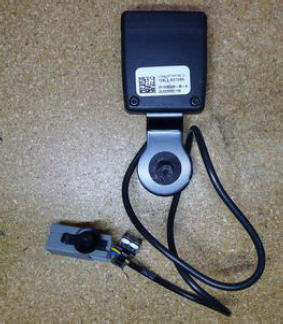 Courtesy of TESLA, INC. Courtesy of TESLA, INC.
|
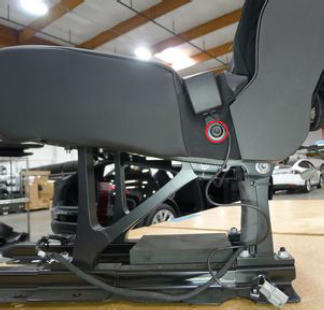 Courtesy of TESLA, INC. Courtesy of TESLA, INC.
|
- Secure 2nd row RH seat belt buckle harness
NOTE:
1x connector, 1x edge clip, 1x clip
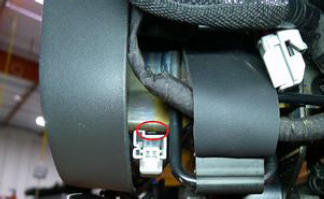 Courtesy of TESLA, INC. Courtesy of TESLA, INC.
|
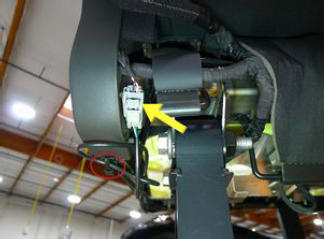 Courtesy of TESLA, INC. Courtesy of TESLA, INC.
|
- Install the seat belt to the RH 40 seat frame
NOTE:
1x bolt, T50, 45 N.m, Install new bolt
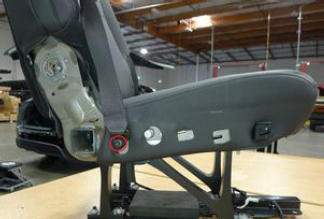 Courtesy of TESLA, INC. Courtesy of TESLA, INC.
|
- Install RH seat outer recliner cover to seat
NOTE:
4x clips, Hook the top right corner to seat before securing clips
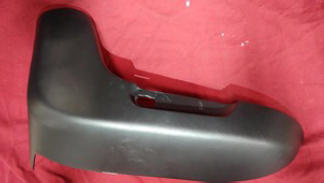 Courtesy of TESLA, INC. Courtesy of TESLA, INC.
|
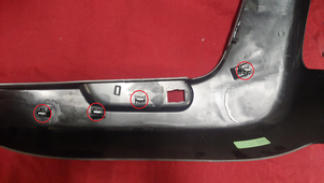 Courtesy of TESLA, INC. Courtesy of TESLA, INC.
|
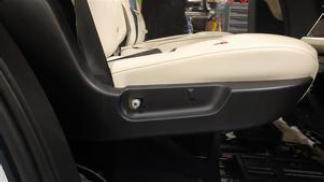 Courtesy of TESLA, INC. Courtesy of TESLA, INC.
|
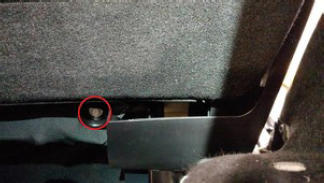
- Secure bolt holding RH seat outer recliner to seat
NOTE:
1x bolt, 10 mm, 4 N.m
 Courtesy of TESLA, INC. Courtesy of TESLA, INC.
|
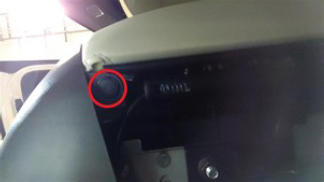
- Secure clip holding RH seat outer recliner to seat
NOTE:
1x clip
 Courtesy of TESLA, INC. Courtesy of TESLA, INC.
|
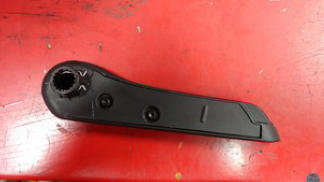
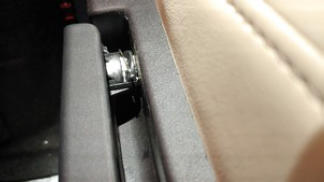
- Install RH recliner lever
NOTE:
Push into seat and allow clip to set fully
 Courtesy of TESLA, INC. Courtesy of TESLA, INC.
|
 Courtesy of TESLA, INC. Courtesy of TESLA, INC.
|
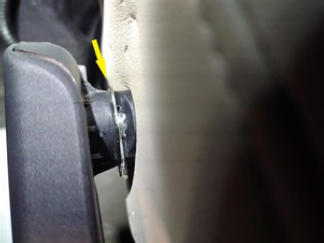 Courtesy of TESLA, INC. Courtesy of TESLA, INC.
|
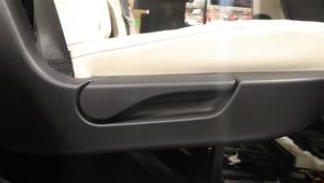 Courtesy of TESLA, INC. Courtesy of TESLA, INC.
|
- Fold down 40 seat
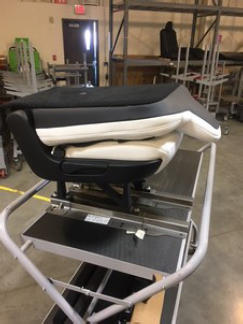 Courtesy of TESLA, INC. Courtesy of TESLA, INC.
|
- Install 40 seat assembly into vehicle
NOTE:
Recommend assistance, Make sure guide pins are aligned properly
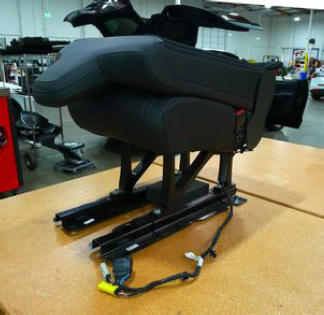 Courtesy of TESLA, INC. Courtesy of TESLA, INC.
|
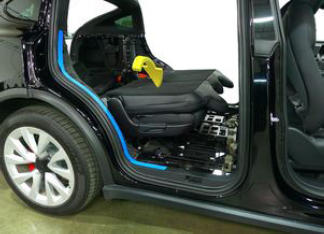 Courtesy of TESLA, INC. Courtesy of TESLA, INC.
|
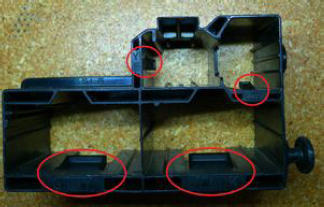
- Connect 40 seat assembly harness
NOTE:
4x connectors, Ensure connector locks engaged, Secure connector housings to bracket
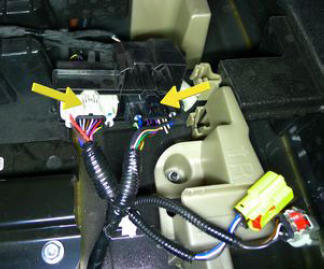 Courtesy of TESLA, INC. Courtesy of TESLA, INC.
|
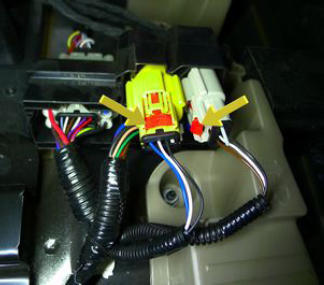 Courtesy of TESLA, INC. Courtesy of TESLA, INC.
|
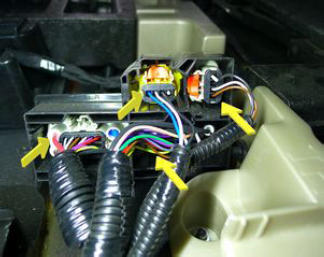 Courtesy of TESLA, INC. Courtesy of TESLA, INC.
|
 Courtesy of TESLA, INC. Courtesy of TESLA, INC.
|
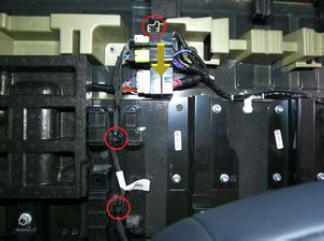
- Secure 40 seat harness to RH floor support bracket
NOTE:
2x clips, 1x datum
 Courtesy of TESLA, INC. Courtesy of TESLA, INC.
|
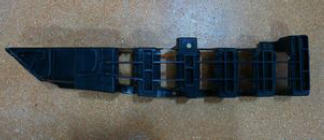
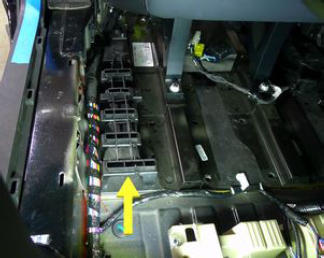
- Install RH 2nd row seat carpet support bracket
NOTE:
2x bolts, 10 mm, 5 N.m
 Courtesy of TESLA, INC. Courtesy of TESLA, INC.
|
 Courtesy of TESLA, INC. Courtesy of TESLA, INC.
|
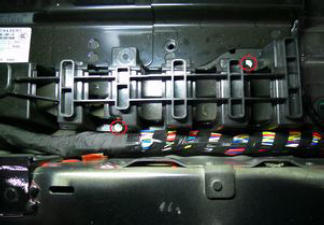 Courtesy of TESLA, INC. Courtesy of TESLA, INC.
|
- Install bolts securing the front seat track on 40 seat hand tight
NOTE:
6x patch bolts, 11 mm, 45 N.m, Install new patch bolts, Torque at a later step
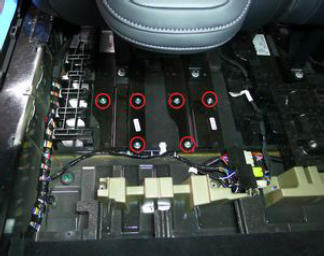 Courtesy of TESLA, INC. Courtesy of TESLA, INC.
|
- Install remaining rear 40 seat track bolts
NOTE:
4x bolts, 11 mm, 45 N.m, Install new patched bolts
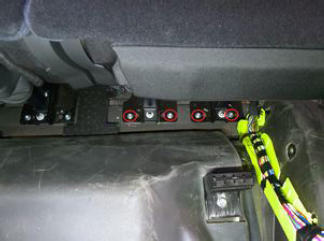 Courtesy of TESLA, INC. Courtesy of TESLA, INC.
|
- Torque the front 40 seat track bolts
NOTE:
6x bolts, 11 mm, 45 N.m, Torque the most forward bolt on each side before the outer bolts
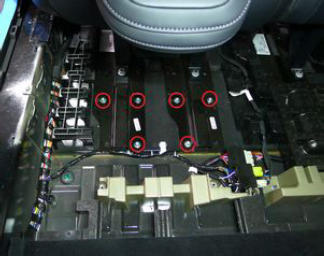 Courtesy of TESLA, INC. Courtesy of TESLA, INC.
|
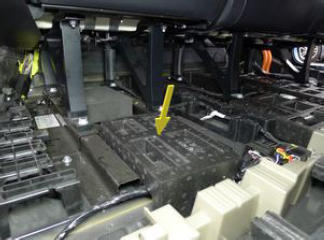
- Install RH bench seat floor support
 Courtesy of TESLA, INC. Courtesy of TESLA, INC.
|
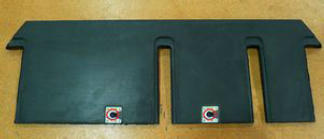
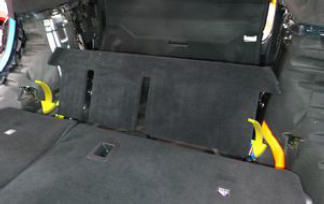
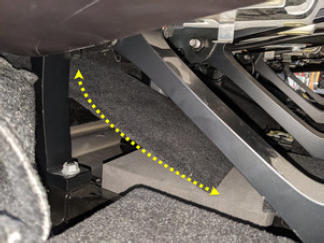
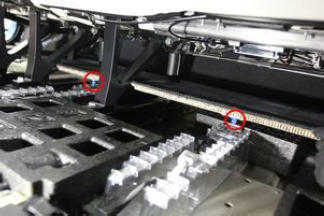
- Install 2nd row rear carpet floor board
NOTE:
2x clips, Slide panel down behind seats, Lower front of panel to engage clips
 Courtesy of TESLA, INC. Courtesy of TESLA, INC.
|
 Courtesy of TESLA, INC. Courtesy of TESLA, INC.
|
 Courtesy of TESLA, INC. Courtesy of TESLA, INC.
|
 Courtesy of TESLA, INC. Courtesy of TESLA, INC.
|
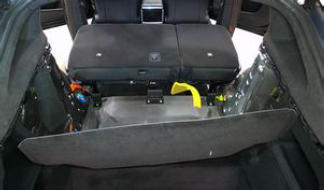
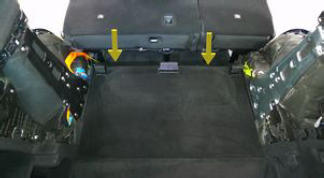
- Fold trunk carpet into original position
NOTE:
Fold carpet down over harpoon brackets
 Courtesy of TESLA, INC. Courtesy of TESLA, INC.
|
 Courtesy of TESLA, INC. Courtesy of TESLA, INC.
|
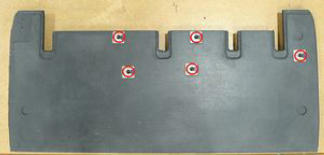
- Install 2nd row mid carpet floor board
NOTE:
5x clips, Replace clips if damaged, Install rear of panel into position and then secure clips
 Courtesy of TESLA, INC. Courtesy of TESLA, INC.
|
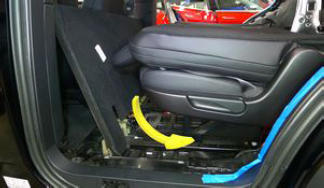 Courtesy of TESLA, INC. Courtesy of TESLA, INC.
|
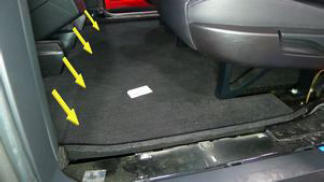 Courtesy of TESLA, INC. Courtesy of TESLA, INC.
|
- Install LH lower C-pillar
NOTE:
1x patch bolt, T25, 2.5 N.m, 2x screws, T20, 2 N.m, 13x clips, Install new patch bolt
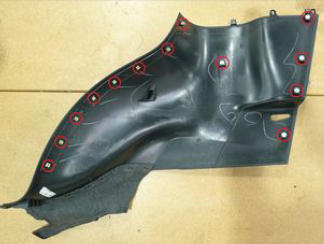 Courtesy of TESLA, INC. Courtesy of TESLA, INC.
|
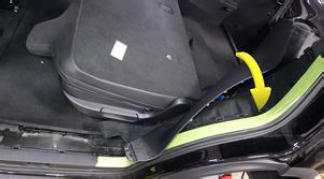 Courtesy of TESLA, INC. Courtesy of TESLA, INC.
|
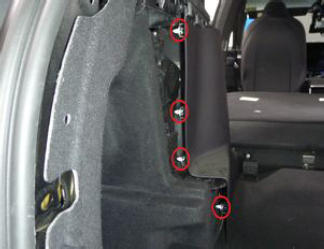 Courtesy of TESLA, INC. Courtesy of TESLA, INC.
|
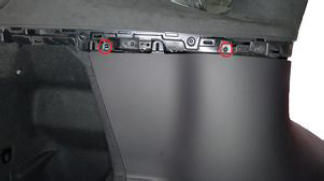 Courtesy of TESLA, INC. Courtesy of TESLA, INC.
|
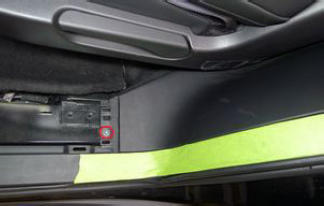 Courtesy of TESLA, INC. Courtesy of TESLA, INC.
|
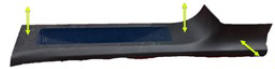
- Install LH rear sill assembly
NOTE:
8x clips, 1x datum
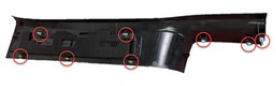 Courtesy of TESLA, INC. Courtesy of TESLA, INC.
|
 Courtesy of TESLA, INC. Courtesy of TESLA, INC.
|
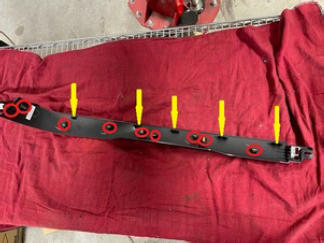
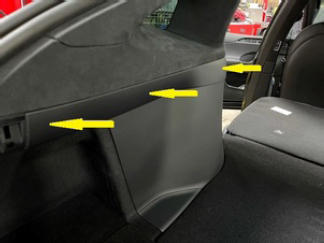
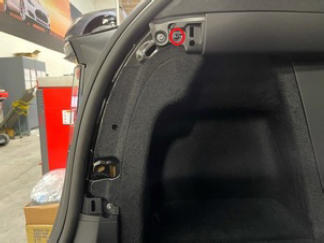
- Install LH mid C-pillar trim
NOTE:
9x clips, 5x tabs, 1x screw, T20, 2 N.m
 Courtesy of TESLA, INC. Courtesy of TESLA, INC.
|
 Courtesy of TESLA, INC. Courtesy of TESLA, INC.
|
 Courtesy of TESLA, INC. Courtesy of TESLA, INC.
|
- Install RH lower C-pillar trim
NOTE:
1x patch bolt, T25, 2.5 N.m, 2x screws, T20, 2 N.m, 12x clips, Install new patch bolt
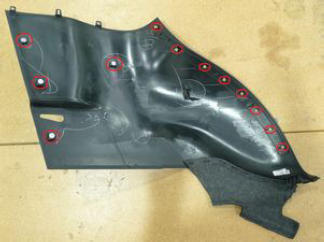 Courtesy of TESLA, INC. Courtesy of TESLA, INC.
|
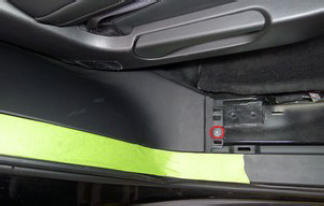 Courtesy of TESLA, INC. Courtesy of TESLA, INC.
|
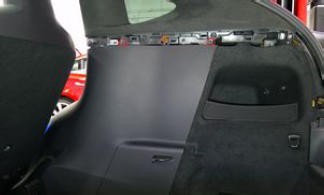 Courtesy of TESLA, INC. Courtesy of TESLA, INC.
|
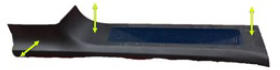
- Install RH rear sill assembly
NOTE:
8x clips, 1x datum
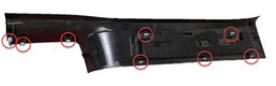 Courtesy of TESLA, INC. Courtesy of TESLA, INC.
|
 Courtesy of TESLA, INC. Courtesy of TESLA, INC.
|
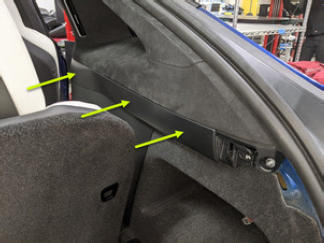
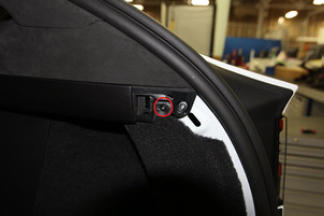
- Install RH mid C-Pillar trim
NOTE:
1x screw, T20, 2 N.m, 9x clips
 Courtesy of TESLA, INC. Courtesy of TESLA, INC.
|
 Courtesy of TESLA, INC. Courtesy of TESLA, INC.
|
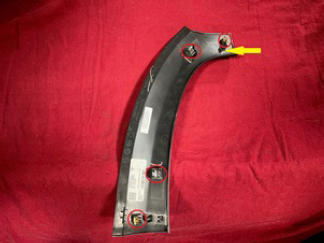
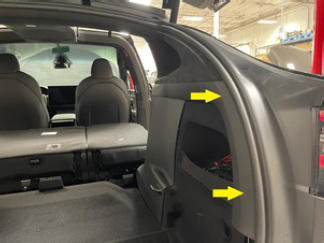
- Install RH trunk sill side trim
NOTE:
4x clips, 1x datum
 Courtesy of TESLA, INC. Courtesy of TESLA, INC.
|
 Courtesy of TESLA, INC. Courtesy of TESLA, INC.
|
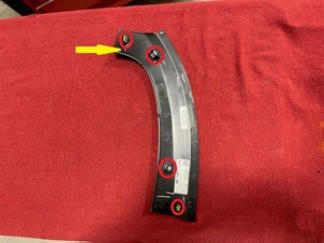
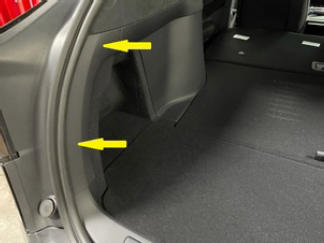
- Install LH trunk sill side trim
NOTE:
4x clips, 1x datum
 Courtesy of TESLA, INC. Courtesy of TESLA, INC.
|
 Courtesy of TESLA, INC. Courtesy of TESLA, INC.
|
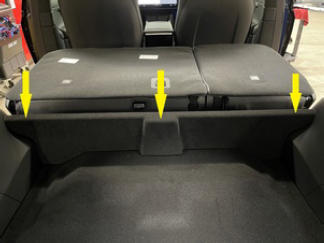
- Install trunk gap hider
 Courtesy of TESLA, INC. Courtesy of TESLA, INC.
|
- Install LH trunk side mini nub
NOTE:
1x clip, 3x tabs
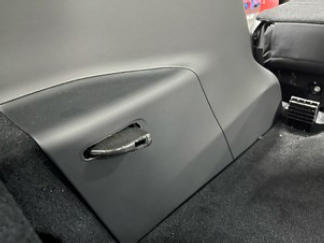 Courtesy of TESLA, INC. Courtesy of TESLA, INC.
|
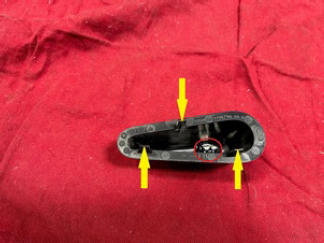 Courtesy of TESLA, INC. Courtesy of TESLA, INC.
|
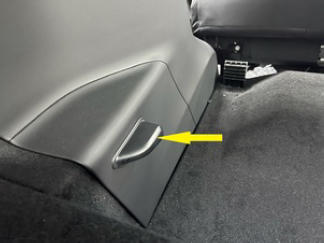 Courtesy of TESLA, INC. Courtesy of TESLA, INC.
|
- Install RH trunk side mini nub
NOTE:
1x clip, 3x tabs
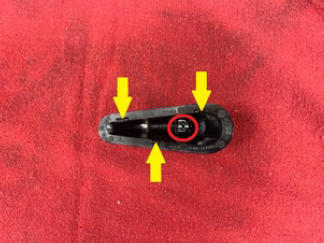 Courtesy of TESLA, INC. Courtesy of TESLA, INC.
|
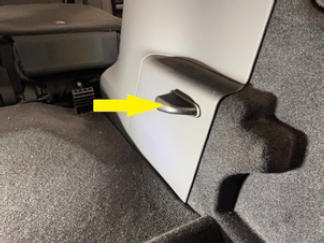 Courtesy of TESLA, INC. Courtesy of TESLA, INC.
|
- Install flat trunk load floor
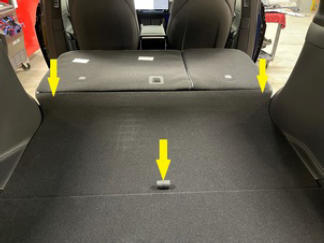 Courtesy of TESLA, INC. Courtesy of TESLA, INC.
|
- Install trunk rear load floor
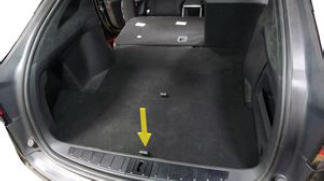 Courtesy of TESLA, INC. Courtesy of TESLA, INC.
|
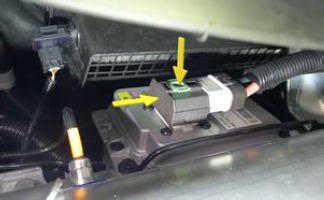
- Connect First Responder Loop and LV battery connector
NOTE:
2x connectors, Secure FRL first, Seat LV battery connection and push black connector lock inwards to secure, Engage upper locking tab when fully seated
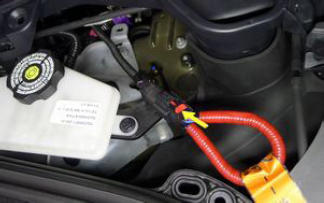 Courtesy of TESLA, INC. Courtesy of TESLA, INC.
|
 Courtesy of TESLA, INC. Courtesy of TESLA, INC.
|
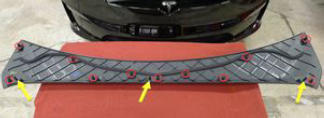
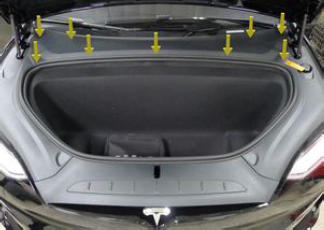
- Install rear underhood apron
NOTE:
11x clips, 2x datums
 Courtesy of TESLA, INC. Courtesy of TESLA, INC.
|
 Courtesy of TESLA, INC. Courtesy of TESLA, INC.
|
- Close hood
- Close liftgate via UI
NOTE:
Controls > Trunk
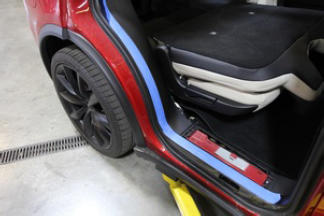
- Remove masking tape from the RH lower C-pillar and from the race tracks
 Courtesy of TESLA, INC. Courtesy of TESLA, INC.
|
- Unfold the 40 seat assembly
- Move RH front seat to original position
- Close RH front door
- Remove masking tape from the LH lower C-pillar and from the race tracks
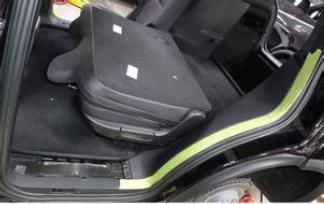 Courtesy of TESLA, INC. Courtesy of TESLA, INC.
|
- Unfold the 60 seat assembly
- Calibrate the rear doors.
NOTE:
If the "Calibration Needed" message appears on the vehicle touchscreen, touch and hold Calibrate
to calibrate the rear doors.
- Move LH front seat to original position
- Raise LH and RH front windows
- Close LH front door