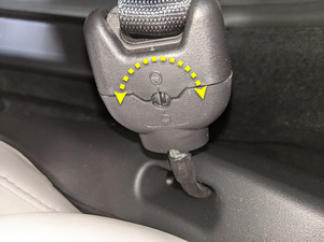
- Release LH front seat belt
NOTE:
Turn release mechanism counter clockwise, turn back clockwise after releasing
 Courtesy of TESLA, INC. Courtesy of TESLA, INC.
|
- Open LH falcon wing door
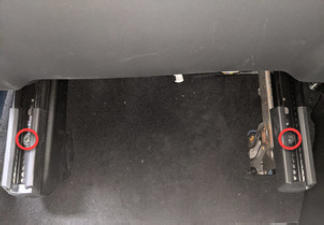
- Remove bolts securing rear of LH front seat tracks to the floor panel
NOTE:
2x patch bolts, T45P, 34 N.m, Discard after removal
 Courtesy of TESLA, INC. Courtesy of TESLA, INC.
|
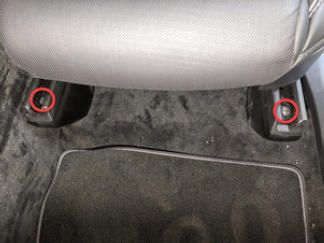
- Remove bolts securing front of LH front seat tracks to the floor panel
NOTE:
2x patch bolts, T45P, 34 N.m, Discard after removal
 Courtesy of TESLA, INC. Courtesy of TESLA, INC.
|
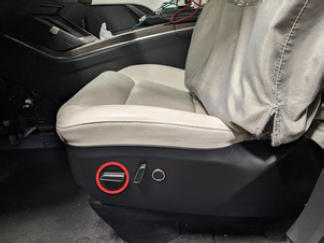
- Adjust position of LH front seat for easy removal
NOTE:
Move seat to middle of track at most upright position with seat fully up off floor
 Courtesy of TESLA, INC. Courtesy of TESLA, INC.
|
- Open hood
NOTE:
Via center display > Controls > Frunk Open
- Remove rear underhood apron
NOTE:
11x clips, 2x datums
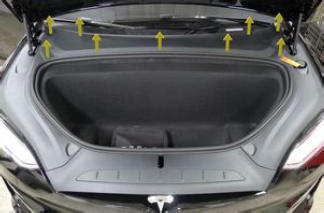 Courtesy of TESLA, INC. Courtesy of TESLA, INC.
|
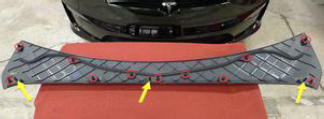 Courtesy of TESLA, INC. Courtesy of TESLA, INC.
|
- Power off vehicle via center display
NOTE:
Controls > Safety & Security > Power Off
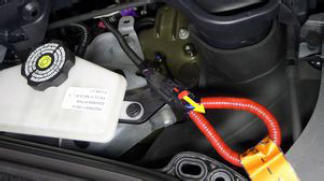
- Disconnect LV battery connector and First Responder Loop
NOTE:
2x connectors, Lift up and release green locking tab, Pull black connector lock outwards to release connection, Release red lock tab on FRL
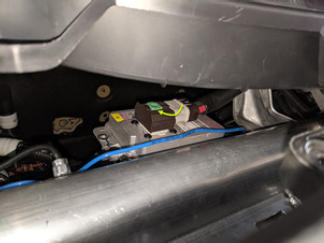 Courtesy of TESLA, INC. Courtesy of TESLA, INC.
|
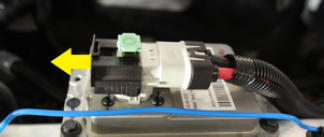 Courtesy of TESLA, INC. Courtesy of TESLA, INC.
|
 Courtesy of TESLA, INC. Courtesy of TESLA, INC.
|
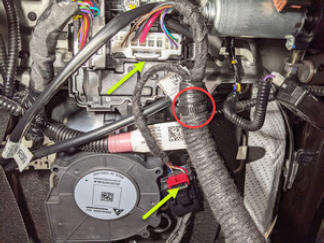
- Position chair to gain access below seat bottom and disconnect LH side body harness from seat controller
NOTE:
2x connectors, 1x clip, Release red locking tab on black connector
 Courtesy of TESLA, INC. Courtesy of TESLA, INC.
|
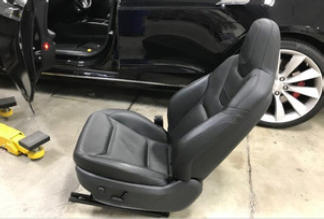
- Remove LH front seat from vehicle
NOTE:
Recommend assistance, Use caution to not damage other components
 Courtesy of TESLA, INC. Courtesy of TESLA, INC.
|
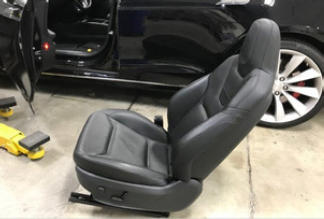
- Install LH front seat into vehicle
NOTE:
Recommend Assistance, Take care not to damage surrounding components while lifting the seat into the vehicle
 Courtesy of TESLA, INC. Courtesy of TESLA, INC.
|
- Position chair to gain access below seat bottom and connect LH side body harness to seat controller
NOTE:
2x connectors, 1x clip, Engage red locking tab on black connector, Recommend assistance
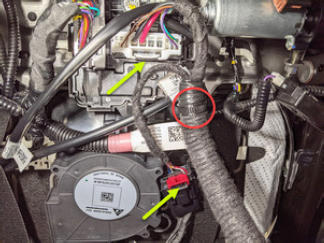 Courtesy of TESLA, INC. Courtesy of TESLA, INC.
|
- Position LH front seat upright for bolt installation
NOTE:
Recommend assistance
- Connect First Responder Loop and LV battery connector
NOTE:
2x connectors, Secure FRL first, Seat LV battery connection and push black connector lock inwards to secure, Engage upper locking tab when fully seated
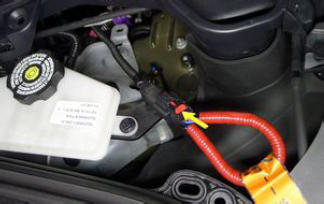 Courtesy of TESLA, INC. Courtesy of TESLA, INC.
|
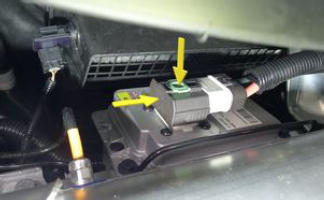 Courtesy of TESLA, INC. Courtesy of TESLA, INC.
|
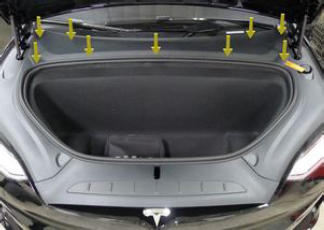
- Install rear underhood apron
NOTE:
11x clips, 2x datums
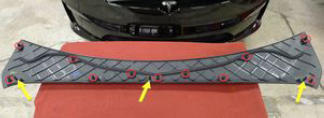 Courtesy of TESLA, INC. Courtesy of TESLA, INC.
|
 Courtesy of TESLA, INC. Courtesy of TESLA, INC.
|
- Calibrate the rear doors.
NOTE:
If the "Calibration Needed" message appears on the vehicle touchscreen, touch and hold Calibrate
to calibrate the rear doors.
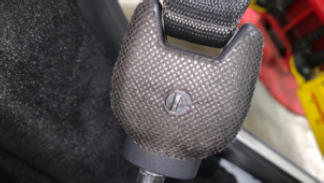
- Secure LH front seat belt
 Courtesy of TESLA, INC. Courtesy of TESLA, INC.
|
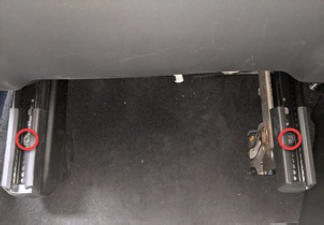
- Install bolts securing LH front seat rear tracks to vehicle
NOTE:
2x patch bolts, T45P, 34 N.m, Install new bolts
 Courtesy of TESLA, INC. Courtesy of TESLA, INC.
|
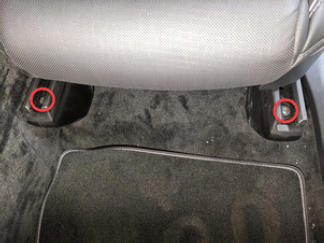
- Install bolts securing both LH front seat front tracks to vehicle
NOTE:
2x patch bolts, T45P, 34 N.m, Install new bolts
 Courtesy of TESLA, INC. Courtesy of TESLA, INC.
|
- Using laptop connect to vehicle with ethernet diag kit and Toolbox 3
- Select "Actions" tab and search for "Service-Redeploy"
- Select "SERVICE CAN REDEPLOY", click "Run", and allow routine to complete
NOTE:
Select "X" at top right of window to close once complete, Routine will state pass but update will continue to run in the background, UI will show update progress
- Re-establish vehicle connection to Toolbox 3
- Select 'Actions/Autodiag' and search for 'Calibration'
- Select 'PROC_VCSEATD_SEAT-CALIBRATE', click 'Run', and allow routine to complete
NOTE:
Verify no items on seat during this routine, Select 'X' at top right of window to close once complete
- Disconnect Toolbox 3 from vehicle and remove laptop and ethernet diag kit
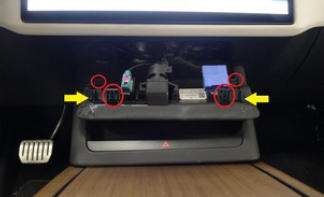
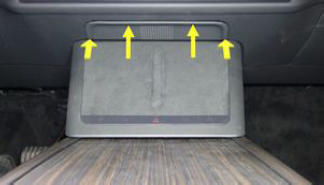
- Install IP service panel
NOTE:
2x tabs, 4 datums, Slide forward engaging datums then secure tabs upward into IP
 Courtesy of TESLA, INC. Courtesy of TESLA, INC.
|
 Courtesy of TESLA, INC. Courtesy of TESLA, INC.
|