- Open all four doors
- Lower LH and RH front windows
- Remove the LH 2nd row seat from the vehicle. See SEAT ASSEMBLY - 2ND ROW - LH (WITHOUT 2ND ROW BENCH SEATS) (REMOVE AND REPLACE)
.
- Remove LH monopost seat back cover
NOTE:
11x clips, 1x connector, Start from top portion of trim and work your way down, Be cautious of switch harness, do not rip trim away
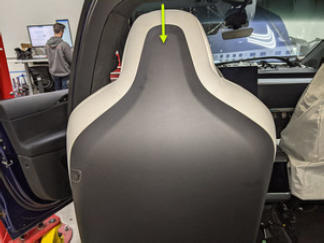 Courtesy of TESLA, INC. Courtesy of TESLA, INC.
|
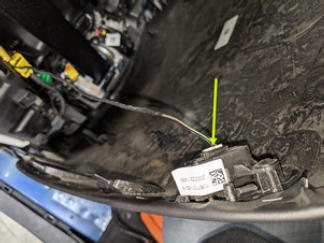 Courtesy of TESLA, INC. Courtesy of TESLA, INC.
|
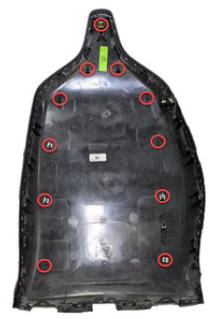 Courtesy of TESLA, INC. Courtesy of TESLA, INC.
|
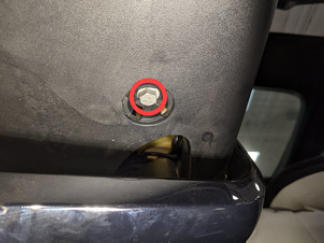
- Remove bolts securing 2nd row LH monopost under belly trim
NOTE:
2x bolts, 10 mm, 8 N.m
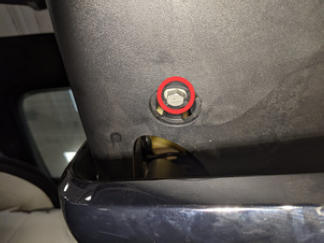 Courtesy of TESLA, INC. Courtesy of TESLA, INC.
|
 Courtesy of TESLA, INC. Courtesy of TESLA, INC.
|
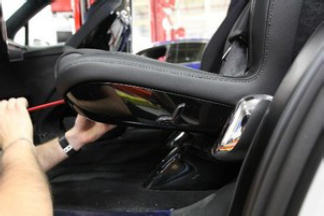
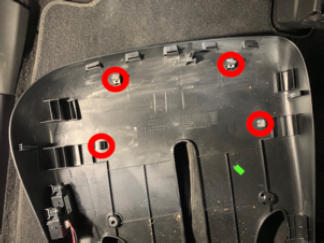
- Release clips securing 2nd row LH monopost under belly trim
NOTE:
4x clips, Use caution when release lower trim as comfort seat switch harness is short in length
 Courtesy of TESLA, INC. Courtesy of TESLA, INC.
|
 Courtesy of TESLA, INC. Courtesy of TESLA, INC.
|
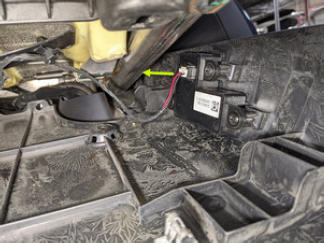
- Disconnect and remove 2nd row LH monopost under belly trim
NOTE:
1x connector
 Courtesy of TESLA, INC. Courtesy of TESLA, INC.
|
- Remove 2nd row monopost surround carpets from surround trim
NOTE:
Carpets are one time use, Discard after removal
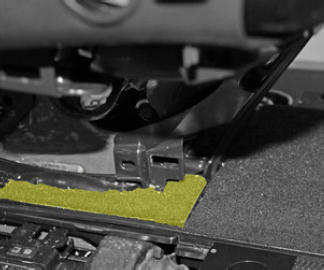 Courtesy of TESLA, INC. Courtesy of TESLA, INC.
|
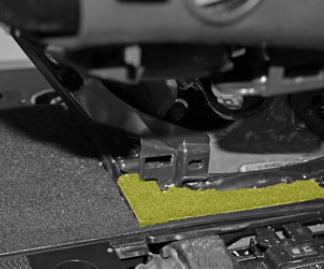 Courtesy of TESLA, INC. Courtesy of TESLA, INC.
|
- Remove screws securing magic carpet
NOTE:
2x screws, T20, 2.5 N.m
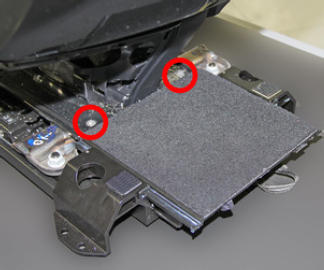 Courtesy of TESLA, INC. Courtesy of TESLA, INC.
|
- Remove magic carpet from plate assembly
NOTE:
2x plastic guides
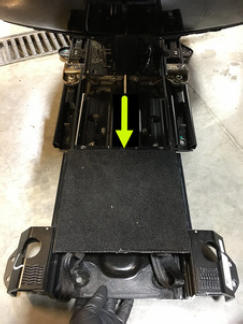 Courtesy of TESLA, INC. Courtesy of TESLA, INC.
|
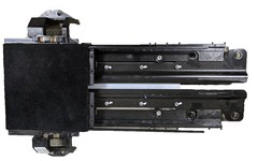 Courtesy of TESLA, INC. Courtesy of TESLA, INC.
|
- Release 2nd row LH monopost top inner covers to gain access to rear strip
NOTE:
8x tabs, Be cautious when releasing trim to avoid damage, tabs are brittle
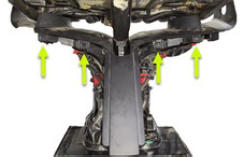 Courtesy of TESLA, INC. Courtesy of TESLA, INC.
|
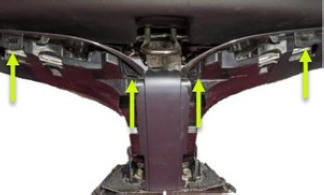 Courtesy of TESLA, INC. Courtesy of TESLA, INC.
|
- Remove rear strip from 2nd row LH monopost seat
NOTE:
6x tabs, Be cautious when releasing trim to avoid damage, tabs are brittle
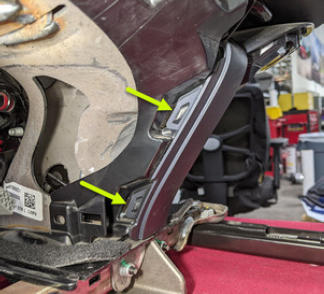 Courtesy of TESLA, INC. Courtesy of TESLA, INC.
|
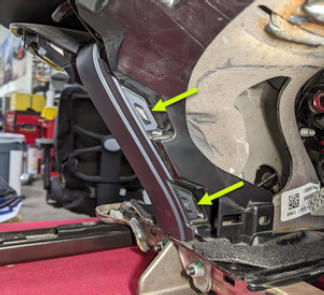 Courtesy of TESLA, INC. Courtesy of TESLA, INC.
|
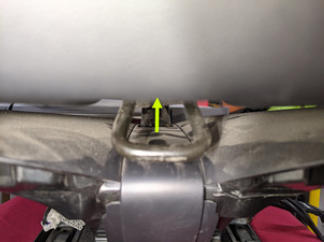 Courtesy of TESLA, INC. Courtesy of TESLA, INC.
|
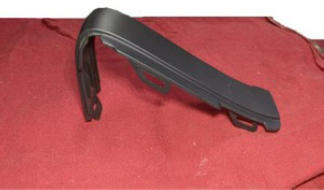 Courtesy of TESLA, INC. Courtesy of TESLA, INC.
|
- Release front strip from 2nd row LH monopost seat
NOTE:
4x tabs, Be cautious when releasing trim to avoid damage, tabs are brittle
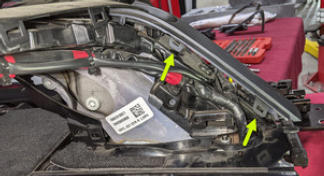 Courtesy of TESLA, INC. Courtesy of TESLA, INC.
|
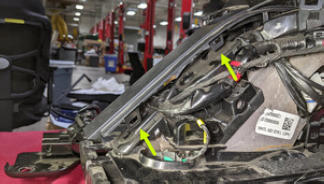 Courtesy of TESLA, INC. Courtesy of TESLA, INC.
|
- Release seat harness from substrate
NOTE:
2x clips
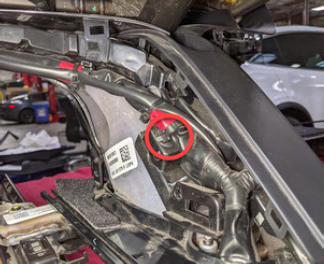 Courtesy of TESLA, INC. Courtesy of TESLA, INC.
|
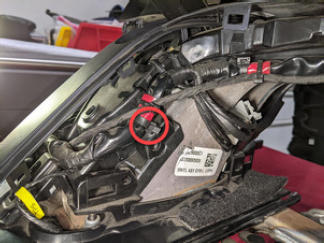 Courtesy of TESLA, INC. Courtesy of TESLA, INC.
|
- Remove bolts securing front side of podium substrate
NOTE:
2x bolts, T25, 3 N.m
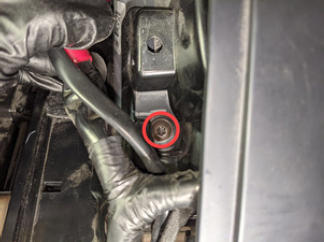 Courtesy of TESLA, INC. Courtesy of TESLA, INC.
|
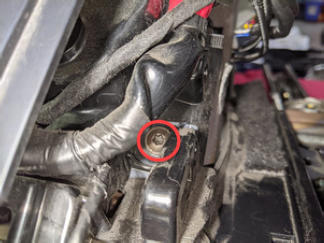 Courtesy of TESLA, INC. Courtesy of TESLA, INC.
|
- Slightly raise trim covering front seat base support
NOTE:
Front end of LH surround, RH surround and front substrate
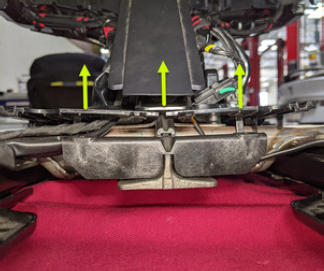 Courtesy of TESLA, INC. Courtesy of TESLA, INC.
|
- Remove screw securing 2nd row LH monopost seat front base support
NOTE:
1x T25, 5 N.m
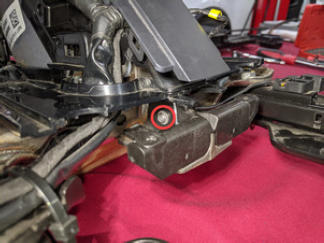 Courtesy of TESLA, INC. Courtesy of TESLA, INC.
|
- Remove 2nd row LH monopost seat front base support
NOTE:
Slightly lift up on trim panels to gain access, While sliding forward slightly rotate front of base support upward to remove
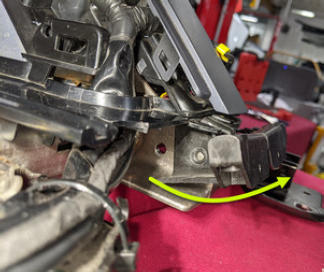 Courtesy of TESLA, INC. Courtesy of TESLA, INC.
|
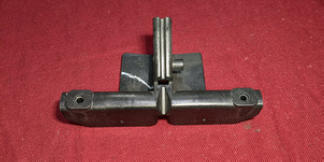 Courtesy of TESLA, INC. Courtesy of TESLA, INC.
|
- Install 2nd row LH monopost seat front base support
NOTE:
Slightly lift up on trim panels to gain access, Slightly rotate front of base support downward then slide inward to install
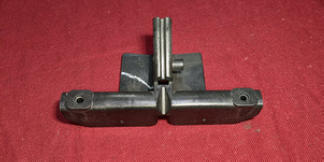 Courtesy of TESLA, INC. Courtesy of TESLA, INC.
|
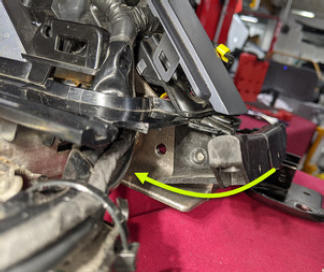 Courtesy of TESLA, INC. Courtesy of TESLA, INC.
|
- Install screw securing 2nd row LH monopost seat front base support
NOTE:
1x T25, 5 N.m
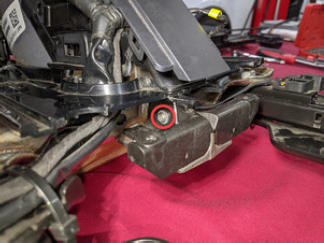 Courtesy of TESLA, INC. Courtesy of TESLA, INC.
|
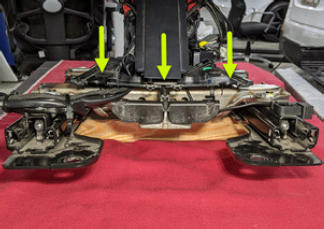
- Secure trim covering front seat base support
NOTE:
Front end of LH surround, RH surround and front substrate, Front strip will be secured at later step
 Courtesy of TESLA, INC. Courtesy of TESLA, INC.
|
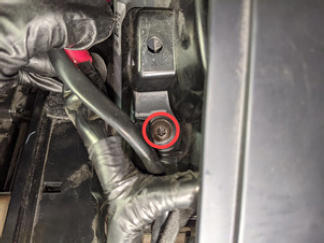
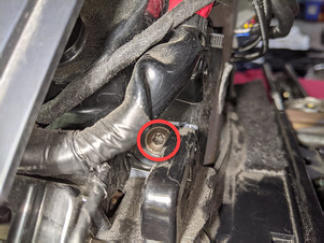
- Install bolts securing podium substrate
NOTE:
4x bolts, T25, 3 N.m
 Courtesy of TESLA, INC. Courtesy of TESLA, INC.
|
 Courtesy of TESLA, INC. Courtesy of TESLA, INC.
|
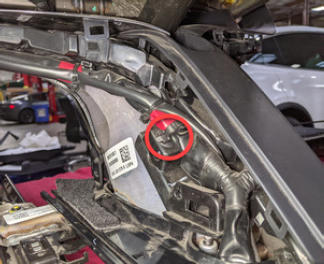
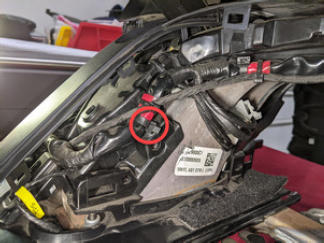
- Secure seat harness onto substrate
NOTE:
2x clips
 Courtesy of TESLA, INC. Courtesy of TESLA, INC.
|
 Courtesy of TESLA, INC. Courtesy of TESLA, INC.
|
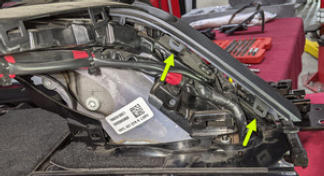
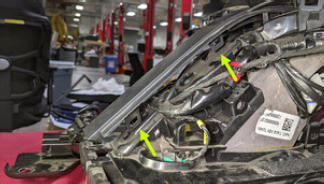
- Install front strip onto 2nd row LH monopost seat
NOTE:
4x tabs
 Courtesy of TESLA, INC. Courtesy of TESLA, INC.
|
 Courtesy of TESLA, INC. Courtesy of TESLA, INC.
|
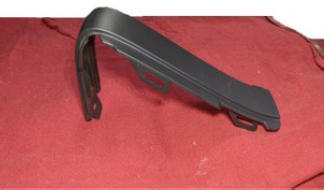
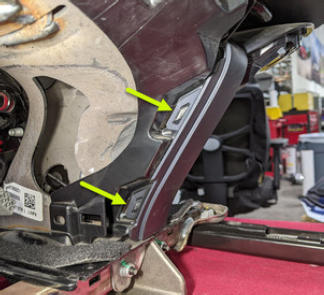
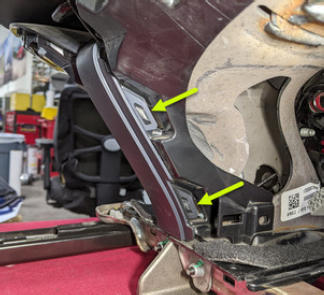
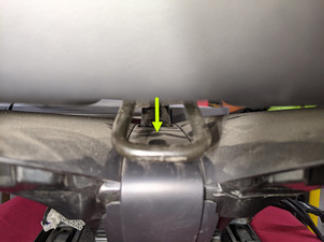
- Install rear strip onto 2nd row LH monopost seat
NOTE:
5x tabs
 Courtesy of TESLA, INC. Courtesy of TESLA, INC.
|
 Courtesy of TESLA, INC. Courtesy of TESLA, INC.
|
 Courtesy of TESLA, INC. Courtesy of TESLA, INC.
|
 Courtesy of TESLA, INC. Courtesy of TESLA, INC.
|
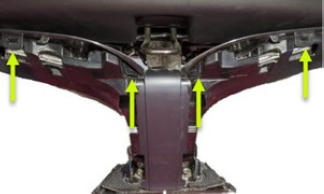
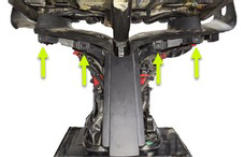
- Secure 2nd row LH monopost top inner covers
NOTE:
8x tabs
 Courtesy of TESLA, INC. Courtesy of TESLA, INC.
|
 Courtesy of TESLA, INC. Courtesy of TESLA, INC.
|
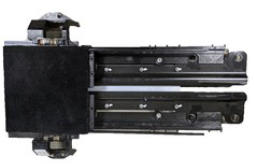
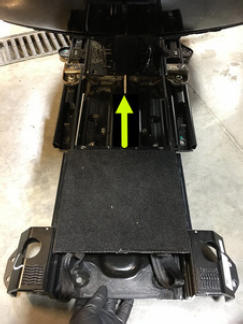
- Install magic carpet onto plate assembly
NOTE:
2x plastic guides, Align guides into surround trim channels
 Courtesy of TESLA, INC. Courtesy of TESLA, INC.
|
 Courtesy of TESLA, INC. Courtesy of TESLA, INC.
|
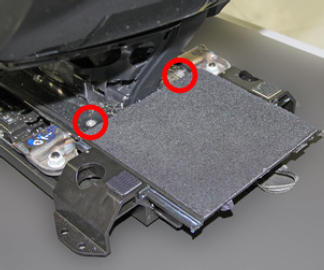
- Install screws securing magic carpet
NOTE:
2x screws, T20, 2.5 N.m
 Courtesy of TESLA, INC. Courtesy of TESLA, INC.
|
- Install 2nd row monopost surround carpets onto surround trim
NOTE:
Carpets are one time use, Install new carpet
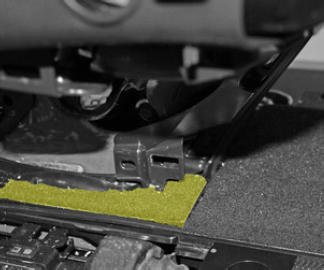 Courtesy of TESLA, INC. Courtesy of TESLA, INC.
|
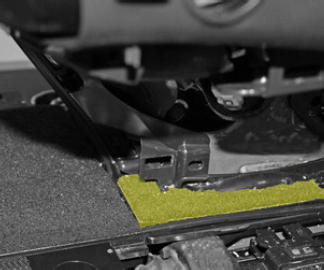 Courtesy of TESLA, INC. Courtesy of TESLA, INC.
|
- Connect 2nd row LH monopost under belly trim
NOTE:
1x connector
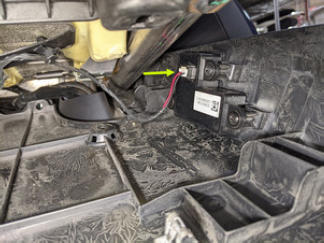 Courtesy of TESLA, INC. Courtesy of TESLA, INC.
|
- Secure 2nd row LH monopost under belly trim
NOTE:
4x clips, Align datums then secure panel
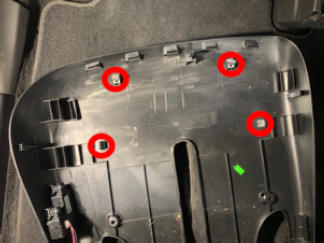 Courtesy of TESLA, INC. Courtesy of TESLA, INC.
|
- Install bolts securing 2nd row LH monopost under belly trim
NOTE:
2x bolts, 10 mm, 8 N.m
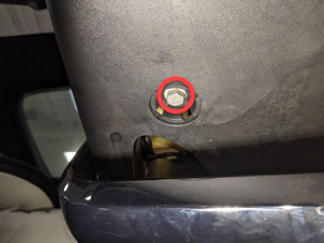 Courtesy of TESLA, INC. Courtesy of TESLA, INC.
|
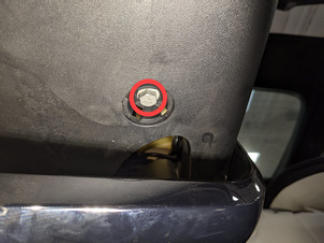 Courtesy of TESLA, INC. Courtesy of TESLA, INC.
|
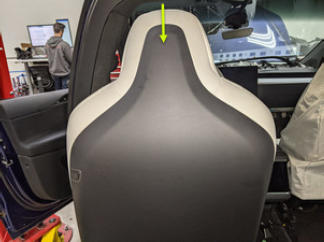
- Install LH 2nd row seat back cover
NOTE:
11x clips, 1x connector, Align lower datums and side tabs along seat assembly, Then engage clips to fully secure
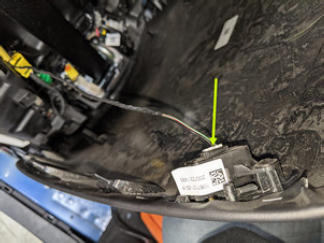 Courtesy of TESLA, INC. Courtesy of TESLA, INC.
|
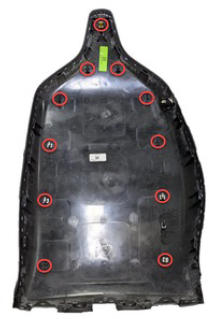 Courtesy of TESLA, INC. Courtesy of TESLA, INC.
|
 Courtesy of TESLA, INC. Courtesy of TESLA, INC.
|
- Install the LH 2nd row seat. See SEAT ASSEMBLY - 2ND ROW - LH (WITHOUT 2ND ROW BENCH SEATS) (REMOVE AND REPLACE)
.
- Raise LH and RH front windows
- Close LH front door