Trim - Side - Trunk - RH - Remove And Replace: Install
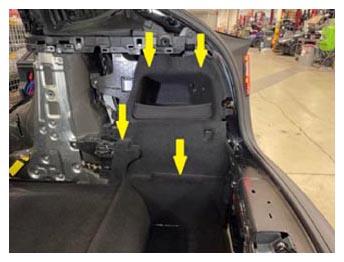
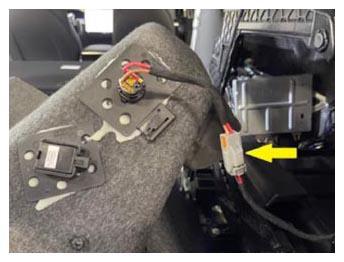
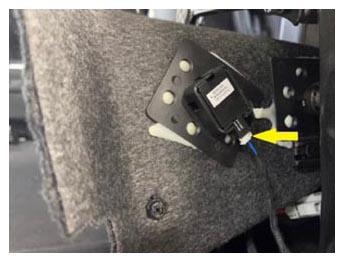
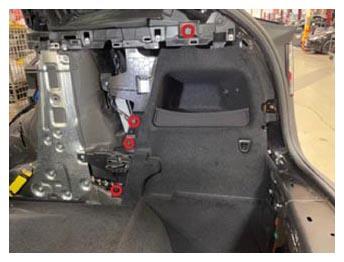
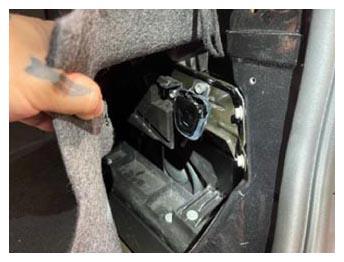
- Position the RH trunk side trim into the vehicle, connect the electrical connectors (x2), and then install the push clips (x4) that attach the side trim to the vehicle.
 Courtesy of TESLA, INC. Courtesy of TESLA, INC.
|
 Courtesy of TESLA, INC. Courtesy of TESLA, INC.
|
 Courtesy of TESLA, INC. Courtesy of TESLA, INC.
|
 Courtesy of TESLA, INC. Courtesy of TESLA, INC.
|
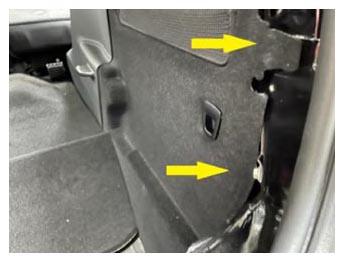
- Secure the RH trunk tie down into the RH side trim carpet.
 Courtesy of TESLA, INC. Courtesy of TESLA, INC.
|
 Courtesy of TESLA, INC. Courtesy of TESLA, INC.
|
- Install the RH upper C-pillar trim. See TRIM - C-PILLAR - UPPER - LH (REMOVE AND REPLACE) .
- Install the RH lower C-pillar trim. See TRIM - C-PILLAR - LOWER - LH (REMOVE AND REPLACE) .
- Install the RH mid C-pillar trim. See TRIM - C-PILLAR - MID - LH (REMOVE AND REPLACE) .
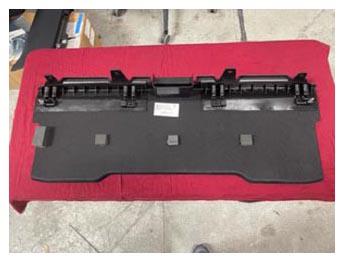
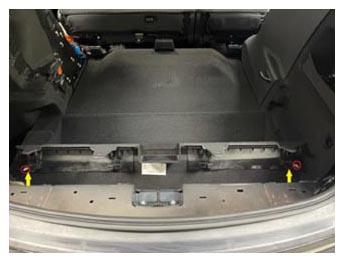
- Position the rear wall load support into the vehicle, and then install the push clips (x4) and secure the clips (x2) that attach the support to the vehicle.
 Courtesy of TESLA, INC. Courtesy of TESLA, INC.
|
 Courtesy of TESLA, INC. Courtesy of TESLA, INC.
|
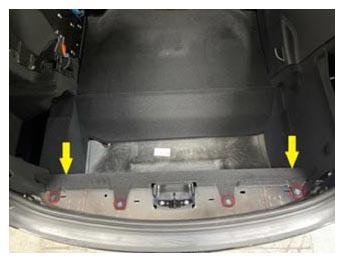 Courtesy of TESLA, INC. Courtesy of TESLA, INC.
|
- Install the trunk sill trim. See TRIM - SILL - TRUNK (REMOVE AND REPLACE) .
- Install the LH and RH side rear trunk garnish. See GARNISH - REAR TRUNK - SIDE - LH (REMOVE AND REPLACE) .
- Install the trunk gap hider. See GAP HIDER - TRUNK (5 SEAT) (REMOVE AND REPLACE)
.
- Install the RH trunk load floor bracket cover. See COVER - BRACKET - TRUNK LOAD FLOOR - LH (REMOVE AND REPLACE)
.
- Install the front trunk load floor. See TRUNK LOAD FLOOR - FRONT (REMOVE AND REPLACE)
.
- Install the rear trunk load floor. See TRUNK LOAD FLOOR - REAR (REMOVE AND REPLACE)
.
- Move the 2nd row seats to the original position.
- Move the front seats to the original position.
- Raise the LH front window and close all the doors.