- Move LH Monopost seat forward
- Open hood
NOTE:
Via center display > Controls > Frunk Open
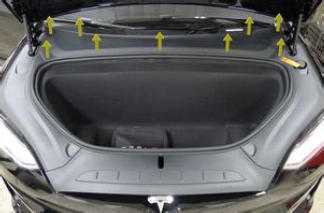
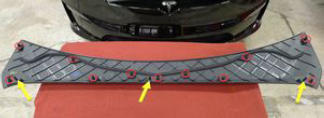
- Remove rear underhood apron
NOTE:
11x clips, 2x datums
 Courtesy of TESLA, INC. Courtesy of TESLA, INC.
|
 Courtesy of TESLA, INC. Courtesy of TESLA, INC.
|
- Move RH Monopost seat forward
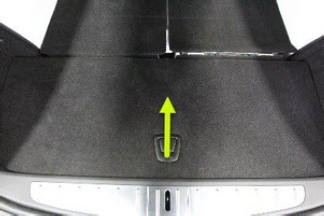
- Remove trunk rear load floor
 Courtesy of TESLA, INC. Courtesy of TESLA, INC.
|
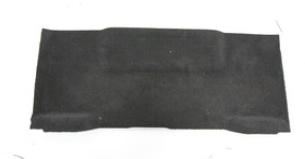
- Remove trunk tub floor insulator
 Courtesy of TESLA, INC. Courtesy of TESLA, INC.
|
- Remove trunk carpet
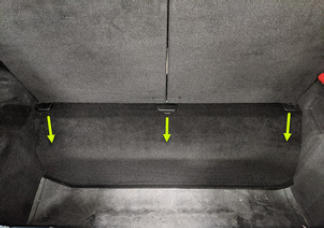 Courtesy of TESLA, INC. Courtesy of TESLA, INC.
|
- Power off vehicle via center display
NOTE:
Controls > Safety & Security > Power Off
- Disconnect LV battery connector and First Responder Loop
NOTE:
2x connectors, Lift up and release green locking tab, Pull black connector lock outwards to release connection, Release red lock tab on FRL
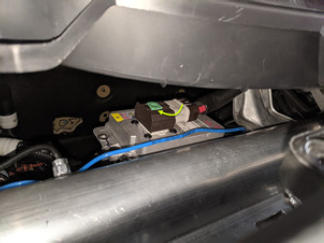 Courtesy of TESLA, INC. Courtesy of TESLA, INC.
|
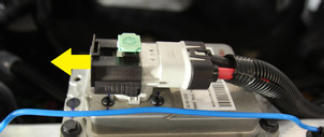 Courtesy of TESLA, INC. Courtesy of TESLA, INC.
|
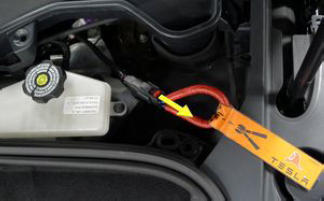 Courtesy of TESLA, INC. Courtesy of TESLA, INC.
|
- Release 3rd row seat harness trays from seat frame
NOTE:
4x push clips
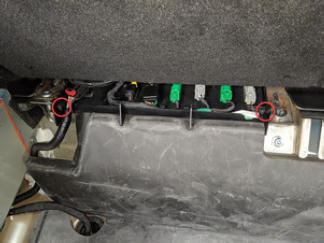 Courtesy of TESLA, INC. Courtesy of TESLA, INC.
|
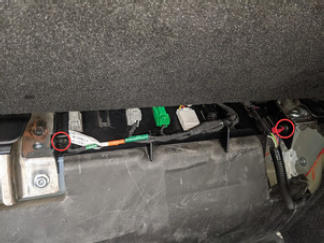 Courtesy of TESLA, INC. Courtesy of TESLA, INC.
|
- Disconnect 3rd row seat assembly connections
NOTE:
11x connectors, Release tab and slide connector housing off tray to remove
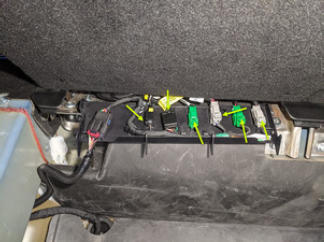 Courtesy of TESLA, INC. Courtesy of TESLA, INC.
|
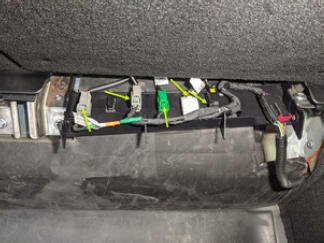 Courtesy of TESLA, INC. Courtesy of TESLA, INC.
|
- Remove 3rd row seat cushion from vehicle
NOTE:
Feed cushion harness's below 3rd row seat backs, Place cushion on protected surface
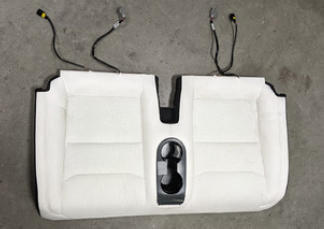 Courtesy of TESLA, INC. Courtesy of TESLA, INC.
|
- Release 3rd row cup holder fascia assembly
NOTE:
8x clips
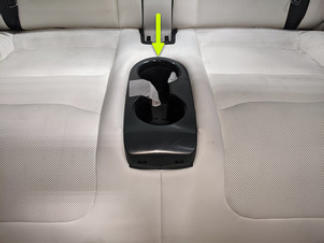 Courtesy of TESLA, INC. Courtesy of TESLA, INC.
|
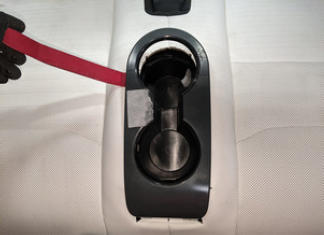 Courtesy of TESLA, INC. Courtesy of TESLA, INC.
|
- Disconnect 3rd row USB hub
NOTE:
1x connector
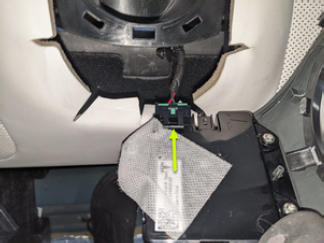 Courtesy of TESLA, INC. Courtesy of TESLA, INC.
|
- Flip 3rd row cushion over to access bottom side of cushion
NOTE:
Place cushion on protected surface
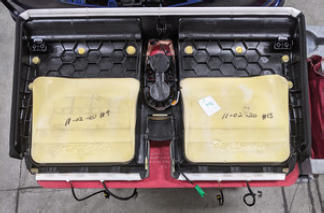 Courtesy of TESLA, INC. Courtesy of TESLA, INC.
|
- Release 3rd row cushion cover from rear corners of cushion substrate
NOTE:
4 tabs, Release trim from tabs
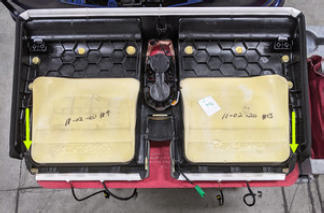 Courtesy of TESLA, INC. Courtesy of TESLA, INC.
|
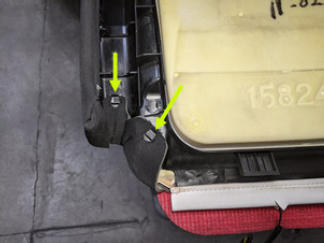 Courtesy of TESLA, INC. Courtesy of TESLA, INC.
|
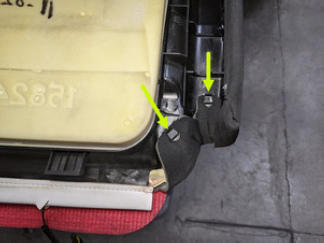 Courtesy of TESLA, INC. Courtesy of TESLA, INC.
|
- Release 3rd row cushion cover from rear end of cushion substrate
NOTE:
2x J-hooks
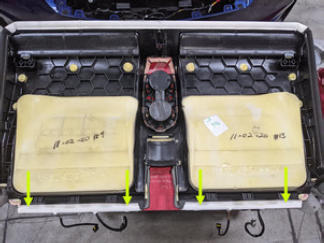 Courtesy of TESLA, INC. Courtesy of TESLA, INC.
|
- Feed 3rd row cushion harness's through rear end of cushion cover
NOTE:
4x connectors
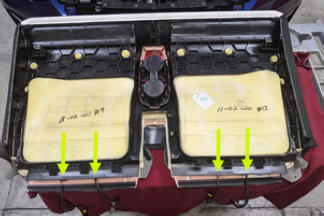 Courtesy of TESLA, INC. Courtesy of TESLA, INC.
|
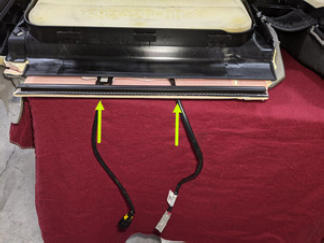 Courtesy of TESLA, INC. Courtesy of TESLA, INC.
|
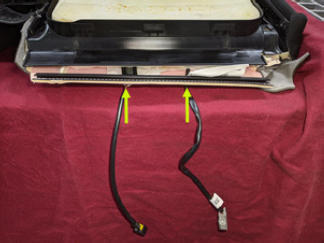 Courtesy of TESLA, INC. Courtesy of TESLA, INC.
|
- Release 3rd row cushion cover from cup holder
NOTE:
2x J-hooks
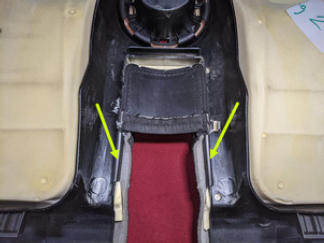 Courtesy of TESLA, INC. Courtesy of TESLA, INC.
|
- Release 3rd row cushion cover from both sides of 3rd row cushion substrate
NOTE:
2x J-hooks
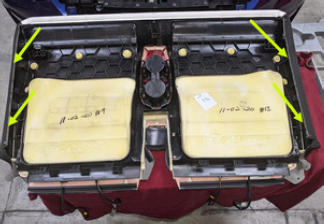 Courtesy of TESLA, INC. Courtesy of TESLA, INC.
|
- Release 3rd row cushion cover from front end of 3rd row cushion substrate
NOTE:
2x J-hooks
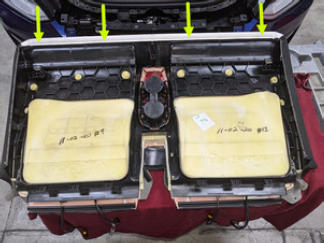 Courtesy of TESLA, INC. Courtesy of TESLA, INC.
|
- Flip 3rd row cushion assembly to access top side
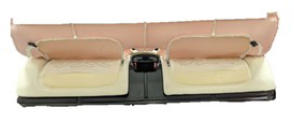 Courtesy of TESLA, INC. Courtesy of TESLA, INC.
|
- Remove hog rings securing 3rd row cushion cover onto LH seat cushion
NOTE:
9x hog rings, 2x Velcro strips, Start from leading edge and work your way towards rear of cushion.
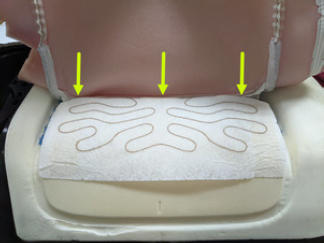 Courtesy of TESLA, INC. Courtesy of TESLA, INC.
|
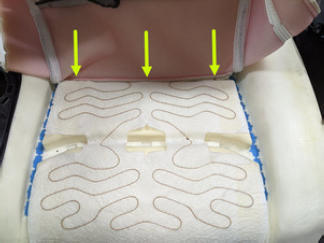 Courtesy of TESLA, INC. Courtesy of TESLA, INC.
|
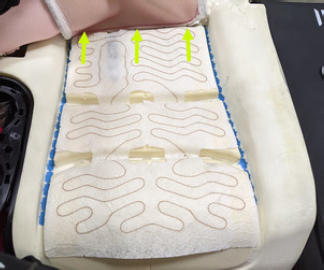 Courtesy of TESLA, INC. Courtesy of TESLA, INC.
|
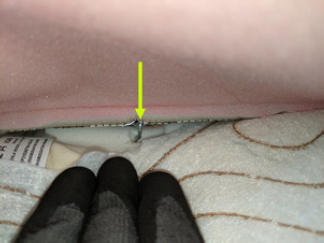 Courtesy of TESLA, INC. Courtesy of TESLA, INC.
|
- Remove 3rd row cushion cover from LH cushion foam
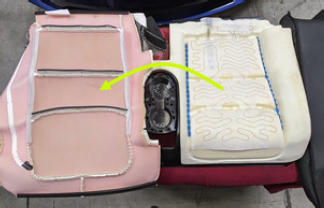 Courtesy of TESLA, INC. Courtesy of TESLA, INC.
|
- Remove 3rd row LH cushion foam from 3rd row cushion substrate
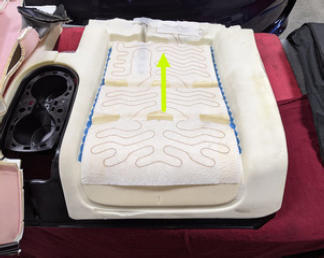 Courtesy of TESLA, INC. Courtesy of TESLA, INC.
|
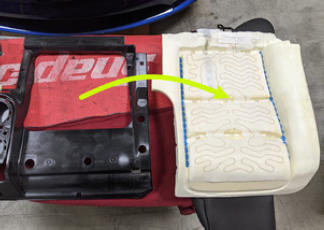 Courtesy of TESLA, INC. Courtesy of TESLA, INC.
|
- Install 3rd row cushion foam into 3rd row cushion substrate
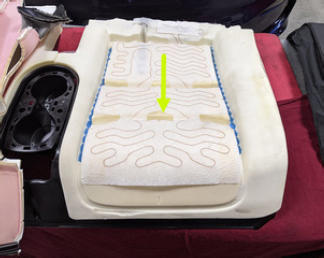 Courtesy of TESLA, INC. Courtesy of TESLA, INC.
|
- Align 3rd row cushion cover onto LH cushion foam for hog ring installation
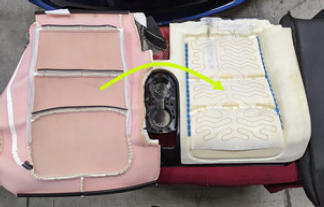 Courtesy of TESLA, INC. Courtesy of TESLA, INC.
|
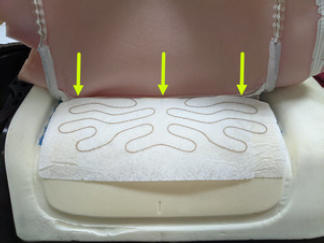
- Install 3rd row cushion cover onto LH cushion foam
NOTE:
9x hog rings, 2x velcro strips, Start from rear of cushion and work your way towards leading edge.
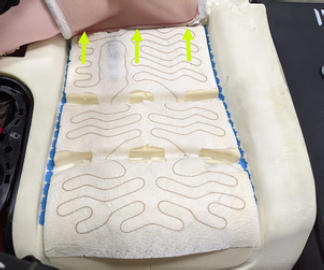 Courtesy of TESLA, INC. Courtesy of TESLA, INC.
|
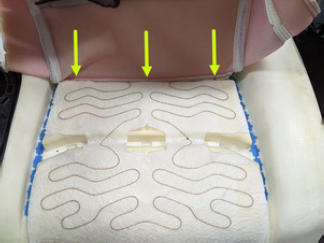 Courtesy of TESLA, INC. Courtesy of TESLA, INC.
|
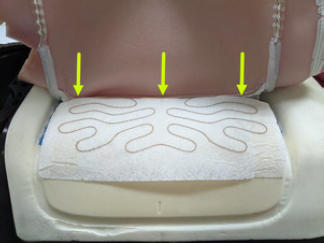 Courtesy of TESLA, INC. Courtesy of TESLA, INC.
|
 Courtesy of TESLA, INC. Courtesy of TESLA, INC.
|
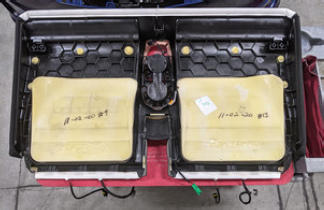
- Flip 3rd row cushion assembly to access bottom side
 Courtesy of TESLA, INC. Courtesy of TESLA, INC.
|
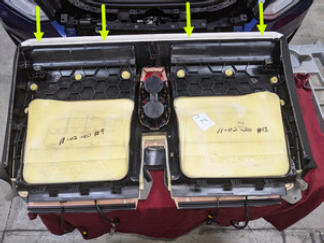
- Install 3rd row cushion cover onto rear end of cushion substrate
NOTE:
2x J-hooks
 Courtesy of TESLA, INC. Courtesy of TESLA, INC.
|
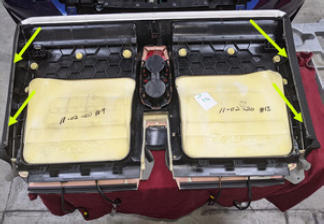
- Install 3rd row cushion cover along both sides of cushion substrate
NOTE:
2x J-hooks
 Courtesy of TESLA, INC. Courtesy of TESLA, INC.
|
- Install 3rd row cushion cover onto cup holder
NOTE:
2x J-hooks
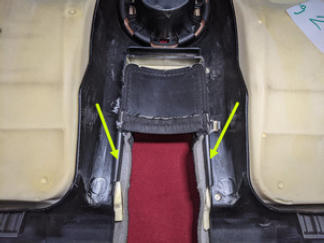 Courtesy of TESLA, INC. Courtesy of TESLA, INC.
|
- Feed 3rd row cushion harness's through cushion cover
NOTE:
4x connectors
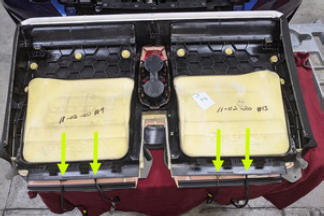 Courtesy of TESLA, INC. Courtesy of TESLA, INC.
|
- Install 3rd row cushion cover along front end of cushion substrate
NOTE:
2x J-hooks
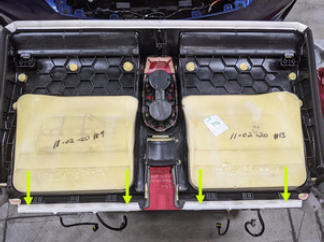 Courtesy of TESLA, INC. Courtesy of TESLA, INC.
|
- Install 3rd row cushion cover onto rear corners of cushion substrate
NOTE:
4x tabs
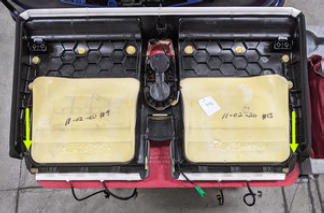 Courtesy of TESLA, INC. Courtesy of TESLA, INC.
|
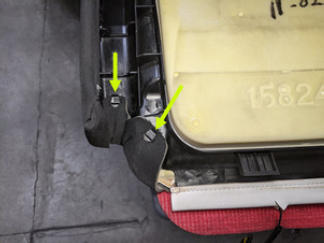 Courtesy of TESLA, INC. Courtesy of TESLA, INC.
|
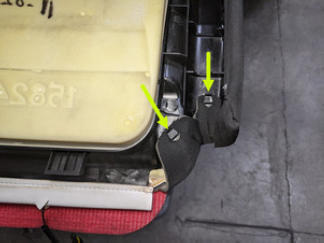 Courtesy of TESLA, INC. Courtesy of TESLA, INC.
|
- Flip 3rd row cushion assembly to access topside and inspect for any fit issues
NOTE:
If issues are present correct trim fit and proceed
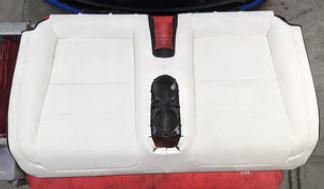 Courtesy of TESLA, INC. Courtesy of TESLA, INC.
|
- Connect 3rd row USB hub
NOTE:
1x connector
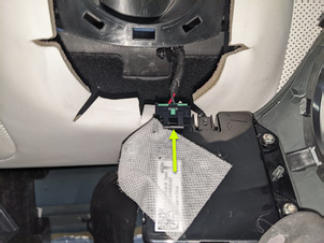 Courtesy of TESLA, INC. Courtesy of TESLA, INC.
|
- Install 3rd row cup holder fascia assembly
NOTE:
8x clips
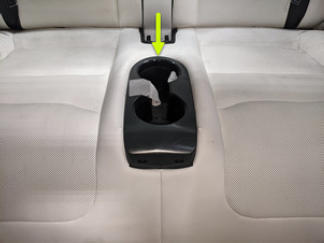 Courtesy of TESLA, INC. Courtesy of TESLA, INC.
|
- Install 3rd row seat cushion
NOTE:
2x securing tabs, Feed cushion harness's below 3rd row seat backs
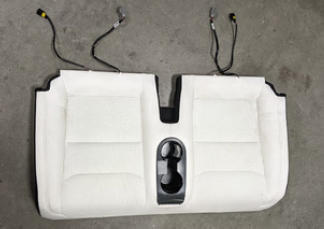 Courtesy of TESLA, INC. Courtesy of TESLA, INC.
|
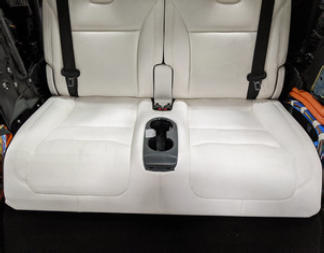 Courtesy of TESLA, INC. Courtesy of TESLA, INC.
|
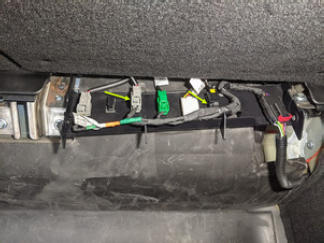
- Connect 3rd row seat cushion connections and secure to brackets
NOTE:
5x connectors
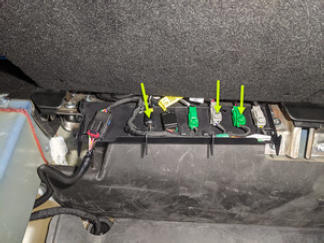 Courtesy of TESLA, INC. Courtesy of TESLA, INC.
|
 Courtesy of TESLA, INC. Courtesy of TESLA, INC.
|
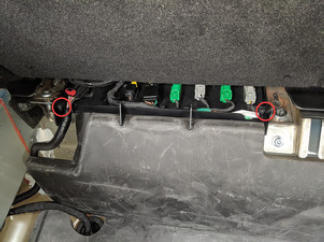
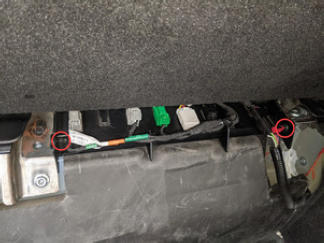
- Install 3rd row seat harness trays
NOTE:
4x push clips
 Courtesy of TESLA, INC. Courtesy of TESLA, INC.
|
 Courtesy of TESLA, INC. Courtesy of TESLA, INC.
|
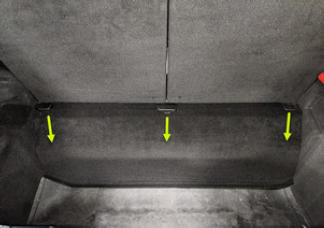
- Install trunk carpet
 Courtesy of TESLA, INC. Courtesy of TESLA, INC.
|
- Install trunk tub floor insulator
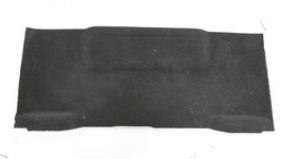 Courtesy of TESLA, INC. Courtesy of TESLA, INC.
|
- Install trunk rear load floor
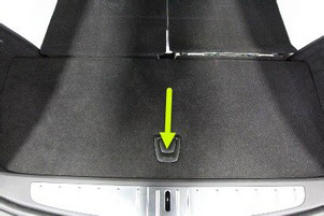 Courtesy of TESLA, INC. Courtesy of TESLA, INC.
|
- Connect First Responder Loop and LV battery connector
NOTE:
2x connectors, Secure FRL first, Seat LV battery connection and push black connector lock inwards to secure, Engage upper locking tab when fully seated
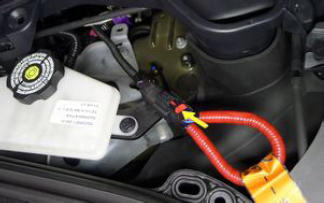 Courtesy of TESLA, INC. Courtesy of TESLA, INC.
|
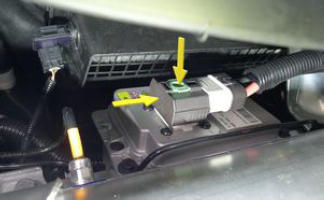 Courtesy of TESLA, INC. Courtesy of TESLA, INC.
|
- Install rear underhood apron
NOTE:
11x clips, 2x datums
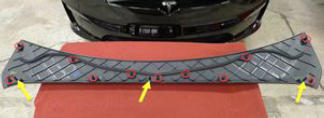 Courtesy of TESLA, INC. Courtesy of TESLA, INC.
|
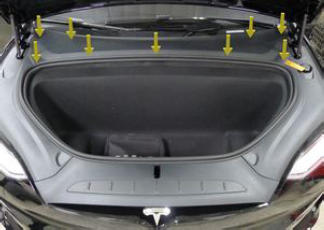 Courtesy of TESLA, INC. Courtesy of TESLA, INC.
|
- Calibrate the rear doors.
NOTE:
If the "Calibration Needed" message appears on the vehicle touchscreen, touch and hold Calibrate
to calibrate the rear doors.