- Remove LH rear outer belt trim
NOTE:
Lift and roll outward slowly and evenly starting from the rear edge, Careful not to bend or damage components
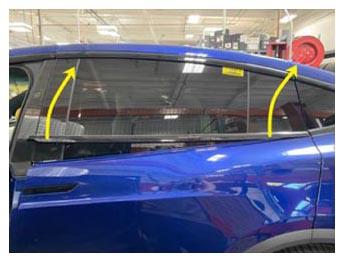 Courtesy of TESLA, INC. Courtesy of TESLA, INC.
|
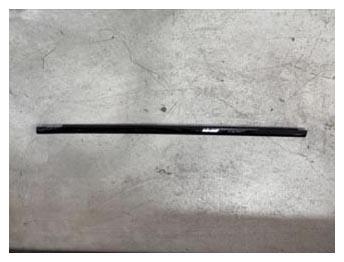 Courtesy of TESLA, INC. Courtesy of TESLA, INC.
|
- Open LH falcon wing door
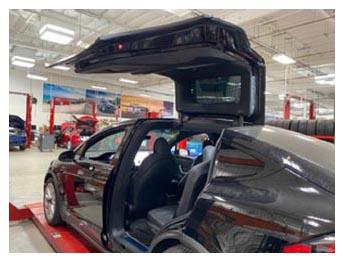 Courtesy of TESLA, INC. Courtesy of TESLA, INC.
|
- Remove LH falcon door lower garnish
NOTE:
9x V-clips, Replace any damaged or missing V-clips, Take care not to damage door trim panel during removal
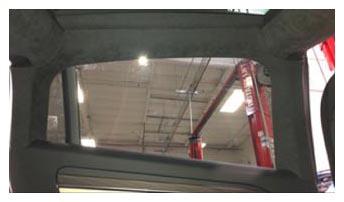 Courtesy of TESLA, INC. Courtesy of TESLA, INC.
|
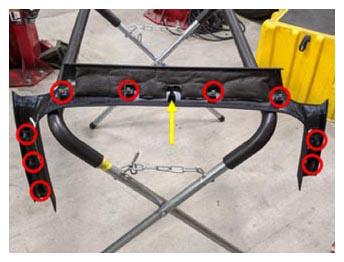 Courtesy of TESLA, INC. Courtesy of TESLA, INC.
|
- Remove LH rear decor trim panel
NOTE:
7x clips, 2x connectors
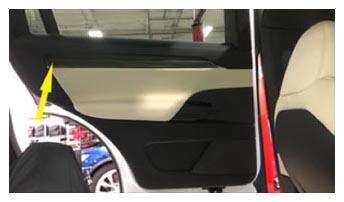 Courtesy of TESLA, INC. Courtesy of TESLA, INC.
|
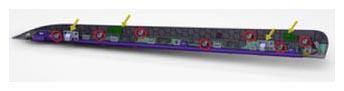 Courtesy of TESLA, INC. Courtesy of TESLA, INC.
|
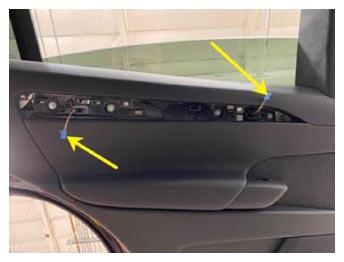 Courtesy of TESLA, INC. Courtesy of TESLA, INC.
|
- Remove LH rear door panel bolts
NOTE:
8x bolts, 10 mm, 6 N.m
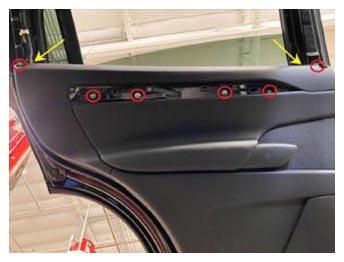 Courtesy of TESLA, INC. Courtesy of TESLA, INC.
|
- Remove LH rear door trim panel
NOTE:
13x clips, 2x connectors
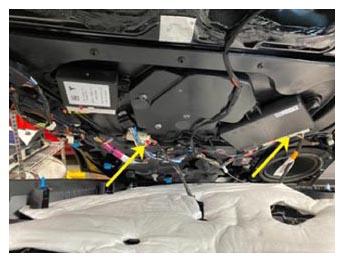 Courtesy of TESLA, INC. Courtesy of TESLA, INC.
|
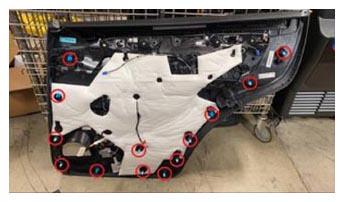 Courtesy of TESLA, INC. Courtesy of TESLA, INC.
|
- Set LH Falcon door at a comfortable working height
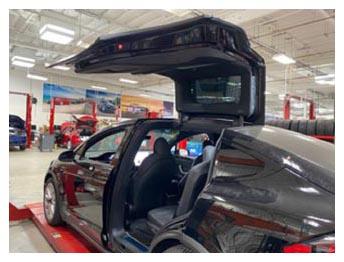 Courtesy of TESLA, INC. Courtesy of TESLA, INC.
|
- Open hood
NOTE:
Via center display > Controls > Frunk Open
- Power off vehicle via center display
NOTE:
Controls > Safety & Security > Power Off
- Remove rear underhood apron
NOTE:
11x clips, 2x datums
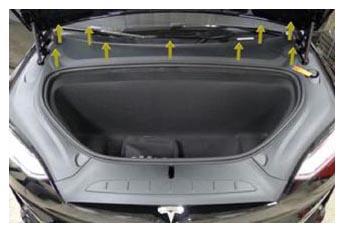 Courtesy of TESLA, INC. Courtesy of TESLA, INC.
|
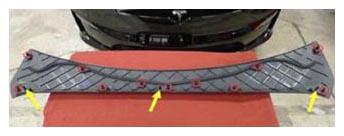 Courtesy of TESLA, INC. Courtesy of TESLA, INC.
|
- Disconnect LV battery connector and First Responder Loop
NOTE:
2x connectors, Lift up and release green locking tab, Pull black connector lock outwards to release connection, Release red lock tab on FRL
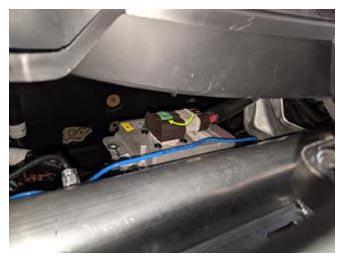 Courtesy of TESLA, INC. Courtesy of TESLA, INC.
|
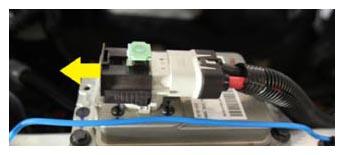 Courtesy of TESLA, INC. Courtesy of TESLA, INC.
|
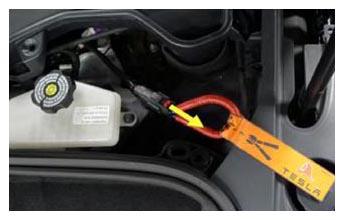 Courtesy of TESLA, INC. Courtesy of TESLA, INC.
|
- Disconnect LH falcon door air bag connector
NOTE:
1x connector, Release orange lock and then disconnect
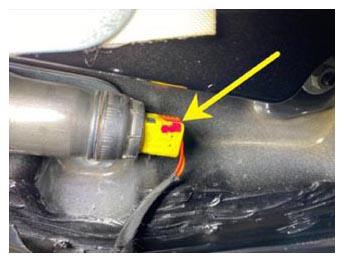 Courtesy of TESLA, INC. Courtesy of TESLA, INC.
|
- Remove screws securing LH closeout panel
NOTE:
10x bolts, T25, 1.8 N.m
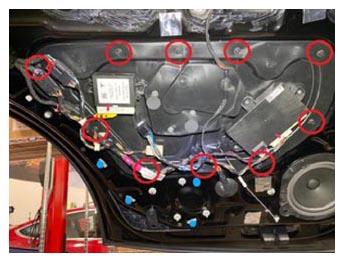 Courtesy of TESLA, INC. Courtesy of TESLA, INC.
|
- Remove screws securing window motor to the LH closeout panel
NOTE:
3x screws, T30, 1.8 N.m
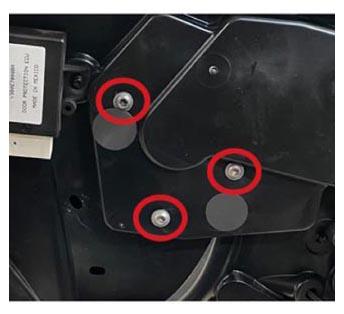 Courtesy of TESLA, INC. Courtesy of TESLA, INC.
|
- Pull LH closeout panel away from door and lift window motor up to release
NOTE:
2x tabs
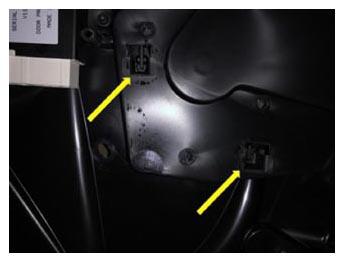 Courtesy of TESLA, INC. Courtesy of TESLA, INC.
|
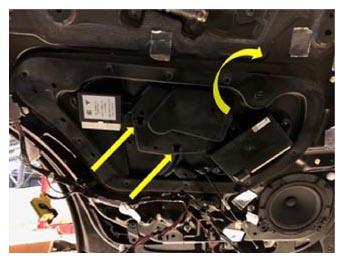 Courtesy of TESLA, INC. Courtesy of TESLA, INC.
|
- Disconnect falcon door protection ECU
NOTE:
1x connector, Release black locking tab
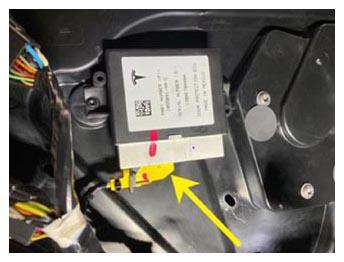 Courtesy of TESLA, INC. Courtesy of TESLA, INC.
|
- Disconnect connectors from falcon door module
NOTE:
2x connectors
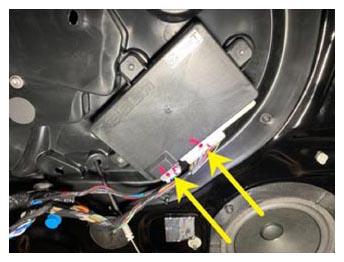 Courtesy of TESLA, INC. Courtesy of TESLA, INC.
|
- Release clips securing harnesses and connectors to the LH closeout panel
NOTE:
7x clips
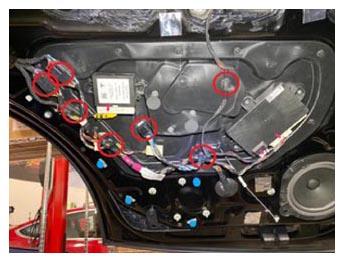 Courtesy of TESLA, INC. Courtesy of TESLA, INC.
|
- Unclip and feed door release cable through LH closeout panel
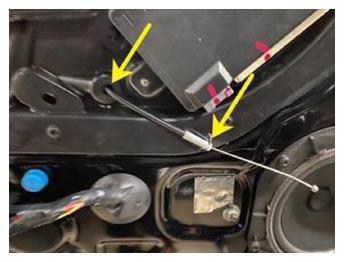 Courtesy of TESLA, INC. Courtesy of TESLA, INC.
|
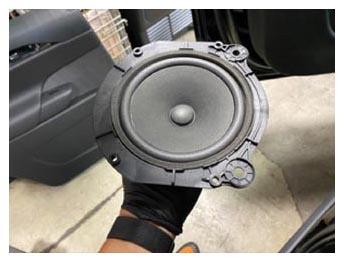
- Remove bolts securing door speaker and disconnect harness connector
NOTE:
3x bolts, T25, 4 N.m, 1x connector
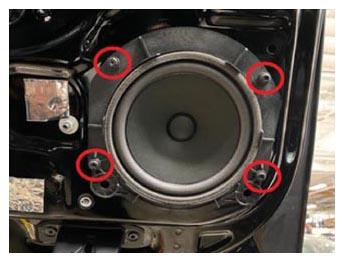 Courtesy of TESLA, INC. Courtesy of TESLA, INC.
|
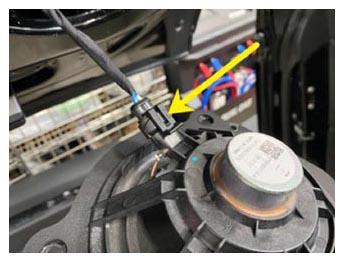 Courtesy of TESLA, INC. Courtesy of TESLA, INC.
|
 Courtesy of TESLA, INC. Courtesy of TESLA, INC.
|
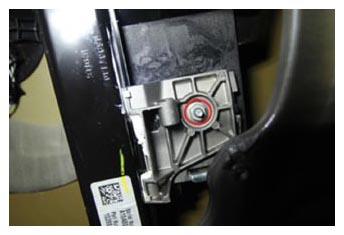
- Loosen nut securing the front of the window to the regulator
NOTE:
1x nut, 10 mm, 9 N.m, Nut does not need to be fully removed, If required power the vehicle back on and use the window switch tool to move regulator for nut access
 Courtesy of TESLA, INC. Courtesy of TESLA, INC.
|
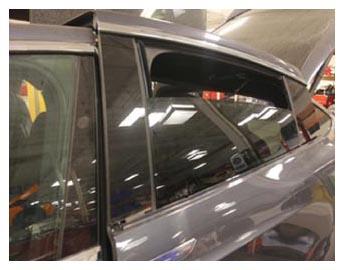
- Partially close LH rear door
NOTE:
Do not engage latch
 Courtesy of TESLA, INC. Courtesy of TESLA, INC.
|
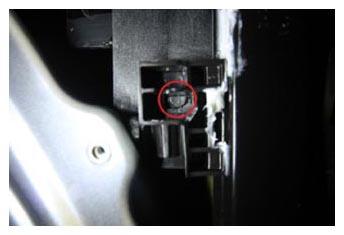
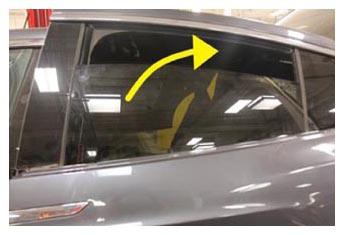
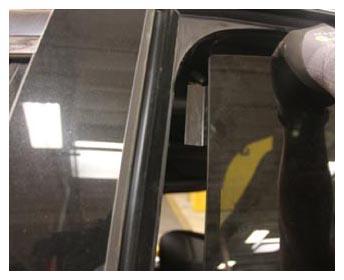
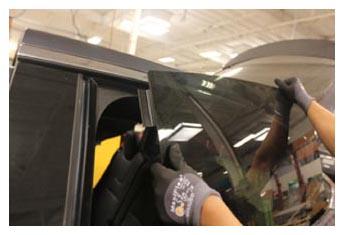
- Release clip securing rear of window to regulator and remove glass from vehicle
NOTE:
1x clip, Recommend assistance, Working from the outside of the vehicle, Pull the front of the window towards the rear of the vehicle and then lift the window out from the door, Take caution do not damage any components
 Courtesy of TESLA, INC. Courtesy of TESLA, INC.
|
 Courtesy of TESLA, INC. Courtesy of TESLA, INC.
|
 Courtesy of TESLA, INC. Courtesy of TESLA, INC.
|
 Courtesy of TESLA, INC. Courtesy of TESLA, INC.
|
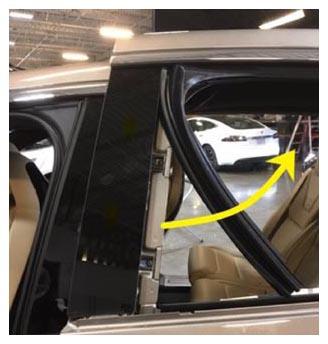
- Partially release LH rear door fixed door glass seal from front falcon door applique
NOTE:
Release LH rear door fixed door glass seal to gain access to fasteners securing front falcon door applique
 Courtesy of TESLA, INC. Courtesy of TESLA, INC.
|
- Remove screws securing LH front falcon door applique
NOTE:
2x screws, T25, 3 N.m
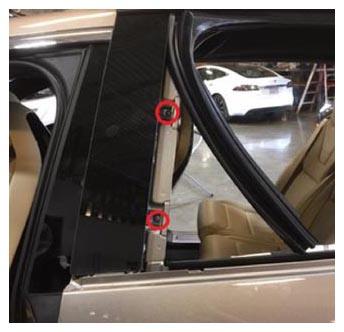 Courtesy of TESLA, INC. Courtesy of TESLA, INC.
|
- Remove LH front falcon door applique
NOTE:
2x clips
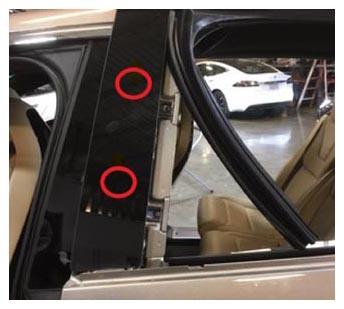 Courtesy of TESLA, INC. Courtesy of TESLA, INC.
|
- Remove LH rear inner belt seal
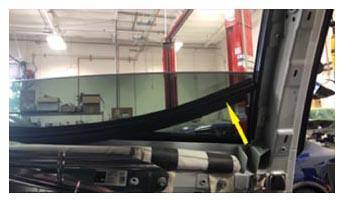 Courtesy of TESLA, INC. Courtesy of TESLA, INC.
|
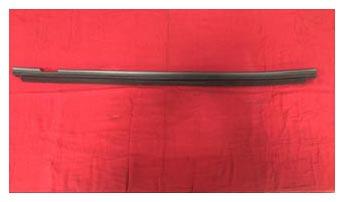 Courtesy of TESLA, INC. Courtesy of TESLA, INC.
|
- Remove fasteners
NOTE:
1x bolt 7 N.m, 1x fir clip
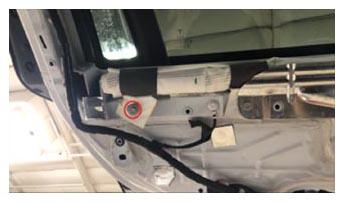 Courtesy of TESLA, INC. Courtesy of TESLA, INC.
|
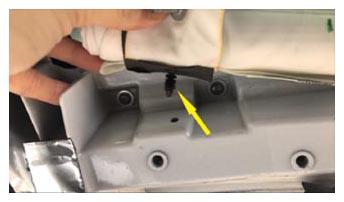 Courtesy of TESLA, INC. Courtesy of TESLA, INC.
|
- Fold down air bag
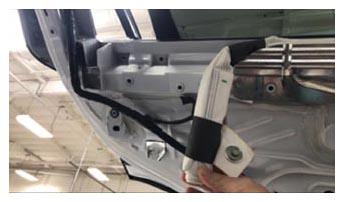 Courtesy of TESLA, INC. Courtesy of TESLA, INC.
|
- Partially remove rear pinch sensor
NOTE:
7x push clips
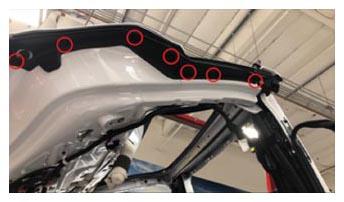 Courtesy of TESLA, INC. Courtesy of TESLA, INC.
|
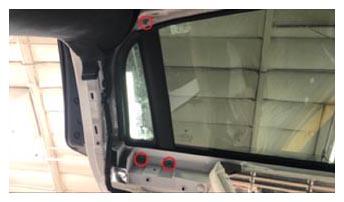
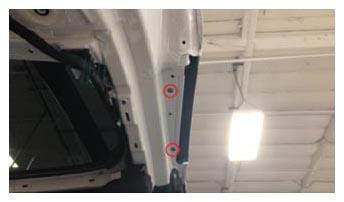
- Remove LH rear fixed glass fasteners
NOTE:
5x T25 bolts 4.5 N.m
 Courtesy of TESLA, INC. Courtesy of TESLA, INC.
|
 Courtesy of TESLA, INC. Courtesy of TESLA, INC.
|
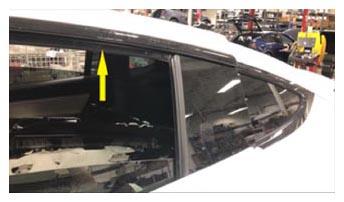
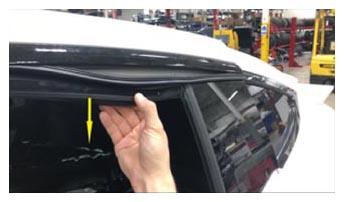
- Partially remove LH rear window seal
 Courtesy of TESLA, INC. Courtesy of TESLA, INC.
|
 Courtesy of TESLA, INC. Courtesy of TESLA, INC.
|
- Remove LH rear door fixed glass
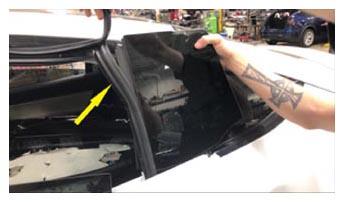 Courtesy of TESLA, INC. Courtesy of TESLA, INC.
|
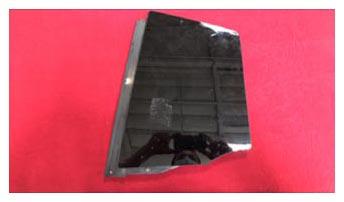 Courtesy of TESLA, INC. Courtesy of TESLA, INC.
|
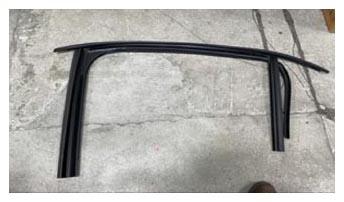
- Remove rear door fixed glass seal
NOTE:
Pull seal down from upper outer belt molding and then up out of the door to remove
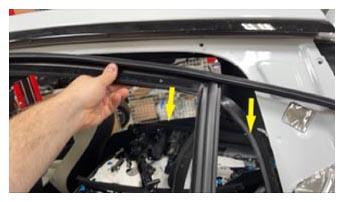 Courtesy of TESLA, INC. Courtesy of TESLA, INC.
|
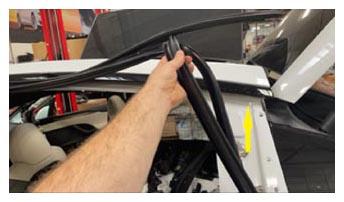 Courtesy of TESLA, INC. Courtesy of TESLA, INC.
|
 Courtesy of TESLA, INC. Courtesy of TESLA, INC.
|
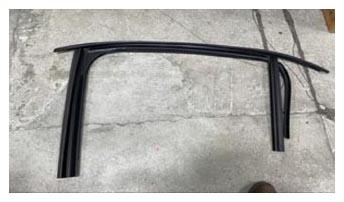
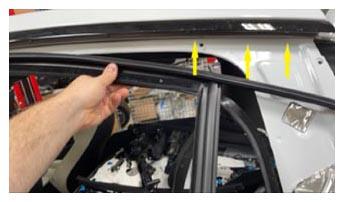
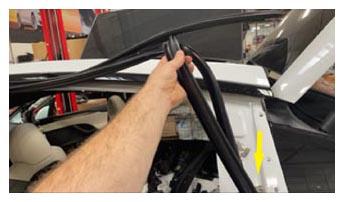
- Install rear door fixed glass seal
NOTE:
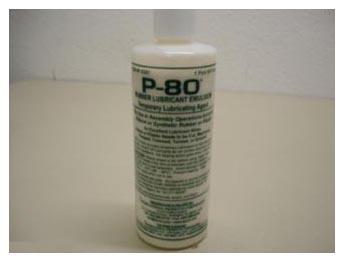
Apply P-80 Emulsion Grease onto seal, Install seal down into door and then press up into upper outer belt molding
 Courtesy of TESLA, INC. Courtesy of TESLA, INC.
|
 Courtesy of TESLA, INC. Courtesy of TESLA, INC.
|
 Courtesy of TESLA, INC. Courtesy of TESLA, INC.
|
 Courtesy of TESLA, INC. Courtesy of TESLA, INC.
|
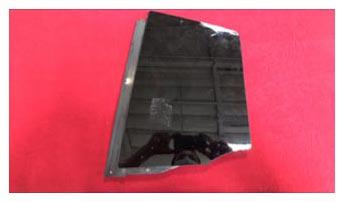
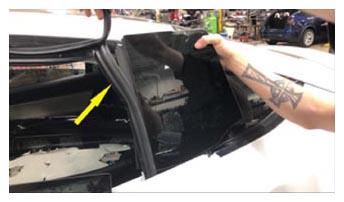
- Install LH rear door fixed glass
 Courtesy of TESLA, INC. Courtesy of TESLA, INC.
|
 Courtesy of TESLA, INC. Courtesy of TESLA, INC.
|
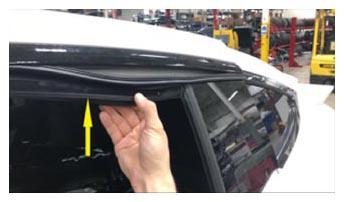
- Secure LH rear window seal
 Courtesy of TESLA, INC. Courtesy of TESLA, INC.
|
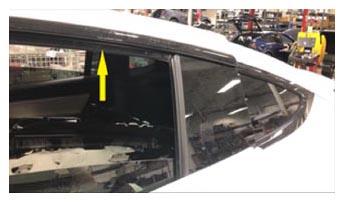 Courtesy of TESLA, INC. Courtesy of TESLA, INC.
|
- Install LH rear fixed glass fasteners
NOTE:
5x T25 bolts 4.5 N.m
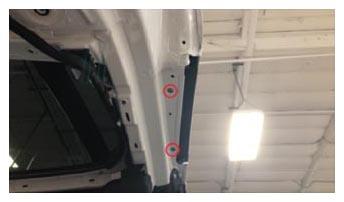 Courtesy of TESLA, INC. Courtesy of TESLA, INC.
|
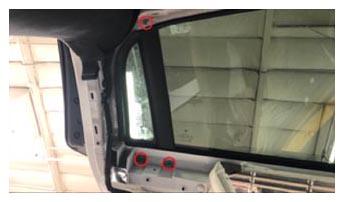 Courtesy of TESLA, INC. Courtesy of TESLA, INC.
|
- Secure LH rear pinch sensor
NOTE:
7x clips
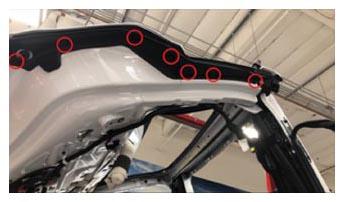 Courtesy of TESLA, INC. Courtesy of TESLA, INC.
|
- Secure LH rear door air bag
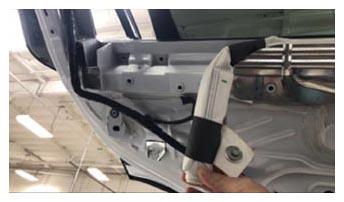 Courtesy of TESLA, INC. Courtesy of TESLA, INC.
|
- Install LH rear door air bag fasteners
NOTE:
1x bolt 7 N.m, 1x fur clip
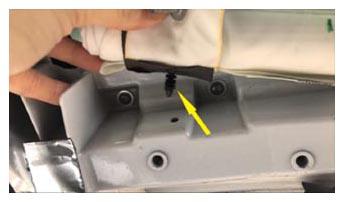 Courtesy of TESLA, INC. Courtesy of TESLA, INC.
|
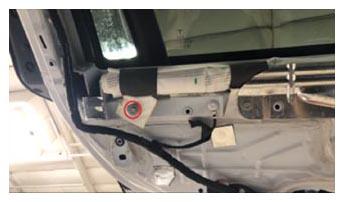 Courtesy of TESLA, INC. Courtesy of TESLA, INC.
|
- Install LH rear inner belt seal
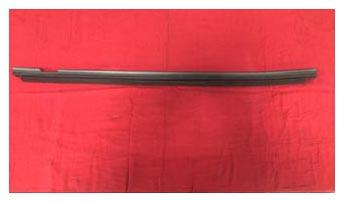 Courtesy of TESLA, INC. Courtesy of TESLA, INC.
|
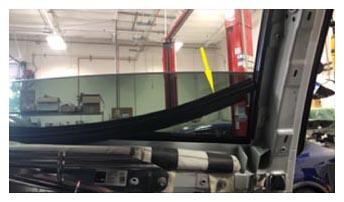 Courtesy of TESLA, INC. Courtesy of TESLA, INC.
|
- Install LH front falcon door applique
NOTE:
2x clips
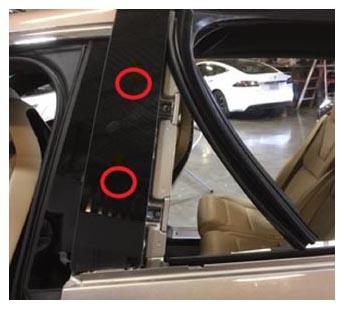 Courtesy of TESLA, INC. Courtesy of TESLA, INC.
|
- Install screws securing LH front falcon door applique
NOTE:
2x screws, T25, 3 N.m
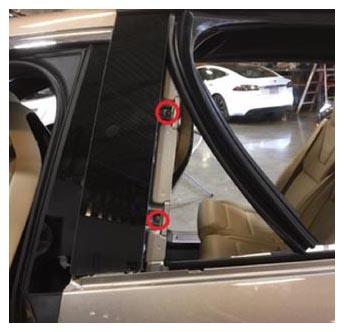 Courtesy of TESLA, INC. Courtesy of TESLA, INC.
|
- Install LH rear door fixed door glass seal onto front falcon door applique
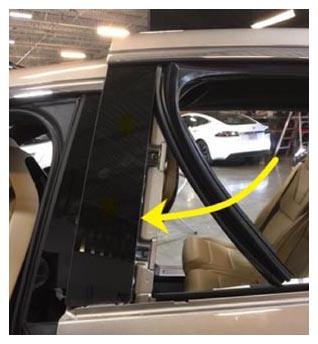 Courtesy of TESLA, INC. Courtesy of TESLA, INC.
|
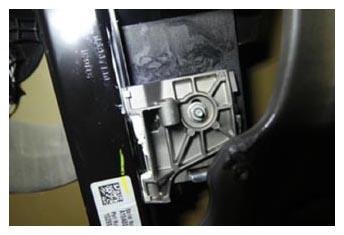
- Install window glass into vehicle and seat it onto the regulator
NOTE:
1x clip, Recommend assistance, Carefully feed window glass into door and seat it into the rear clip and forward brace
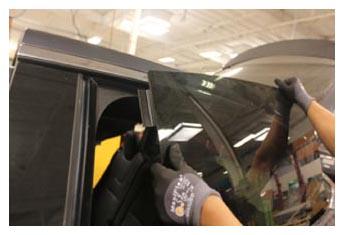 Courtesy of TESLA, INC. Courtesy of TESLA, INC.
|
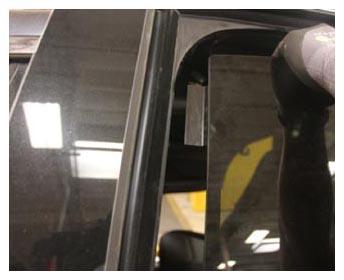 Courtesy of TESLA, INC. Courtesy of TESLA, INC.
|
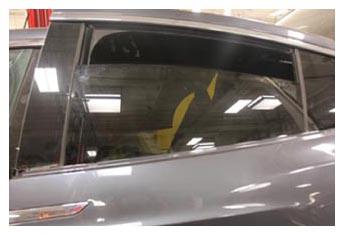 Courtesy of TESLA, INC. Courtesy of TESLA, INC.
|
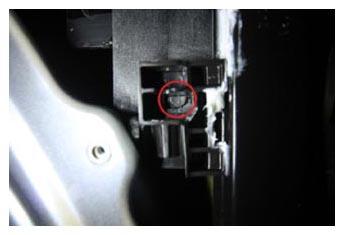 Courtesy of TESLA, INC. Courtesy of TESLA, INC.
|
 Courtesy of TESLA, INC. Courtesy of TESLA, INC.
|
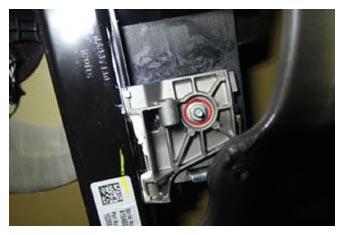
- Verify window glass fitment and tighten nut securing the front of the window to the regulator
NOTE:
1x nut, 10 mm, 9 N.m,
 Courtesy of TESLA, INC. Courtesy of TESLA, INC.
|
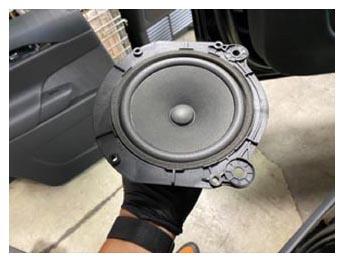
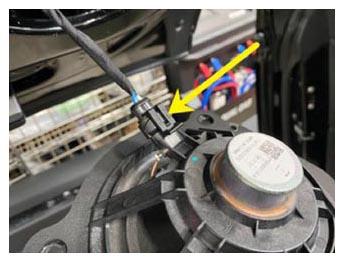
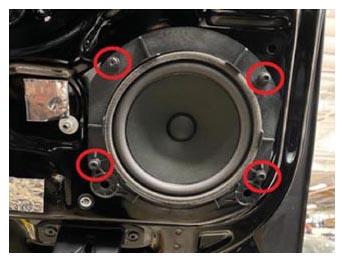
- Install LH falcon door speaker
NOTE:
4x screws, T25, 4 N.m, 1x connector
 Courtesy of TESLA, INC. Courtesy of TESLA, INC.
|
 Courtesy of TESLA, INC. Courtesy of TESLA, INC.
|
 Courtesy of TESLA, INC. Courtesy of TESLA, INC.
|
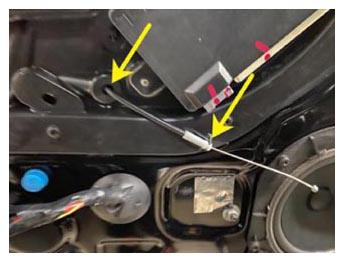
- Install release cable through the LH closeout panel
 Courtesy of TESLA, INC. Courtesy of TESLA, INC.
|
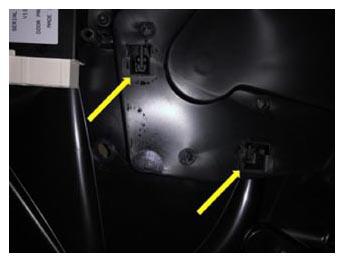
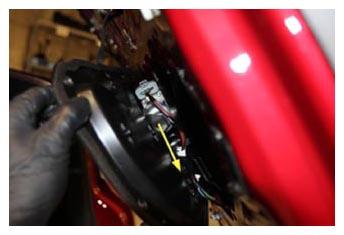
- Secure window motor onto the back of the closeout panel
NOTE:
2x tabs
 Courtesy of TESLA, INC. Courtesy of TESLA, INC.
|
 Courtesy of TESLA, INC. Courtesy of TESLA, INC.
|
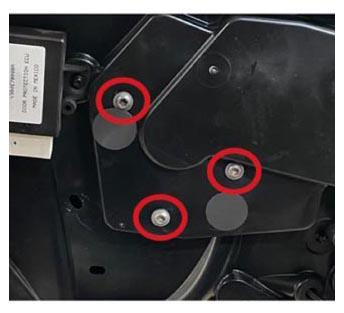
- Install screws securing window motor to LH closeout panel
NOTE:
3x screws, T30, 1.8 N.m
 Courtesy of TESLA, INC. Courtesy of TESLA, INC.
|
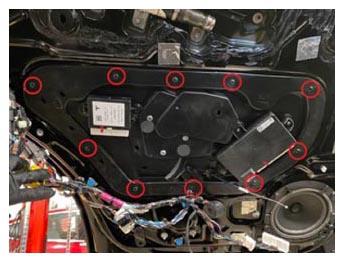
- Install LH closeout panel
NOTE:
10x bolts, T25, 1.8 N.m
 Courtesy of TESLA, INC. Courtesy of TESLA, INC.
|
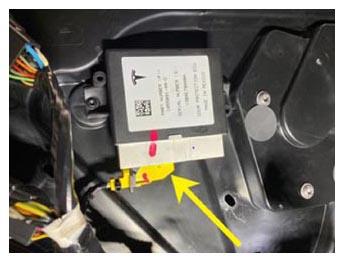
- Connect falcon door protection ECU
NOTE:
1x connector, securing locking tab
 Courtesy of TESLA, INC. Courtesy of TESLA, INC.
|
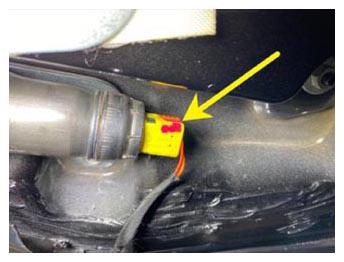
- Connect LH falcon door air bag connector
NOTE:
1x connector, Engage locking tab
 Courtesy of TESLA, INC. Courtesy of TESLA, INC.
|
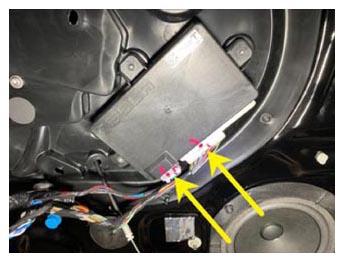
- Connect LH falcon door module
NOTE:
2x connectors
 Courtesy of TESLA, INC. Courtesy of TESLA, INC.
|
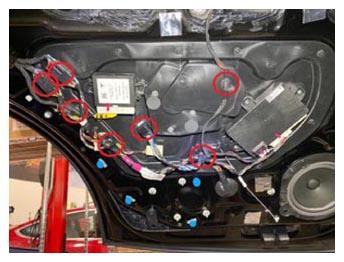
- Install clips securing harnesses and connectors to closeout panel
NOTE:
7x clips
 Courtesy of TESLA, INC. Courtesy of TESLA, INC.
|
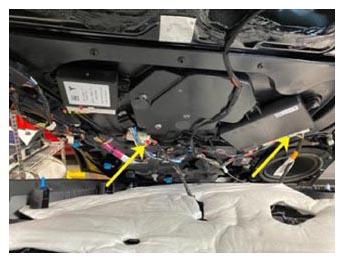
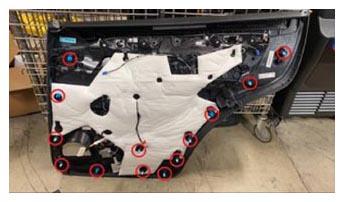
- Install LH rear door trim panel
NOTE:
2x connectors, 13 clips, replace all clips, Install door trim starting from top and make sure the door trim tap is fitted correctly on the inner belt seal
 Courtesy of TESLA, INC. Courtesy of TESLA, INC.
|
 Courtesy of TESLA, INC. Courtesy of TESLA, INC.
|
- Install LH rear door trim bolts securing door trim panel to door
NOTE:
8x bolts, 10 mm, 6 N.m
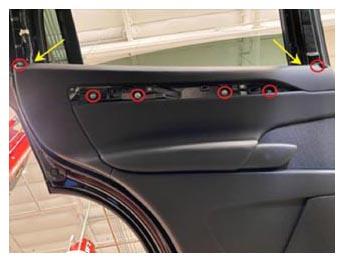 Courtesy of TESLA, INC. Courtesy of TESLA, INC.
|
- Install LH rear door decor trim panel
NOTE:
7x clips, 2x connectors, Take care not to damage door trim panel
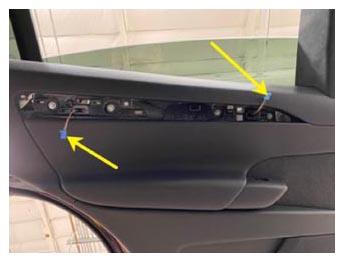 Courtesy of TESLA, INC. Courtesy of TESLA, INC.
|
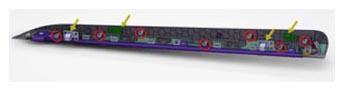 Courtesy of TESLA, INC. Courtesy of TESLA, INC.
|
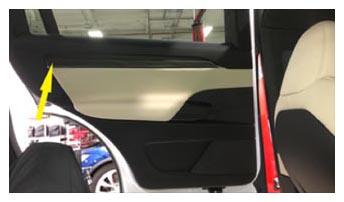 Courtesy of TESLA, INC. Courtesy of TESLA, INC.
|
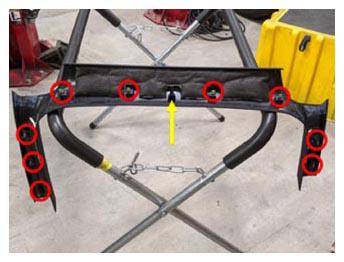
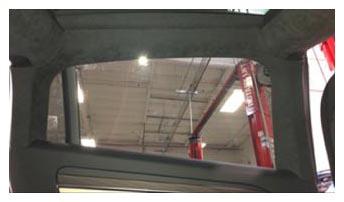
- Install LH rear lower door garnish
NOTE:
9x V-clips
 Courtesy of TESLA, INC. Courtesy of TESLA, INC.
|
 Courtesy of TESLA, INC. Courtesy of TESLA, INC.
|
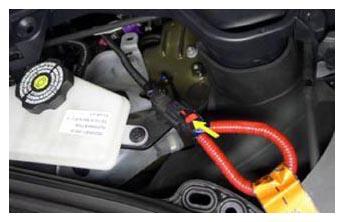
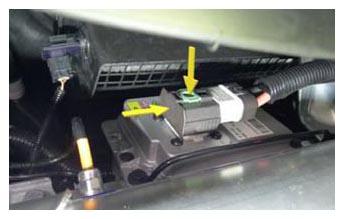
- Connect First Responder Loop and LV battery connector
NOTE:
2x connectors, Secure FRL first, Seat LV battery connection and push black connector lock inwards to secure, Engage upper locking tab when fully seated
 Courtesy of TESLA, INC. Courtesy of TESLA, INC.
|
 Courtesy of TESLA, INC. Courtesy of TESLA, INC.
|
- Install rear underhood apron
NOTE:
11x clips, 2x datums
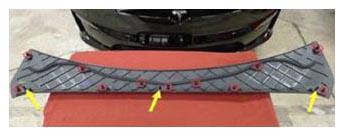 Courtesy of TESLA, INC. Courtesy of TESLA, INC.
|
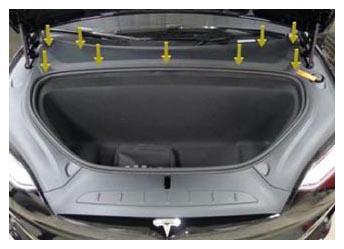 Courtesy of TESLA, INC. Courtesy of TESLA, INC.
|
- Close hood
- Calibrate the rear doors.
NOTE:
If the "Calibration Needed" message appears on the vehicle touchscreen, touch and hold Calibrate
to calibrate the rear doors.
- Install LH rear door outer belt trim
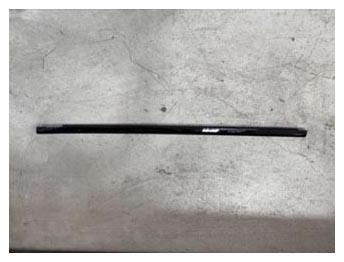 Courtesy of TESLA, INC. Courtesy of TESLA, INC.
|
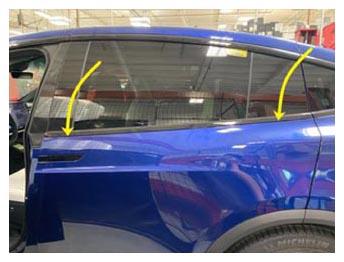 Courtesy of TESLA, INC. Courtesy of TESLA, INC.
|
- Test window function and check window fitment, adjust as needed
NOTE:
Refer to CVIS for latest specifications https://service.teslamotors.com/protected-doc/ModelS/TheoryOp/InspectionStandards/index_frames.html
 Courtesy of TESLA, INC. Courtesy of TESLA, INC.
|