- Open LH front door
- Lower LH front window
- Remove LH mid A-pillar trim
NOTE:
1x clip, 2x tabs
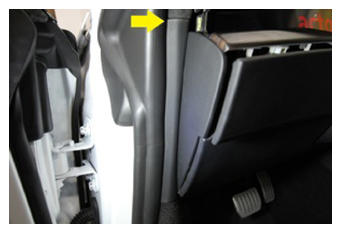 Courtesy of TESLA, INC. Courtesy of TESLA, INC.
|
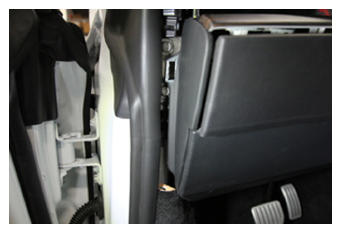 Courtesy of TESLA, INC. Courtesy of TESLA, INC.
|
- Remove LH IP end cap
NOTE:
4x clips
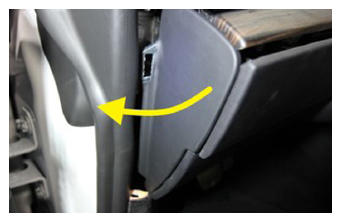 Courtesy of TESLA, INC. Courtesy of TESLA, INC.
|
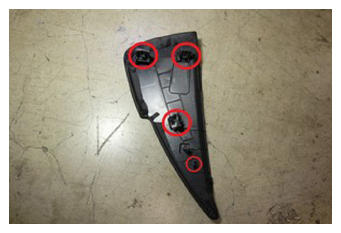 Courtesy of TESLA, INC. Courtesy of TESLA, INC.
|
- Remove LH upper A-pillar trim
NOTE:
2x tethered clips, 1x clip, 1x connector, Pull inside of the upper portion of upper A-pillar, Depress 2x tabs to remove each tether from body side, Disconnect tweeter, Then pull upper A-pillar upward to remove
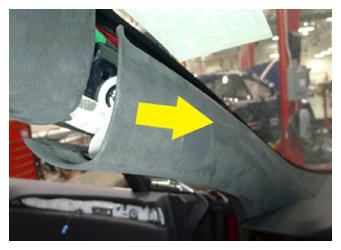 Courtesy of TESLA, INC. Courtesy of TESLA, INC.
|
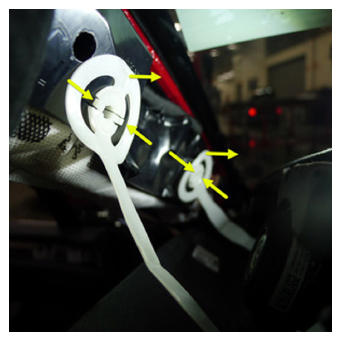 Courtesy of TESLA, INC. Courtesy of TESLA, INC.
|
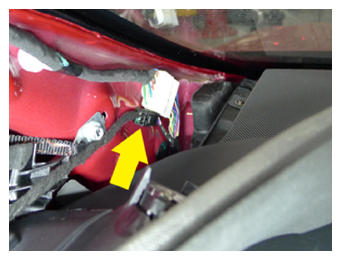 Courtesy of TESLA, INC. Courtesy of TESLA, INC.
|
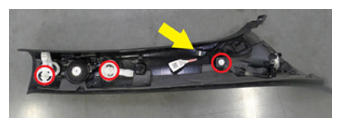 Courtesy of TESLA, INC. Courtesy of TESLA, INC.
|
- Remove LH sun visor bracket cover
NOTE:
4x clips, Extending the sun visor may allow for extra working room
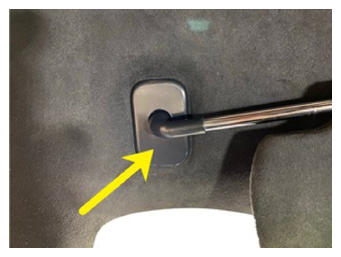 Courtesy of TESLA, INC. Courtesy of TESLA, INC.
|
- Remove LH sun visor fastener
NOTE:
1x screw, T25, 3.5 N.m, Extending the sun visor may allow for extra working room
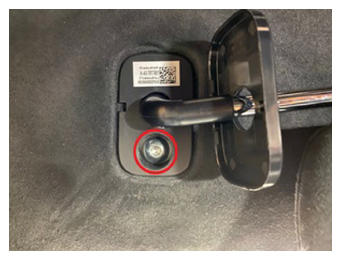 Courtesy of TESLA, INC. Courtesy of TESLA, INC.
|
- Remove LH sun visor from headliner area
NOTE:
Fold sun visor to the closed and folded down position but do not latch in place
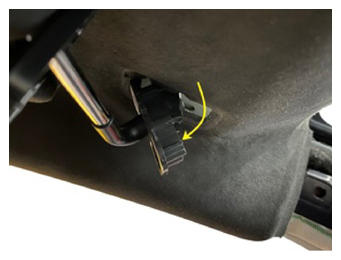 Courtesy of TESLA, INC. Courtesy of TESLA, INC.
|
- Disconnect LH sun visor connector
NOTE:
1x connector
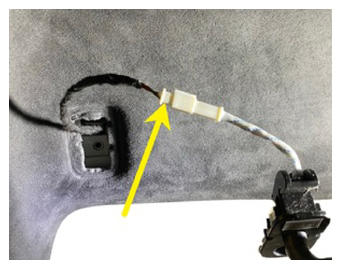 Courtesy of TESLA, INC. Courtesy of TESLA, INC.
|
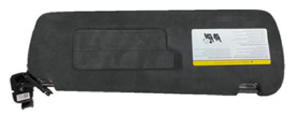 Courtesy of TESLA, INC. Courtesy of TESLA, INC.
|
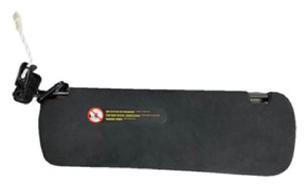 Courtesy of TESLA, INC. Courtesy of TESLA, INC.
|
- Open RH front door
- Remove RH mid A-pillar trim
NOTE:
1x clip, 2x tabs
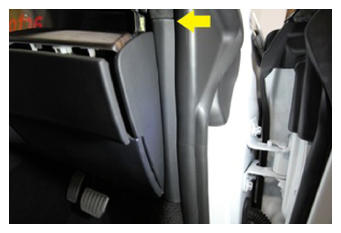 Courtesy of TESLA, INC. Courtesy of TESLA, INC.
|
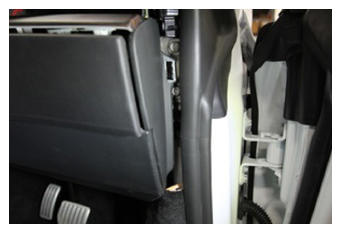 Courtesy of TESLA, INC. Courtesy of TESLA, INC.
|
- Remove RH IP end cap
NOTE:
4x clips
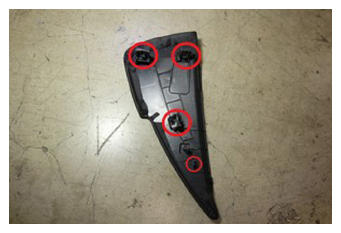 Courtesy of TESLA, INC. Courtesy of TESLA, INC.
|
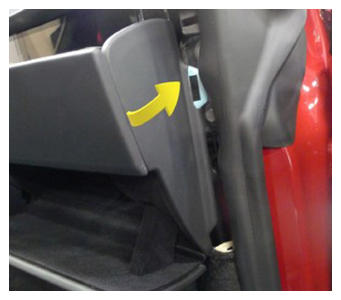 Courtesy of TESLA, INC. Courtesy of TESLA, INC.
|
- Remove RH upper A-pillar trim
NOTE:
2x tethered clips, 1x clip, 1x connector, Pull inside of the upper portion of upper A-pillar, Depress 2x tabs to remove each tether from body side, Disconnect tweeter, Then pull upper A-pillar upward to remove
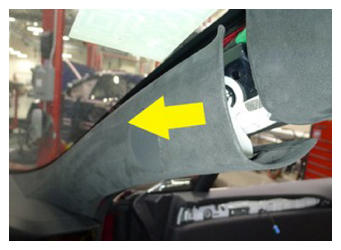 Courtesy of TESLA, INC. Courtesy of TESLA, INC.
|
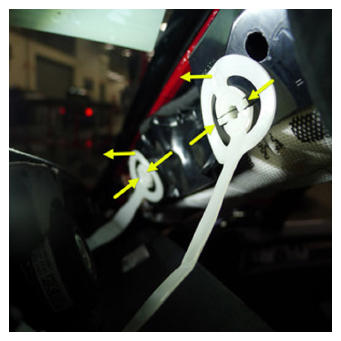 Courtesy of TESLA, INC. Courtesy of TESLA, INC.
|
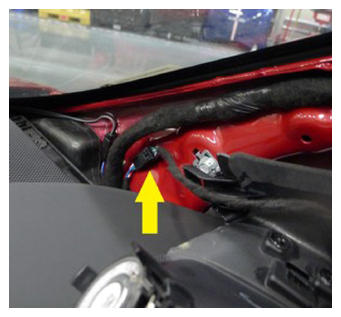 Courtesy of TESLA, INC. Courtesy of TESLA, INC.
|
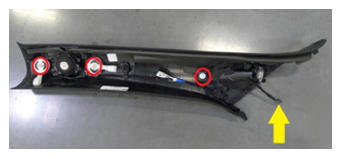 Courtesy of TESLA, INC. Courtesy of TESLA, INC.
|
- Remove RH sun visor bracket cover
NOTE:
4x clips, Extending the sun visor may allow for extra working room
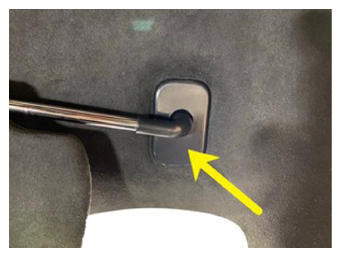 Courtesy of TESLA, INC. Courtesy of TESLA, INC.
|
- Remove RH sun visor fastener
NOTE:
1x screw, T25, 3.5 N.m, Extending the sun visor may allow for extra working room
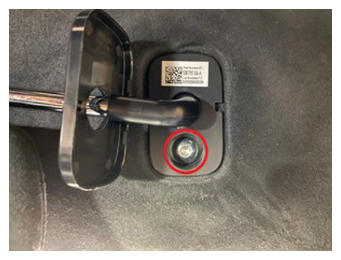 Courtesy of TESLA, INC. Courtesy of TESLA, INC.
|
- Remove RH sun visor from headliner area
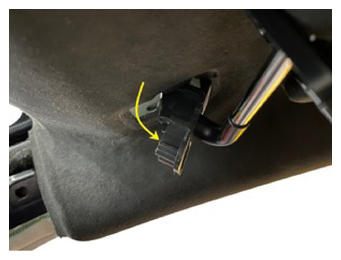 Courtesy of TESLA, INC. Courtesy of TESLA, INC.
|
- Disconnect RH sun visor connector
NOTE:
1x connector
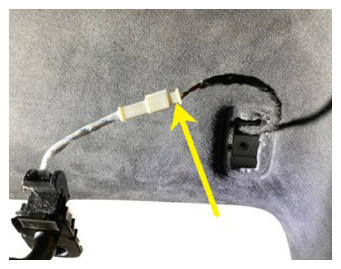 Courtesy of TESLA, INC. Courtesy of TESLA, INC.
|
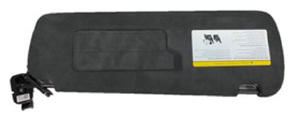 Courtesy of TESLA, INC. Courtesy of TESLA, INC.
|
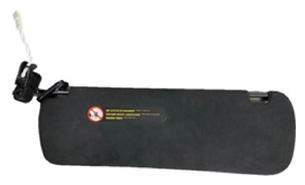 Courtesy of TESLA, INC. Courtesy of TESLA, INC.
|
- Release rear view mirror lower cover
NOTE:
4x tabs, Press inward on the sides of the cover and pull the bottom edge downward to release
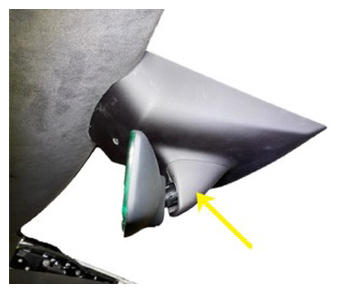 Courtesy of TESLA, INC. Courtesy of TESLA, INC.
|
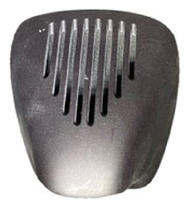 Courtesy of TESLA, INC. Courtesy of TESLA, INC.
|
- Disconnect rear view mirror connector
NOTE:
1x connector
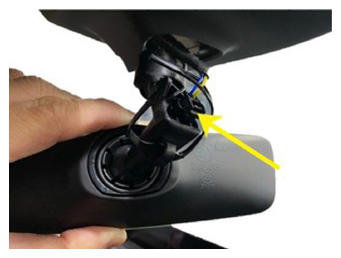 Courtesy of TESLA, INC. Courtesy of TESLA, INC.
|
- Remove rear view mirror
NOTE:
Rotate mirror to release
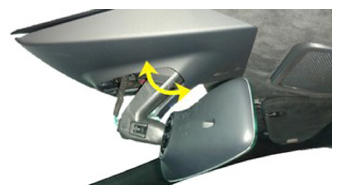 Courtesy of TESLA, INC. Courtesy of TESLA, INC.
|
- Remove upper rear view mirror cover
NOTE:
4x clips, 3x connectors, Carefully pull down on upper rear view mirror cover to release from clips
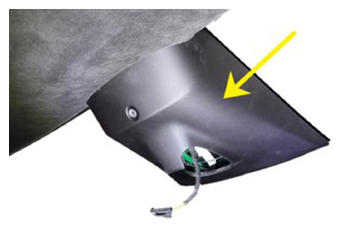 Courtesy of TESLA, INC. Courtesy of TESLA, INC.
|
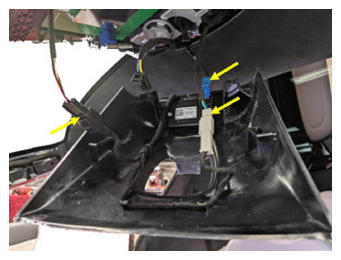 Courtesy of TESLA, INC. Courtesy of TESLA, INC.
|
- Move LH front seat forward
- Open LH rear door
- Release LH front seat belt
NOTE:
Turn release mechanism counter clockwise, turn back clockwise after releasing
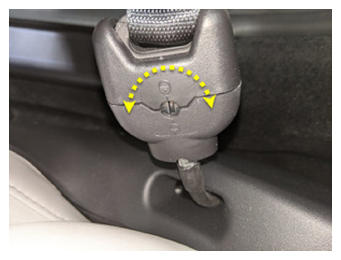 Courtesy of TESLA, INC. Courtesy of TESLA, INC.
|
- Partially release LH lower B-pillar
NOTE:
6x clips, Release from upper trim and body
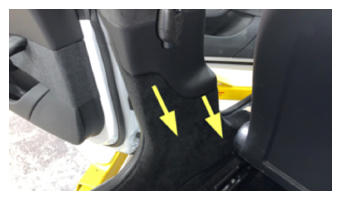 Courtesy of TESLA, INC. Courtesy of TESLA, INC.
|
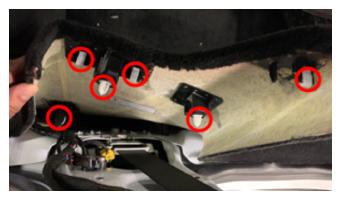 Courtesy of TESLA, INC. Courtesy of TESLA, INC.
|
- Remove LH upper B-pillar
NOTE:
7x clips, Release clips and route seatbelt through B-pillar, Be cautious not to separate the upper B-pillar, There are plastic welds near the center of trim holding upper and lower portion together
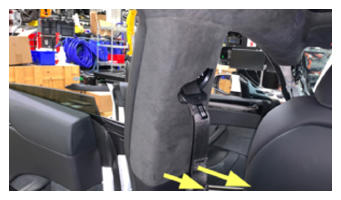 Courtesy of TESLA, INC. Courtesy of TESLA, INC.
|
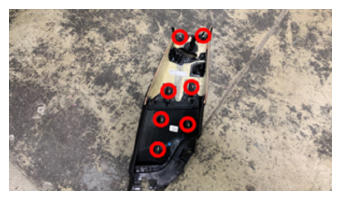 Courtesy of TESLA, INC. Courtesy of TESLA, INC.
|
- Push open LH coat hook
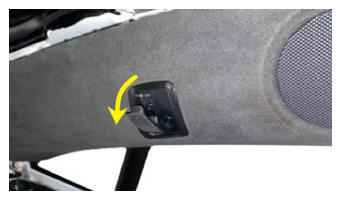 Courtesy of TESLA, INC. Courtesy of TESLA, INC.
|
- Pry open LH coat hook screw cover
NOTE:
2x tabs
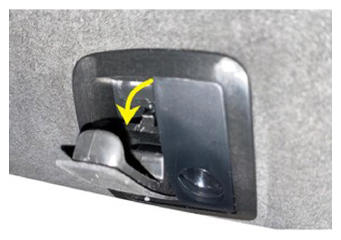 Courtesy of TESLA, INC. Courtesy of TESLA, INC.
|
- Remove LH coat hook screw
NOTE:
1x screw, T25, 2.5 N.m
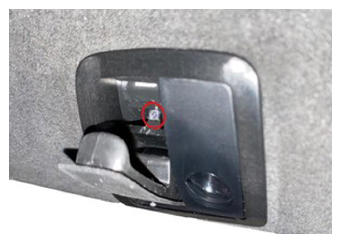 Courtesy of TESLA, INC. Courtesy of TESLA, INC.
|
- Move RH front seat forward
- Open RH rear door
- Release RH front seat belt
NOTE:
Turn release mechanism counter clockwise, turn back clockwise after releasing
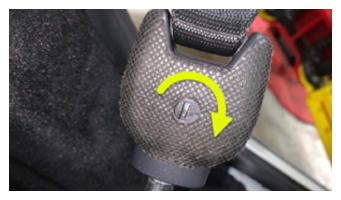 Courtesy of TESLA, INC. Courtesy of TESLA, INC.
|
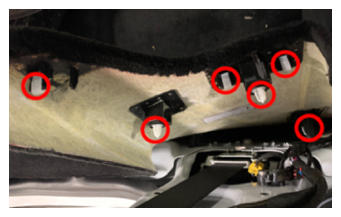
- Partially release RH lower B-pillar
NOTE:
6x clips, Release from upper trim and body
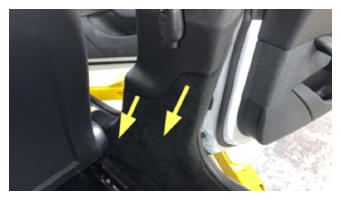 Courtesy of TESLA, INC. Courtesy of TESLA, INC.
|
 Courtesy of TESLA, INC. Courtesy of TESLA, INC.
|
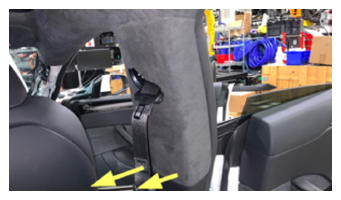
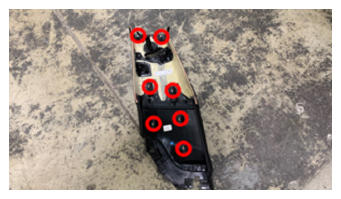
- Remove RH upper B-pillar
NOTE:
7x clips, Release clips and route seatbelt through B-pillar, Be cautious not to separate the upper B-pillar, There are plastic welds near the center of trim holding upper and lower portion together
 Courtesy of TESLA, INC. Courtesy of TESLA, INC.
|
 Courtesy of TESLA, INC. Courtesy of TESLA, INC.
|
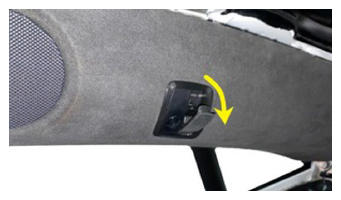
- Push open RH coat hook
 Courtesy of TESLA, INC. Courtesy of TESLA, INC.
|
- Pry open RH coat hook screw cover
NOTE:
2x tabs
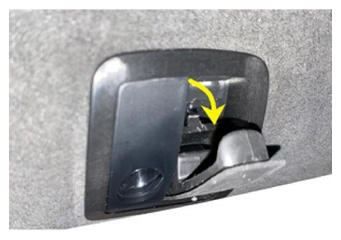 Courtesy of TESLA, INC. Courtesy of TESLA, INC.
|
- Remove RH coat hook screw
NOTE:
1x screw, T25, 2.5 N.m
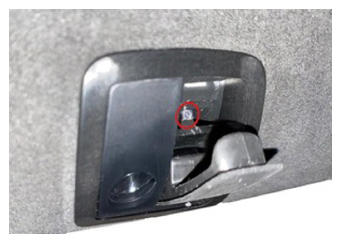 Courtesy of TESLA, INC. Courtesy of TESLA, INC.
|
- Open liftgate
- Remove parcel shelf
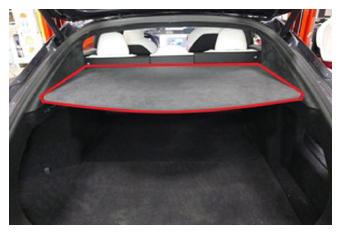 Courtesy of TESLA, INC. Courtesy of TESLA, INC.
|
- Remove LH side bolster trim
NOTE:
1x clip, 1x tab, Start by releasing upper portion
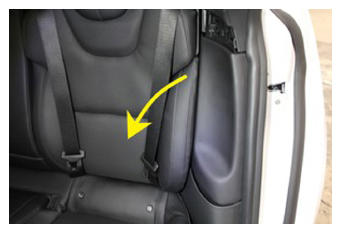 Courtesy of TESLA, INC. Courtesy of TESLA, INC.
|
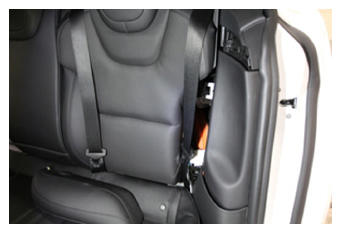 Courtesy of TESLA, INC. Courtesy of TESLA, INC.
|
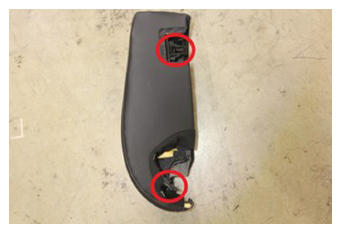 Courtesy of TESLA, INC. Courtesy of TESLA, INC.
|
- Fold the 60 seat in down position
NOTE:
Release seat from either button at backrest or from trunk switch, If seat cushion is not present, protect the seat as required
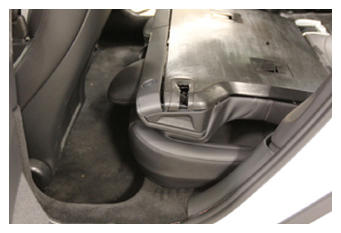 Courtesy of TESLA, INC. Courtesy of TESLA, INC.
|
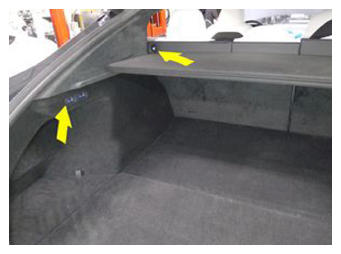 Courtesy of TESLA, INC. Courtesy of TESLA, INC.
|
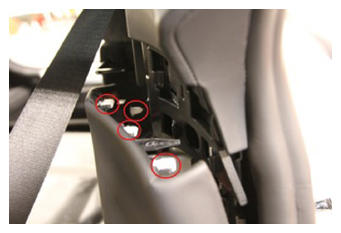
- Separate LH lower C-pillar trim from LH mid C-pillar trim
NOTE:
4x clips, 1x datum
 Courtesy of TESLA, INC. Courtesy of TESLA, INC.
|
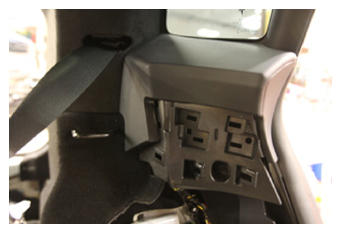
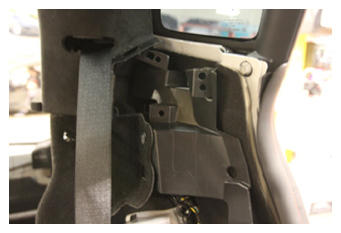
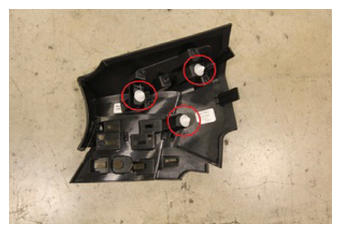
- Remove LH mid C-pillar trim
NOTE:
3x clips
 Courtesy of TESLA, INC. Courtesy of TESLA, INC.
|
 Courtesy of TESLA, INC. Courtesy of TESLA, INC.
|
 Courtesy of TESLA, INC. Courtesy of TESLA, INC.
|
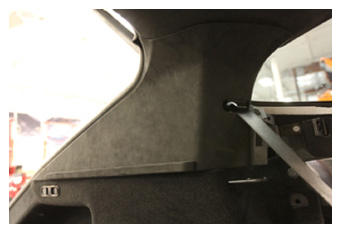
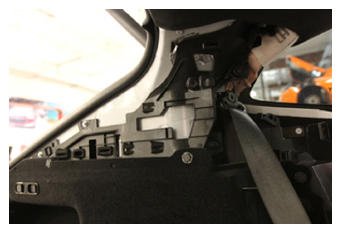
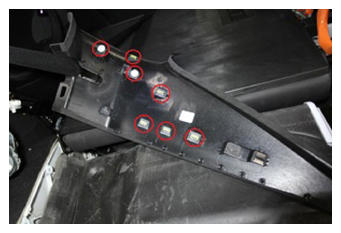
- Release LH upper C-pillar trim and move aside
NOTE:
7x clips
 Courtesy of TESLA, INC. Courtesy of TESLA, INC.
|
 Courtesy of TESLA, INC. Courtesy of TESLA, INC.
|
 Courtesy of TESLA, INC. Courtesy of TESLA, INC.
|
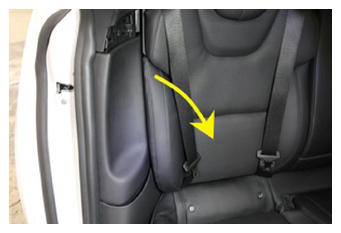
- Remove RH side bolster trim
NOTE:
1x clip, 1x tab, Start by releasing upper portion
 Courtesy of TESLA, INC. Courtesy of TESLA, INC.
|
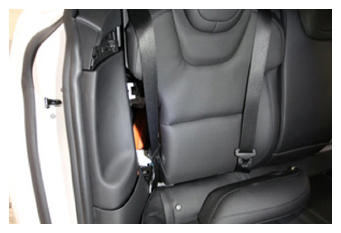 Courtesy of TESLA, INC. Courtesy of TESLA, INC.
|
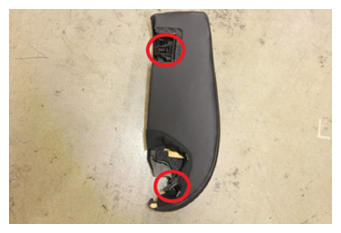 Courtesy of TESLA, INC. Courtesy of TESLA, INC.
|
- Fold the 40 seat in down position
NOTE:
If seat cushion is not present, protect the seat as required
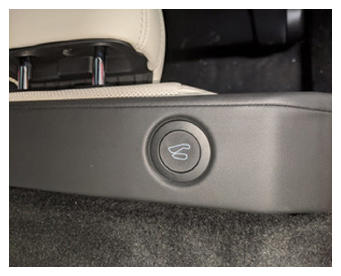 Courtesy of TESLA, INC. Courtesy of TESLA, INC.
|
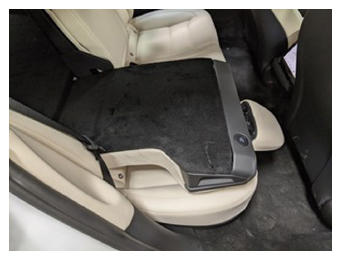 Courtesy of TESLA, INC. Courtesy of TESLA, INC.
|
- Separate RH lower C-pillar trim from RH mid C-pillar trim
NOTE:
4x clips, 1x datum
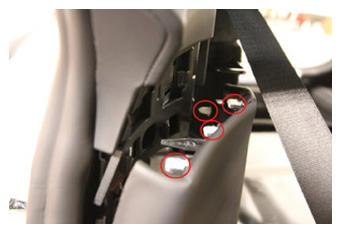 Courtesy of TESLA, INC. Courtesy of TESLA, INC.
|
- Remove RH mid C-pillar trim
NOTE:
3x clips
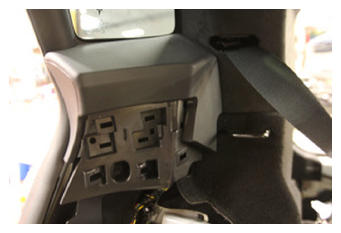 Courtesy of TESLA, INC. Courtesy of TESLA, INC.
|
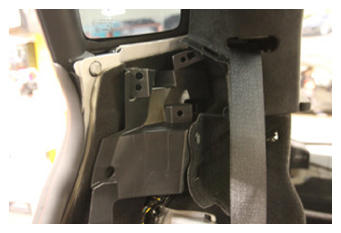 Courtesy of TESLA, INC. Courtesy of TESLA, INC.
|
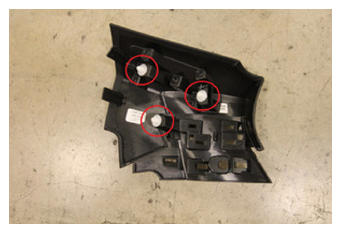 Courtesy of TESLA, INC. Courtesy of TESLA, INC.
|
- Release RH upper C-pillar trim and move aside
NOTE:
7x clips
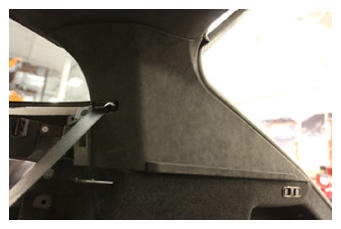 Courtesy of TESLA, INC. Courtesy of TESLA, INC.
|
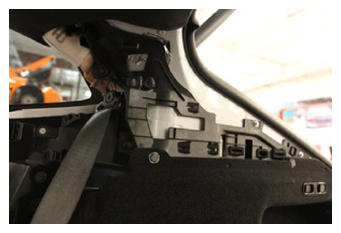 Courtesy of TESLA, INC. Courtesy of TESLA, INC.
|
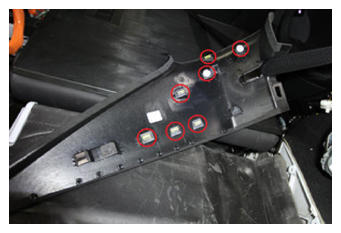 Courtesy of TESLA, INC. Courtesy of TESLA, INC.
|
- Remove bolts securing rear of headliner to body
NOTE:
2x bolts, 10 mm, 3 N.m, Bolt located on LH & RH side of headliner
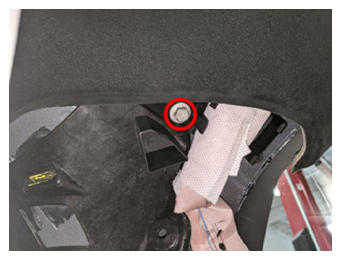 Courtesy of TESLA, INC. Courtesy of TESLA, INC.
|
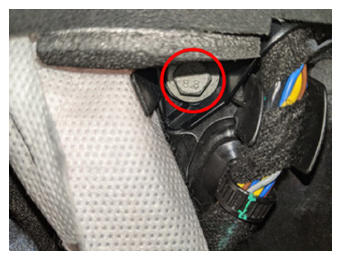 Courtesy of TESLA, INC. Courtesy of TESLA, INC.
|
- Release headliner from body
NOTE:
18x clips, 2x hooks, Headliner will be supported by 8x tethers when released, Push upward and inward to release hooks on the coat hook assemblies from the body
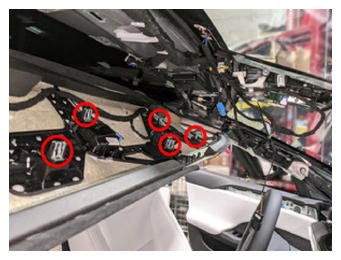 Courtesy of TESLA, INC. Courtesy of TESLA, INC.
|
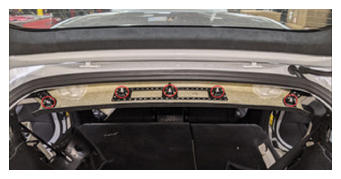 Courtesy of TESLA, INC. Courtesy of TESLA, INC.
|
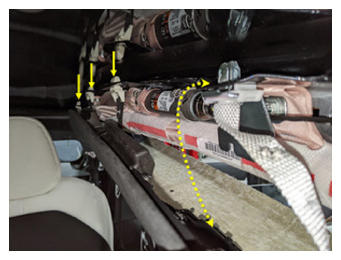 Courtesy of TESLA, INC. Courtesy of TESLA, INC.
|
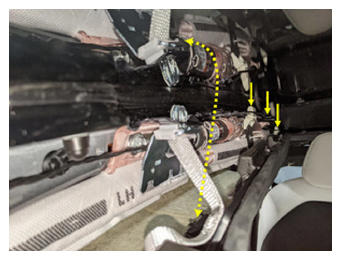 Courtesy of TESLA, INC. Courtesy of TESLA, INC.
|
- Close liftgate
- Apply tape to the vehicle exterior
NOTE:
Cover the side rails and front corners of the liftgate
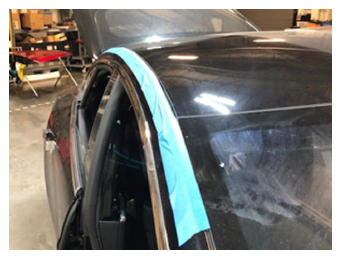 Courtesy of TESLA, INC. Courtesy of TESLA, INC.
|
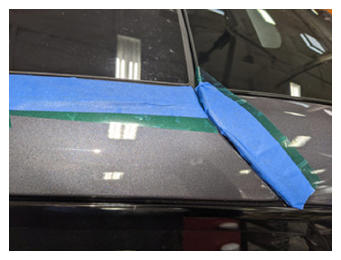 Courtesy of TESLA, INC. Courtesy of TESLA, INC.
|
- Measure and record gaps from fixed roof glass to windshield, body sides, and liftgate glass
NOTE:
Measurements will be used during installation of new glass
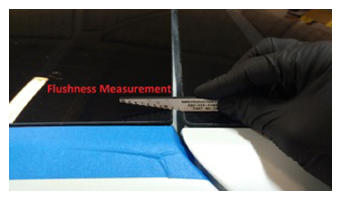 Courtesy of TESLA, INC. Courtesy of TESLA, INC.
|
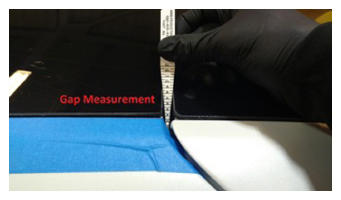 Courtesy of TESLA, INC. Courtesy of TESLA, INC.
|
- Open liftgate
- Apply masking tape to protect the headliner
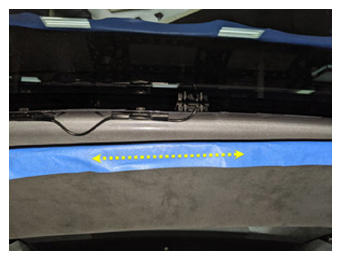 Courtesy of TESLA, INC. Courtesy of TESLA, INC.
|
- Cut length of square wire to use with T-handles
NOTE:
Make sure there's adequate wire
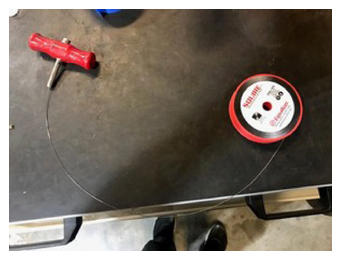 Courtesy of TESLA, INC. Courtesy of TESLA, INC.
|
- Insert tool through roof glass urethane at rear corner
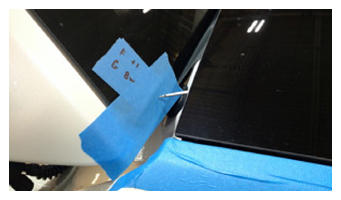 Courtesy of TESLA, INC. Courtesy of TESLA, INC.
|
- Attach square wire and pull tool back through into vehicle
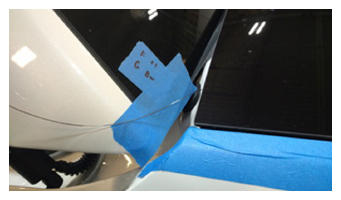 Courtesy of TESLA, INC. Courtesy of TESLA, INC.
|
- Insert square wire into one T-handle
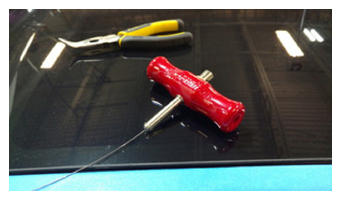 Courtesy of TESLA, INC. Courtesy of TESLA, INC.
|
- Attach second T-handle
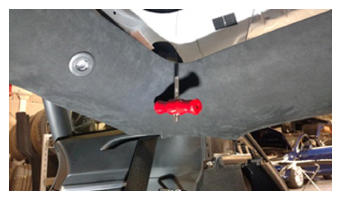 Courtesy of TESLA, INC. Courtesy of TESLA, INC.
|
- Using T-handles, cut urethane securing roof glass to body
NOTE:
Recommend assistance, Use caution near XM antenna, roof rack blocks, and bolts for brackets near B-pillars
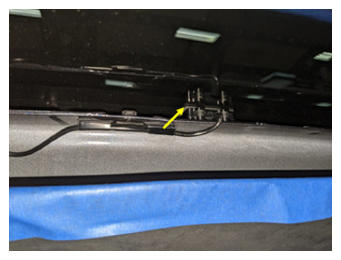 Courtesy of TESLA, INC. Courtesy of TESLA, INC.
|
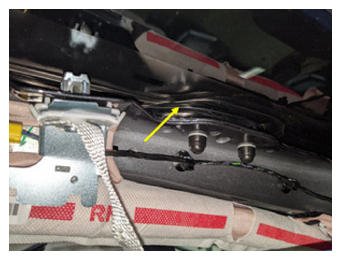 Courtesy of TESLA, INC. Courtesy of TESLA, INC.
|
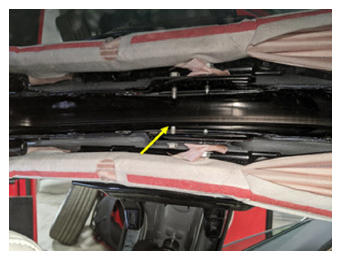 Courtesy of TESLA, INC. Courtesy of TESLA, INC.
|
- Secure suction cups to roof glass at each corner
NOTE:
4x suction cup tools, Recommend assistance
- Remove fixed roof glass from vehicle
NOTE:
Recommend assistance, discard per local regulations
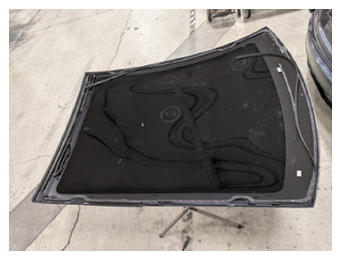 Courtesy of TESLA, INC. Courtesy of TESLA, INC.
|
- Remove old urethane from body
NOTE:
Ensure residual urethane is 1 mm or less in thickness
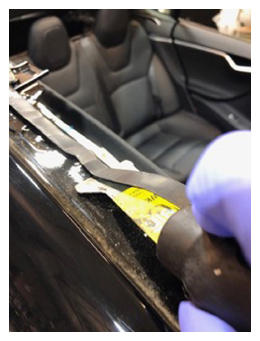 Courtesy of TESLA, INC. Courtesy of TESLA, INC.
|
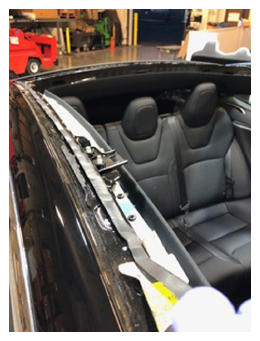 Courtesy of TESLA, INC. Courtesy of TESLA, INC.
|
- Remove datums and any other debris from body
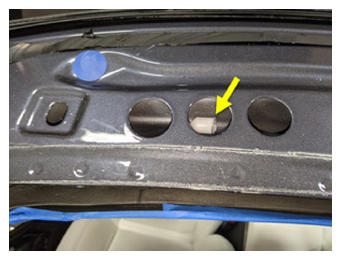 Courtesy of TESLA, INC. Courtesy of TESLA, INC.
|
- Wipe body with IPA to clean surface
NOTE:
Allow 1 minute dry time
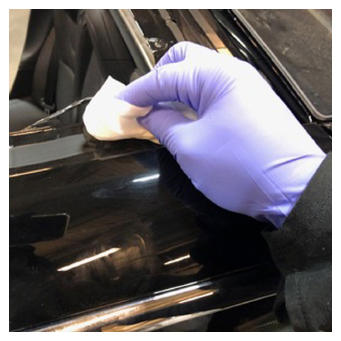 Courtesy of TESLA, INC. Courtesy of TESLA, INC.
|
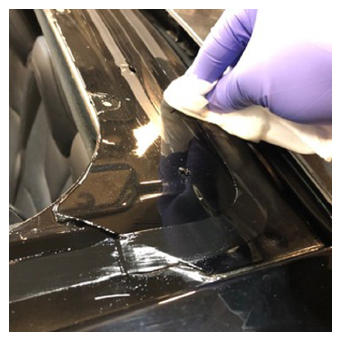 Courtesy of TESLA, INC. Courtesy of TESLA, INC.
|
- Replace any body plugs or tape that were damaged during removal or cleaning
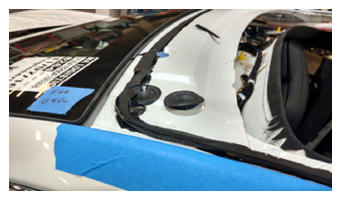 Courtesy of TESLA, INC. Courtesy of TESLA, INC.
|
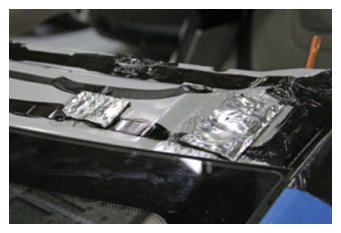 Courtesy of TESLA, INC. Courtesy of TESLA, INC.
|
- Inspect XM antenna to make sure it is secure and the foam is not damaged
NOTE:
If damaged, please replace as needed.
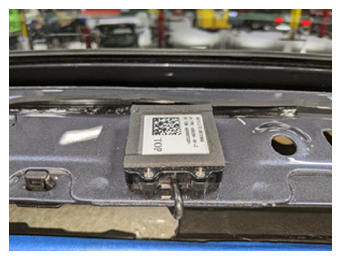 Courtesy of TESLA, INC. Courtesy of TESLA, INC.
|
- Disconnect XM antenna harness
NOTE:
1x connector
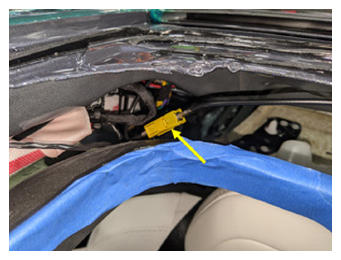 Courtesy of TESLA, INC. Courtesy of TESLA, INC.
|
- Release XM antenna harness
NOTE:
3x harness clips
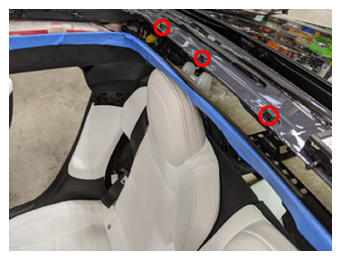 Courtesy of TESLA, INC. Courtesy of TESLA, INC.
|
- Remove XM antenna from body
NOTE:
4x pieces double sided tape
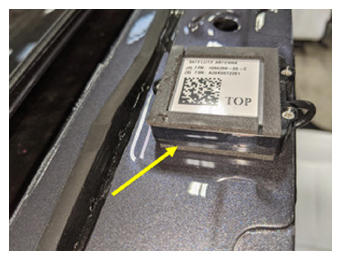 Courtesy of TESLA, INC. Courtesy of TESLA, INC.
|
- Remove residual double sided tape from the body
NOTE:
Allow 1 minute dry time
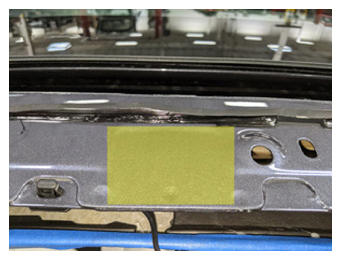 Courtesy of TESLA, INC. Courtesy of TESLA, INC.
|
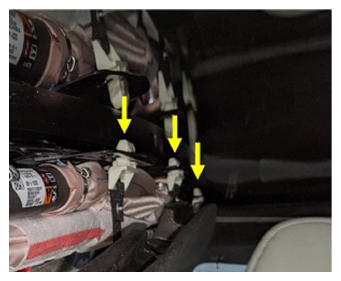
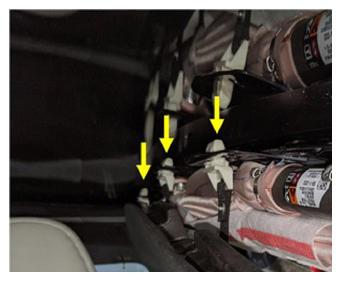
- Release tether clips from body
NOTE:
6x tether clips, This will assist with headliner installation later, A good tool to release these clips is available for purchase via eProcurment in the Grainger punchout catalog, Item #2ZPP2 - GearWrench Push Pin Pliers
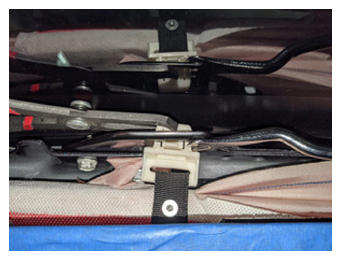 Courtesy of TESLA, INC. Courtesy of TESLA, INC.
|
 Courtesy of TESLA, INC. Courtesy of TESLA, INC.
|
 Courtesy of TESLA, INC. Courtesy of TESLA, INC.
|
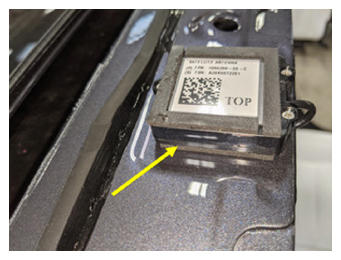
- Install XM antenna to body
NOTE:
4x pieces double sided tape
 Courtesy of TESLA, INC. Courtesy of TESLA, INC.
|
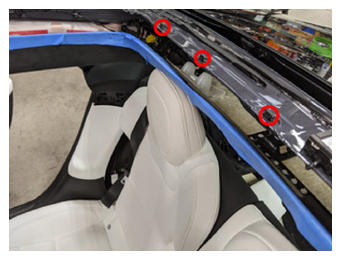
- Install XM antenna harness
NOTE:
3x harness clips
 Courtesy of TESLA, INC. Courtesy of TESLA, INC.
|
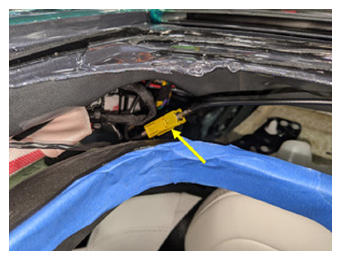
- Connect XM antenna harness
NOTE:
1x connector
 Courtesy of TESLA, INC. Courtesy of TESLA, INC.
|
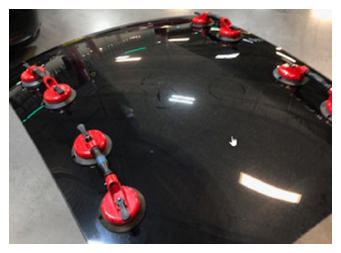
- Attach suction cups to new roof glass
 Courtesy of TESLA, INC. Courtesy of TESLA, INC.
|
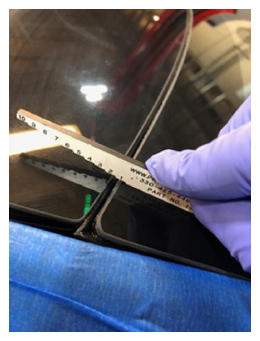
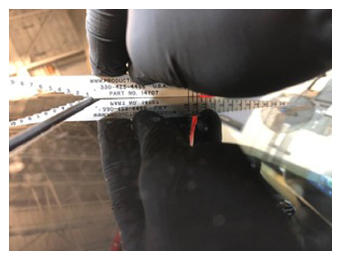
- Position new roof glass onto vehicle for dry fit
NOTE:
Recommend assistance
- Make sure gaps are all within acceptable limits
NOTE:
If glass is too high, it may be necessary to trim or remove net pads
 Courtesy of TESLA, INC. Courtesy of TESLA, INC.
|
 Courtesy of TESLA, INC. Courtesy of TESLA, INC.
|
- Remove roof glass and set it upside-down onto stand
NOTE:
Recommend assistance
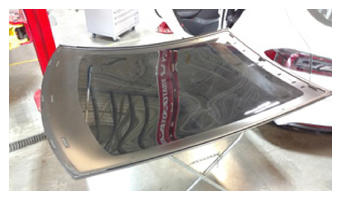 Courtesy of TESLA, INC. Courtesy of TESLA, INC.
|
- Remove protective tape from vehicle body
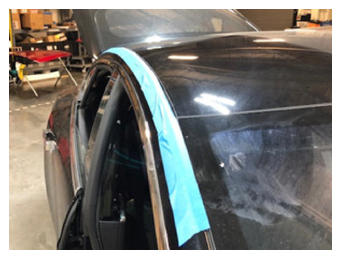 Courtesy of TESLA, INC. Courtesy of TESLA, INC.
|
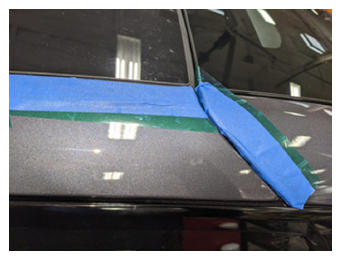 Courtesy of TESLA, INC. Courtesy of TESLA, INC.
|
- Clean glass mating surfaces with isopropyl alcohol
NOTE:
Allow 1 minute dry time
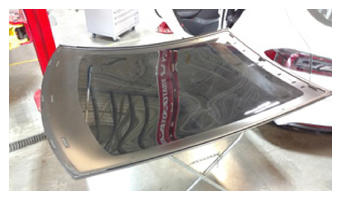 Courtesy of TESLA, INC. Courtesy of TESLA, INC.
|
- Apply primer to body on urethane path and any areas that were damaged during removal
NOTE:
If vehicle is equipped with roof rack anchors, primer should go around the inside of the roof bracket. If vehicle is not equipped with roof rack brackets, primer outside the roof rack bracket mounting holes. Allow primer to dry for at least 1 minute
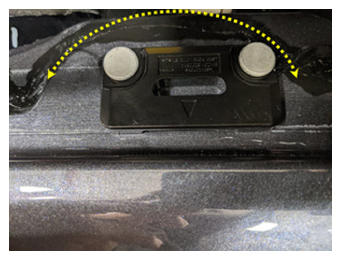 Courtesy of TESLA, INC. Courtesy of TESLA, INC.
|
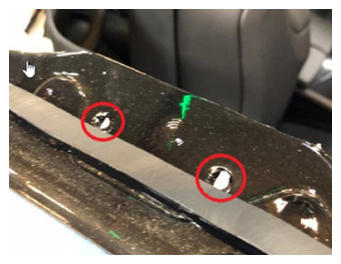 Courtesy of TESLA, INC. Courtesy of TESLA, INC.
|
- Prepare caulking gun and urethane
NOTE:
Opening must be 8 mm wide and 14 mm tall
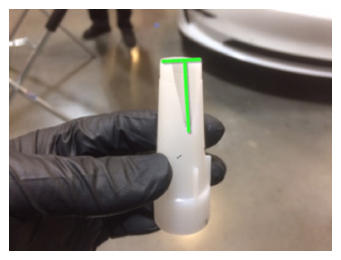 Courtesy of TESLA, INC. Courtesy of TESLA, INC.
|
- Apply urethane to body
NOTE:
If equipped with roof rack anchors urethane should go around the inside of the roof rack anchor, if not urethane should go on the outside of the anchor mounting holes.
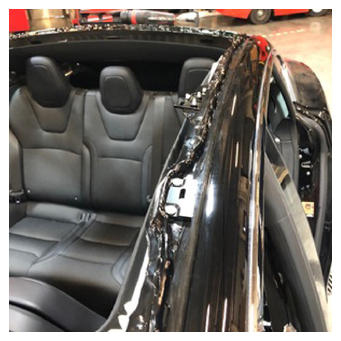 Courtesy of TESLA, INC. Courtesy of TESLA, INC.
|
 Courtesy of TESLA, INC. Courtesy of TESLA, INC.
|
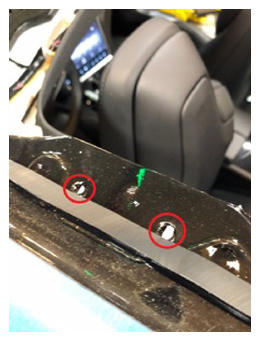
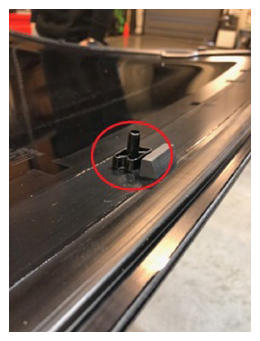
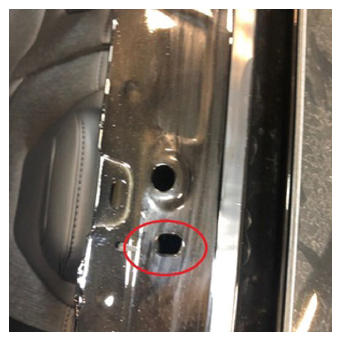
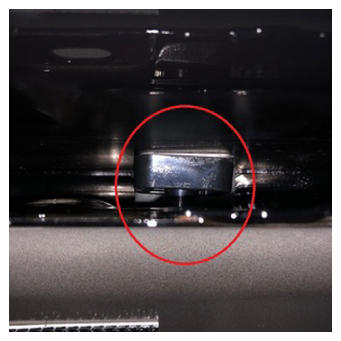
- Place new roof glass onto vehicle but do not set yet
NOTE:
Recommend assistance. Align datum at rear of glass to body
 Courtesy of TESLA, INC. Courtesy of TESLA, INC.
|
 Courtesy of TESLA, INC. Courtesy of TESLA, INC.
|
 Courtesy of TESLA, INC. Courtesy of TESLA, INC.
|
- Position new seal at front of glass beneath windshield seal
NOTE:
A trim tool can be used to properly seat the roof glass seal under the windshield seal
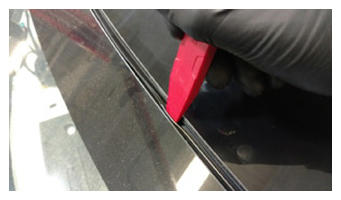 Courtesy of TESLA, INC. Courtesy of TESLA, INC.
|
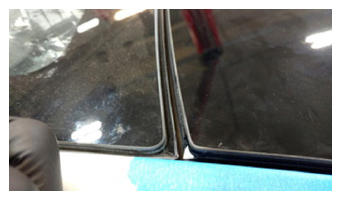 Courtesy of TESLA, INC. Courtesy of TESLA, INC.
|
- Press glass onto body once in position
NOTE:
Use sandbags for the front if needed
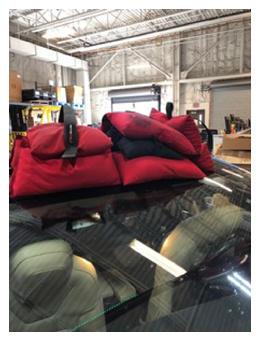 Courtesy of TESLA, INC. Courtesy of TESLA, INC.
|
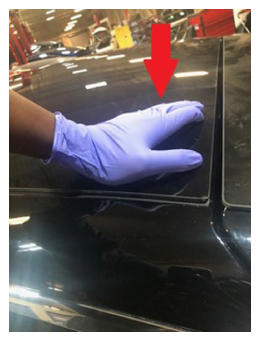 Courtesy of TESLA, INC. Courtesy of TESLA, INC.
|
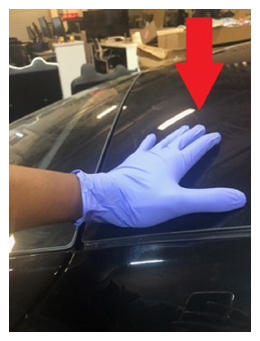 Courtesy of TESLA, INC. Courtesy of TESLA, INC.
|
- Verify clearances with liftgate glass, windshield, and body sides are within CVIS specification
NOTE:
Adjust if necessary
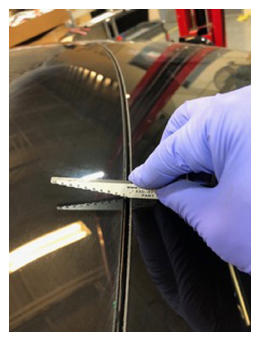 Courtesy of TESLA, INC. Courtesy of TESLA, INC.
|
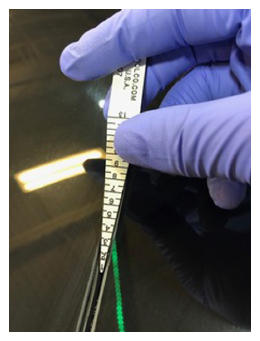 Courtesy of TESLA, INC. Courtesy of TESLA, INC.
|
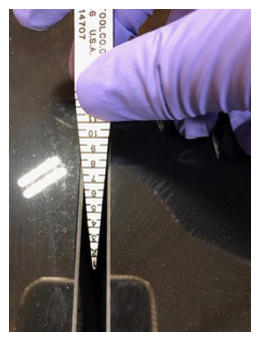 Courtesy of TESLA, INC. Courtesy of TESLA, INC.
|
- Remove suction cups from roof glass
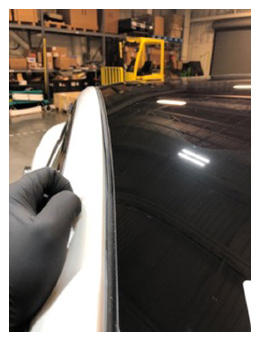 Courtesy of TESLA, INC. Courtesy of TESLA, INC.
|
- Remove protective tape from headliner
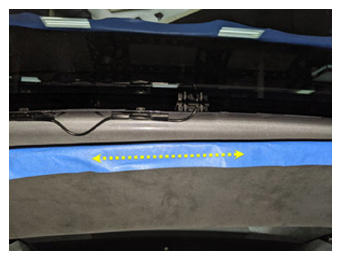 Courtesy of TESLA, INC. Courtesy of TESLA, INC.
|
- Secure tether clips to headliner
NOTE:
Listen for audible click when seated properly
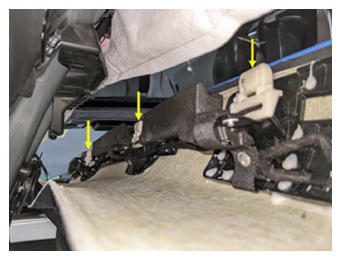 Courtesy of TESLA, INC. Courtesy of TESLA, INC.
|
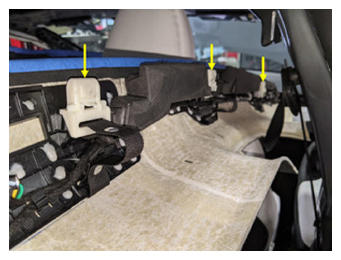 Courtesy of TESLA, INC. Courtesy of TESLA, INC.
|
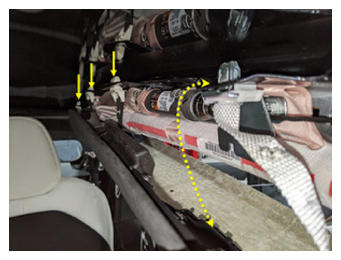
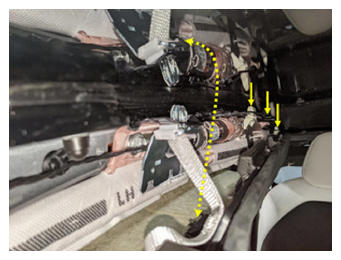
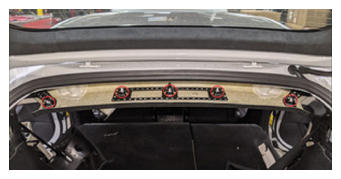
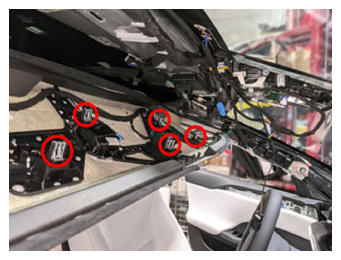
- Secure headliner to body
NOTE:
18x clips, 2x hooks, Push coat hook upward and outward to secure hooks to the body flange at the top of the coat hook assembly
 Courtesy of TESLA, INC. Courtesy of TESLA, INC.
|
 Courtesy of TESLA, INC. Courtesy of TESLA, INC.
|
 Courtesy of TESLA, INC. Courtesy of TESLA, INC.
|
 Courtesy of TESLA, INC. Courtesy of TESLA, INC.
|
- Install bolts securing rear of headliner to body
NOTE:
2x bolts, 10 mm, 3 N.m, Bolt located on LH & RH side of headliner
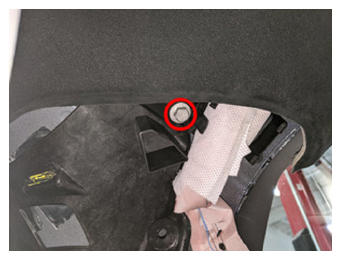 Courtesy of TESLA, INC. Courtesy of TESLA, INC.
|
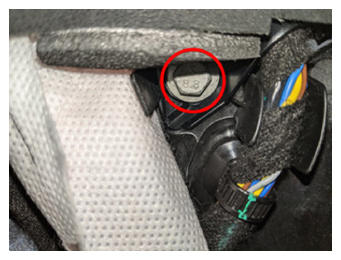 Courtesy of TESLA, INC. Courtesy of TESLA, INC.
|
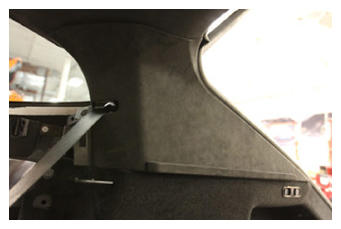
- Install RH upper C-pillar trim
NOTE:
7x clips, Replace any damaged clips
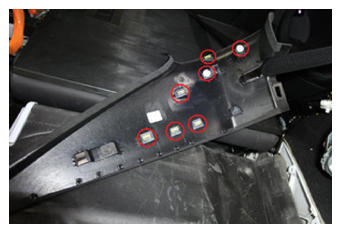 Courtesy of TESLA, INC. Courtesy of TESLA, INC.
|
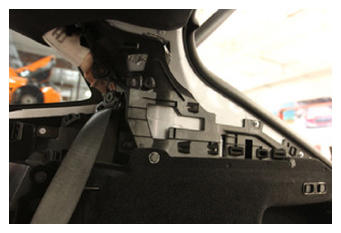 Courtesy of TESLA, INC. Courtesy of TESLA, INC.
|
 Courtesy of TESLA, INC. Courtesy of TESLA, INC.
|
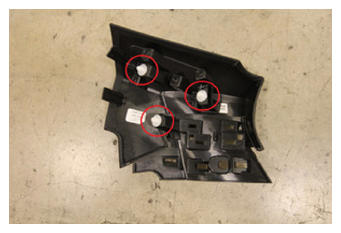
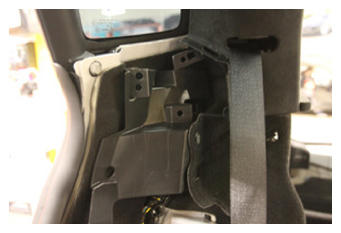
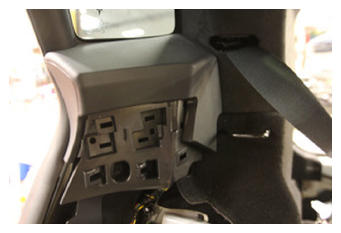
- Install RH mid C-pillar trim
NOTE:
3x clips, Replace any damaged clips
 Courtesy of TESLA, INC. Courtesy of TESLA, INC.
|
 Courtesy of TESLA, INC. Courtesy of TESLA, INC.
|
 Courtesy of TESLA, INC. Courtesy of TESLA, INC.
|
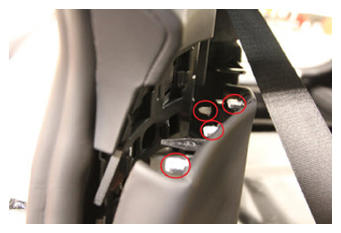
- Secure RH lower C-pillar trim onto RH mid C-pillar trim
NOTE:
4x clips
 Courtesy of TESLA, INC. Courtesy of TESLA, INC.
|
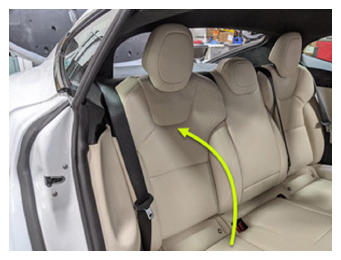
- Fold the 40 seat into vertical position
NOTE:
Remove seat cushion protection
 Courtesy of TESLA, INC. Courtesy of TESLA, INC.
|
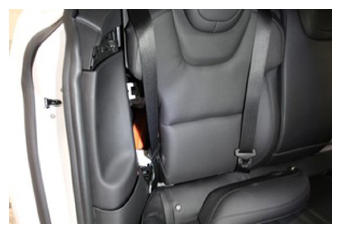
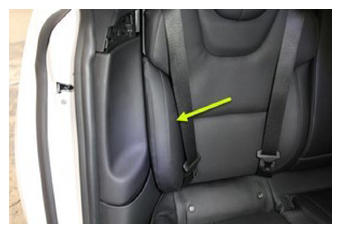
- Install RH side bolster trim
NOTE:
1x clip, 1x tab, Replace clip if damaged, Hook bottom portion and then secure the top
 Courtesy of TESLA, INC. Courtesy of TESLA, INC.
|
 Courtesy of TESLA, INC. Courtesy of TESLA, INC.
|
- Install LH upper C-pillar trim
NOTE:
7x clips, Replace any damaged clips
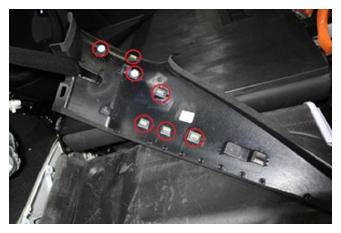 Courtesy of TESLA, INC. Courtesy of TESLA, INC.
|
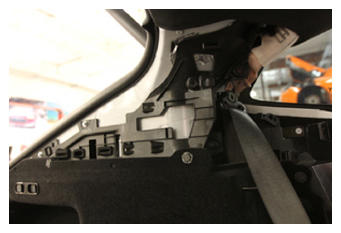 Courtesy of TESLA, INC. Courtesy of TESLA, INC.
|
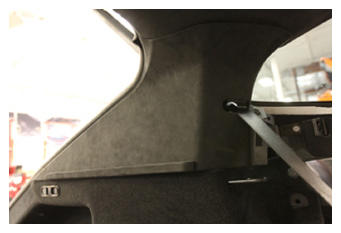 Courtesy of TESLA, INC. Courtesy of TESLA, INC.
|
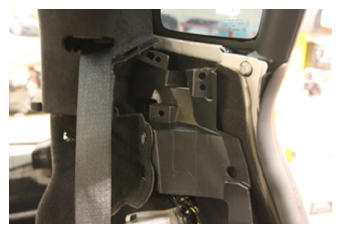
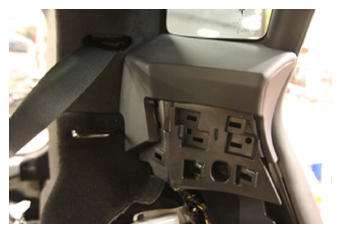
- Install LH mid C-pillar trim
NOTE:
3x clips, Replace any damaged clips
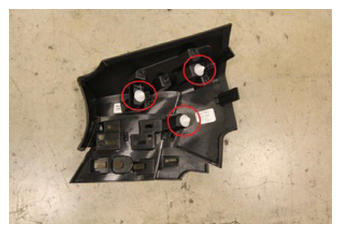 Courtesy of TESLA, INC. Courtesy of TESLA, INC.
|
 Courtesy of TESLA, INC. Courtesy of TESLA, INC.
|
 Courtesy of TESLA, INC. Courtesy of TESLA, INC.
|
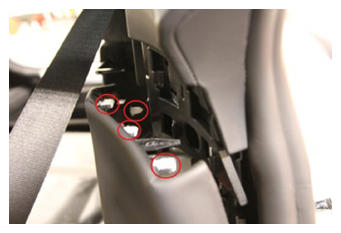
- Secure LH lower C-pillar trim onto LH mid C-pillar trim
NOTE:
4x clips
 Courtesy of TESLA, INC. Courtesy of TESLA, INC.
|
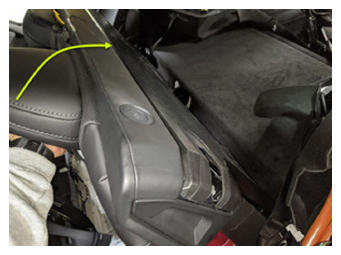
- Fold the 60 seat into vertical position
NOTE:
Remove seat cushion protection
 Courtesy of TESLA, INC. Courtesy of TESLA, INC.
|
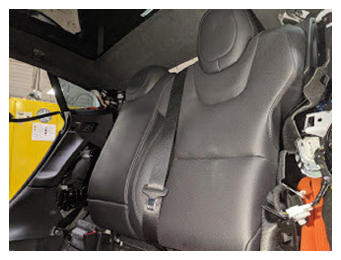 Courtesy of TESLA, INC. Courtesy of TESLA, INC.
|
- Install LH side bolster trim
NOTE:
1x clip, 1x tab, Replace clip if damaged, Hook bottom portion and then secure the top
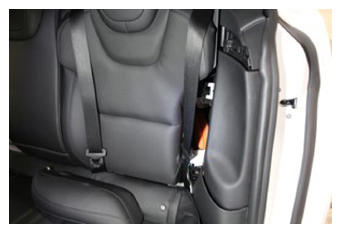 Courtesy of TESLA, INC. Courtesy of TESLA, INC.
|
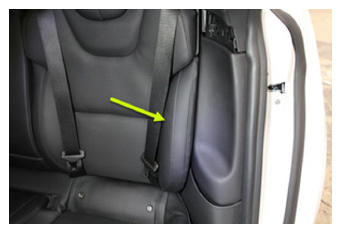 Courtesy of TESLA, INC. Courtesy of TESLA, INC.
|
- Install parcel shelf
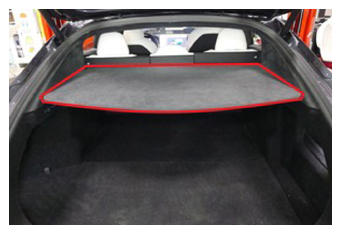 Courtesy of TESLA, INC. Courtesy of TESLA, INC.
|
- Close liftgate
- Install RH coat hook screw
NOTE:
1x screw, T25, 2.5 N.m
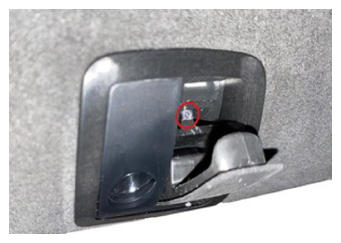 Courtesy of TESLA, INC. Courtesy of TESLA, INC.
|
- Close RH coat hook screw cover
NOTE:
2x tabs
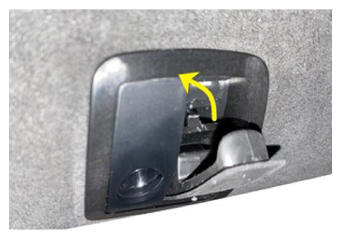 Courtesy of TESLA, INC. Courtesy of TESLA, INC.
|
- Push RH coat hook closed
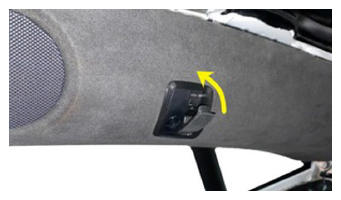 Courtesy of TESLA, INC. Courtesy of TESLA, INC.
|
- Install LH coat hook screw
NOTE:
1x screw, T25, 2.5 N.m
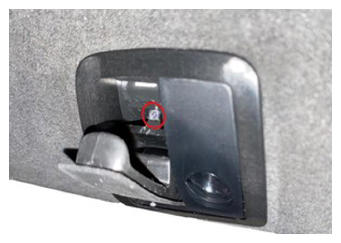 Courtesy of TESLA, INC. Courtesy of TESLA, INC.
|
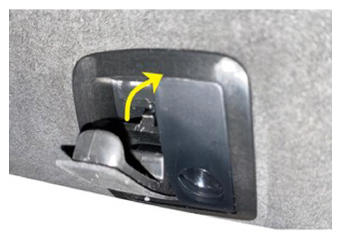
- Close LH coat hook screw cover
NOTE:
2x tabs
 Courtesy of TESLA, INC. Courtesy of TESLA, INC.
|
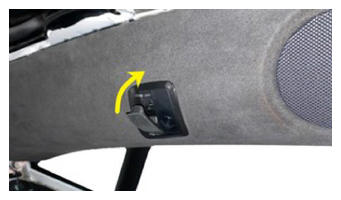
- Push LH coat hook closed
 Courtesy of TESLA, INC. Courtesy of TESLA, INC.
|
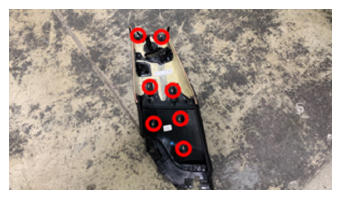
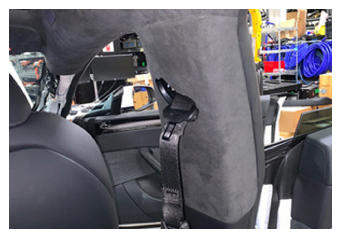
- Install RH upper B-pillar
NOTE:
7x clips, Route seatbelt through B-pillar, Replace any damaged or missing clips
 Courtesy of TESLA, INC. Courtesy of TESLA, INC.
|
 Courtesy of TESLA, INC. Courtesy of TESLA, INC.
|
- Reinstall top portion of RH lower B-pillar
NOTE:
6x clips, Replace any damaged or missing clips
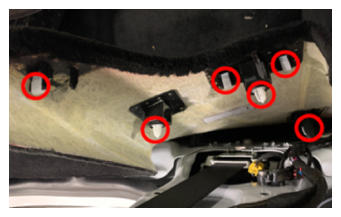 Courtesy of TESLA, INC. Courtesy of TESLA, INC.
|
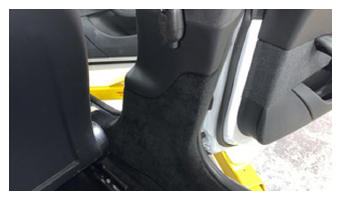 Courtesy of TESLA, INC. Courtesy of TESLA, INC.
|
- Secure RH front seat belt
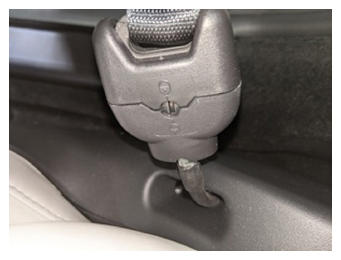 Courtesy of TESLA, INC. Courtesy of TESLA, INC.
|
- Move RH front seat to original position
- Close RH rear door
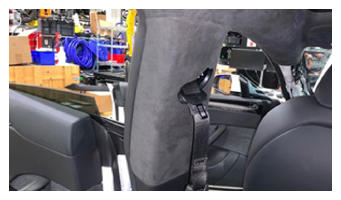
- Install LH upper B-pillar
NOTE:
7x clips, Route seatbelt through B-pillar, Replace any damaged or missing clips
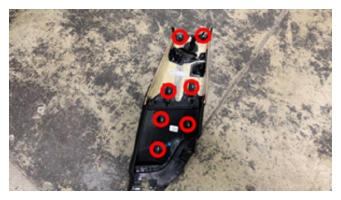 Courtesy of TESLA, INC. Courtesy of TESLA, INC.
|
 Courtesy of TESLA, INC. Courtesy of TESLA, INC.
|
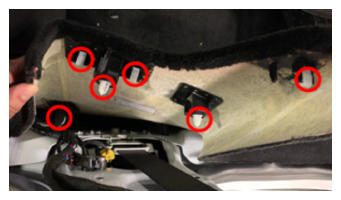
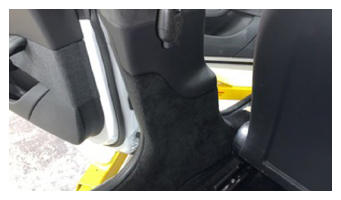
- Reinstall top portion of LH lower B-pillar
NOTE:
6x clips, Replace any damaged or missing clips
 Courtesy of TESLA, INC. Courtesy of TESLA, INC.
|
 Courtesy of TESLA, INC. Courtesy of TESLA, INC.
|
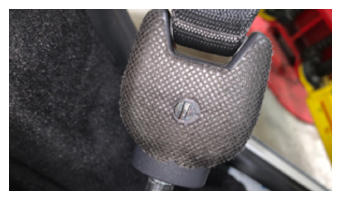
- Secure LH front seat belt
 Courtesy of TESLA, INC. Courtesy of TESLA, INC.
|
- Close LH rear door
- Move LH front seat to original position
- Install upper rear view mirror cover
NOTE:
4x clips, 3x connectors, Ensure the rear view mirror harness is routed so that it hangs freely on the outside and is not pinched between the cover and glare shield assembly
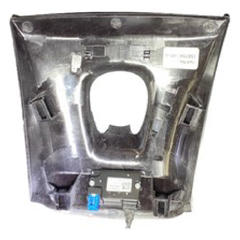 Courtesy of TESLA, INC. Courtesy of TESLA, INC.
|
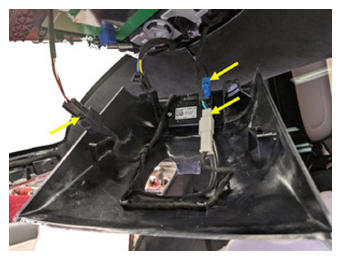 Courtesy of TESLA, INC. Courtesy of TESLA, INC.
|
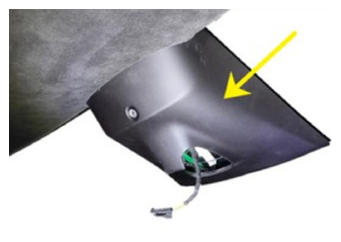 Courtesy of TESLA, INC. Courtesy of TESLA, INC.
|
- Install rear view mirror
NOTE:
Install the rear view mirror by turning mirror counter clockwise until mirror is secured
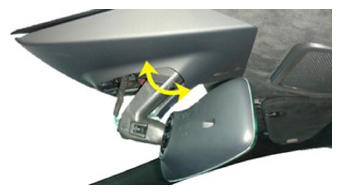 Courtesy of TESLA, INC. Courtesy of TESLA, INC.
|
- Connect rear view mirror connector
NOTE:
1x connector, Connect rear view mirror connector and tuck harness slack along the arm
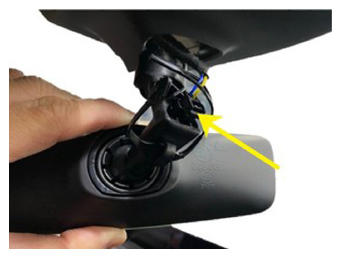 Courtesy of TESLA, INC. Courtesy of TESLA, INC.
|
- Connect RH sunvisor connector
NOTE:
1x connector
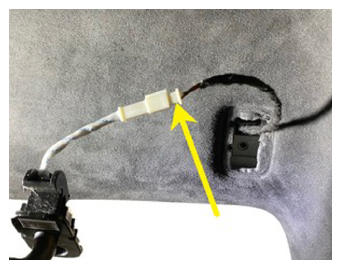 Courtesy of TESLA, INC. Courtesy of TESLA, INC.
|
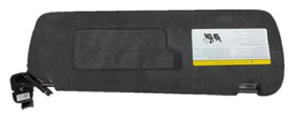 Courtesy of TESLA, INC. Courtesy of TESLA, INC.
|
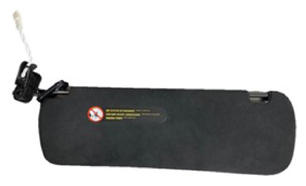 Courtesy of TESLA, INC. Courtesy of TESLA, INC.
|
- Install RH sun visor into headliner area
NOTE:
Fold sun visor to the closed and folded down position, but do not latch in place
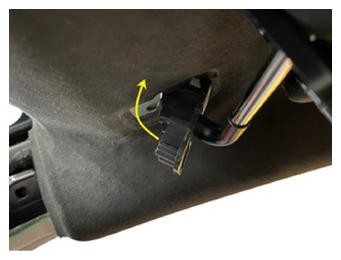 Courtesy of TESLA, INC. Courtesy of TESLA, INC.
|
- Install RH sun visor fastener
NOTE:
1x screw, T25, 3.5 N.m
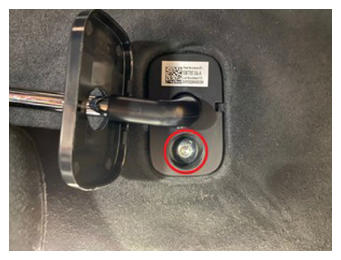 Courtesy of TESLA, INC. Courtesy of TESLA, INC.
|
- Install RH sun visor bracket cover
NOTE:
4x clips
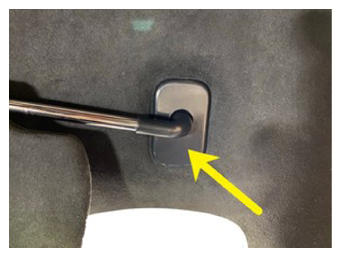 Courtesy of TESLA, INC. Courtesy of TESLA, INC.
|
- Install RH upper A-pillar trim
NOTE:
2x tethered clips, 1x clip, 1x connector, Slide bottom of trim along IP and speaker grill, attach each tether to body side, Set clips starting at the bottom and work up, Pull seal over trim
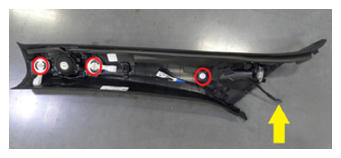 Courtesy of TESLA, INC. Courtesy of TESLA, INC.
|
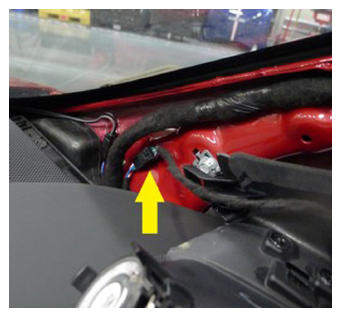 Courtesy of TESLA, INC. Courtesy of TESLA, INC.
|
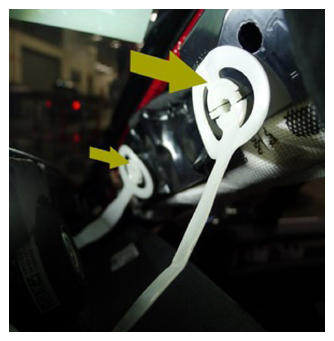 Courtesy of TESLA, INC. Courtesy of TESLA, INC.
|
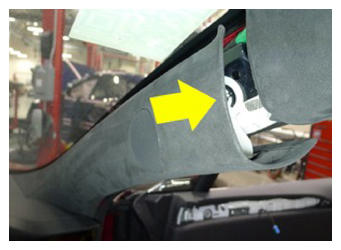 Courtesy of TESLA, INC. Courtesy of TESLA, INC.
|
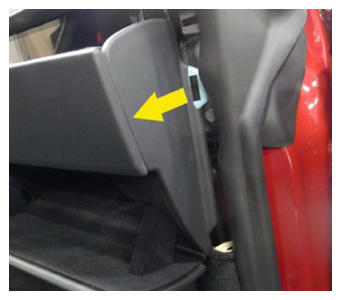
- Install RH IP end cap
NOTE:
4x clips
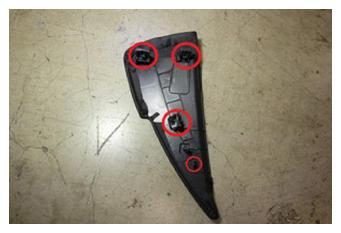 Courtesy of TESLA, INC. Courtesy of TESLA, INC.
|
 Courtesy of TESLA, INC. Courtesy of TESLA, INC.
|
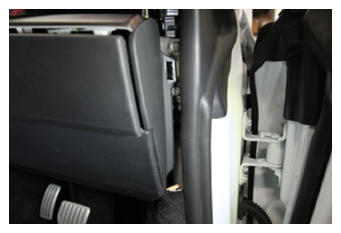
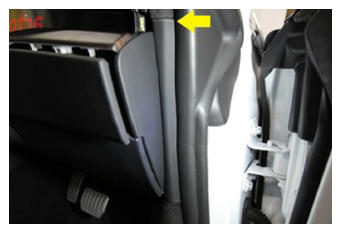
- Install RH mid A-pillar trim
NOTE:
1x clip, 2x tabs, Verify weather seal is seated properly
 Courtesy of TESLA, INC. Courtesy of TESLA, INC.
|
 Courtesy of TESLA, INC. Courtesy of TESLA, INC.
|
- Close RH front door
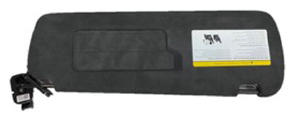
- Connect LH sun visor connector
NOTE:
1x connector
 Courtesy of TESLA, INC. Courtesy of TESLA, INC.
|
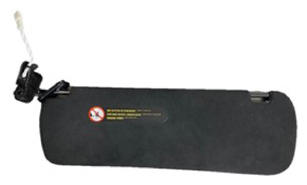 Courtesy of TESLA, INC. Courtesy of TESLA, INC.
|
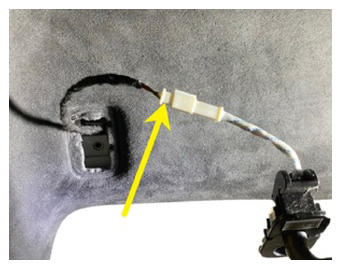 Courtesy of TESLA, INC. Courtesy of TESLA, INC.
|
- Install LH sun visor into headliner area
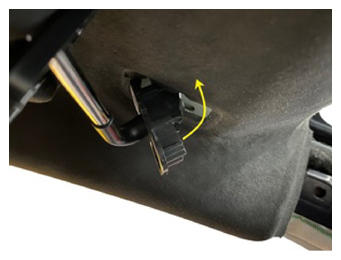 Courtesy of TESLA, INC. Courtesy of TESLA, INC.
|
- Install LH sun visor fastener
NOTE:
1x screw, T25, 3.5 N.m
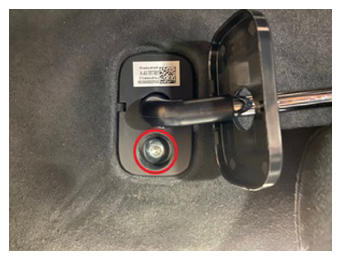 Courtesy of TESLA, INC. Courtesy of TESLA, INC.
|
- Install LH sun visor bracket cover
NOTE:
4x clips
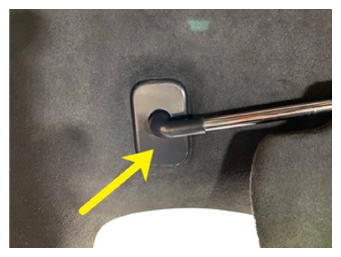 Courtesy of TESLA, INC. Courtesy of TESLA, INC.
|
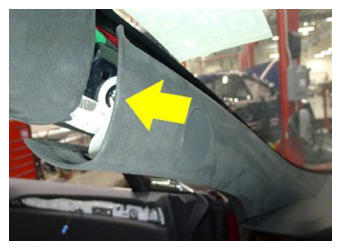
- Install LH upper A-pillar trim
NOTE:
2x tethered clips, 1x clip, 1x connector, Slide bottom of trim along IP and speaker grill, attach each tether to body side, Set clips starting at the bottom and work up, Pull seal over trim
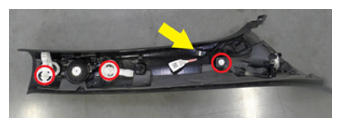 Courtesy of TESLA, INC. Courtesy of TESLA, INC.
|
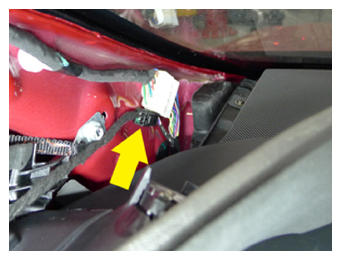 Courtesy of TESLA, INC. Courtesy of TESLA, INC.
|
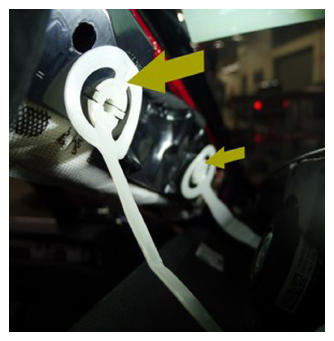 Courtesy of TESLA, INC. Courtesy of TESLA, INC.
|
 Courtesy of TESLA, INC. Courtesy of TESLA, INC.
|
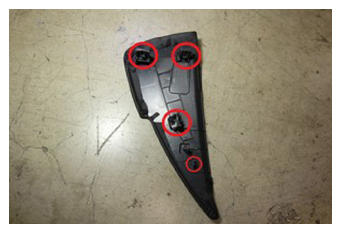
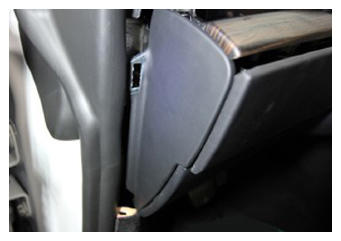
- Install LH IP end cap
NOTE:
4x clips
 Courtesy of TESLA, INC. Courtesy of TESLA, INC.
|
 Courtesy of TESLA, INC. Courtesy of TESLA, INC.
|
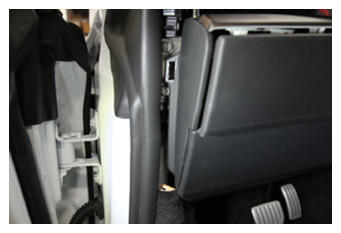
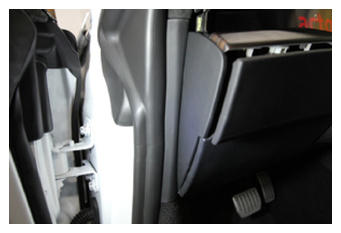
- Install LH mid A-pillar trim
NOTE:
1x clip, 2x tabs, Verify weather seal is seated properly
 Courtesy of TESLA, INC. Courtesy of TESLA, INC.
|
 Courtesy of TESLA, INC. Courtesy of TESLA, INC.
|
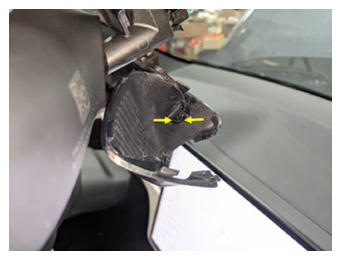
- Install tether onto rear view mirror lower cover
NOTE:
2x tabs, Guide tabs through anchor on rear view mirror lower cover
 Courtesy of TESLA, INC. Courtesy of TESLA, INC.
|
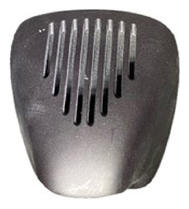
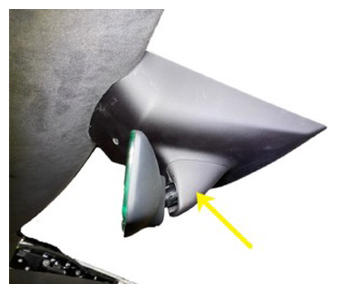
- Install rear view mirror lower cover
NOTE:
4x tabs, Install the tabs closest to the rearview mirror assembly and push the cover up to secure
 Courtesy of TESLA, INC. Courtesy of TESLA, INC.
|
 Courtesy of TESLA, INC. Courtesy of TESLA, INC.
|
- Raise LH front window
- Close LH front door