- Use IPA wipes to clean any residue from LH primary rear side body seal area on the body.
NOTE:
Allow at least 1 min for dry time.
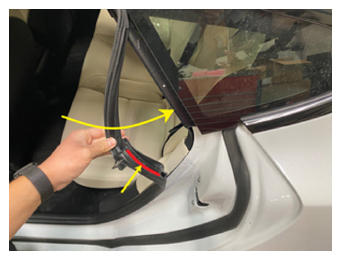
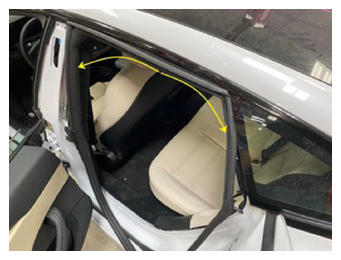
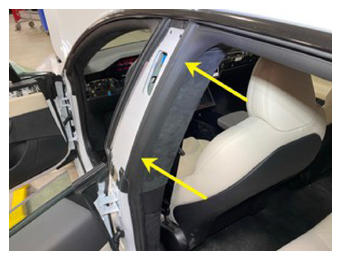
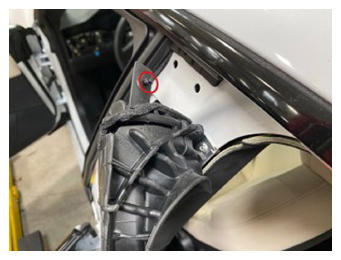
- Align the LH primary rear side body seal onto the vehicle, secure the clip to the B-pillar, and then remove the adhesive backing and adhere the seal to the body along the installation path.
NOTE:
Make sure the seal is seated properly along the bright molding, quarter glass, and interior trim.
 Courtesy of TESLA, INC. Courtesy of TESLA, INC.
|
 Courtesy of TESLA, INC. Courtesy of TESLA, INC.
|
 Courtesy of TESLA, INC. Courtesy of TESLA, INC.
|
 Courtesy of TESLA, INC. Courtesy of TESLA, INC.
|
 Courtesy of TESLA, INC. Courtesy of TESLA, INC.
|
 Courtesy of TESLA, INC. Courtesy of TESLA, INC.
|
 Courtesy of TESLA, INC. Courtesy of TESLA, INC.
|
 Courtesy of TESLA, INC. Courtesy of TESLA, INC.
|
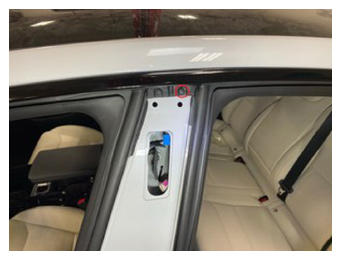 Courtesy of TESLA, INC. Courtesy of TESLA, INC.
|
- Install the LH B-pillar applique. See Applique - B-Pillar - LH (Remove And Replace)
.
NOTE:
It is not necessary to perform service redeploy after installation.
- Close LH rear door
- Recalibrate the windows. See Window Regulator Recalibrate
- Confirm that the window operates correctly and without any abnormal noise.
- Connect a laptop with Toolbox 3 to the vehicle.
- In Toolbox, click the Dashboards
tab, and then search for "Service Tools".
- Click the Clear Calibration Pillars
button.
NOTE:
Confirm that there is a successfully cleared calibration message.
- Exit the vehicle, and then click DAS Image Capture
.
NOTE:
The vehicle needs to be unoccupied in order for the ride height to maintain specifications.
- Review the images and make sure all the cameras are able to capture the image correctly.
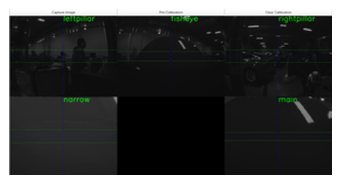 Courtesy of TESLA, INC. Courtesy of TESLA, INC.
|
- Disconnect Toolbox 3 and remove the laptop from the vehicle.
- Raise the LH front window and close the LH front door.
- Inform the customer that the vehicle will need to be driven to complete the calibration procedure. During this time, DAS functions will be completely unavailable.