- Inspect the regulator isolator clamps for glass splinters or other debris, and clean them if necessary.
CAUTION:
Debris and splinters may damage or shatter the new door glass.
- Position the rear LH door glass into the LH rear door.
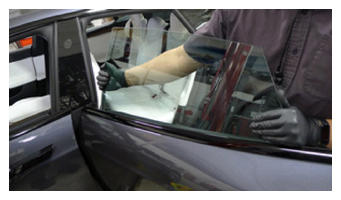 Courtesy of TESLA, INC. Courtesy of TESLA, INC.
|
- Install the LH rear door inner belt seal. See SEAL - INNER BELT - REAR DOOR - LH (REMOVE AND REPLACE) .
- Install the LH C-pillar margin seal onto the LH rear door assembly.
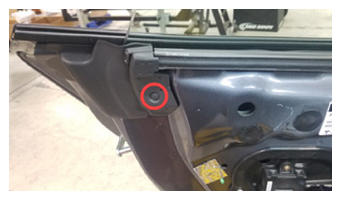 Courtesy of TESLA, INC. Courtesy of TESLA, INC.
|
- Install the LH rear door margin seal onto the LH rear door assembly.
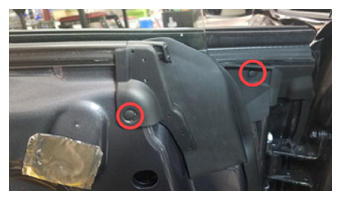 Courtesy of TESLA, INC. Courtesy of TESLA, INC.
|
- Install and hand tighten the bolt that attaches the rear LH door glass to the rearmost regulator isolator clamp.
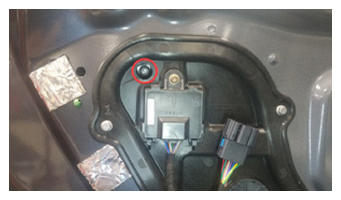 Courtesy of TESLA, INC. Courtesy of TESLA, INC.
|
- Lower the rear LH door glass partially for access to foremost regulator isolator clamp.
- Install and hand tighten the bolt that attaches the rear LH door glass to the foremost regulator isolator clamp.
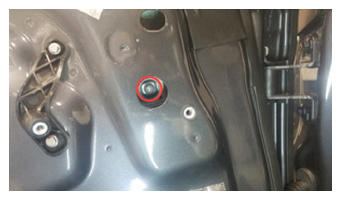 Courtesy of TESLA, INC. Courtesy of TESLA, INC.
|
- Raise the window fully.
- Close the LH rear door.
- Adjust the rear LH door glass. DOOR GLASS - REAR - LH (ADJUST) .
- Disconnect puddle lamp from LH rear door.
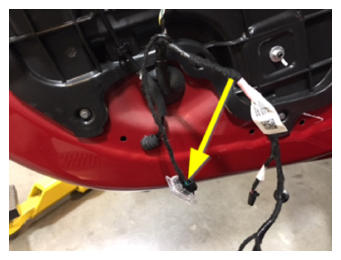 Courtesy of TESLA, INC. Courtesy of TESLA, INC.
|
- Install butyl patches covering the openings for the regulator isolator clamps in the LH rear door.
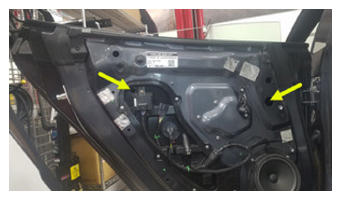 Courtesy of TESLA, INC. Courtesy of TESLA, INC.
|
- Install the LH rear door trim panel. See Panel - Door Trim - Rear - LH (Remove and Replace)
- Close LH rear door.
- Connect a laptop with Toolbox 3 to the vehicle.
- Click Actions/Autodiag
, and then search for "window".
- Click TEST-SELF_VCLEFT_REAR-L_CALIBRATE-WINDOW, and then click Run
and allow the routine to complete.
NOTE:
Click X
at the top right of the window to close once complete.
- Press the LH rear window switch down to the second position to activate the auto-lower function, then raise window switch up to the second position to activate auto-raise function.
NOTE:
If the window does not lower completely, repeat the previous calibration steps.
- Disconnect Toolbox 3 and remove the laptop from the vehicle.
- Close the LH front door.