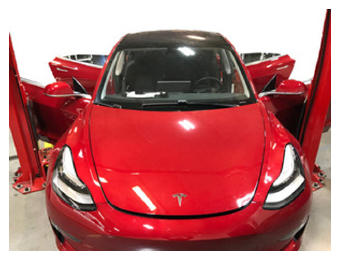
- Open all four doors
NOTE:
If vehicle is being powered down, Latch rear doors to prevent accidental closure
 Courtesy of TESLA, INC. Courtesy of TESLA, INC.
|
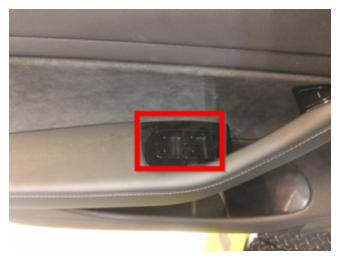
- Lower all four windows
 Courtesy of TESLA, INC. Courtesy of TESLA, INC.
|
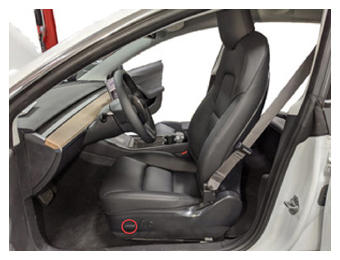
- Move LH front seat forward
 Courtesy of TESLA, INC. Courtesy of TESLA, INC.
|
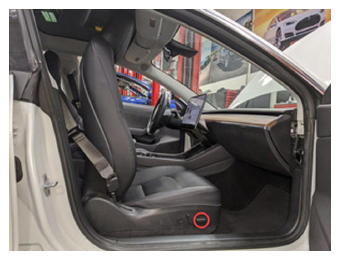
- Move RH front seat forward
 Courtesy of TESLA, INC. Courtesy of TESLA, INC.
|
- Remove RH side rail assembly
NOTE:
4x clips, 2x tether hooks, Pull the upper corner of the side rail then work your way to bottom, Pull the lower side rail toward LH to release clips, Remove 2x tethers by twisting and pulling away from housing, DO NOT remove the tethers from body side, must be replaced if removed
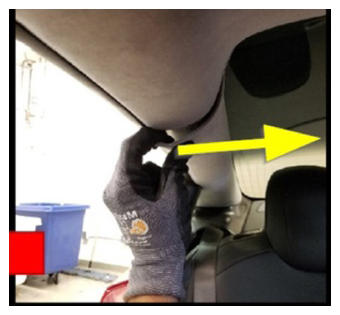 Courtesy of TESLA, INC. Courtesy of TESLA, INC.
|
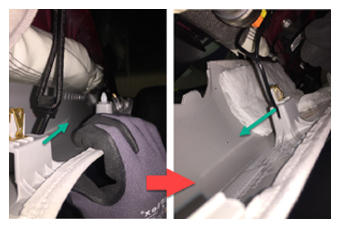 Courtesy of TESLA, INC. Courtesy of TESLA, INC.
|
- Push open RH coat hook
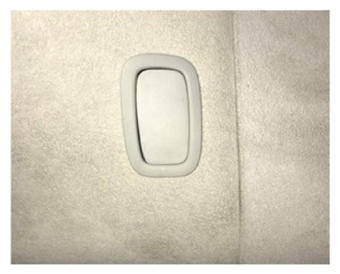 Courtesy of TESLA, INC. Courtesy of TESLA, INC.
|
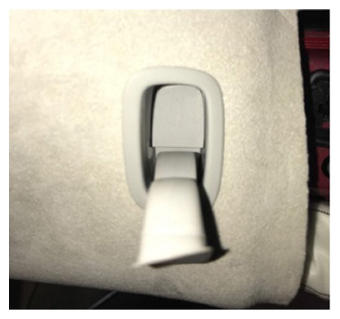 Courtesy of TESLA, INC. Courtesy of TESLA, INC.
|
- Pry open RH coat hook screw cover
NOTE:
2x clips
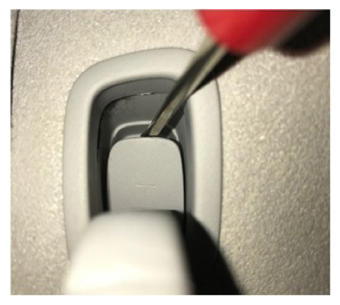 Courtesy of TESLA, INC. Courtesy of TESLA, INC.
|
- Remove RH coat hook screw
NOTE:
1x screw, T25, 2.5 N.m (1.84 ft-lbs.)
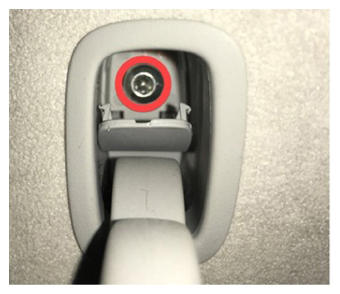 Courtesy of TESLA, INC. Courtesy of TESLA, INC.
|
- Release clips securing the RH upper B-pillar assembly and move aside
NOTE:
4x clips, Pull the bottom of the upper B-pillar toward inside of the car, then pull the top of trim to release the remaining clips
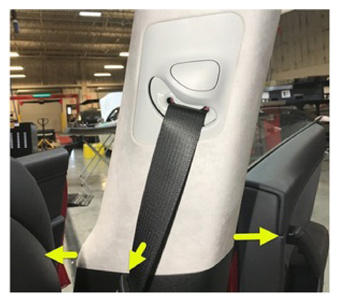 Courtesy of TESLA, INC. Courtesy of TESLA, INC.
|
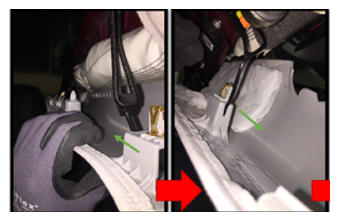
- Remove LH side rail assembly
NOTE:
4x clips, 2x tether hooks, Pull the upper corner of the side rail then work your way to bottom, Pull the lower side rail toward RH to release clips, Remove 2x tethers by twisting and pulling away from housing, DO NOT remove the tethers from body side, must be replaced if removed
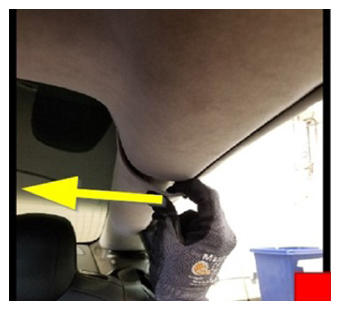 Courtesy of TESLA, INC. Courtesy of TESLA, INC.
|
 Courtesy of TESLA, INC. Courtesy of TESLA, INC.
|
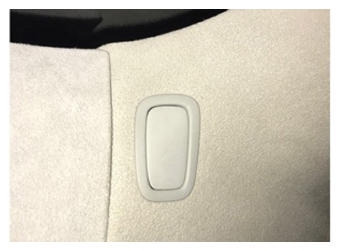
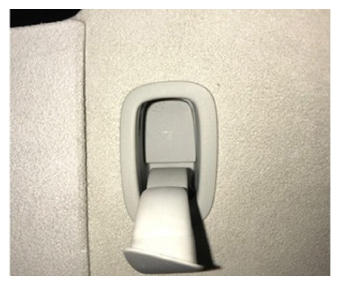
- Push open LH coat hook
 Courtesy of TESLA, INC. Courtesy of TESLA, INC.
|
 Courtesy of TESLA, INC. Courtesy of TESLA, INC.
|
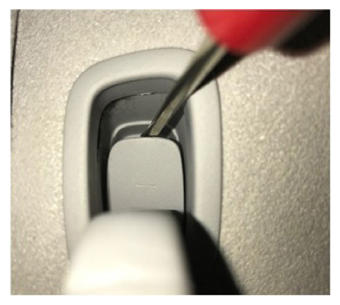
- Pry open LH coat hook screw cover
NOTE:
2x securing tabs
 Courtesy of TESLA, INC. Courtesy of TESLA, INC.
|
- Remove LH coat hook screw
NOTE:
1x screw, T25, 2.5 N.m (1.84 ft-lbs.)
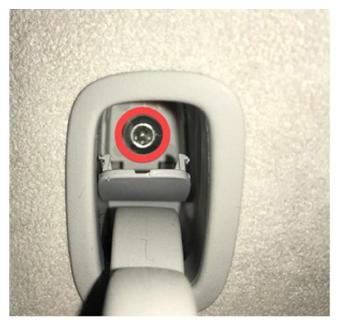 Courtesy of TESLA, INC. Courtesy of TESLA, INC.
|
- Release clips securing the LH upper B-pillar assembly and move aside
NOTE:
4x clips, Pull the bottom of the upper B-pillar toward inside of the car, then pull the top to release the remaining clips
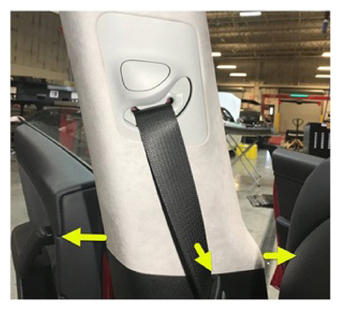 Courtesy of TESLA, INC. Courtesy of TESLA, INC.
|
- Release rear end of headliner from body
NOTE:
4x clips, Use air bladder between headliner and body for additional clearance if needed, be cautious not to damage headliner
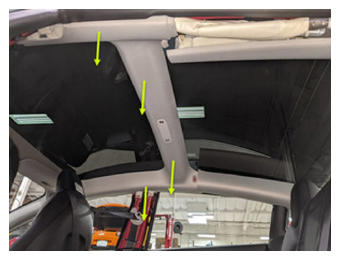 Courtesy of TESLA, INC. Courtesy of TESLA, INC.
|
- Disconnect LH MIMO antenna
NOTE:
2x connectors, Release red locking tabs
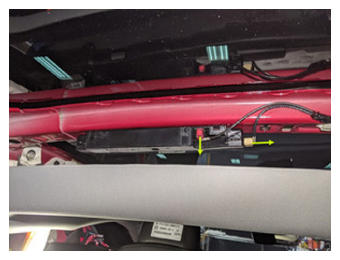 Courtesy of TESLA, INC. Courtesy of TESLA, INC.
|
- Remove bolt securing LH MIMO antenna to body
NOTE:
1x bolt, T25, 10 N.m (7.37 ft-lbs.). Bolt is captive in antenna housing and cannot be removed from antenna
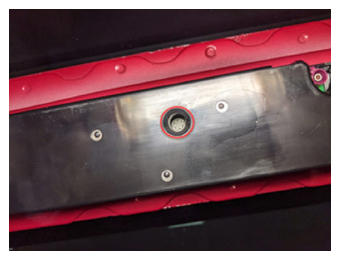 Courtesy of TESLA, INC. Courtesy of TESLA, INC.
|
- Remove LH MIMO antenna from body
NOTE:
2x clips
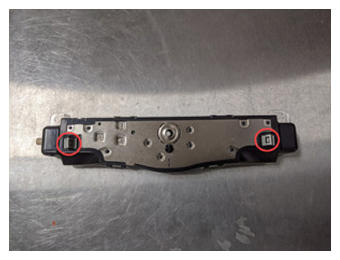 Courtesy of TESLA, INC. Courtesy of TESLA, INC.
|
- Install LH MIMO antenna to body
NOTE:
2x clips
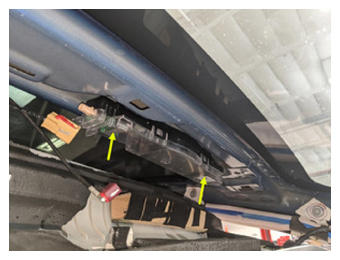 Courtesy of TESLA, INC. Courtesy of TESLA, INC.
|
- Install bolt securing LH MIMO antenna to body
NOTE:
1x bolt, T25, 10 N.m (7.37 ft-lbs.).
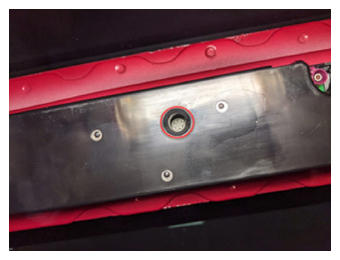 Courtesy of TESLA, INC. Courtesy of TESLA, INC.
|
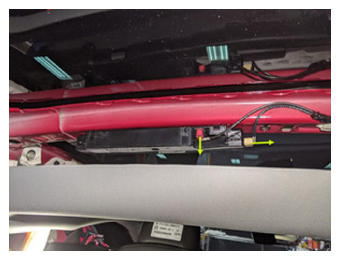
- Connect LH MIMO antenna
NOTE:
2x connectors, Engage locking tabs
 Courtesy of TESLA, INC. Courtesy of TESLA, INC.
|
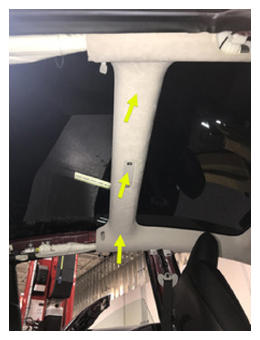
- Install rear end of headliner to body
NOTE:
4x clips, Verify all clips are fully engaged
 Courtesy of TESLA, INC. Courtesy of TESLA, INC.
|
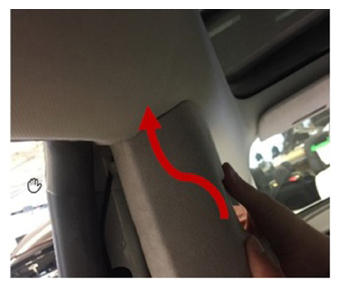
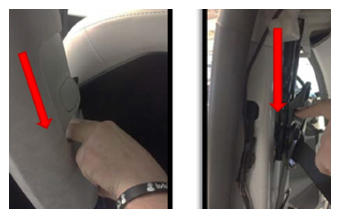
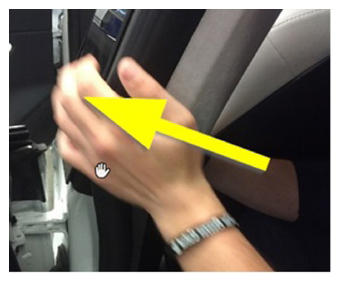
- Install the LH upper B-pillar assembly
NOTE:
4x clips, Lower the seat belt slider to align it with the B-pillar panel, Insert top portion of upper B-pillar under the headliner to align the clips, Press the bottom to fully seat upper B-pillar to lower B-pillar, Make sure the seal correctly overlaps the trim
 Courtesy of TESLA, INC. Courtesy of TESLA, INC.
|
 Courtesy of TESLA, INC. Courtesy of TESLA, INC.
|
 Courtesy of TESLA, INC. Courtesy of TESLA, INC.
|
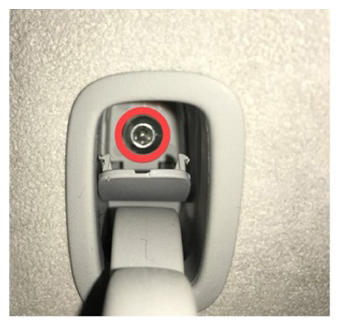
- Install LH coat hook screw
NOTE:
1x screw, T25, 2.5 N.m (1.84 ft-lbs.).
 Courtesy of TESLA, INC. Courtesy of TESLA, INC.
|
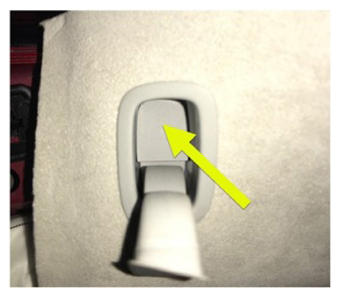
- Close LH coat hook screw cover
NOTE:
2x securing tabs
 Courtesy of TESLA, INC. Courtesy of TESLA, INC.
|
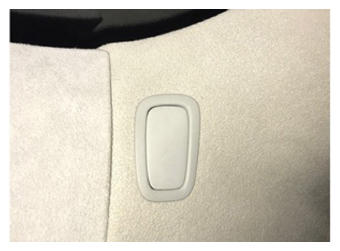
- Push LH coat hook closed
 Courtesy of TESLA, INC. Courtesy of TESLA, INC.
|
- Install LH side rail assembly
NOTE:
4x clips, 2x tethers, Replace tether if removed from body side, Install 2x tethers hooks to housing, Align the clips from bottom to top then press clips from top to bottom, Align the seal to sit on top of the trim
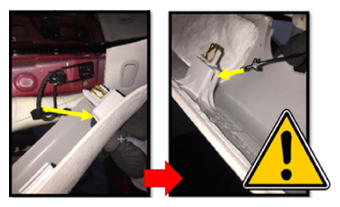 Courtesy of TESLA, INC. Courtesy of TESLA, INC.
|
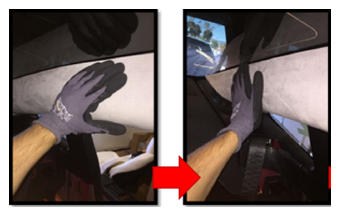 Courtesy of TESLA, INC. Courtesy of TESLA, INC.
|
- Install the RH upper B-pillar assembly
NOTE:
4x clips, Lower the seat belt slider to align it with the B-pillar panel, Insert top portion of upper B-pillar under the headliner to align the clips, Press the bottom to fully seat upper B-pillar to lower B-pillar, Make sure the seal correctly overlaps the trim
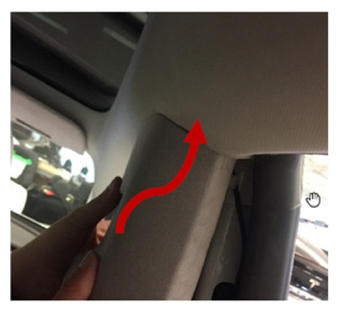 Courtesy of TESLA, INC. Courtesy of TESLA, INC.
|
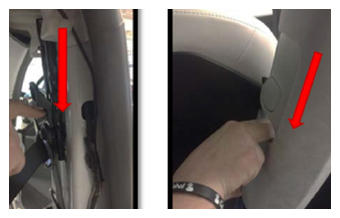 Courtesy of TESLA, INC. Courtesy of TESLA, INC.
|
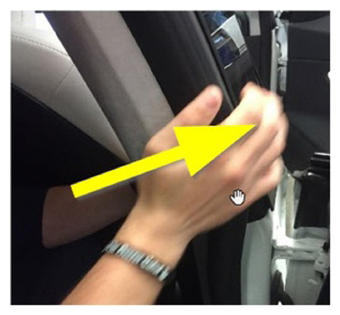 Courtesy of TESLA, INC. Courtesy of TESLA, INC.
|
- Install RH coat hook screw
NOTE:
1x screw, T25, 2.5 N.m (1.84 ft-lbs.).
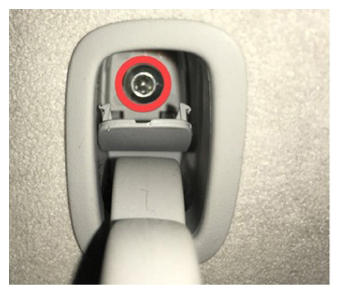 Courtesy of TESLA, INC. Courtesy of TESLA, INC.
|
- Close RH coat hook screw cover
NOTE:
2x clips
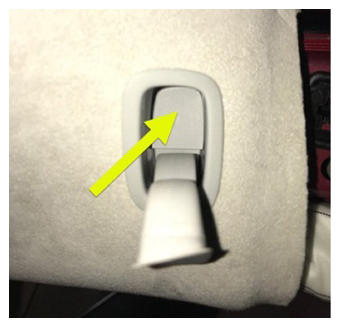 Courtesy of TESLA, INC. Courtesy of TESLA, INC.
|
- Push RH coat hook closed
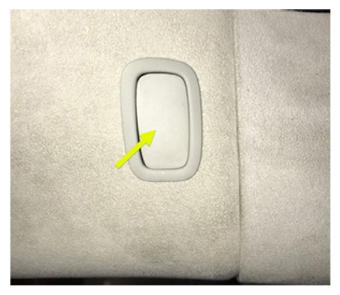 Courtesy of TESLA, INC. Courtesy of TESLA, INC.
|
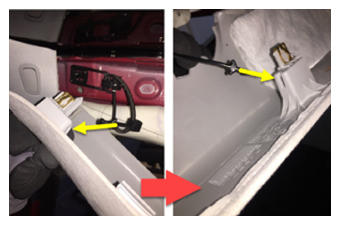
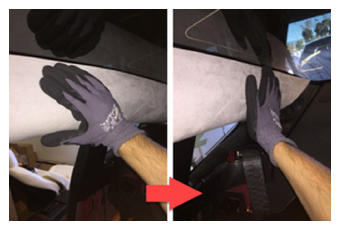
- Install RH side rail assembly
NOTE:
4x clips, 2x tethers, Replace tether if removed from body side, Install 2x tethers hooks to housing, Align the clips from bottom to top then press clips from top to bottom, Align the seal to sit on top of the trim
 Courtesy of TESLA, INC. Courtesy of TESLA, INC.
|
 Courtesy of TESLA, INC. Courtesy of TESLA, INC.
|
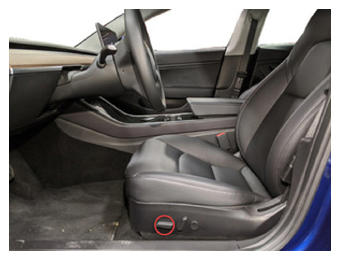
- Move LH front seat to original position
 Courtesy of TESLA, INC. Courtesy of TESLA, INC.
|
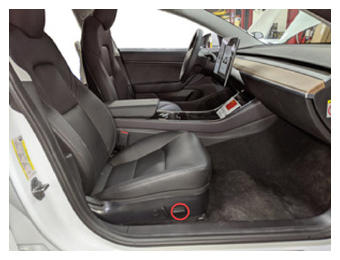
- Move RH front seat to original position
 Courtesy of TESLA, INC. Courtesy of TESLA, INC.
|
- Verify BT, WiFi, and LTE are functioning properly
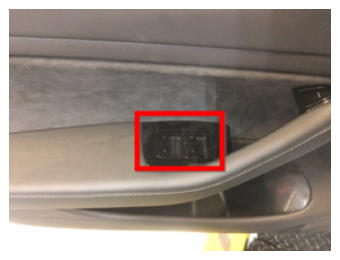
- Raise all the windows
 Courtesy of TESLA, INC. Courtesy of TESLA, INC.
|
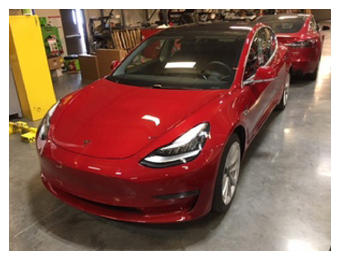
- Close all four doors
 Courtesy of TESLA, INC. Courtesy of TESLA, INC.
|