- Install the clips that attach the instrument panel electrical harness to the cross car beam.
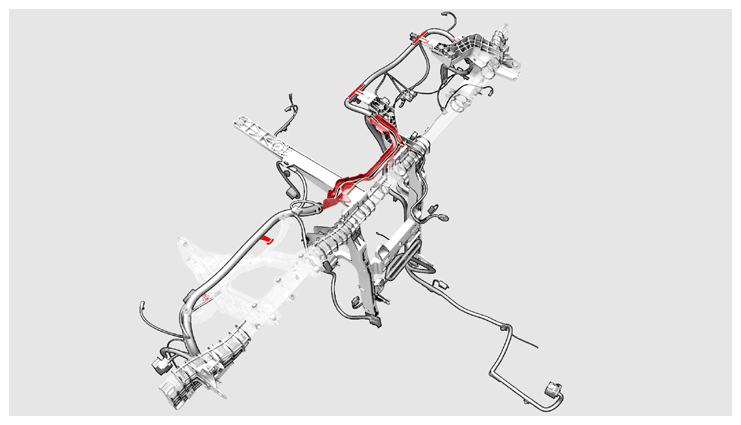 Courtesy of TESLA, INC. Courtesy of TESLA, INC.
|
- With an assistant, position the cross car beam in the vehicle for installation.
CAUTION:
Do not damage the interior when installing the cross car beam in the vehicle.
- Hand-tighten the bolts that attach the LH and RH corners of the cross car beam to the body.
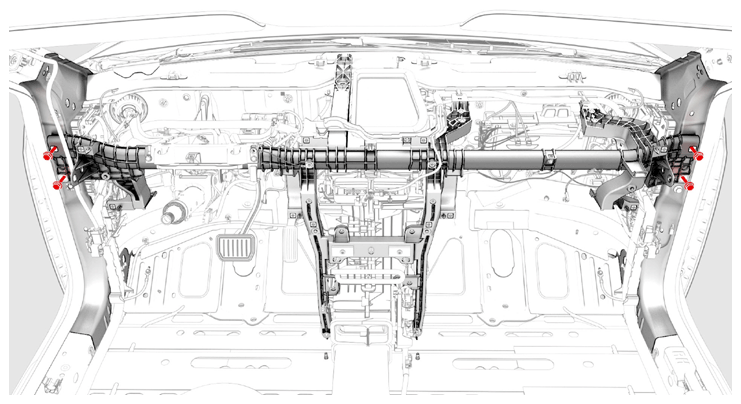 Courtesy of TESLA, INC. Courtesy of TESLA, INC.
|
- Hand-tighten the bolts that attach the cross car beam to the HVAC assembly.
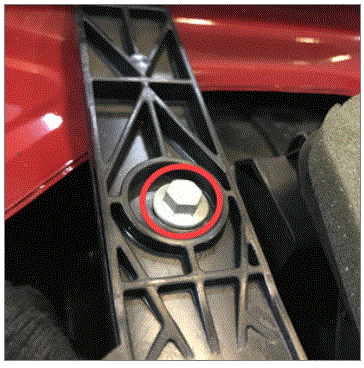 Courtesy of TESLA, INC. Courtesy of TESLA, INC.
|
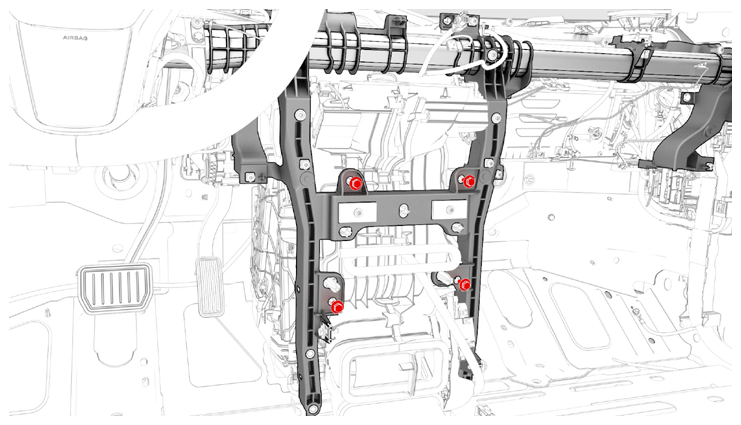 Courtesy of TESLA, INC. Courtesy of TESLA, INC.
|
- Hand-tighten the bolt and nut that attach the RH cross car beam bracket to the cross car beam.
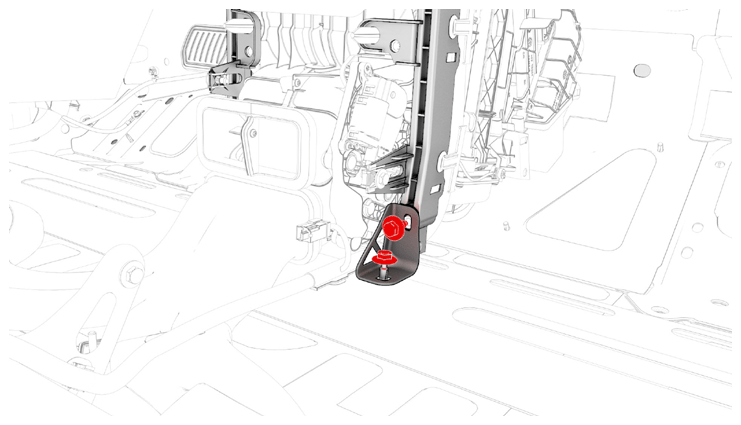 Courtesy of TESLA, INC. Courtesy of TESLA, INC.
|
- Hand-tighten the bolt and nut that attach the LH cross car beam bracket to the cross car beam.
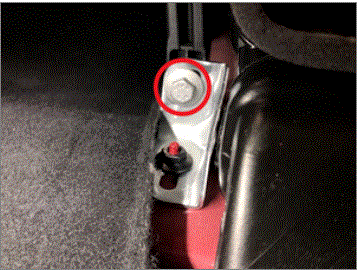 Courtesy of TESLA, INC. Courtesy of TESLA, INC.
|
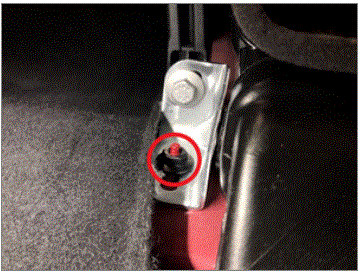 Courtesy of TESLA, INC. Courtesy of TESLA, INC.
|
- Install the bolts (x2) that attach the steering column to the body.
 25 N.m (18.4 lbs-ft)
NOTE:
Use of the following tool(s) is recommended:
- 3 in extension
- 13 mm socket
- Ratchet/torque wrench
- Cordless Ratchet/Impact Driver
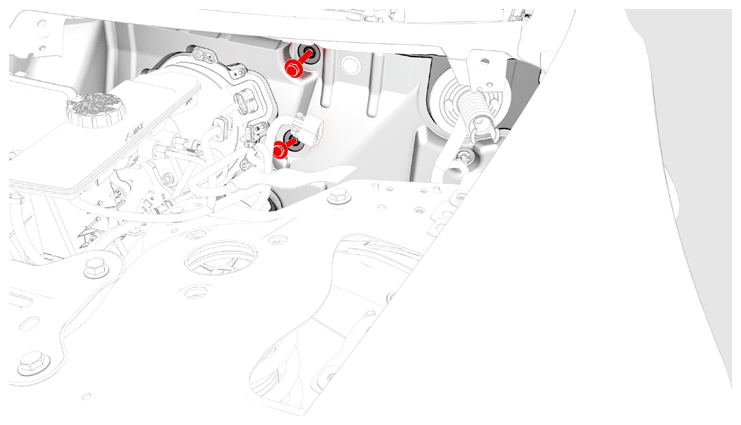 Courtesy of TESLA, INC. Courtesy of TESLA, INC.
|
- Tighten the bolt and nut that attach the LH cross car beam bracket to the cross car beam.
 25 N.m (18.4 lbs-ft)
 25 N.m (18.4 lbs-ft)
Courtesy of TESLA, INC.
|
Courtesy of TESLA, INC.
|
- Tighten the bolt and nut that attach the RH cross car beam bracket to the cross car beam.
25 N.m (18.4 lbs-ft)
25 N.m (18.4 lbs-ft)
NOTE:
Use of the following tool(s) is recommended:
- 3 in extension
- 13 mm socket
- Ratchet/torque wrench
Courtesy of TESLA, INC.
|
- Tighten the bolts that attach the cross car beam to the HVAC assembly.
 5.5 N.m (4.1 lbs-ft)
NOTE:
Use of the following tool(s) is recommended:
- 3 in extension
- 10 mm socket
- Ratchet/torque wrench
- Cordless Ratchet/Impact Driver
Courtesy of TESLA, INC.
|
Courtesy of TESLA, INC.
|
- Tighten the bolts that attach the LH and RH corners of the cross car beam to the body.
 29 N.m (21.4 lbs-ft)
NOTE:
Use of the following tool(s) is recommended:
- 3 in extension
- 15 mm socket
- Ratchet/torque wrench
- Cordless Ratchet/Impact Driver
Courtesy of TESLA, INC.
|
- Tighten the bolt that attaches the cross car beam to the upper side of the cowl.
25 N.m (18.4 lbs-ft)
NOTE:
Tip: Use of the following tool(s) is recommended:
- 13mm 12pt combination wrench
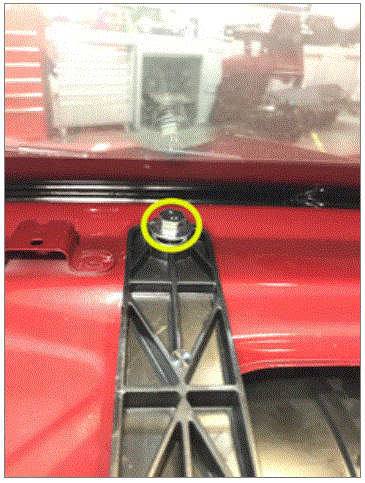 Courtesy of TESLA, INC. Courtesy of TESLA, INC.
|
- Secure the HVAC harness to the harness holders on the RH side of the instrument panel harness.
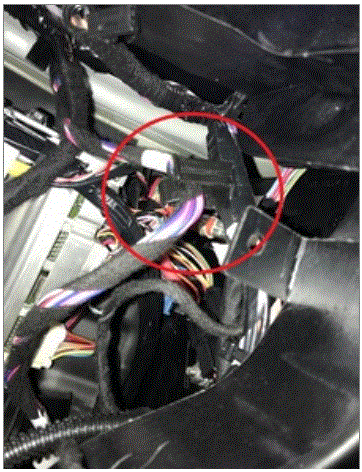 Courtesy of TESLA, INC. Courtesy of TESLA, INC.
|
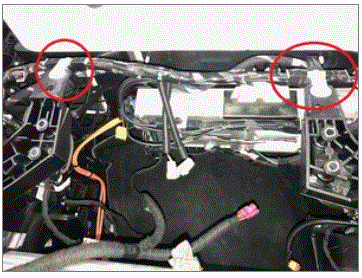 Courtesy of TESLA, INC. Courtesy of TESLA, INC.
|
- Position the instrument panel electrical harness to the center console area for installation.
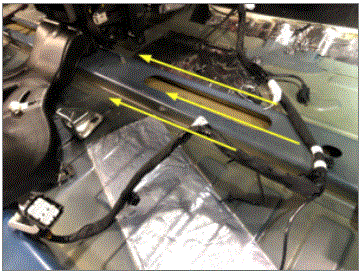 Courtesy of TESLA, INC. Courtesy of TESLA, INC.
|
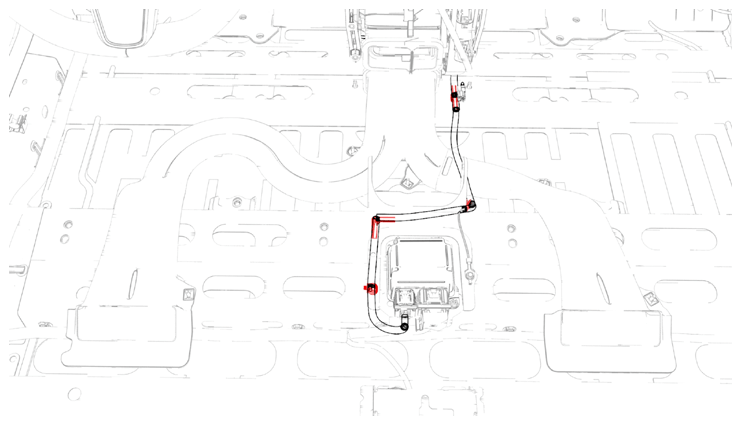
- Install the clips (x4) that attach the instrument panel electrical harness to the body.
 Courtesy of TESLA, INC. Courtesy of TESLA, INC.
|
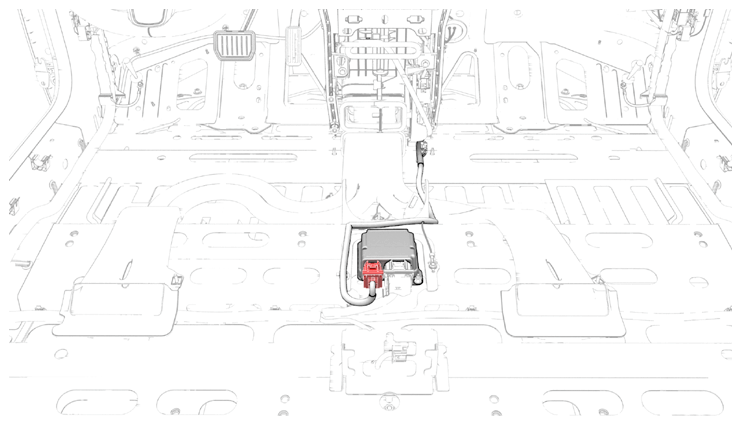
- Connect the instrument panel electrical harness to the passive safety restraint module (RCM) connector.
 Courtesy of TESLA, INC. Courtesy of TESLA, INC.
|
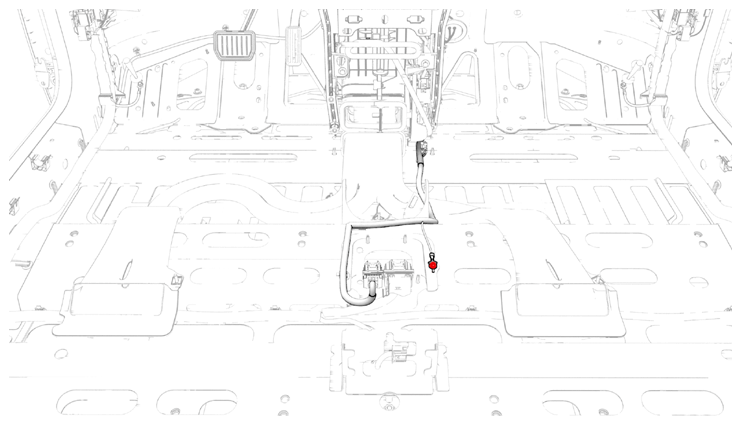
- Install a new bolt that attaches the instrument panel electrical harness ground strap to the body.
 8 N.m (5.9 lbs-ft)
NOTE:
Inspect the bolt: if it is a self tapping tri-lobular bolt (1128269-00-A), discard the bolt. If it is a normal bolt (1447438-00-A), then it can be reused.
NOTE:
Tip: Use of the following tool(s) is recommended:
- 2 in extension
- 10 mm socket
- Ratchet/torque wrench
 Courtesy of TESLA, INC. Courtesy of TESLA, INC.
|
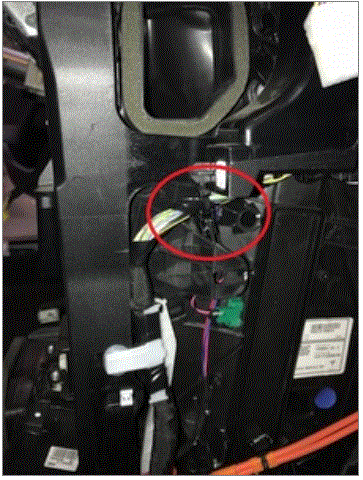
- Install the clip that attaches the instrument panel electrical harness to the RH side of the HVAC assembly.
 Courtesy of TESLA, INC. Courtesy of TESLA, INC.
|
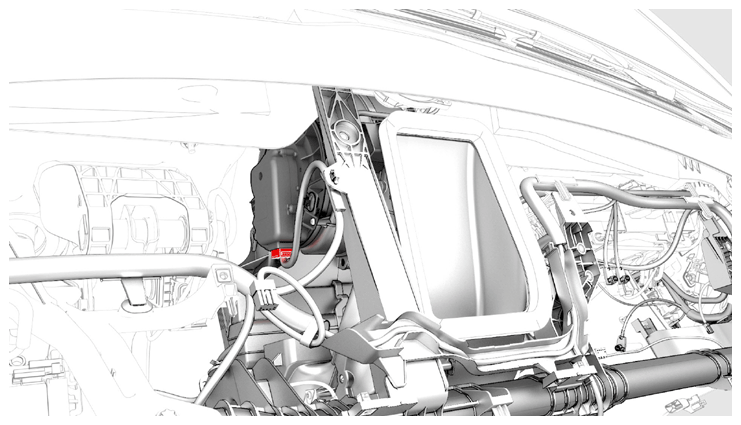
- Connect the instrument panel electrical harness to the HVAC fan assembly motor connector.
 Courtesy of TESLA, INC. Courtesy of TESLA, INC.
|
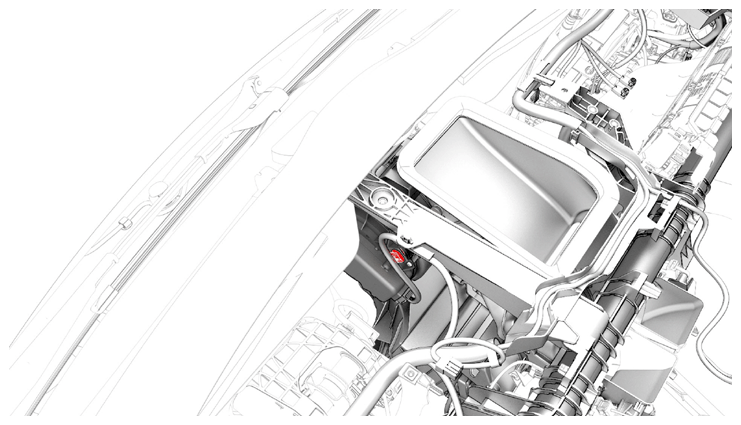
- Install the clip that attaches the instrument panel electrical harness to the HVAC fan assembly.
 Courtesy of TESLA, INC. Courtesy of TESLA, INC.
|
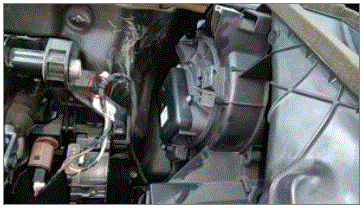
- Install the clip that attaches the brake pedal electrical harness to the brake pedal assembly.
 Courtesy of TESLA, INC. Courtesy of TESLA, INC.
|
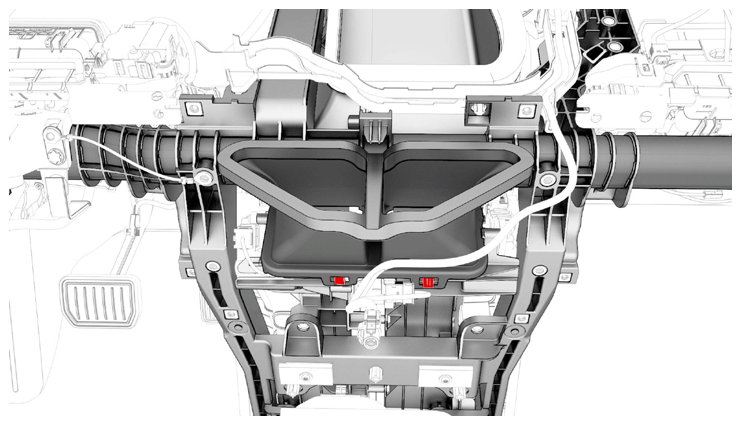
- Install the clips that attach the bleeder duct adapter to the HVAC assembly.
 Courtesy of TESLA, INC. Courtesy of TESLA, INC.
|
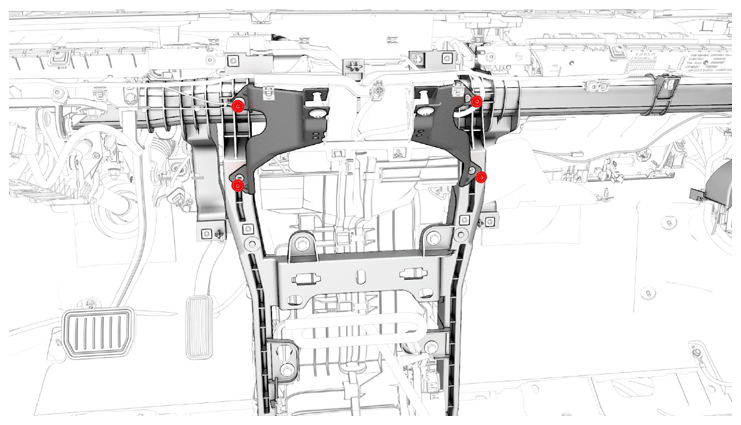
- Install the bolts that attach the touchscreen brackets.
 12 N.m (8.8 lbs-ft)
NOTE:
Tip: Use of the following tool(s) is recommended:
- 2 in extension
- Torx T30 socket
- Ratchet/torque wrench
 Courtesy of TESLA, INC. Courtesy of TESLA, INC.
|
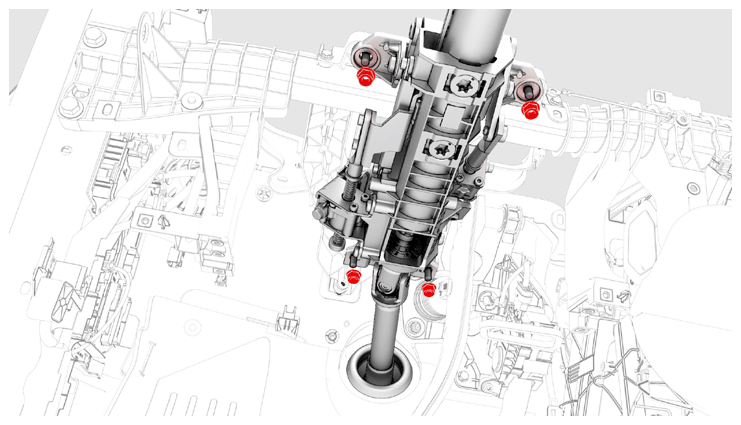
- Position the steering column for installation.
- Install the nuts (x4) that attach the steering column to the cross car beam.
 15 N.m (11.1 lbs-ft)
NOTE:
Tip: Use of the following tool(s) is recommended:
- 3 in extension
- 13 mm socket
- Ratchet/torque wrench
- Cordless Ratchet/Impact Driver
 Courtesy of TESLA, INC. Courtesy of TESLA, INC.
|
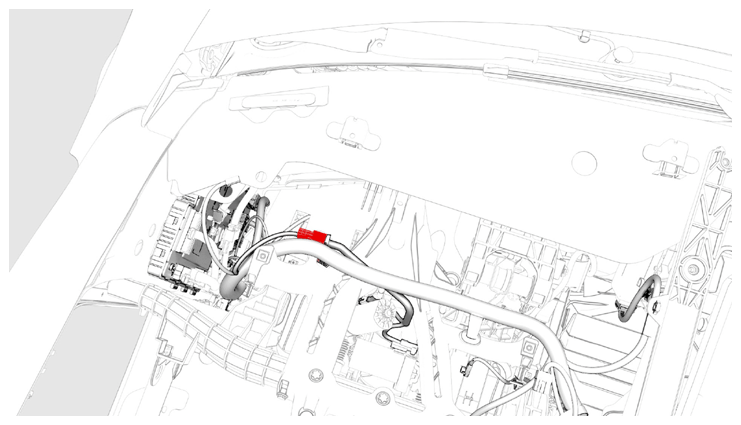
- Connect the instrument panel electrical harness to the steering column control module connector.
 Courtesy of TESLA, INC. Courtesy of TESLA, INC.
|
- Install the clips (x2) that attach the headliner electrical harness.
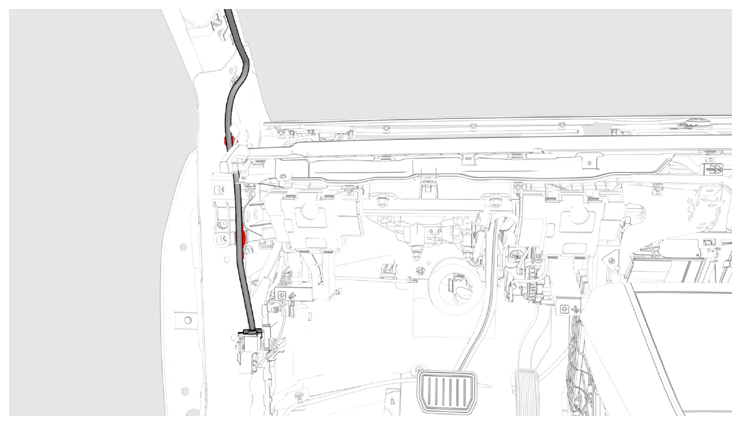 Courtesy of TESLA, INC. Courtesy of TESLA, INC.
|
- Connect the headliner electrical harness to the LH body controller module connector.
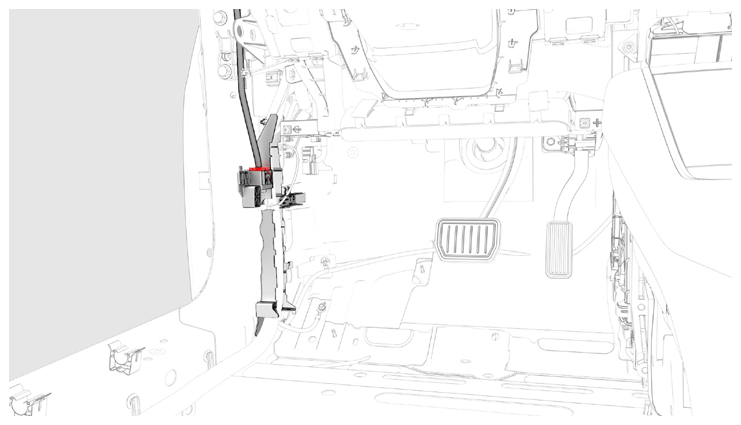 Courtesy of TESLA, INC. Courtesy of TESLA, INC.
|
- Install the LH front carpet. See CARPET - FRONT - LH (REMOVE AND REPLACE)
.
- Install the LH air wave duct. See DUCT - AIR WAVE - LH (LHD) (NON-HEAT PUMP) - REMOVE AND REPLACE
.
- Install the IP carrier. See IP CARRIER (REMOVE AND INSTALL) .
- Install the dash tweeter. See TWEETER - DASH (REMOVE AND REPLACE)
.
- Install the center dash speaker. See SPEAKER - DASH - CENTER (REMOVE AND REPLACE)
.
- Install the LH and RH dash speakers. See SPEAKER - DASH - LH (REMOVE AND REPLACE)
.
- Install the instrument panel speaker grille. See GRILLE - SPEAKER - INSTRUMENT PANEL (REMOVE AND REPLACE) .
- Install the LH front vent. See VENT - FRONT - LH (REMOVE AND REPLACE) .
- Install the RH front vent. See VENT - FRONT - RH (REMOVE AND REPLACE) .
- Install the vent finisher. See FINISHER - VENT (REMOVE AND REPLACE) .
- Install the RH air wave duct. See DUCT - AIR WAVE - RH (LHD) (REMOVE AND REPLACE)
.
- Install the RH footwell duct. See DUCT - FOOTWELL - RH (LHD) (REMOVE AND REPLACE)
.
- Install the glove box. See GLOVE BOX - WITH KNEE AIRBAGS (NON-HEAT PUMP) (REMOVE AND REPLACE) or GLOVE BOX - WITHOUT KNEE AIRBAGS (REMOVE AND REPLACE) .
- Install the main instrument panel decor trim. See DECOR TRIM - INSTRUMENT PANEL - MAIN (REMOVE AND REPLACE) .
- Install the touchscreen. See TOUCHSCREEN (REMOVE AND REPLACE)
.
- Install the steering column control module. See MODULE - STEERING COLUMN CONTROL (REMOVE AND REPLACE)
.
- Install the steering wheel. See STEERING WHEEL (REMOVE AND INSTALL)
.
- Install the center console. See CENTER CONSOLE (REMOVE AND INSTALL)
.
- Install the passenger knee airbag (if equipped). See AIRBAG - KNEE - FRONT PASSENGER (REMOVE AND REPLACE)
.
- Install the front passenger footwell cover. See COVER - FOOTWELL - PASSENGER (LHD) (REMOVE AND REPLACE) .
- Install the LH footwell duct. See DUCT - FOOTWELL - LH (LHD) (REMOVE AND REPLACE)
.
- Install the driver knee airbag (if equipped). See AIRBAG - KNEE - DRIVER (REMOVE AND INSTALL)
.
- Install the driver footwell cover. See COVER - FOOTWELL - DRIVER (REMOVE AND REPLACE) .
- Install the LH and RH upper A-pillar trim panels. See TRIM - A-PILLAR - UPPER - LH (REMOVE AND REPLACE)
.
- Install the RH lower A-pillar trim panel. See TRIM - A-PILLAR - LOWER - LH (REMOVE AND REPLACE)
.
- Install the LH and RH middle A-pillar trim panels. See TRIM - A-PILLAR - MIDDLE - LH (REMOVE AND REPLACE)
.
- Install the LH and RH instrument panel end caps. See END CAP - INSTRUMENT PANEL - LH (REMOVE AND REPLACE) .
- Push the vehicle onto the lift.
CAUTION:
Recommend assistance. Note this vehicle can only be safely pushed for a very short distance and at very slow speed.
- Raise and support the vehicle.
- Install the windshield washer reservoir into position, and then connect the electrical harness to the windshield washer reservoir connector.
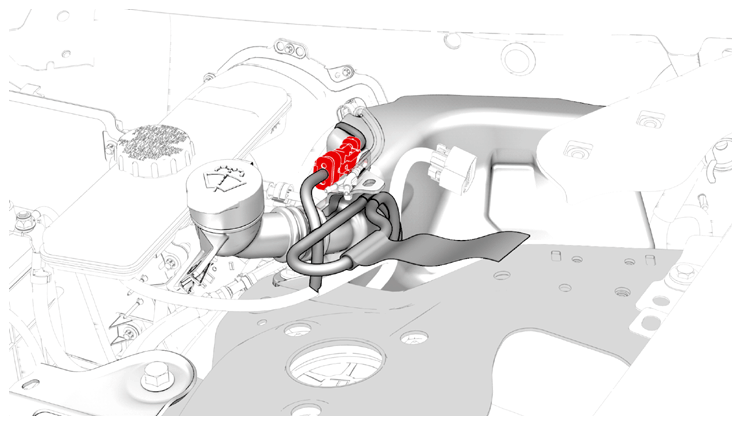 Courtesy of TESLA, INC. Courtesy of TESLA, INC.
|
- Install the upper bolt that attaches the windshield washer reservoir to the body.
3 N.m (2.2 lbs-ft)
NOTE:
Tip: Use of the following tool(s) is recommended:
- 2 in extension
- 10 mm socket
- Ratchet/torque wrench
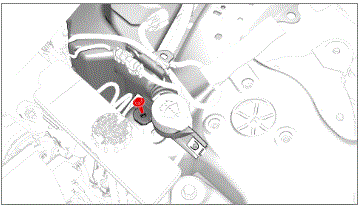 Courtesy of TESLA, INC. Courtesy of TESLA, INC.
|
- Install the clip that attaches the electrical harness to the windshield washer reservoir.
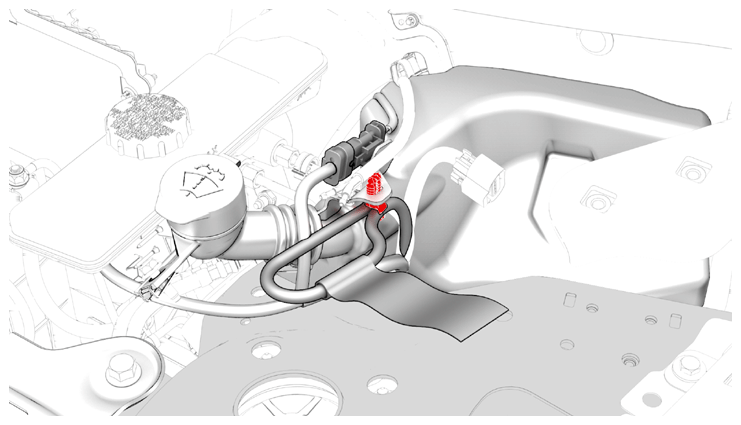 Courtesy of TESLA, INC. Courtesy of TESLA, INC.
|
- Remove the LH front wheel. See WHEEL (REMOVE AND INSTALL)
.
- Partially release the LH front wheel arch liner.
NOTE:
Remove the 2 clips that secured the LH front wheel liner earlier.
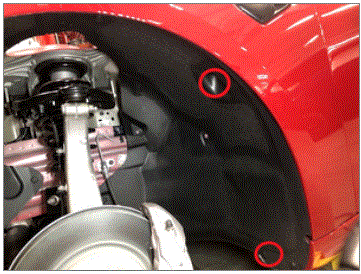 Courtesy of TESLA, INC. Courtesy of TESLA, INC.
|
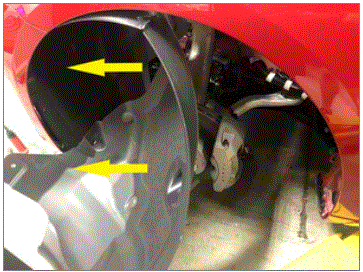 Courtesy of TESLA, INC. Courtesy of TESLA, INC.
|
- Install the lower bolt that attaches the windshield washer reservoir to the body.
3 N.m (2.2 lbs-ft)
NOTE:
Tip: Use of the following tool(s) is recommended:
- 2 in extension
- 10 mm socket
- Flex head ratchet/flex head torque wrench
- Cordless Ratchet/Impact Driver
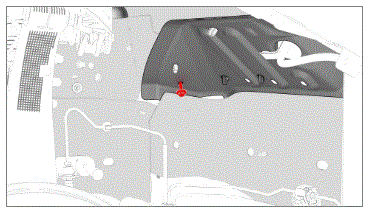 Courtesy of TESLA, INC. Courtesy of TESLA, INC.
|
- Install the bolt and the clips (x6) that attach the rear portion of the LH front wheel arch liner to the vehicle.
 5 N.m (3.7 lbs-ft)
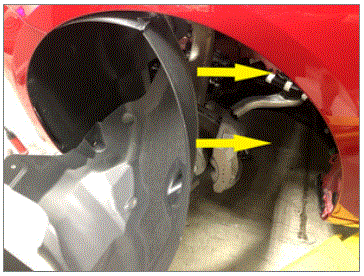 Courtesy of TESLA, INC. Courtesy of TESLA, INC.
|
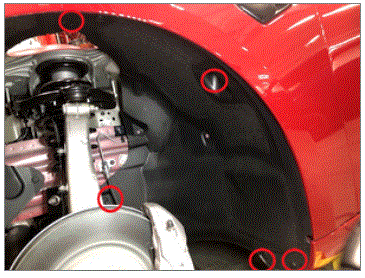 Courtesy of TESLA, INC. Courtesy of TESLA, INC.
|
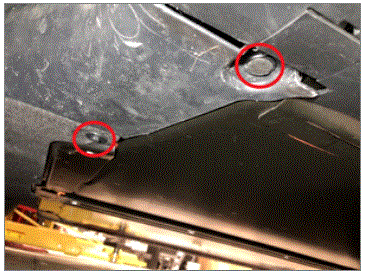 Courtesy of TESLA, INC. Courtesy of TESLA, INC.
|
- Install the LH front wheel. See WHEEL (REMOVE AND INSTALL)
.
- Install the HVAC plenum inner duct. See DUCT - HVAC PLENUM - INNER (REMOVE AND REPLACE)
.
- Install the HVAC plenum outer duct. See DUCT - HVAC PLENUM - OUTER (REMOVE AND REPLACE)
.
- Install the wiper module. See WIPER MODULE (REMOVE AND REPLACE)
.
- Install the cowl screen panel. See PANEL - COWL SCREEN (REMOVE AND REPLACE)
.
- Install the LH and RH shock tower covers. See COVER - SHOCK TOWER - LH (REMOVE AND REPLACE)
.
- Install the LH and RH wiper arms. See WIPER ARMS (REMOVE AND REPLACE)
.
- Install the LH lower A-pillar trim panel. See TRIM - A-PILLAR - LOWER - LH (REMOVE AND REPLACE)
.
- Connect 12V power. See 12V/LV POWER (DISCONNECT AND CONNECT)
.
- Install the driver seat. See SEAT ASSEMBLY - 1ST ROW (LH) - REMOVE AND REPLACE
.
- Install the underhood storage unit. See UNDERHOOD STORAGE UNIT (REMOVE AND REPLACE)
.
- Install the cabin intake duct. See DUCT - CABIN INTAKE (REMOVE AND REPLACE)
.
- Install the rear underhood apron. See UNDERHOOD APRON - REAR (REMOVE AND REPLACE)
.
- Verify the operation of windshield washers and wipers.
- Install the 2nd row lower seat cushion. See SEAT CUSHION - LOWER - 2ND ROW (REMOVE AND REPLACE)
.
- Move the LH and RH front seats to the original position.
- Raise all windows and close all doors.