- Remove residual adhesive from the LH B-pillar and clean the surface with an IPA wipe.
NOTE:
Allow 1 minute for the IPA to dry.
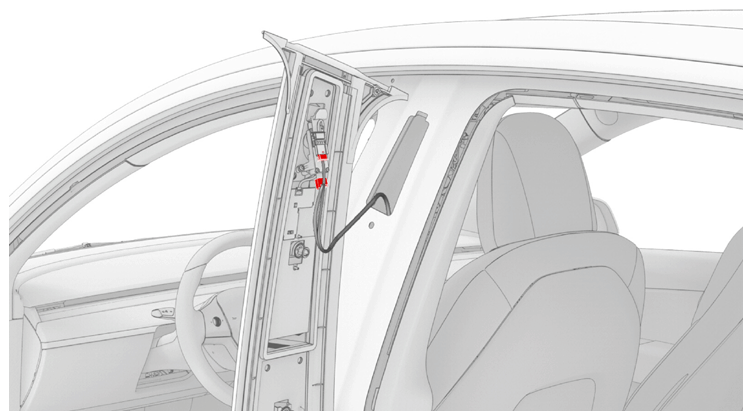
- Connect the camera connectors to the B-pillar applique, and then position the applique onto the vehicle.
NOTE:
Ensure the connector lock is fully engaged.
 Courtesy of TESLA, INC. Courtesy of TESLA, INC.
|
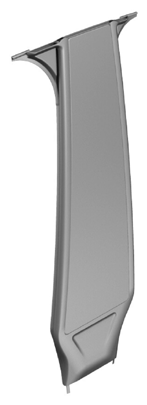
- Position the B-pillar applique onto the vehicle, and then engage the clips that attach the B-pillar applique to the vehicle.
 Courtesy of TESLA, INC. Courtesy of TESLA, INC.
|
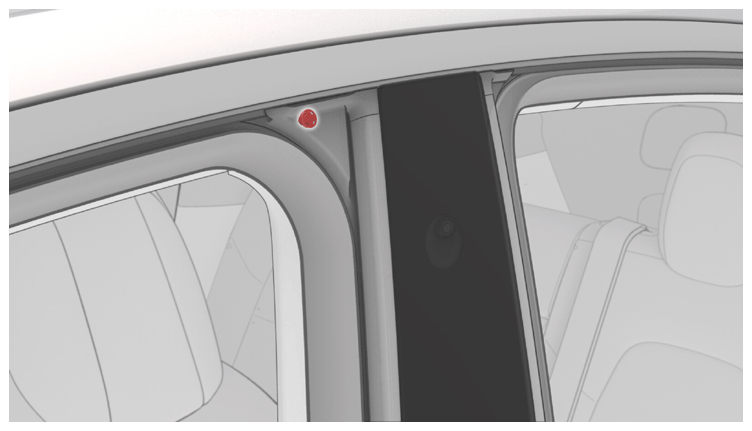
- Engage the clip that attaches the upper LH B-pillar seal to the vehicle.
 Courtesy of TESLA, INC. Courtesy of TESLA, INC.
|
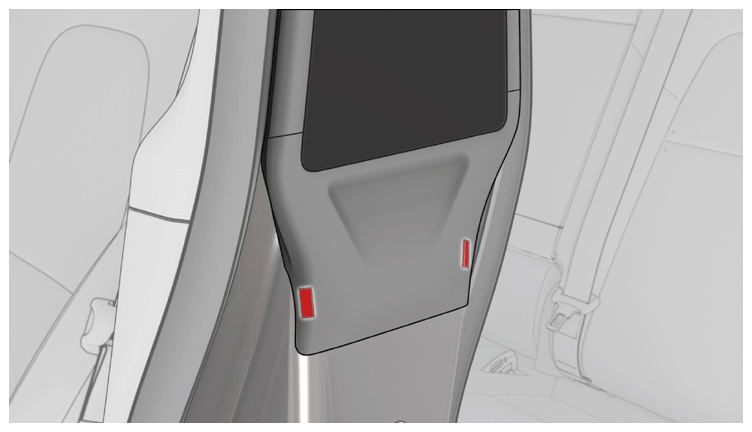
- Gently press the double sided tape that attaches the lower portion of the B-pillar applique seal to the vehicle.
 Courtesy of TESLA, INC. Courtesy of TESLA, INC.
|
- Install the LH rear primary body seal onto the B-pillar.
- Close the LH rear door.
- HW4 cameras only:
Run the camera connection test to update the new camera's firmware.
NOTE:
DAS Cameras are not CAN modules and cannot be updated via firmware reinstall or "Part Replacement Deploy".
- Locally connect a laptop with Toolbox 3 to the vehicle.
- Click on the Actions
tab, search for "calibration mode", and then Run
the DAS Enter Calibration Mode
routine.
- Click on the Actions
tab, search for "camera connection test", and then Run
the routine that corresponds with the camera that was replaced (e.g., Left B-pillar Camera Connetion Test
or Front Camera Connection Test
).
NOTE:
The forward facing bi-camera assembly consists of two individual cameras that must be updated separately: Front Camera Connection Test
and Fisheye Camera Connection Test.
Make sure to update firmware on the cameras that were replaced.
NOTE:
If 2 versions of the same routine are displated, Run
the routine that contains " - SCRIPT" in the "Path" field.
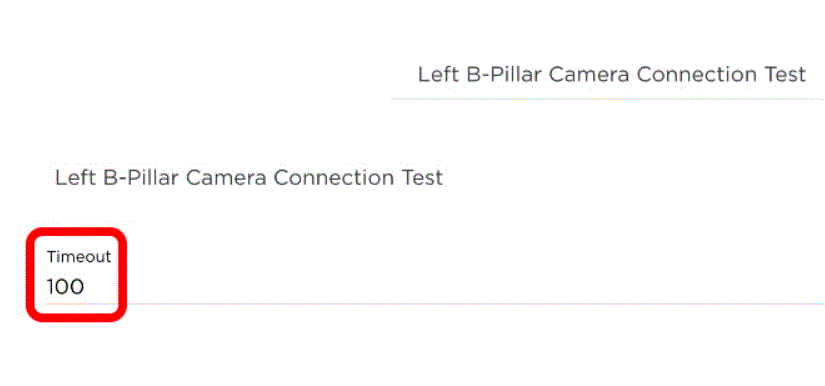
- In the Camera Connection Test prompt, change the "Timeout" to "100", and the Run
the routine.
NOTE:
This routine will update the camera's firmware and then confirm that the camera is connected.
 Courtesy of TESLA, INC. Courtesy of TESLA, INC.
|
- Reinstall the vehicle firmware. See Software Reinstall - Touchscreen
.
NOTE:
Skip this step if reinstalling the original B-pillar applique assembly that came with the vehicle.
- Connect a laptop with Toolbox 3 to the vehicle.
- In Toolbox, click on the "Dashboard" tab.
- Click on "Service Tools".
- Click on "DAS Image Capture".
- Click on "Clear Calibration Pillars".
- Click on "Capture Image" to check the current settings.
- Review the images to make sure all cameras are able to capture images correctly.
- Verify that all key cards work on the B-pillar applique as designed.
- Disconnect the laptop from the vehicle.
- Inform the customer that manual driving is now required to allow the camera to self-calibrate.
NOTE:
Self-calibration can take up to 100 miles (160 km) of manual driving, depending upon the road type and condition. Until self-calibration is complete, the message "Autopilot Features Currently Unavailable: Manual Driving Required While Camera Is Calibrating" is displayed if an attempt is made to engage an Autopilot feature.