- Remove the pins (x5) from the front molding of the new inner belt seal using diagonal cutters.
CAUTION:
Pins must be completely removed from the inner belt seal and any remaining material should not protrude more than 0.5 mm from the surface. Sand the any excess material, if needed.
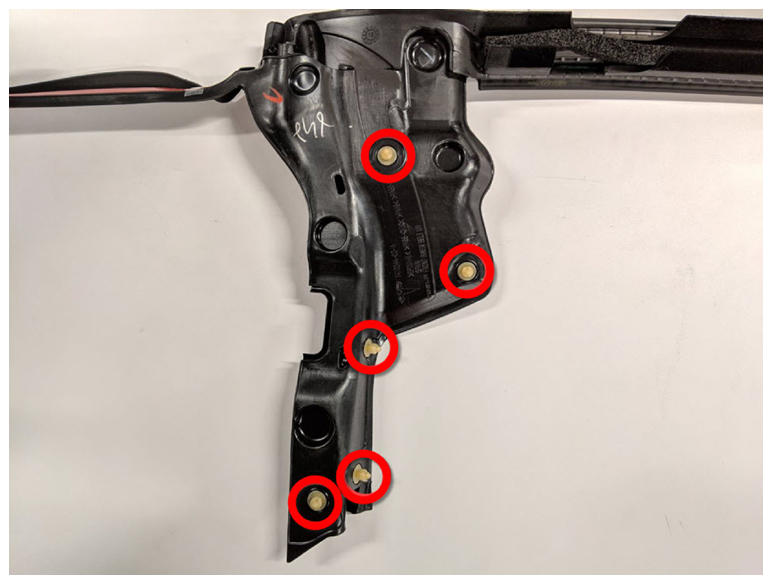 Courtesy of TESLA, INC. Courtesy of TESLA, INC.
|
- Remove the pins (x4) from the rear molding of the new inner belt seal using diagonal cutters.
CAUTION:
Pins must be completely removed from the inner belt seal and any remaining material should not protrude more than 0.5 mm from the surface. Sand the any excess material, if needed.
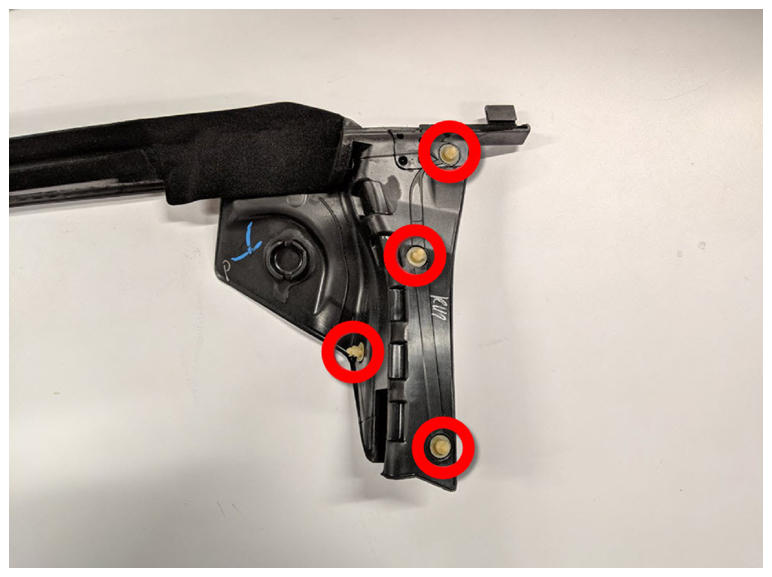 Courtesy of TESLA, INC. Courtesy of TESLA, INC.
|
- Sand the highlighted areas of the rear molding using a cordless rotary kit.
CAUTION:
Do not damage the surface that will be visible once the seal is installed.
NOTE:
Reduce the remaining clips to avoid scuffing up surfaces, and also to assist with adhesion later in this procedure.
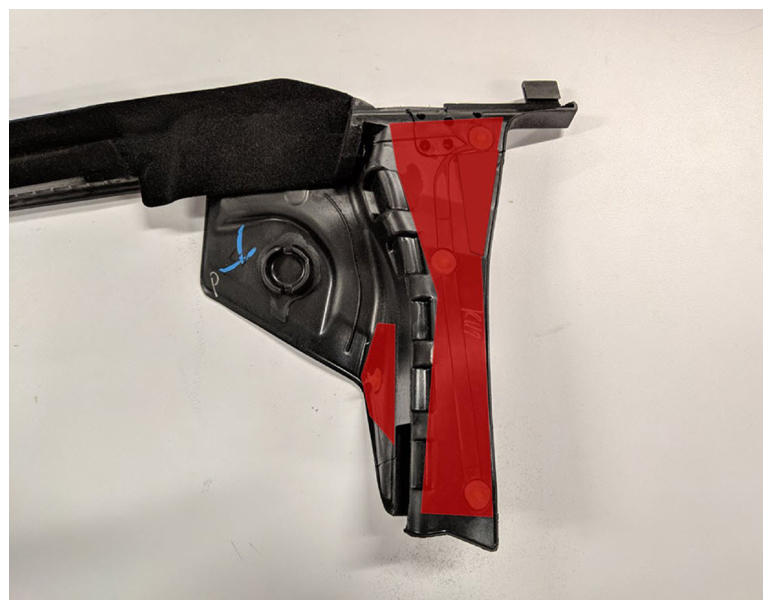 Courtesy of TESLA, INC. Courtesy of TESLA, INC.
|
- Clean the debris from the surface of the rear molding seal using an IPA wipe, and then allow the surface to dry before continuing.
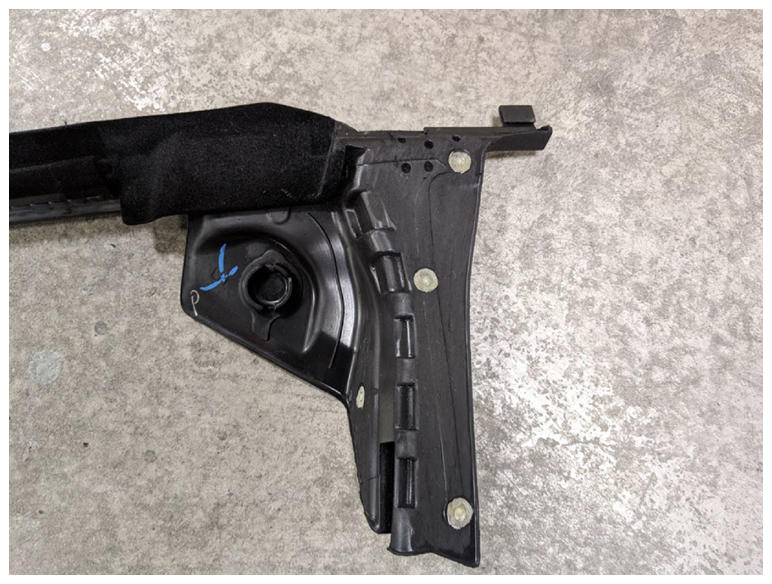 Courtesy of TESLA, INC. Courtesy of TESLA, INC.
|
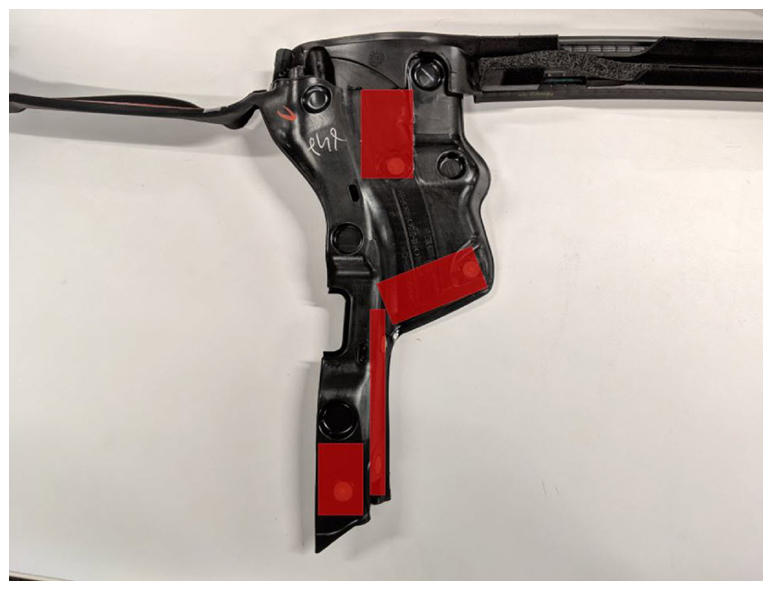
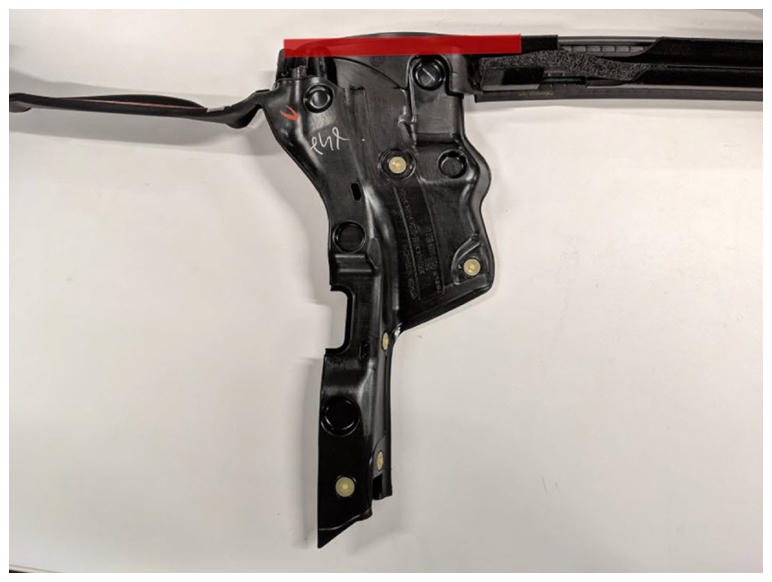
- Sand the highlighted areas of the front molding using a cordless rotary kit.
CAUTION:
Do not damage the surface that will be visible once the seal is installed.
NOTE:
Sanding should overlap at least 20 mm above the nitto foam.
NOTE:
Reduce the remaining clips to avoid scuffing up surfaces, and also to assist with adhesion later in this procedure.
 Courtesy of TESLA, INC. Courtesy of TESLA, INC.
|
 Courtesy of TESLA, INC. Courtesy of TESLA, INC.
|
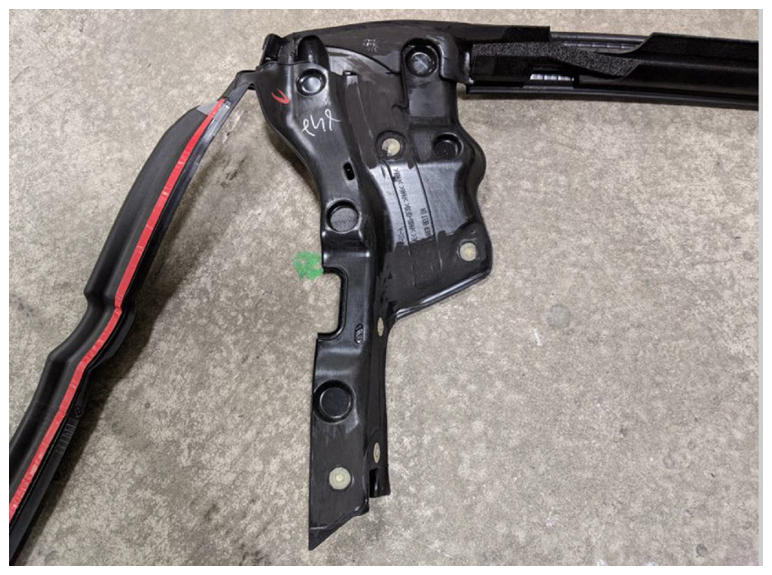
- Clean off the front molding with an IPA wipe. Allow the molding to dry before continuing.
 Courtesy of TESLA, INC. Courtesy of TESLA, INC.
|
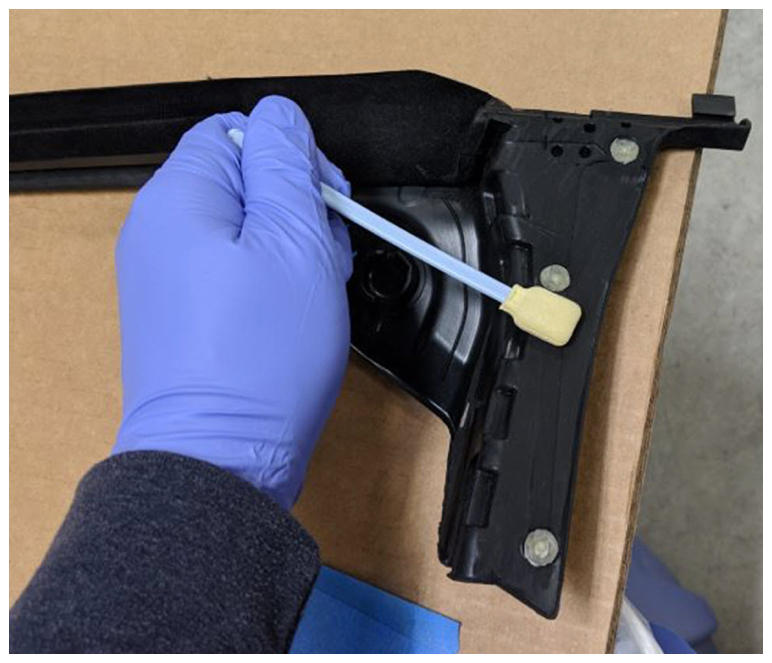
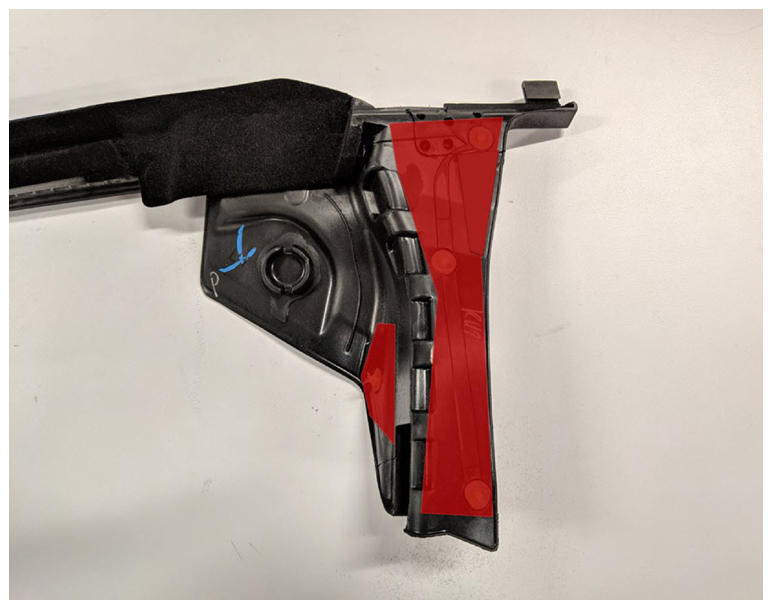
- Apply promoter to the rear molding at the areas that were previously sanded. Allow the area to dry for at least 30 seconds before continuing.
CAUTION:
Avoid applying excess promoter to the rear molding.
NOTE:
All sanded areas of the rear molding must be covered with promoter.
 Courtesy of TESLA, INC. Courtesy of TESLA, INC.
|
 Courtesy of TESLA, INC. Courtesy of TESLA, INC.
|
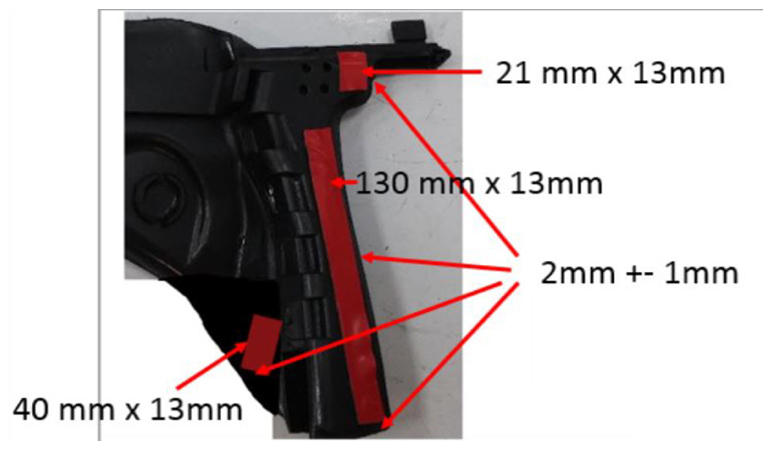
- Cut 3 strips of 3M double-sided tape to length as specified, and then apply the tape to the rear molding.
- 12 mm x 13 mm
- 40 mm x 13 mm
- 130 mm x 13 mm
NOTE:
Make sure that the tape is 2 mm from the edge of the rear molding.
 Courtesy of TESLA, INC. Courtesy of TESLA, INC.
|
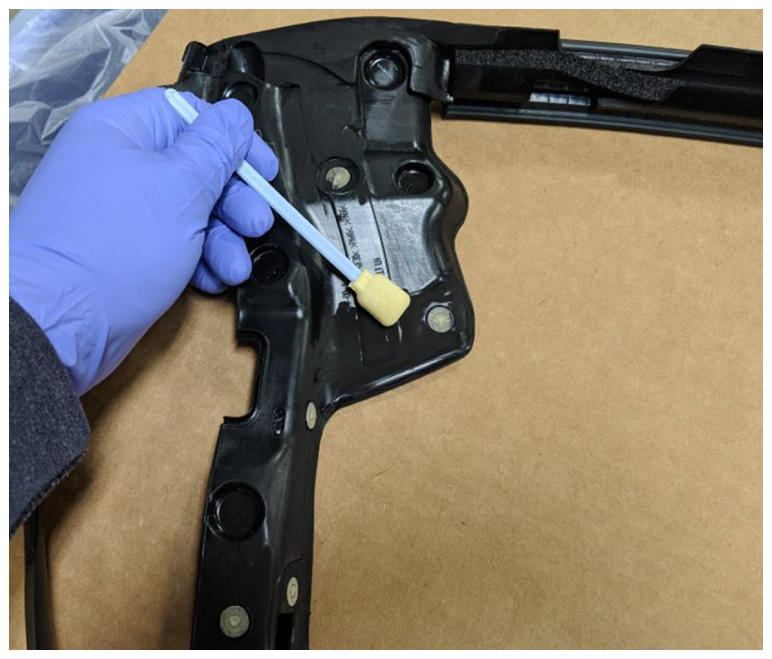
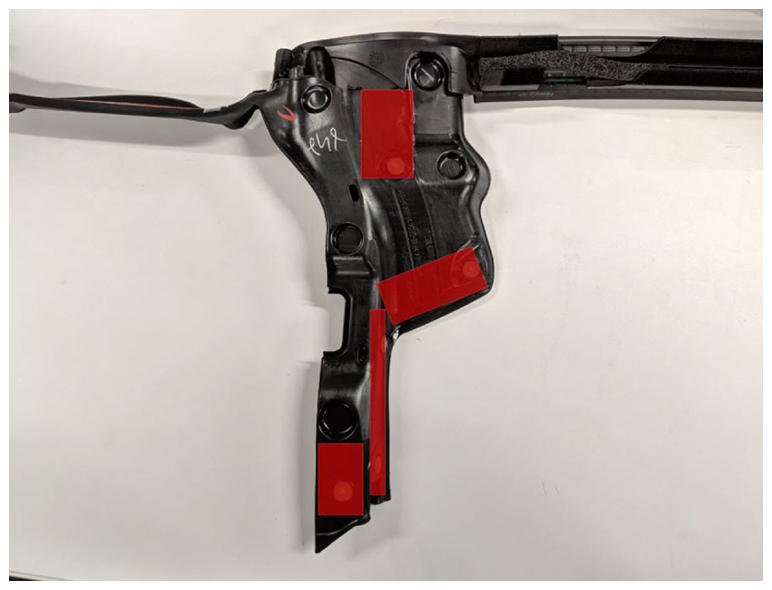
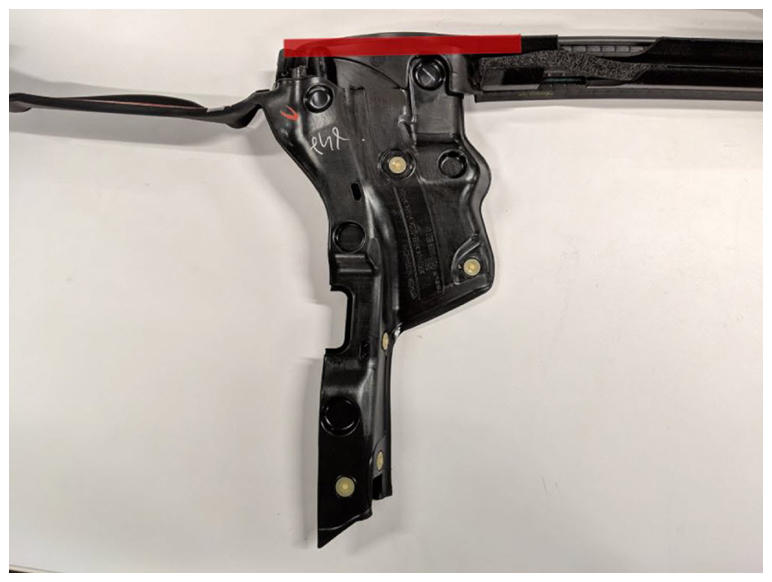
- Apply promoter to the front molding at the areas that were previously sanded. Allow the area to dry for at least 30 seconds before continuing.
CAUTION:
Avoid applying excess promoter to the front molding.
NOTE:
All sanded areas of the front molding must be covered with promoter.
 Courtesy of TESLA, INC. Courtesy of TESLA, INC.
|
 Courtesy of TESLA, INC. Courtesy of TESLA, INC.
|
 Courtesy of TESLA, INC. Courtesy of TESLA, INC.
|
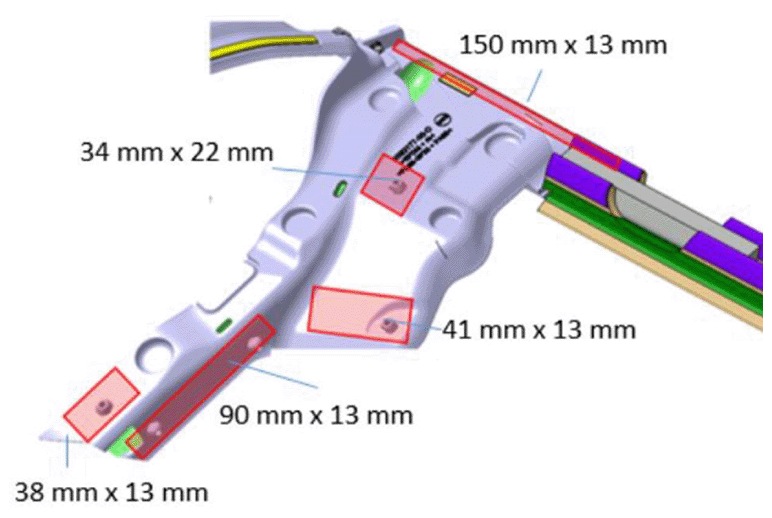
- Cut 5 strips of 3M double-sided tape to length as specified, and then apply the tape to the front molding.
- 38 mm x 13 mm
- 41 mm x 13 mm
- 90 mm x 13 mm
- 150 mm x 13 mm
- 34 mm x 22 mm
NOTE:
Make sure that the tape is 2 mm from the edge of the front molding.
 Courtesy of TESLA, INC. Courtesy of TESLA, INC.
|