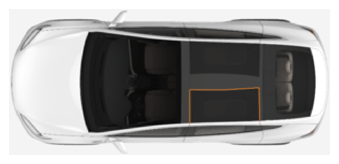
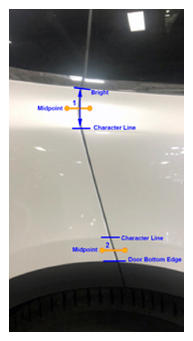
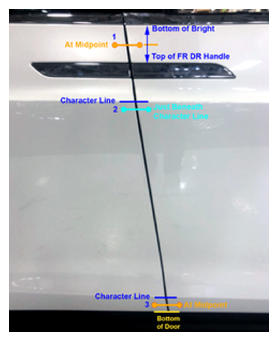
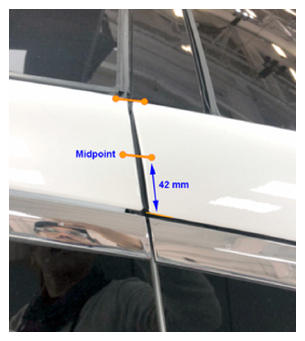
- Measure the gap and flush of LH falcon door according to specification
NOTE:
Record that data and use it as a base line when installing the new door
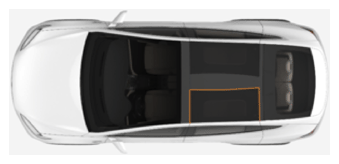 Courtesy of TESLA, INC. Courtesy of TESLA, INC.
|
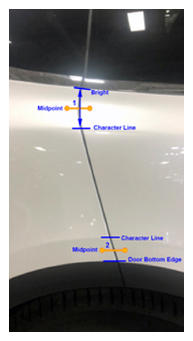 Courtesy of TESLA, INC. Courtesy of TESLA, INC.
|
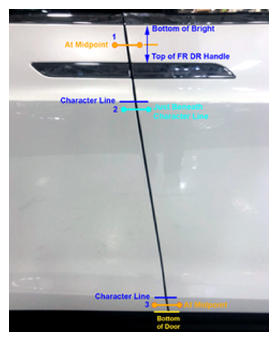 Courtesy of TESLA, INC. Courtesy of TESLA, INC.
|
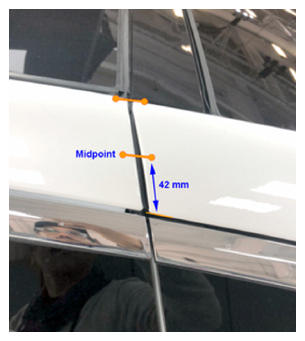 Courtesy of TESLA, INC. Courtesy of TESLA, INC.
|
- Open LH front door
- Lower LH front window
- Lower LH rear window fully
- Move LH front seat forward
- Open LH falcon door
- Remove LH falcon door lower garnish
NOTE:
9x V-clips, Replace any damaged or missing V-clips, Take care not to damage door trim panel during removal
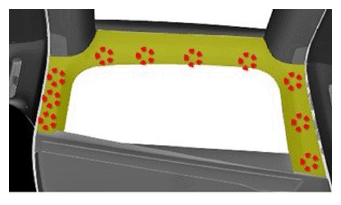 Courtesy of TESLA, INC. Courtesy of TESLA, INC.
|
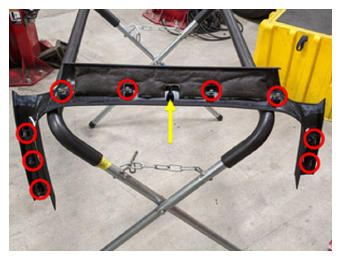 Courtesy of TESLA, INC. Courtesy of TESLA, INC.
|
- Remove LH upper falcon door trim
NOTE:
17x clips, 1x connector may be present on early production vehicles
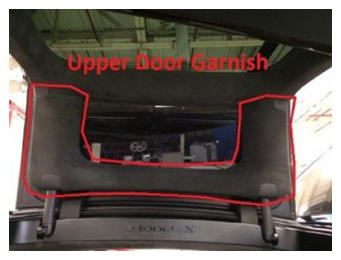 Courtesy of TESLA, INC. Courtesy of TESLA, INC.
|
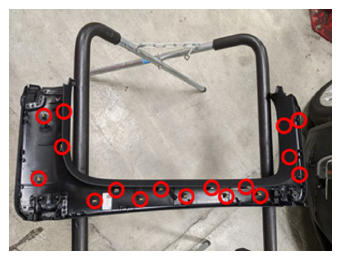 Courtesy of TESLA, INC. Courtesy of TESLA, INC.
|
- Remove LH upper outer falcon door rear trim
NOTE:
5x bolts, T25, 2.5 N.m, 4.0 N.m, 1x harness clip, Fastener count may vary
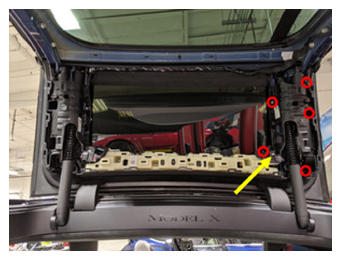 Courtesy of TESLA, INC. Courtesy of TESLA, INC.
|
- Remove LH upper outer falcon door front trim
NOTE:
5x bolts, T25, 2.5 N.m, 4.0 N.m, 1x harness clip, Fastener count may vary
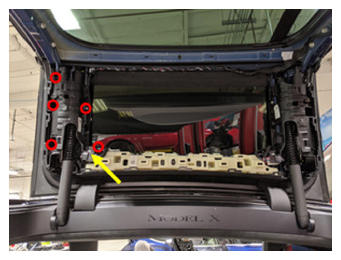 Courtesy of TESLA, INC. Courtesy of TESLA, INC.
|
- Remove LH upper outer falcon door middle trim
NOTE:
7x bolts, T25, 3.0 N.m, 4.0 N.m, Fastener count may vary
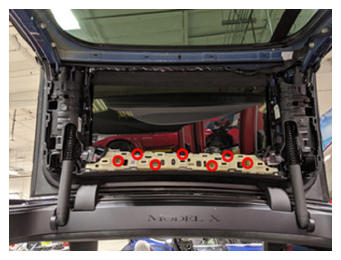 Courtesy of TESLA, INC. Courtesy of TESLA, INC.
|
- Remove LH upper gap hider trim
NOTE:
4x clips
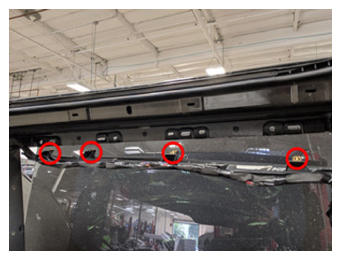 Courtesy of TESLA, INC. Courtesy of TESLA, INC.
|
- Lower LH falcon door
NOTE:
May need to assist the door to close
- Remove LH falcon door upper glass
NOTE:
10x nuts, 10 mm, 6 N.m, Recommend assistance
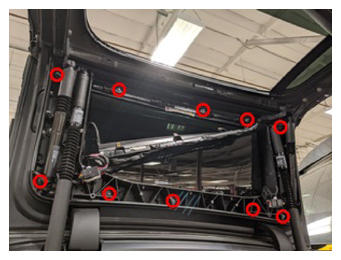 Courtesy of TESLA, INC. Courtesy of TESLA, INC.
|
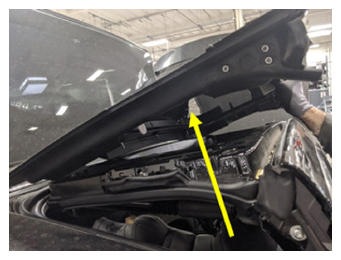 Courtesy of TESLA, INC. Courtesy of TESLA, INC.
|
- Remove decorative trim panel
NOTE:
8x clips, Push down 2 metal clips and slide rearward to release the trim
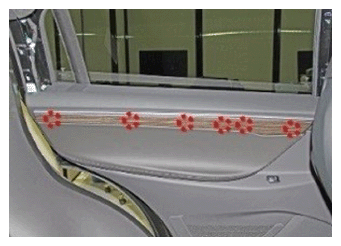 Courtesy of TESLA, INC. Courtesy of TESLA, INC.
|
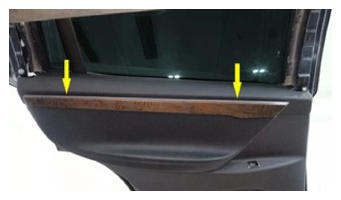 Courtesy of TESLA, INC. Courtesy of TESLA, INC.
|
- Remove door panel bolts
NOTE:
8x bolts, 10 mm, 6 N.m
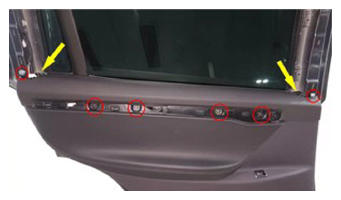 Courtesy of TESLA, INC. Courtesy of TESLA, INC.
|
- Remove LH rear door trim panel
NOTE:
13x clips, 1x connector
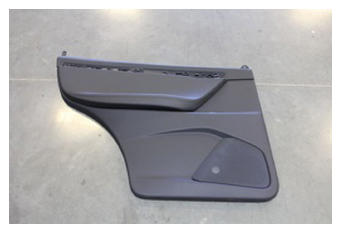 Courtesy of TESLA, INC. Courtesy of TESLA, INC.
|
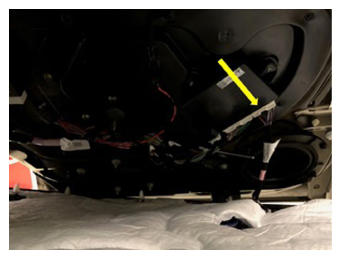 Courtesy of TESLA, INC. Courtesy of TESLA, INC.
|
- Open LH rear door
- Support the rear door
NOTE:
May need assist to open
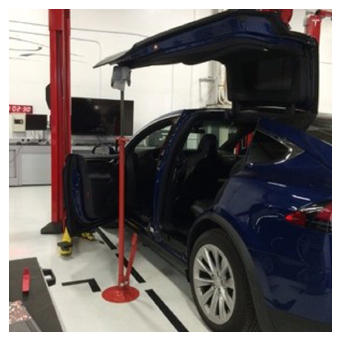 Courtesy of TESLA, INC. Courtesy of TESLA, INC.
|
- Open hood
NOTE:
Via center display > Controls > Front Trunk
- Power down vehicle using MCU
NOTE:
Via Controls > Safety > "Power off"
- Remove underhood aprons
NOTE:
4x aprons
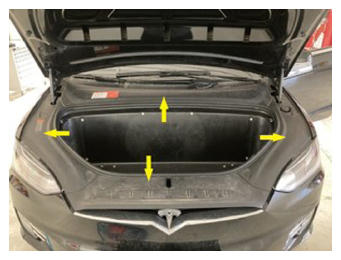 Courtesy of TESLA, INC. Courtesy of TESLA, INC.
|
- Remove frunk carpet
NOTE:
2x connectors
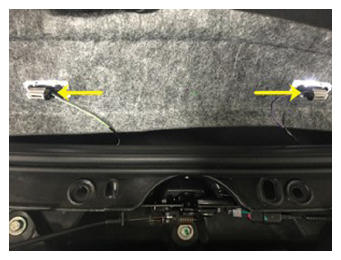 Courtesy of TESLA, INC. Courtesy of TESLA, INC.
|
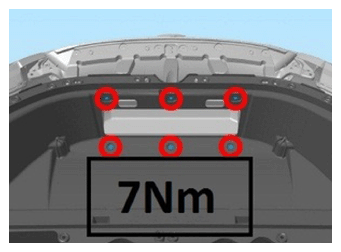
- Remove underhood storage unit
NOTE:
10x bolts, 10 mm, 4 N.m, 10x bolts, 10 mm, 7 N.m
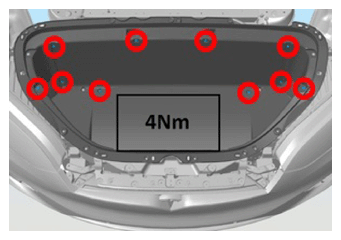 Courtesy of TESLA, INC. Courtesy of TESLA, INC.
|
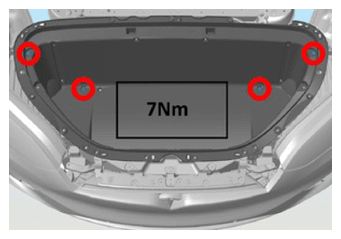 Courtesy of TESLA, INC. Courtesy of TESLA, INC.
|
 Courtesy of TESLA, INC. Courtesy of TESLA, INC.
|
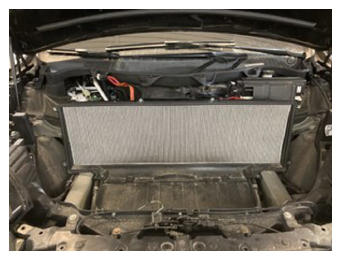
- Remove HEPA filter
NOTE:
Lift up from bottom and pull out
 Courtesy of TESLA, INC. Courtesy of TESLA, INC.
|
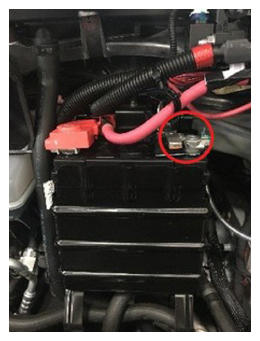
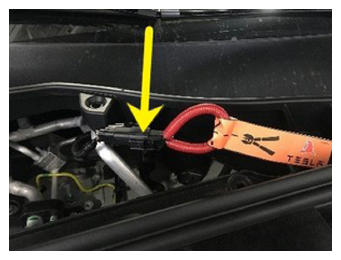
- Disconnect 12V negative terminal and First Responder Loop
NOTE:
1x nut, 10 mm, 5 N.m, 1x connector, Wait at least 2 minutes before disconnecting modules or HV components
 Courtesy of TESLA, INC. Courtesy of TESLA, INC.
|
 Courtesy of TESLA, INC. Courtesy of TESLA, INC.
|
- Release clips securing harness connectors to closeout panel
NOTE:
3x clips
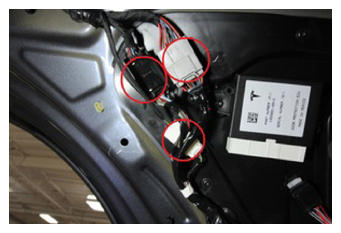 Courtesy of TESLA, INC. Courtesy of TESLA, INC.
|
- Remove the ground strap from lower falcon door and disconnect door harness from close out panel harness
NOTE:
1x bolt, 10 mm, 9 N.m, 3 connectors
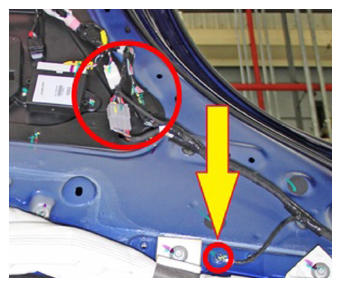 Courtesy of TESLA, INC. Courtesy of TESLA, INC.
|
- Remove lower falcon door harness clips
NOTE:
5x clips
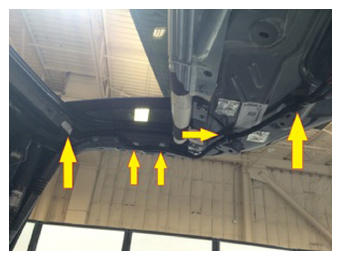 Courtesy of TESLA, INC. Courtesy of TESLA, INC.
|
- Mark the position of the lower falcon door to the upper falcon door assembly
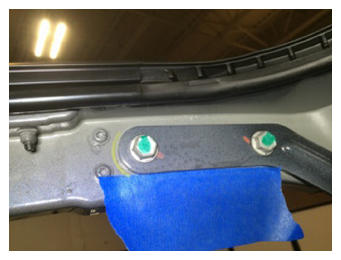 Courtesy of TESLA, INC. Courtesy of TESLA, INC.
|
- Remove the lower falcon door from vehicle
NOTE:
4x bolts, 13 mm, 24 N.m, Recommend assistant to hold the lower falcon door.
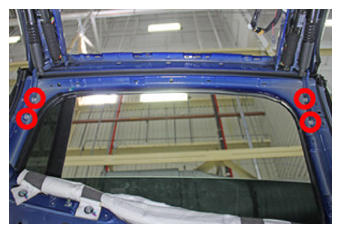 Courtesy of TESLA, INC. Courtesy of TESLA, INC.
|
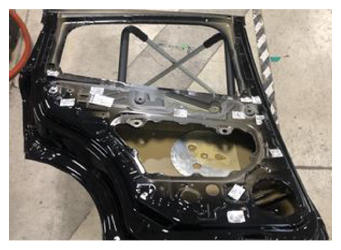 Courtesy of TESLA, INC. Courtesy of TESLA, INC.
|
- Disconnect both front and rear falcon door strut connectors
NOTE:
4x connectors
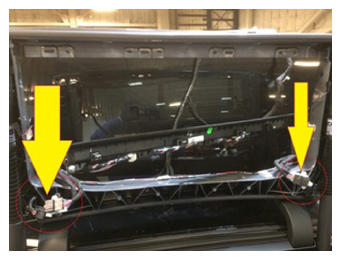 Courtesy of TESLA, INC. Courtesy of TESLA, INC.
|
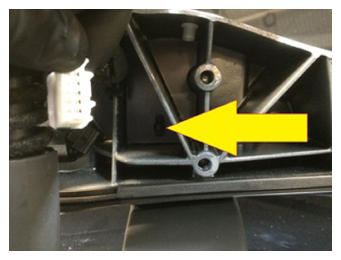
- Remove the upper falcon door harness clips and route the harness to back of the falcon door
NOTE:
7x clips, Protect the spine applique
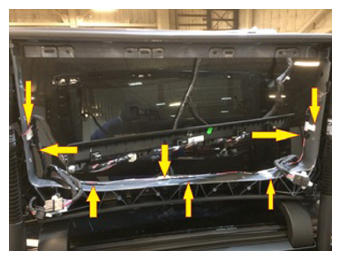 Courtesy of TESLA, INC. Courtesy of TESLA, INC.
|
 Courtesy of TESLA, INC. Courtesy of TESLA, INC.
|
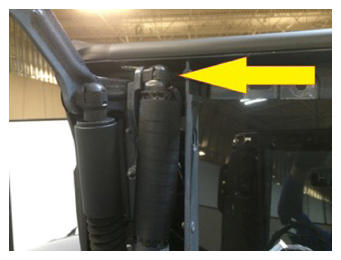
- Remove the front primary strut from upper falcon door
NOTE:
1x C-clip, 1x harness clip
 Courtesy of TESLA, INC. Courtesy of TESLA, INC.
|
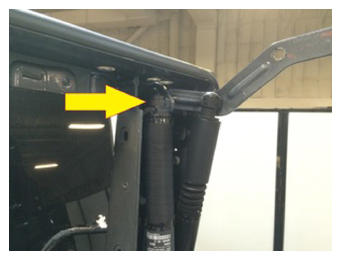
- Remove the rear primary strut from upper falcon door
NOTE:
1x C-clip
 Courtesy of TESLA, INC. Courtesy of TESLA, INC.
|
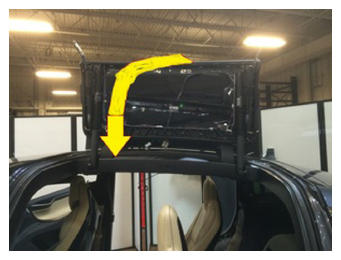
- Pull the upper falcon door lower to mark the hinges
NOTE:
The upper door is still spring loaded, Recommend assistance if necessary, Caution: the upper falcon door hinges are spring loaded and will retract to the open position.
 Courtesy of TESLA, INC. Courtesy of TESLA, INC.
|
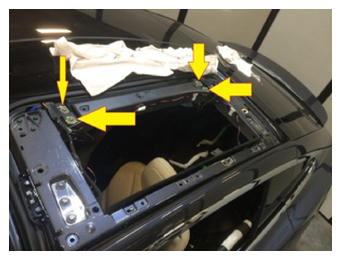 Courtesy of TESLA, INC. Courtesy of TESLA, INC.
|
- Remove the LH upper falcon door from vehicle
NOTE:
4x 13 mm bolts, 24 N.m, Loosen bolts in closed position, Remove bolts in open position, Recommend assistance if necessary
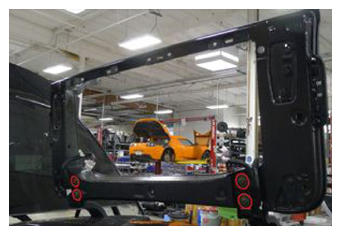 Courtesy of TESLA, INC. Courtesy of TESLA, INC.
|
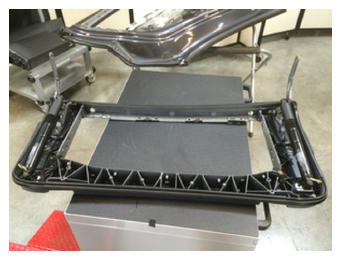 Courtesy of TESLA, INC. Courtesy of TESLA, INC.
|
- Lay LH rear door upper harness on top of vehicle
NOTE:
Use fender cover to protect spine and roof glass
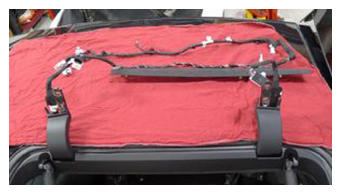 Courtesy of TESLA, INC. Courtesy of TESLA, INC.
|
- Remove the front secondary strut with bracket from the upper falcon door
NOTE:
1x C-clips, 2x harness clips, 3x bolts, 10 mm, 12 N.m
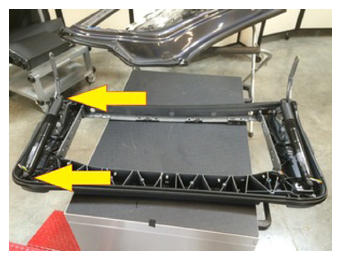 Courtesy of TESLA, INC. Courtesy of TESLA, INC.
|
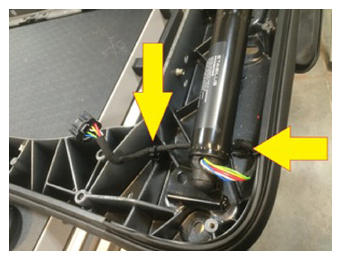 Courtesy of TESLA, INC. Courtesy of TESLA, INC.
|
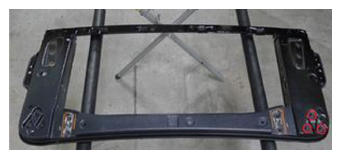 Courtesy of TESLA, INC. Courtesy of TESLA, INC.
|
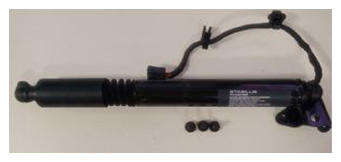 Courtesy of TESLA, INC. Courtesy of TESLA, INC.
|
- Remove the rear secondary strut with bracket from the upper falcon door
NOTE:
1x C-clips, 2x harness clips, 3x bolts, 10 mm, 12 N.m
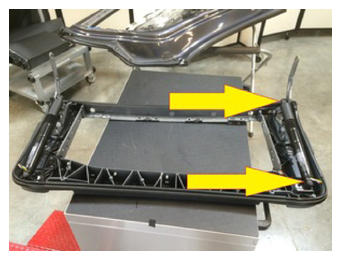 Courtesy of TESLA, INC. Courtesy of TESLA, INC.
|
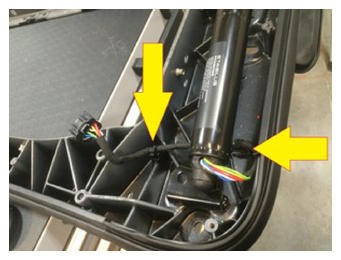 Courtesy of TESLA, INC. Courtesy of TESLA, INC.
|
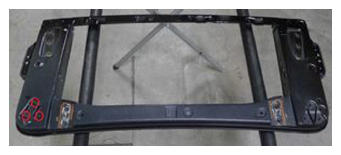 Courtesy of TESLA, INC. Courtesy of TESLA, INC.
|
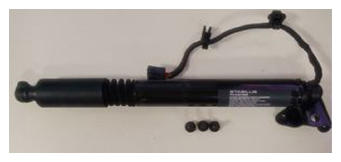 Courtesy of TESLA, INC. Courtesy of TESLA, INC.
|
- Remove the front secondary hinge assembly with clamp bracket
NOTE:
3x bolts, ET 18, 32 N.m, Recommend assistance if necessary
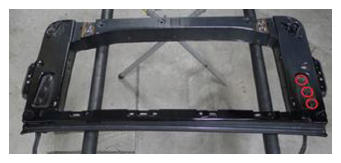 Courtesy of TESLA, INC. Courtesy of TESLA, INC.
|
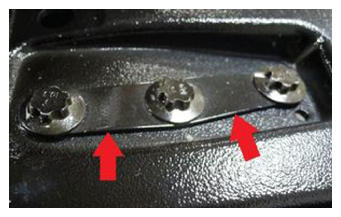 Courtesy of TESLA, INC. Courtesy of TESLA, INC.
|
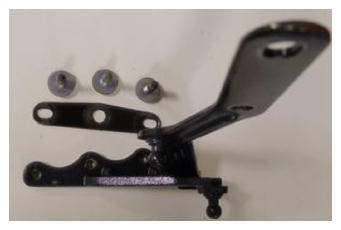 Courtesy of TESLA, INC. Courtesy of TESLA, INC.
|
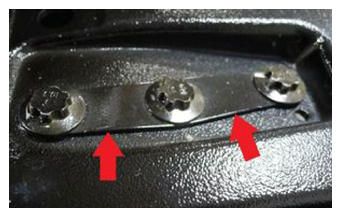
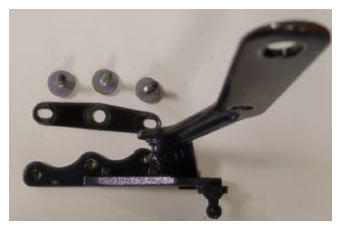
- Remove the rear secondary hinge assembly with clamp bracket
NOTE:
3x bolts, ET 18, 32 N.m, Recommend assistance if necessary
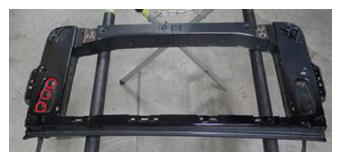 Courtesy of TESLA, INC. Courtesy of TESLA, INC.
|
 Courtesy of TESLA, INC. Courtesy of TESLA, INC.
|
 Courtesy of TESLA, INC. Courtesy of TESLA, INC.
|
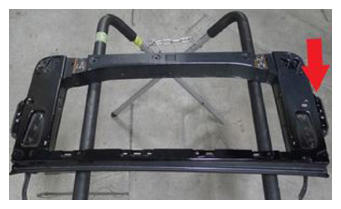
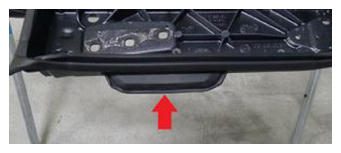
- Remove LH front upper falcon door bumpstop assembly
NOTE:
2x bolts, 10 mm, 8 N.m, 1x screw, T30, 5 N.m
 Courtesy of TESLA, INC. Courtesy of TESLA, INC.
|
 Courtesy of TESLA, INC. Courtesy of TESLA, INC.
|
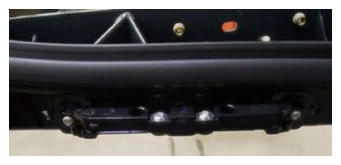 Courtesy of TESLA, INC. Courtesy of TESLA, INC.
|
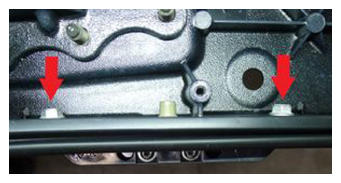 Courtesy of TESLA, INC. Courtesy of TESLA, INC.
|
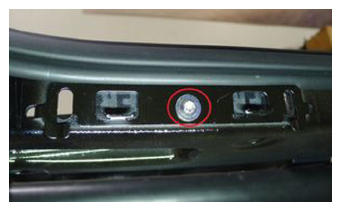 Courtesy of TESLA, INC. Courtesy of TESLA, INC.
|
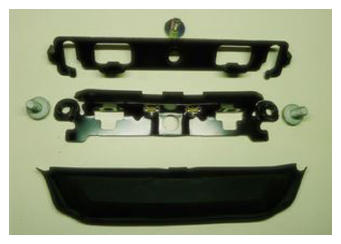 Courtesy of TESLA, INC. Courtesy of TESLA, INC.
|
- Remove LH rear upper falcon door bumpstop assembly
NOTE:
2x bolts, 10 mm, 8 N.m, 1x screw, T30, 5 N.m
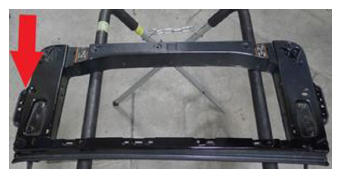 Courtesy of TESLA, INC. Courtesy of TESLA, INC.
|
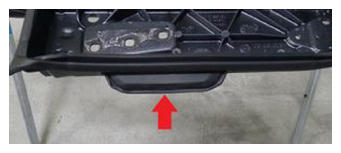 Courtesy of TESLA, INC. Courtesy of TESLA, INC.
|
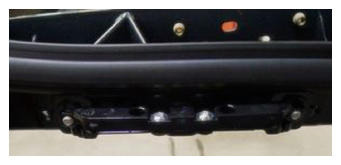 Courtesy of TESLA, INC. Courtesy of TESLA, INC.
|
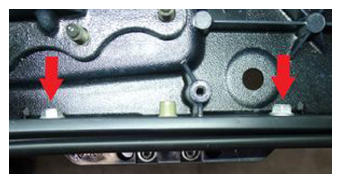 Courtesy of TESLA, INC. Courtesy of TESLA, INC.
|
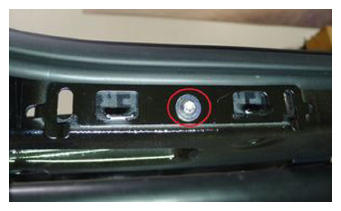 Courtesy of TESLA, INC. Courtesy of TESLA, INC.
|
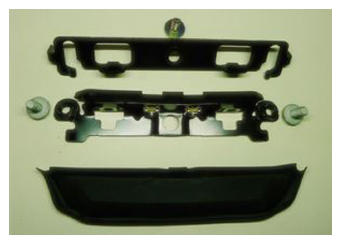 Courtesy of TESLA, INC. Courtesy of TESLA, INC.
|
- Use IPA clean NVH seal area of the new upper falcon door
NOTE:
Allow 1 minute drying time
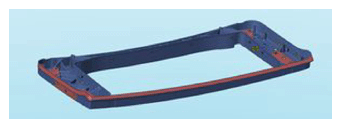 Courtesy of TESLA, INC. Courtesy of TESLA, INC.
|
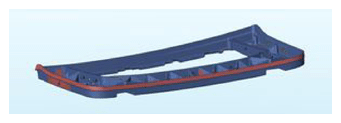 Courtesy of TESLA, INC. Courtesy of TESLA, INC.
|
- Apply adhesive promoter to NVH seal area of the new upper falcon door
NOTE:
Allow 1 minute drying time
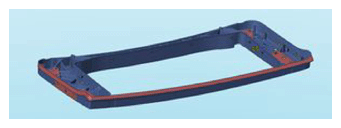 Courtesy of TESLA, INC. Courtesy of TESLA, INC.
|
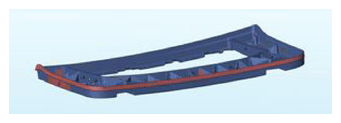 Courtesy of TESLA, INC. Courtesy of TESLA, INC.
|
- Install new upper falcon door NVH seal to new upper falcon door
NOTE:
Use roller to press the seal in place
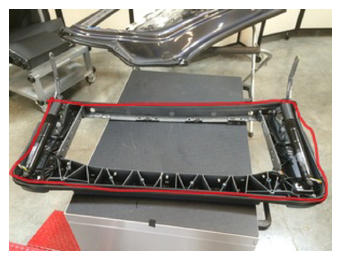 Courtesy of TESLA, INC. Courtesy of TESLA, INC.
|
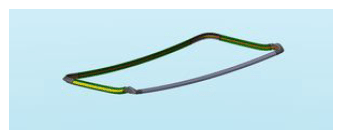 Courtesy of TESLA, INC. Courtesy of TESLA, INC.
|
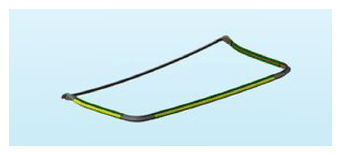 Courtesy of TESLA, INC. Courtesy of TESLA, INC.
|
- Install LH front upper falcon door bumpstop assembly
NOTE:
2x bolts, 10 mm, 8 N.m, 1x screw, T30, 5 N.m
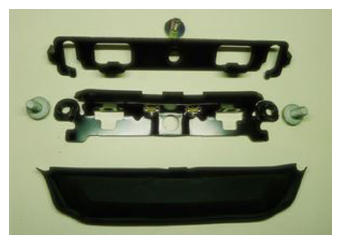 Courtesy of TESLA, INC. Courtesy of TESLA, INC.
|
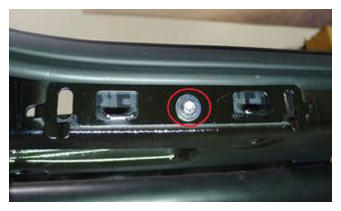 Courtesy of TESLA, INC. Courtesy of TESLA, INC.
|
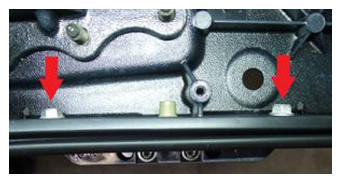 Courtesy of TESLA, INC. Courtesy of TESLA, INC.
|
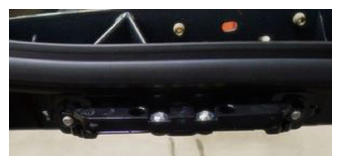 Courtesy of TESLA, INC. Courtesy of TESLA, INC.
|
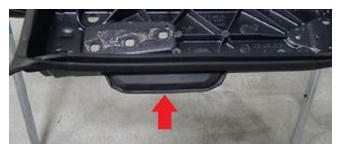 Courtesy of TESLA, INC. Courtesy of TESLA, INC.
|
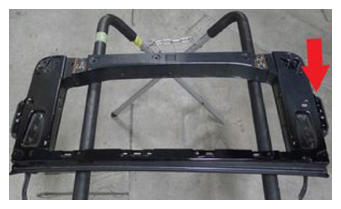 Courtesy of TESLA, INC. Courtesy of TESLA, INC.
|
- Install LH rear upper falcon door bumpstop assembly
NOTE:
2x bolts, 10 mm, 8 N.m, 1x screw, T30, 5 N.m
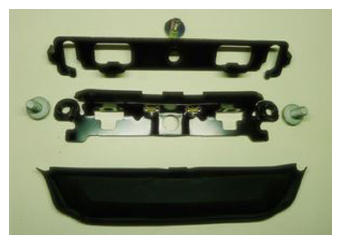 Courtesy of TESLA, INC. Courtesy of TESLA, INC.
|
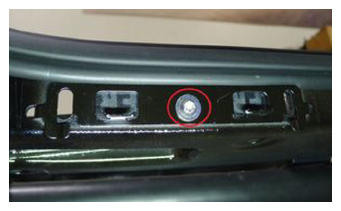 Courtesy of TESLA, INC. Courtesy of TESLA, INC.
|
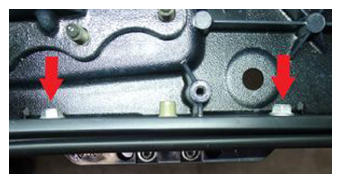 Courtesy of TESLA, INC. Courtesy of TESLA, INC.
|
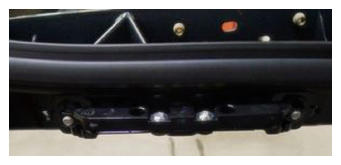 Courtesy of TESLA, INC. Courtesy of TESLA, INC.
|
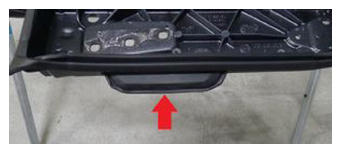 Courtesy of TESLA, INC. Courtesy of TESLA, INC.
|
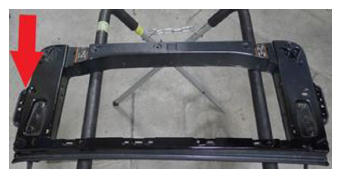 Courtesy of TESLA, INC. Courtesy of TESLA, INC.
|
- Install the rear secondary hinge assembly with bracket
NOTE:
3x bolts, ET 18, 32 N.m
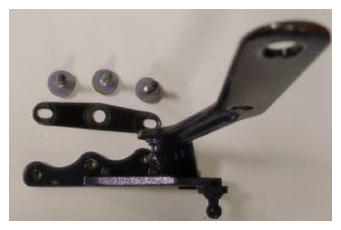 Courtesy of TESLA, INC. Courtesy of TESLA, INC.
|
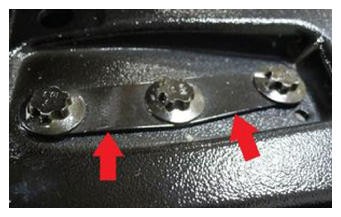 Courtesy of TESLA, INC. Courtesy of TESLA, INC.
|
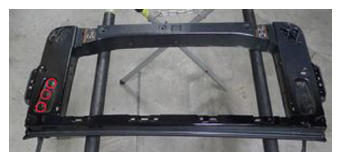 Courtesy of TESLA, INC. Courtesy of TESLA, INC.
|
- Install the front secondary hinge assembly with bracket
NOTE:
3x bolts, ET 18, 32 N.m
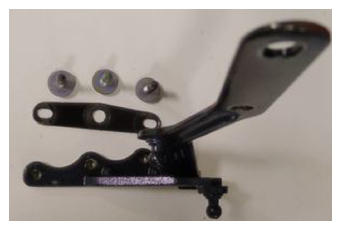 Courtesy of TESLA, INC. Courtesy of TESLA, INC.
|
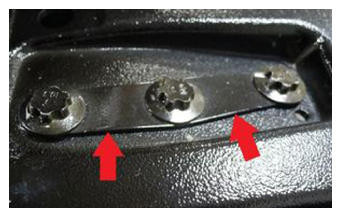 Courtesy of TESLA, INC. Courtesy of TESLA, INC.
|
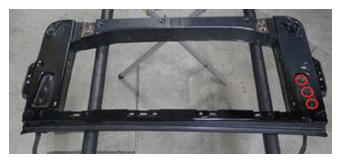 Courtesy of TESLA, INC. Courtesy of TESLA, INC.
|
- Install the rear secondary strut with bracket from the upper falcon door
NOTE:
1x C-clips, 2x harness clips, 3x bolts, 10 mm, 12 N.m
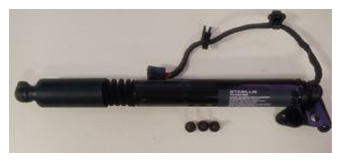 Courtesy of TESLA, INC. Courtesy of TESLA, INC.
|
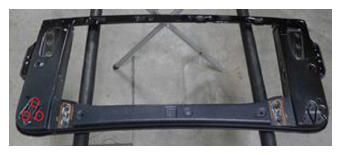 Courtesy of TESLA, INC. Courtesy of TESLA, INC.
|
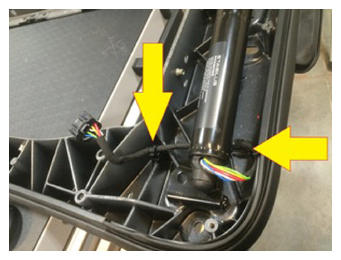 Courtesy of TESLA, INC. Courtesy of TESLA, INC.
|
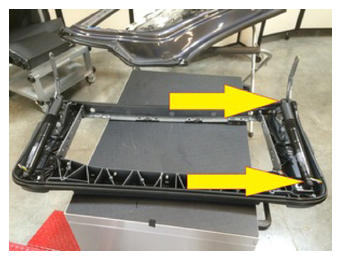 Courtesy of TESLA, INC. Courtesy of TESLA, INC.
|
- Install the front secondary strut with bracket from the upper falcon door
NOTE:
1x C-clips, 2x harness clips, 2x bolts, 10 mm, 12 N.m
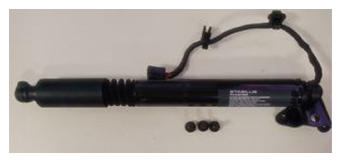 Courtesy of TESLA, INC. Courtesy of TESLA, INC.
|
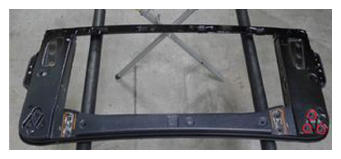 Courtesy of TESLA, INC. Courtesy of TESLA, INC.
|
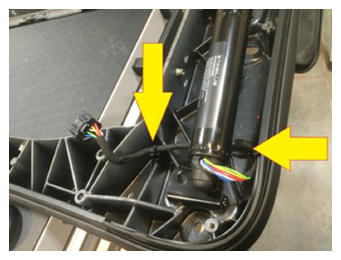 Courtesy of TESLA, INC. Courtesy of TESLA, INC.
|
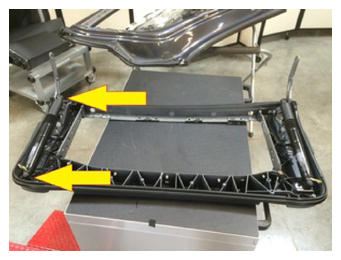 Courtesy of TESLA, INC. Courtesy of TESLA, INC.
|
- Install the LH upper falcon door and hand tighten bolts
NOTE:
4x bolts, 13 mm, 24 N.m, Recommend assistance if necessary
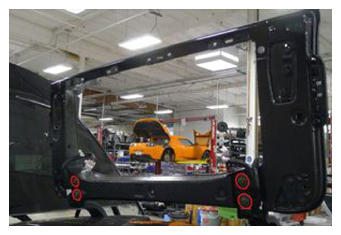 Courtesy of TESLA, INC. Courtesy of TESLA, INC.
|
- Pull the upper falcon door lower and make sure the upper falcon door is aligned and centered before tightening
NOTE:
4x bolts, 13 mm, 24 N.m, Use a rubber hammer to tap on the upper falcon door to center it, Recommend assistance, Caution: the upper falcon door hinges are spring loaded and it want to retract to falcon door open position.
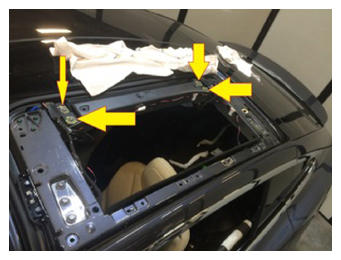 Courtesy of TESLA, INC. Courtesy of TESLA, INC.
|
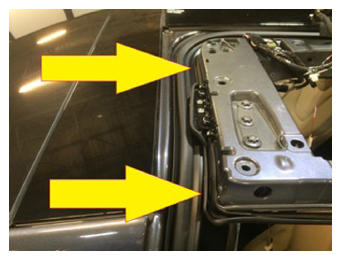 Courtesy of TESLA, INC. Courtesy of TESLA, INC.
|
- Install the rear primary strut to upper falcon door
NOTE:
1x C-clip, 1x harness clip, Door may need to be lifted to align strut, Recommend assistance
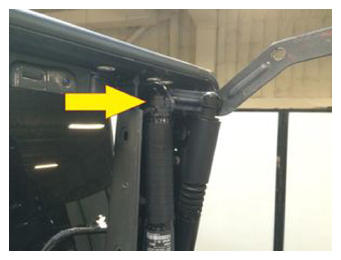 Courtesy of TESLA, INC. Courtesy of TESLA, INC.
|
- Install the front primary strut to upper falcon door
NOTE:
1x C-clip, 1x harness clip, Door may need to be lifted to align strut, Recommend assistance
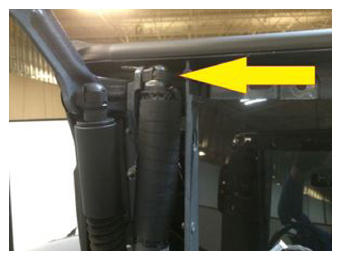 Courtesy of TESLA, INC. Courtesy of TESLA, INC.
|
- Install the upper falcon door harness
NOTE:
7x clips, Replace any broken clips
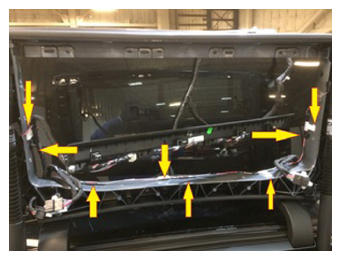 Courtesy of TESLA, INC. Courtesy of TESLA, INC.
|
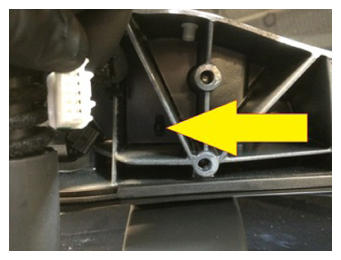 Courtesy of TESLA, INC. Courtesy of TESLA, INC.
|
- Connect both front and rear falcon door strut connectors and secure
NOTE:
4x connectors, 2 clips
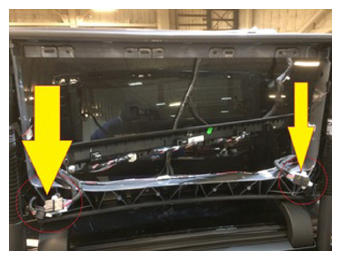 Courtesy of TESLA, INC. Courtesy of TESLA, INC.
|
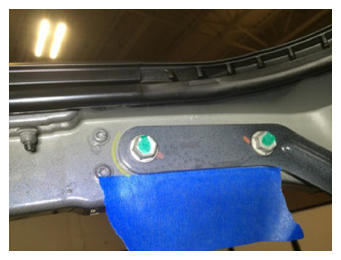
- Install the lower falcon door to vehicle
NOTE:
4x bolts, 13 mm, 24 N.m, Recommend assistant to hold the lower falcon door, Ensure the lower falcon door hinges align with marked position before tightening bolts
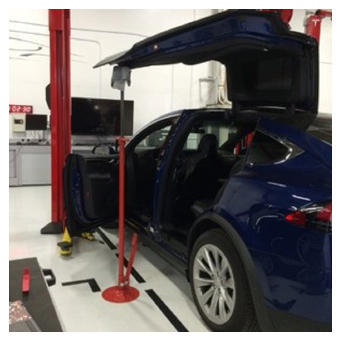 Courtesy of TESLA, INC. Courtesy of TESLA, INC.
|
 Courtesy of TESLA, INC. Courtesy of TESLA, INC.
|
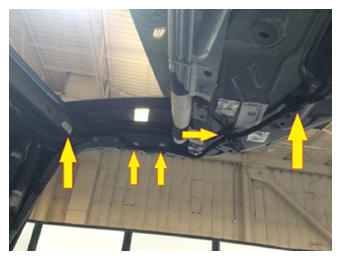
- Install lower falcon door harness clips
NOTE:
5x clips
 Courtesy of TESLA, INC. Courtesy of TESLA, INC.
|
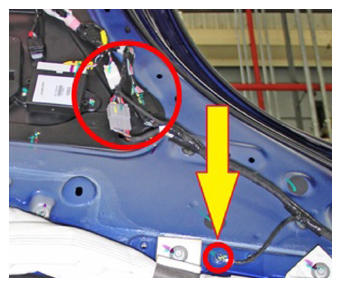
- Install the ground strap from lower falcon door and connect door harness to close out panel harness
NOTE:
1x bolt, 10 mm, 9 N.m, 3 connectors
 Courtesy of TESLA, INC. Courtesy of TESLA, INC.
|
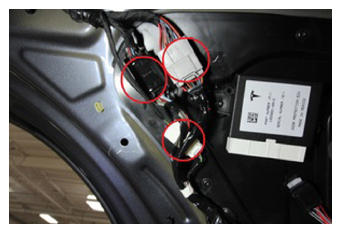
- Secure clips securing harness connectors to closeout panel
NOTE:
3x clips
 Courtesy of TESLA, INC. Courtesy of TESLA, INC.
|
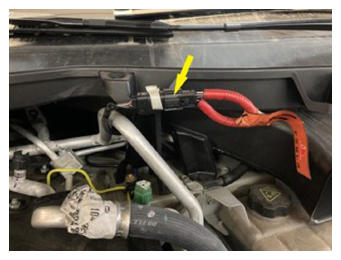
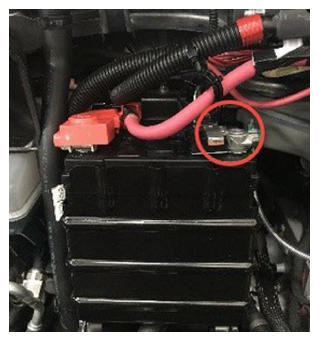
- Connect first responder loop and then 12V negative terminal
NOTE:
1x connector, 1x nut, 10 mm, 5 N.m
 Courtesy of TESLA, INC. Courtesy of TESLA, INC.
|
 Courtesy of TESLA, INC. Courtesy of TESLA, INC.
|
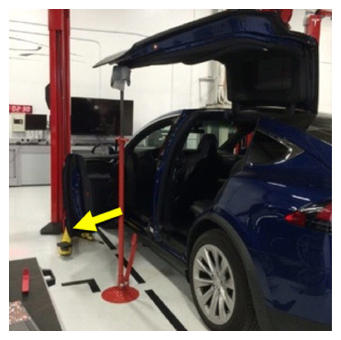
- Remove door support stand
 Courtesy of TESLA, INC. Courtesy of TESLA, INC.
|
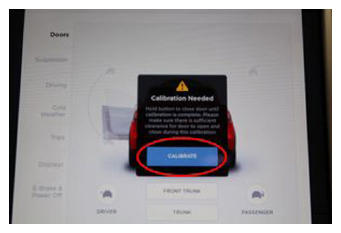
- Calibrate falcon doors using MCU
NOTE:
Required after 12V and FRL disconnect
 Courtesy of TESLA, INC. Courtesy of TESLA, INC.
|
- Close LH rear door and window
- Check the gap and flush of LH falcon door according to specification
NOTE:
Adjust as needed
 Courtesy of TESLA, INC. Courtesy of TESLA, INC.
|
 Courtesy of TESLA, INC. Courtesy of TESLA, INC.
|
 Courtesy of TESLA, INC. Courtesy of TESLA, INC.
|
 Courtesy of TESLA, INC. Courtesy of TESLA, INC.
|
- Adjust door as close to specification as possible if necessary
NOTE:
Adjust the lower falcon door hinges, the upper corner of the lower falcon door should be adjust a bit under flush at this time, the struts should push it out once installed. Recommend assistance, 6x bolts, E18, 32 N.m, 4x bolts, 13 mm, 24 N.m
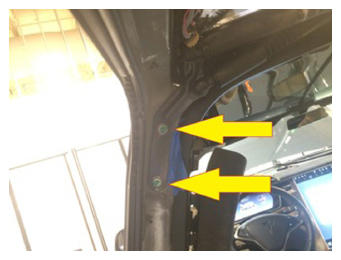 Courtesy of TESLA, INC. Courtesy of TESLA, INC.
|
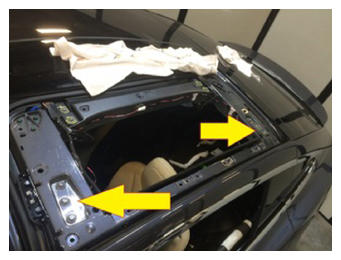 Courtesy of TESLA, INC. Courtesy of TESLA, INC.
|
- Install LH falcon door upper glass
NOTE:
10x nuts, 10 mm, 6 N.m, Recommend assistance
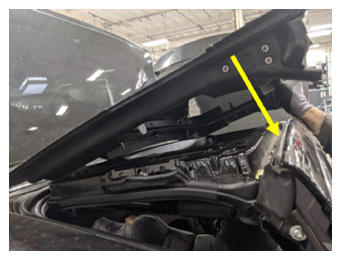 Courtesy of TESLA, INC. Courtesy of TESLA, INC.
|
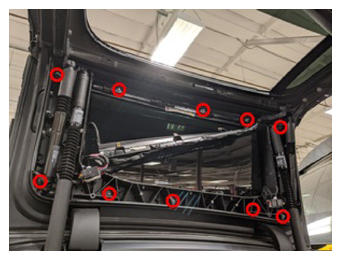 Courtesy of TESLA, INC. Courtesy of TESLA, INC.
|
- Open LH rear door
- Install LH upper gap hider trim
NOTE:
4x clips
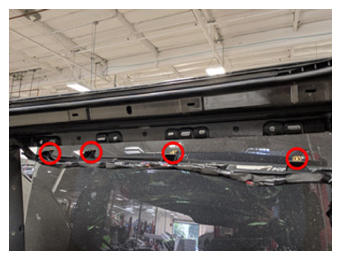 Courtesy of TESLA, INC. Courtesy of TESLA, INC.
|
- Install LH upper outer falcon door middle trim
NOTE:
7x bolts, T25, 3.0 N.m, 4.0 N.m, Fastener count may vary
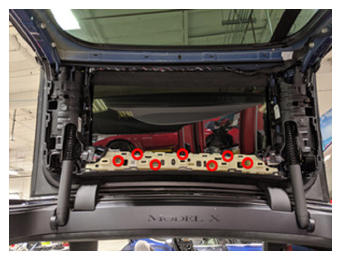 Courtesy of TESLA, INC. Courtesy of TESLA, INC.
|
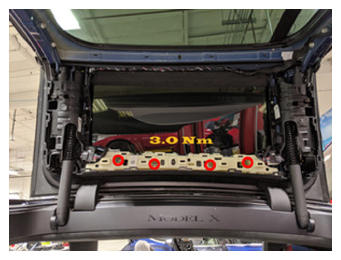 Courtesy of TESLA, INC. Courtesy of TESLA, INC.
|
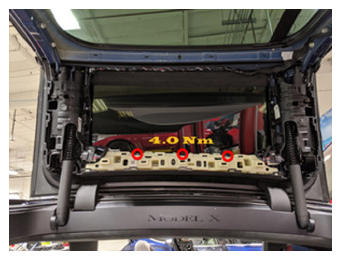 Courtesy of TESLA, INC. Courtesy of TESLA, INC.
|
- Install LH upper outer falcon door front trim
NOTE:
5x bolts, T25, 2.5 N.m, 4.0 N.m, 1x harness clip, Fastener count may vary
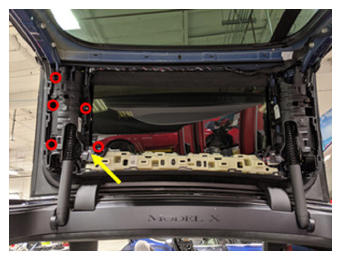 Courtesy of TESLA, INC. Courtesy of TESLA, INC.
|
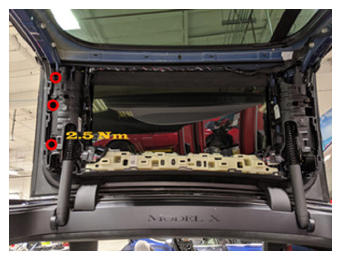 Courtesy of TESLA, INC. Courtesy of TESLA, INC.
|
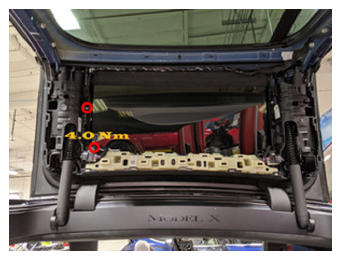 Courtesy of TESLA, INC. Courtesy of TESLA, INC.
|
- Install LH upper outer falcon door rear trim
NOTE:
5x bolts, T25, 2.5 N.m, 4.0 N.m, 1x harness clip, Fastener count may vary
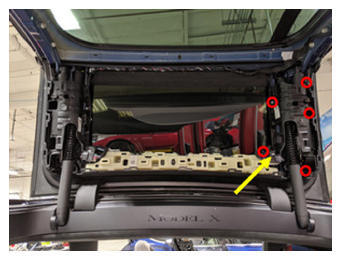 Courtesy of TESLA, INC. Courtesy of TESLA, INC.
|
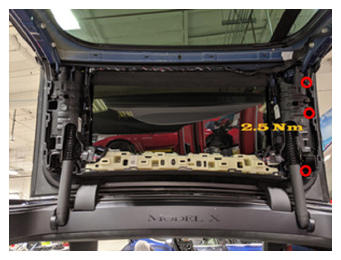 Courtesy of TESLA, INC. Courtesy of TESLA, INC.
|
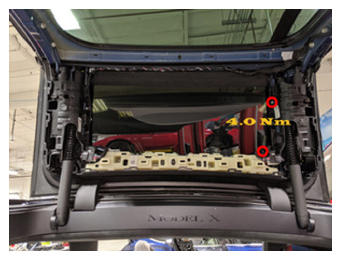 Courtesy of TESLA, INC. Courtesy of TESLA, INC.
|
- Replace LH rear door trim panel clips
NOTE:
13x clips
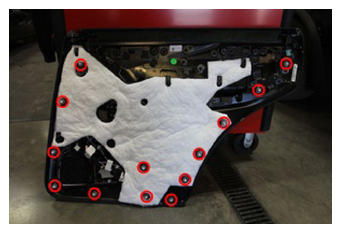 Courtesy of TESLA, INC. Courtesy of TESLA, INC.
|
- Install LH rear door trim panel
NOTE:
13x clips, 1x connector
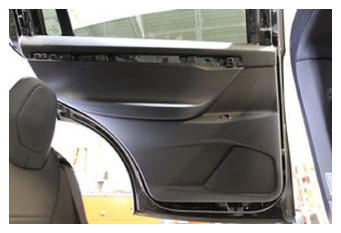 Courtesy of TESLA, INC. Courtesy of TESLA, INC.
|
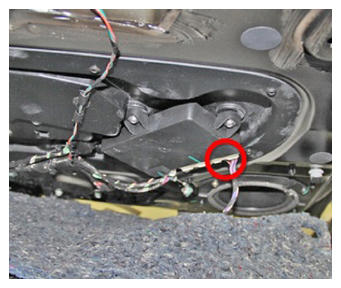 Courtesy of TESLA, INC. Courtesy of TESLA, INC.
|
- Install bolts securing LH rear door trim panel to door
NOTE:
8x bolts, 10 mm, 6 N.m
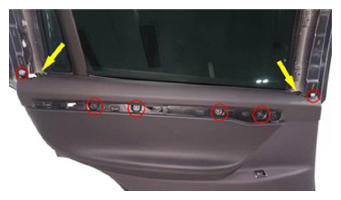 Courtesy of TESLA, INC. Courtesy of TESLA, INC.
|
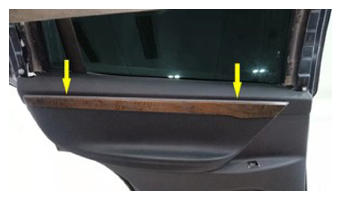
- Install LH rear door decor trim
NOTE:
8x clips
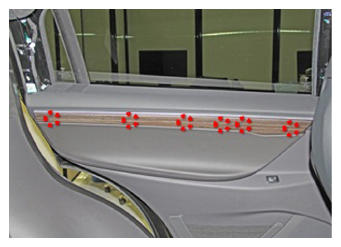 Courtesy of TESLA, INC. Courtesy of TESLA, INC.
|
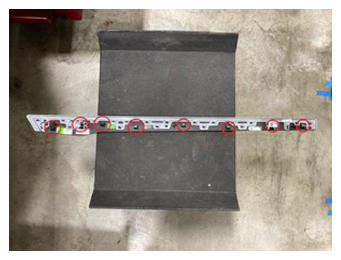 Courtesy of TESLA, INC. Courtesy of TESLA, INC.
|
 Courtesy of TESLA, INC. Courtesy of TESLA, INC.
|
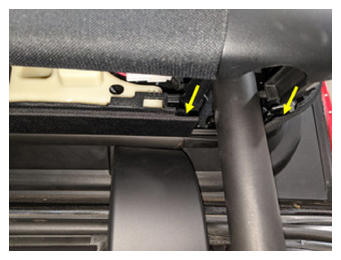
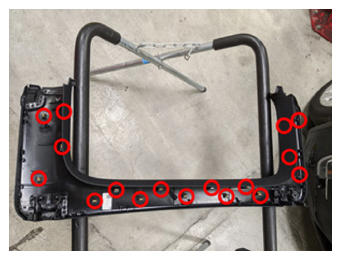
- Install LH upper falcon door trim
NOTE:
17x clips, Align strut cover first, 1x connector may be present on early production vehicles
 Courtesy of TESLA, INC. Courtesy of TESLA, INC.
|
 Courtesy of TESLA, INC. Courtesy of TESLA, INC.
|
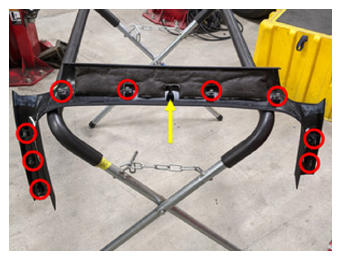
- Install LH falcon door lower garnish
NOTE:
9x V-clips, 1x guide tab
 Courtesy of TESLA, INC. Courtesy of TESLA, INC.
|
- Close LH Falcon door
- Install HEPA filter housing
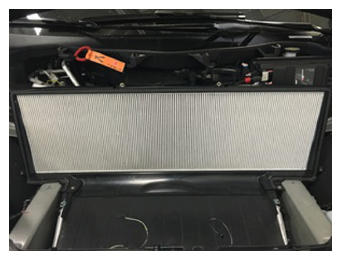 Courtesy of TESLA, INC. Courtesy of TESLA, INC.
|
- Install underhood storage unit
NOTE:
10x bolts, 10 mm, 4 N.m, 10x bolts, 10 mm, 7 N.m
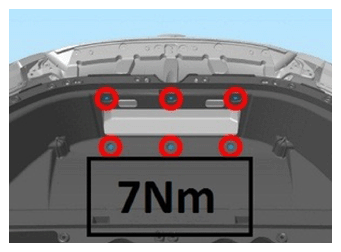 Courtesy of TESLA, INC.
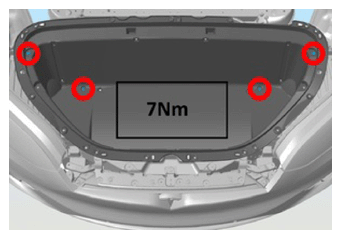 Courtesy of TESLA, INC.
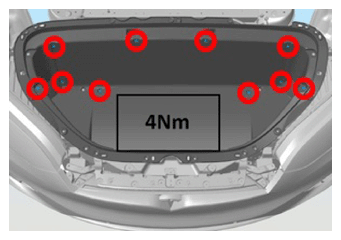 Courtesy of TESLA, INC.
- Install frunk carpet
NOTE:
2x connectors
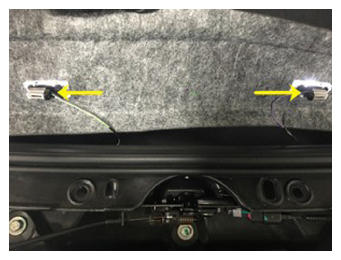 Courtesy of TESLA, INC. Courtesy of TESLA, INC.
|
- Install under hood aprons
NOTE:
4x aprons
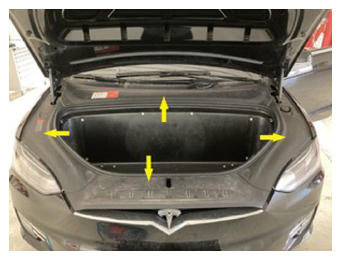 Courtesy of TESLA, INC. Courtesy of TESLA, INC.
|
- Close hood
- Move LH front seat to original position
- Raise LH rear window
- Raise LH front window
- Close LH front door