- Open LH front door
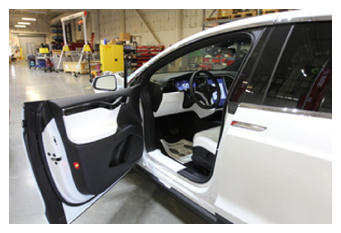 Courtesy of TESLA, INC. Courtesy of TESLA, INC.
|
- Using MCU, open all doors, hood and liftgate
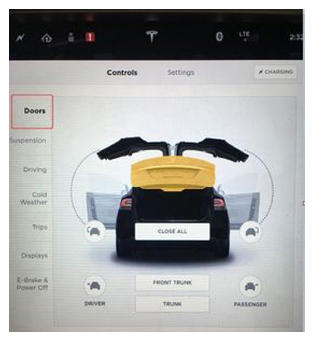 Courtesy of TESLA, INC. Courtesy of TESLA, INC.
|
- Move LH front seat forward
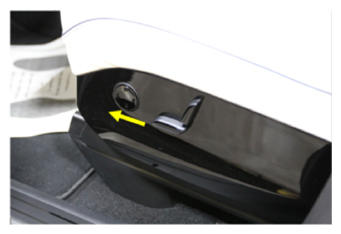 Courtesy of TESLA, INC. Courtesy of TESLA, INC.
|
- Move RH front seat forward
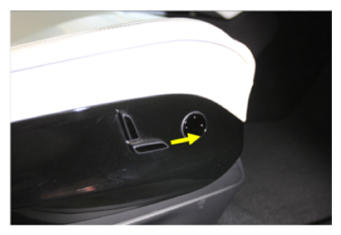 Courtesy of TESLA, INC. Courtesy of TESLA, INC.
|
- Fully open hood
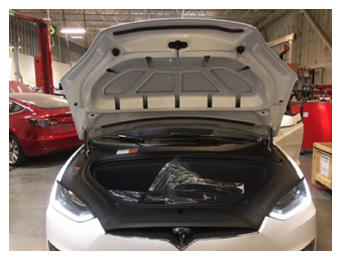 Courtesy of TESLA, INC. Courtesy of TESLA, INC.
|
- Remove underhood aprons
NOTE:
4x aprons
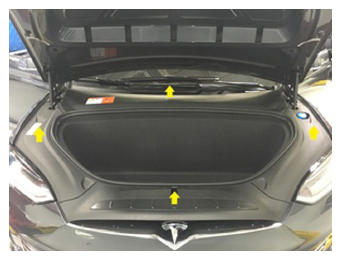 Courtesy of TESLA, INC. Courtesy of TESLA, INC.
|
- Remove frunk carpet
NOTE:
2x connectors
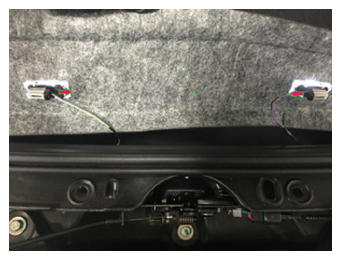 Courtesy of TESLA, INC. Courtesy of TESLA, INC.
|
- Remove underhood storage unit
NOTE:
10x bolts, 10 mm, 4 N.m, 10x bolts, 10 mm, 7 N.m
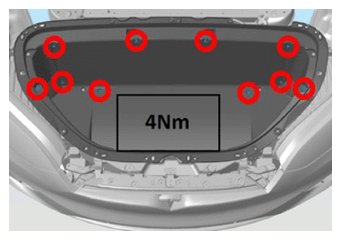 Courtesy of TESLA, INC.
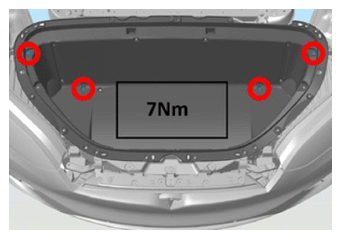 Courtesy of TESLA, INC.
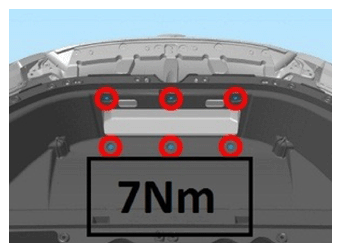 Courtesy of TESLA, INC.
- Remove HEPA filter
NOTE:
Lift up from bottom and pull out
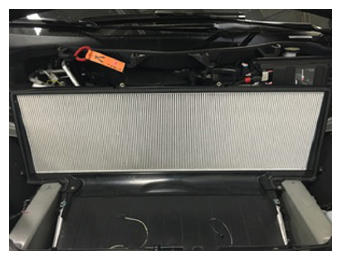 Courtesy of TESLA, INC. Courtesy of TESLA, INC.
|
- Remove 2nd row floor mat
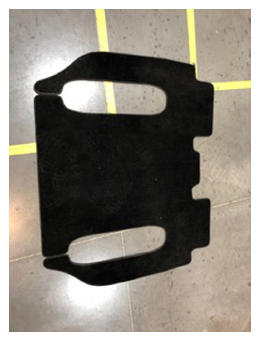 Courtesy of TESLA, INC. Courtesy of TESLA, INC.
|
- Remove LH welcome plate
NOTE:
8x clips
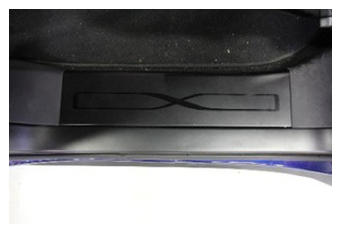 Courtesy of TESLA, INC. Courtesy of TESLA, INC.
|
- Remove LH rear door sill
NOTE:
1x patch bolt, T25, 3 N.m, 2x clips, Discard after removal
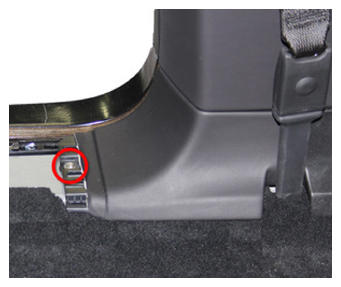 Courtesy of TESLA, INC. Courtesy of TESLA, INC.
|
- Move 60 seat fully forward using easy entry
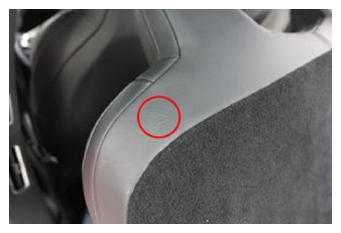 Courtesy of TESLA, INC. Courtesy of TESLA, INC.
|
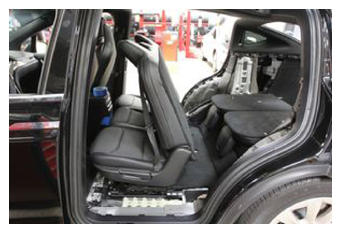 Courtesy of TESLA, INC. Courtesy of TESLA, INC.
|
- Tape the LH lower C-pillar area around the 2nd row seat side trim area
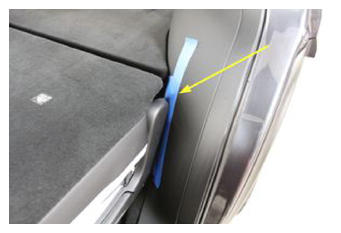 Courtesy of TESLA, INC. Courtesy of TESLA, INC.
|
- Apply tape to LH racetrack to avoid damage
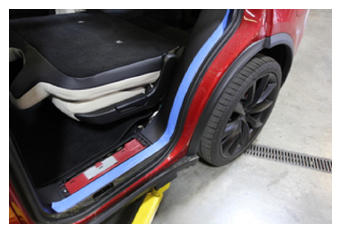 Courtesy of TESLA, INC. Courtesy of TESLA, INC.
|
- Remove front screw securing LH lower C-pillar
NOTE:
1x patch screw, T25, 2.5 N.m, Discard after removal
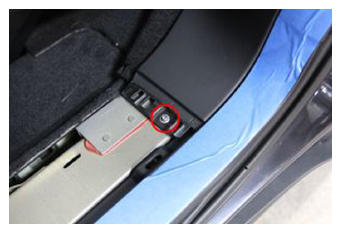 Courtesy of TESLA, INC. Courtesy of TESLA, INC.
|
- Fold down LH 3rd row seat
NOTE:
Press button located on LH 3rd row seat back assembly near headrest, fold seat back down towards front of vehicle into a flat position
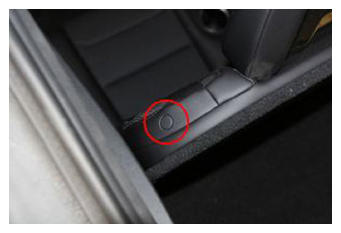 Courtesy of TESLA, INC. Courtesy of TESLA, INC.
|
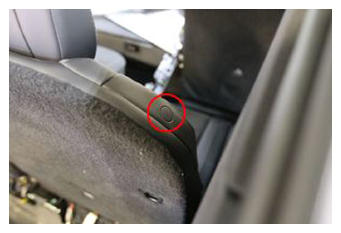
- Fold down RH 3rd row seat
NOTE:
Press button located on RH 3rd row seat back assembly near headrest, fold seat back down towards front of vehicle into a flat position
 Courtesy of TESLA, INC. Courtesy of TESLA, INC.
|
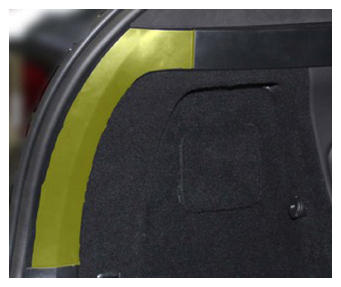
- Remove LH trunk sill side trim
NOTE:
4x clips
 Courtesy of TESLA, INC. Courtesy of TESLA, INC.
|
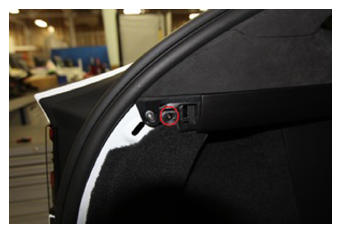
- Remove screw securing LH C-pillar mid trim
NOTE:
1x screw, T20, 2 N.m
 Courtesy of TESLA, INC. Courtesy of TESLA, INC.
|
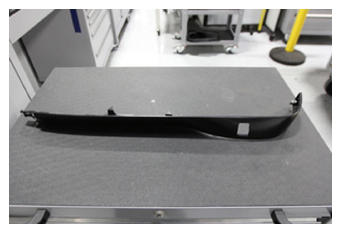
- Release clips securing LH C-pillar mid trim and remove
NOTE:
9x clips
 Courtesy of TESLA, INC. Courtesy of TESLA, INC.
|
- Remove fasteners securing C-pillar lower panel to LH parcel shelf support
NOTE:
2x screws, T20, 2 N.m
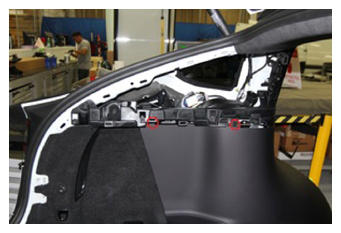 Courtesy of TESLA, INC. Courtesy of TESLA, INC.
|
- Release clips securing rear edge of C-pillar lower panel to rear trunk side carpet panel and pull top edge of C-pillar lower panel out
NOTE:
4x clips
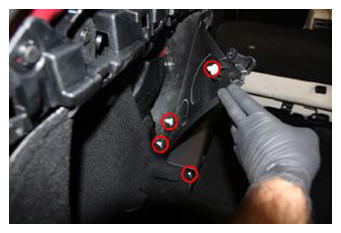 Courtesy of TESLA, INC. Courtesy of TESLA, INC.
|
- Release clips securing LH C-pillar lower panel along front edge and remove panel
NOTE:
10x clips
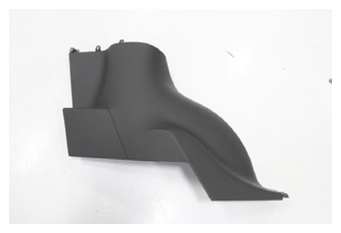 Courtesy of TESLA, INC. Courtesy of TESLA, INC.
|
- Remove RH trunk sill side trim
NOTE:
4x clips
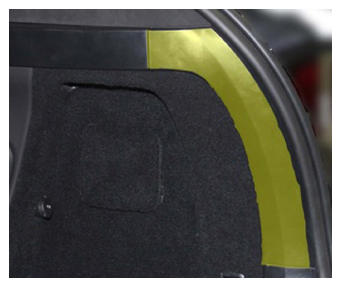 Courtesy of TESLA, INC. Courtesy of TESLA, INC.
|
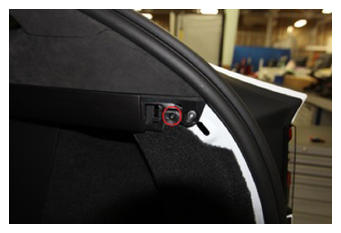
- Remove screw securing RH C-pillar mid trim
NOTE:
1x screw, T20, 2 N.m
 Courtesy of TESLA, INC. Courtesy of TESLA, INC.
|
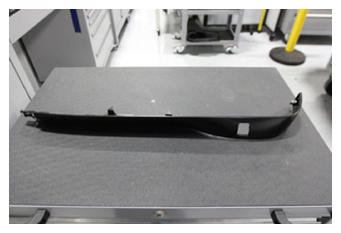
- Release clips securing RH C-pillar mid trim and remove
NOTE:
9x clips
 Courtesy of TESLA, INC. Courtesy of TESLA, INC.
|
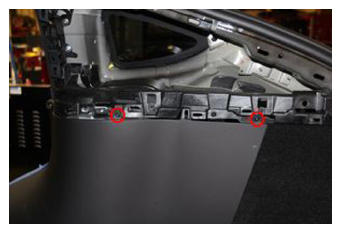
- Remove fasteners securing C-pillar lower panel to RH parcel shelf support
NOTE:
2x screws, T20, 2 N.m
 Courtesy of TESLA, INC. Courtesy of TESLA, INC.
|
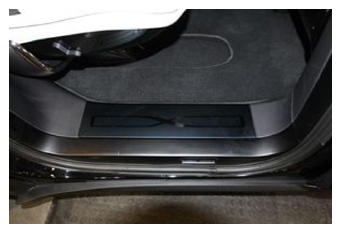
- Remove RH welcome plate
NOTE:
8x clips
 Courtesy of TESLA, INC. Courtesy of TESLA, INC.
|
- Remove front screw securing RH lower C-pillar
NOTE:
1x screw, T25, 2.5 N.m, Discard after removal
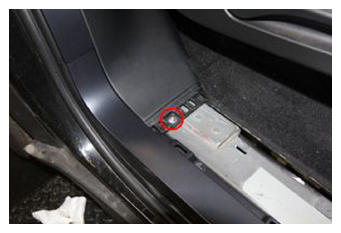 Courtesy of TESLA, INC. Courtesy of TESLA, INC.
|
- Remove RH rear door sill
NOTE:
1x patch bolt, T25, 3 N.m, 2x clips, Discard after removal
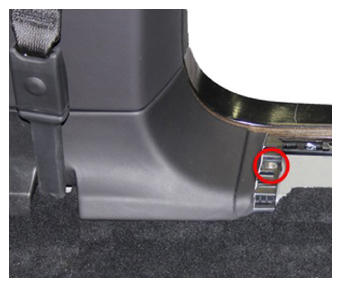 Courtesy of TESLA, INC. Courtesy of TESLA, INC.
|
- Move 40 seat fully forward using easy entry
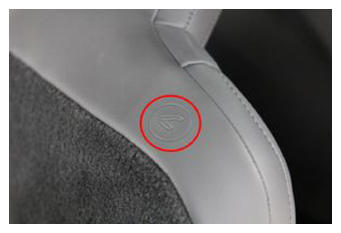 Courtesy of TESLA, INC. Courtesy of TESLA, INC.
|
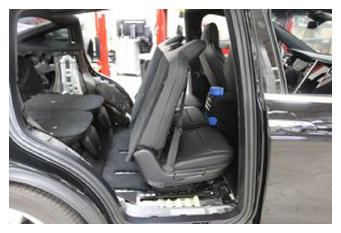 Courtesy of TESLA, INC. Courtesy of TESLA, INC.
|
- Tape the RH lower C-pillar area around the 2nd row seat side trim area
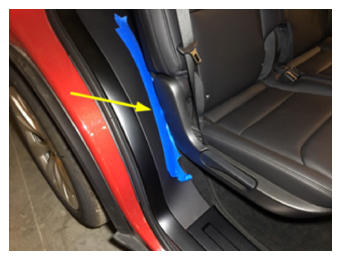 Courtesy of TESLA, INC. Courtesy of TESLA, INC.
|
- Release clips securing RH C-pillar lower panel along front edge and remove panel
NOTE:
10x clips
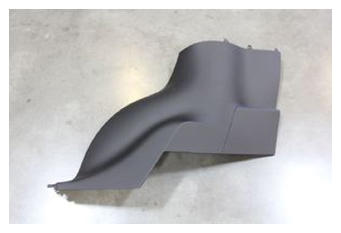 Courtesy of TESLA, INC. Courtesy of TESLA, INC.
|
- Move 40 seat back and out of easy entry position
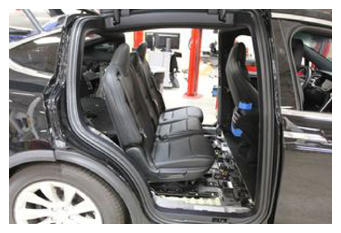 Courtesy of TESLA, INC. Courtesy of TESLA, INC.
|
- Move 60 seat back and out of easy entry position
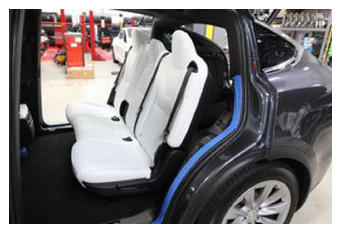 Courtesy of TESLA, INC. Courtesy of TESLA, INC.
|
- Tape rear center console cup holder trim to prevent from damage
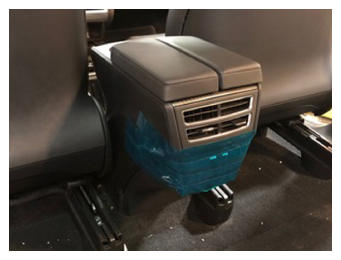 Courtesy of TESLA, INC. Courtesy of TESLA, INC.
|
- Remove 2nd row floor panel 2
NOTE:
6x clips, Replace any broken clips, Lift the front of panel toward the rear of the vehicle, then pull the floor panel out
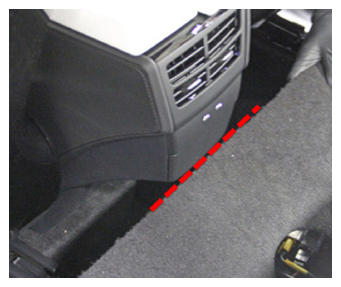 Courtesy of TESLA, INC. Courtesy of TESLA, INC.
|
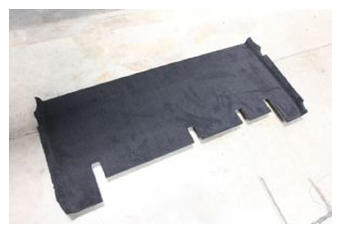 Courtesy of TESLA, INC. Courtesy of TESLA, INC.
|
- Move 60 seat fully forward using easy entry
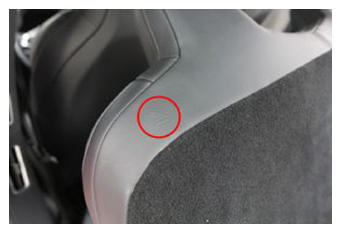 Courtesy of TESLA, INC. Courtesy of TESLA, INC.
|
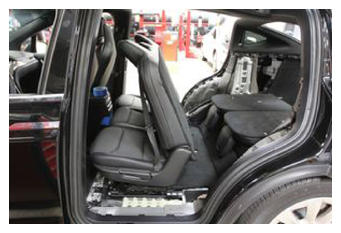 Courtesy of TESLA, INC. Courtesy of TESLA, INC.
|
- Move 40 seat fully forward using easy entry
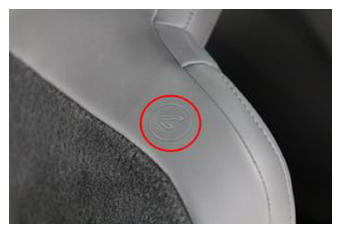 Courtesy of TESLA, INC. Courtesy of TESLA, INC.
|
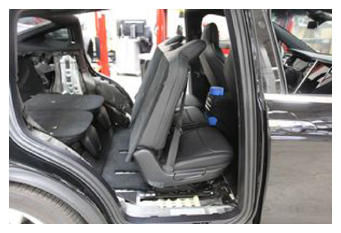 Courtesy of TESLA, INC. Courtesy of TESLA, INC.
|
- Remove 2nd row floor panel 3
NOTE:
Lift front of panel up to release clips, While lifting up, need to release the rear sliding plates from the seat and slide them all the way back, Once free, lift rear of panel and slide out from behind seats, Use caution since floor panel can damage HVAC ducts
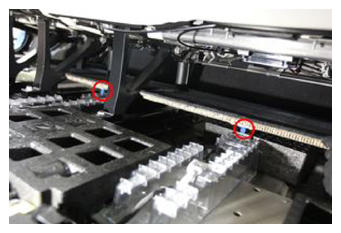 Courtesy of TESLA, INC. Courtesy of TESLA, INC.
|
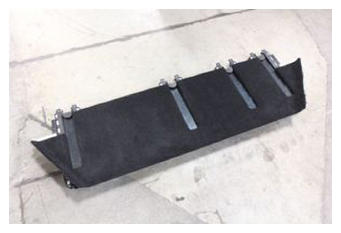 Courtesy of TESLA, INC. Courtesy of TESLA, INC.
|
- Power down vehicle using MCU
NOTE:
Controls > E-brake & Power Off > Power off
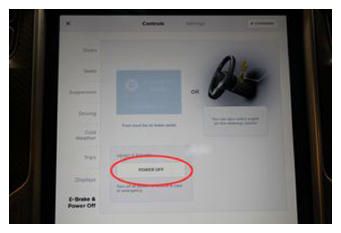 Courtesy of TESLA, INC. Courtesy of TESLA, INC.
|
- Disconnect 12V negative terminal and First Responder Loop
NOTE:
1x nut, 10 mm, 5 N.m, 1x connector, Wait at least 2 minutes before disconnecting modules or HV components
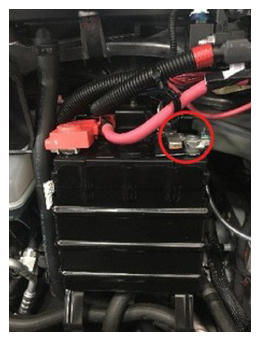 Courtesy of TESLA, INC. Courtesy of TESLA, INC.
|
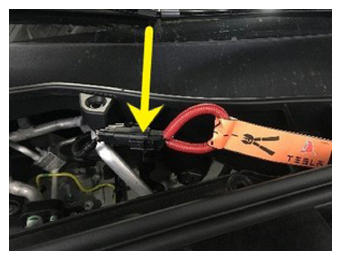 Courtesy of TESLA, INC. Courtesy of TESLA, INC.
|
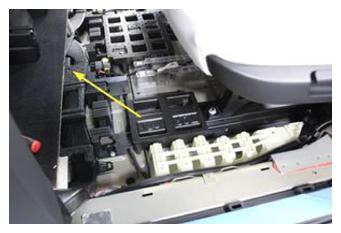
- Remove LH bench seat floor support
 Courtesy of TESLA, INC. Courtesy of TESLA, INC.
|
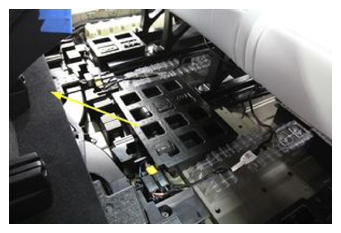
- Remove center bench seat floor support
 Courtesy of TESLA, INC. Courtesy of TESLA, INC.
|
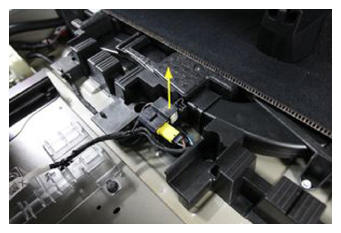
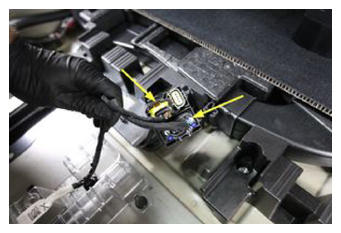
- Disconnect 60 seat harness
NOTE:
2x connectors, Release bracket for better access
 Courtesy of TESLA, INC. Courtesy of TESLA, INC.
|
 Courtesy of TESLA, INC. Courtesy of TESLA, INC.
|
- Release harness from LH floor support bracket
NOTE:
2x clips
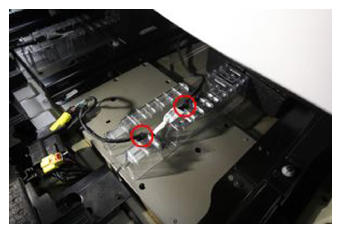 Courtesy of TESLA, INC. Courtesy of TESLA, INC.
|
- Remove LH outer sliding closeout panel
NOTE:
1x clip, Need to peel sticker back to release clip
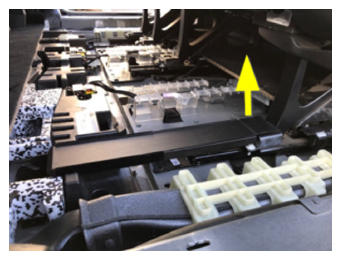 Courtesy of TESLA, INC. Courtesy of TESLA, INC.
|
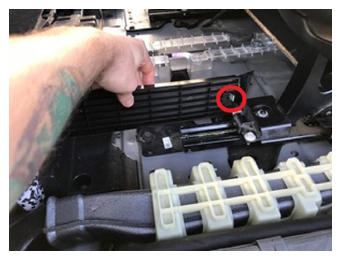 Courtesy of TESLA, INC. Courtesy of TESLA, INC.
|
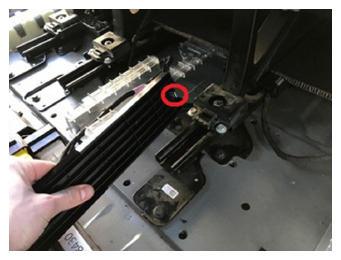
- Remove LH inner sliding closeout panel
NOTE:
1x clip, Need to peel sticker back to release clip
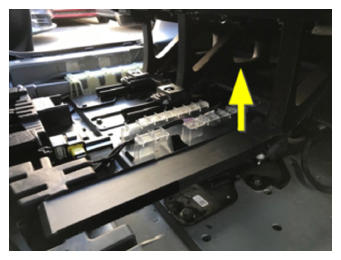 Courtesy of TESLA, INC. Courtesy of TESLA, INC.
|
 Courtesy of TESLA, INC. Courtesy of TESLA, INC.
|
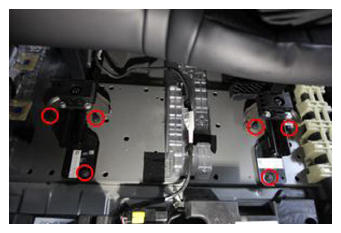
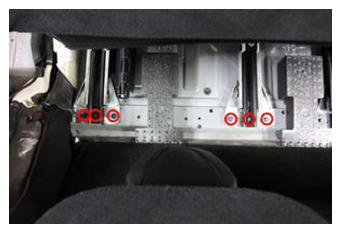
- Remove fasteners securing the 60 bench
NOTE:
12x bolts, 11 mm, 45 N.m
 Courtesy of TESLA, INC. Courtesy of TESLA, INC.
|
 Courtesy of TESLA, INC. Courtesy of TESLA, INC.
|
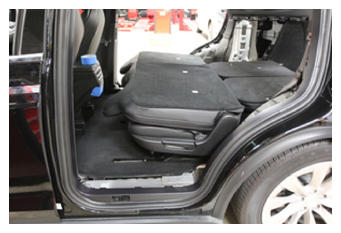
- Fold down 60 seat
 Courtesy of TESLA, INC. Courtesy of TESLA, INC.
|
- Remove 60 seat assembly from vehicle
NOTE:
Recommend assistance
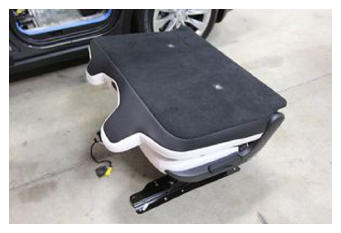 Courtesy of TESLA, INC. Courtesy of TESLA, INC.
|
- Unfold the 60 seat assembly
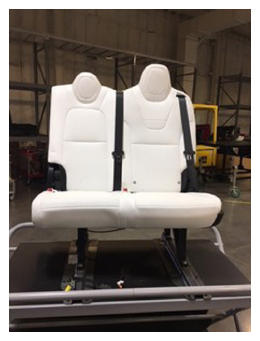 Courtesy of TESLA, INC. Courtesy of TESLA, INC.
|
- Release rear toe kick from 60 seat assembly
NOTE:
6x J-hooks, Release lower outer two to expose inner 4 clips
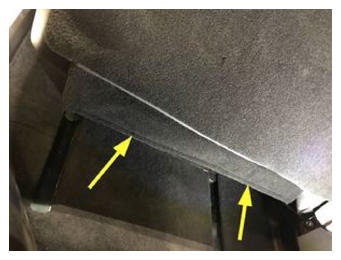 Courtesy of TESLA, INC. Courtesy of TESLA, INC.
|
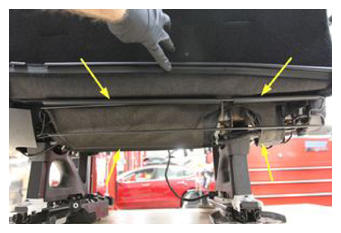 Courtesy of TESLA, INC. Courtesy of TESLA, INC.
|
- Remove center seat belt buckle from seat
NOTE:
1x patch bolt, T50, 45 N.m, Discard after removal, 1x connector, 1x edge clip
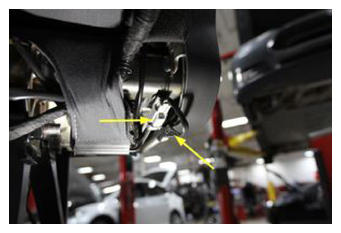 Courtesy of TESLA, INC. Courtesy of TESLA, INC.
|
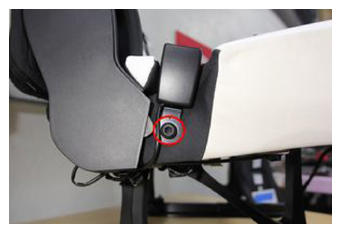 Courtesy of TESLA, INC. Courtesy of TESLA, INC.
|
- Remove 60 seat assembly release handle
NOTE:
Pry at pivot point to release
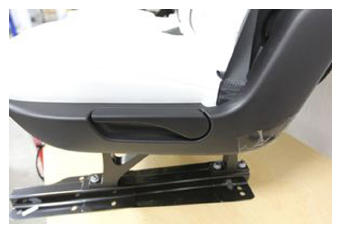 Courtesy of TESLA, INC. Courtesy of TESLA, INC.
|
- Remove LH outer recliner cover
NOTE:
1x bolt, 10 mm, 6 N.m, 1x push clip, 4x clips
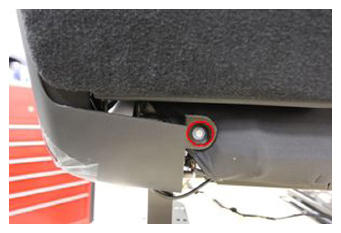 Courtesy of TESLA, INC. Courtesy of TESLA, INC.
|
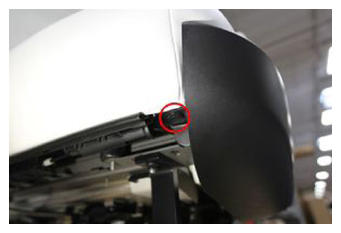 Courtesy of TESLA, INC. Courtesy of TESLA, INC.
|
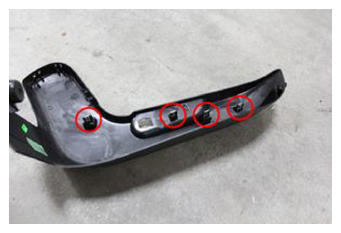 Courtesy of TESLA, INC. Courtesy of TESLA, INC.
|
- Remove LH outer seat belt from the 60 seat assembly
NOTE:
1x patch bolt, T50, 45 N.m, Discard after removal
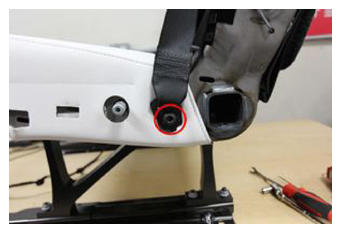 Courtesy of TESLA, INC. Courtesy of TESLA, INC.
|
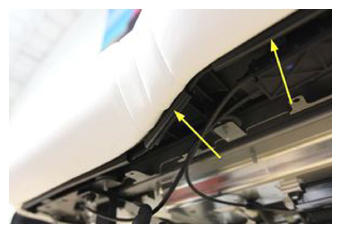
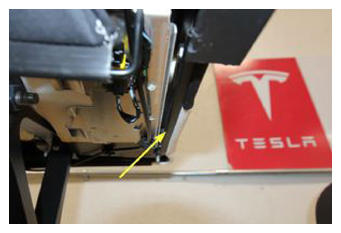
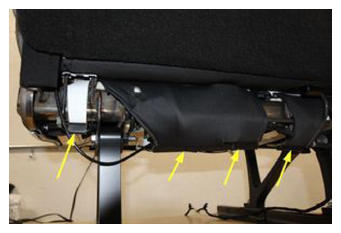
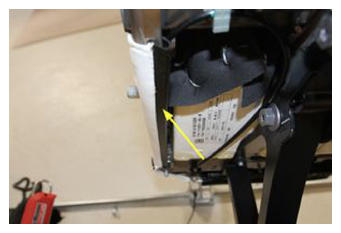
- Release upholstery from under side of 60 seat assembly
NOTE:
11x J-hooks
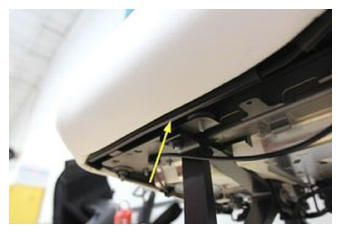 Courtesy of TESLA, INC. Courtesy of TESLA, INC.
|
 Courtesy of TESLA, INC. Courtesy of TESLA, INC.
|
 Courtesy of TESLA, INC. Courtesy of TESLA, INC.
|
 Courtesy of TESLA, INC. Courtesy of TESLA, INC.
|
 Courtesy of TESLA, INC. Courtesy of TESLA, INC.
|
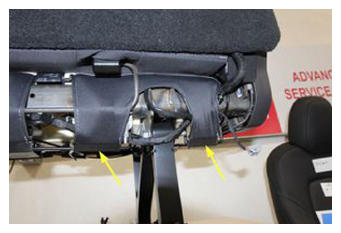 Courtesy of TESLA, INC. Courtesy of TESLA, INC.
|
- Disconnect seat cushion connectors
NOTE:
2x gray connectors, 2x black connectors, Black connectors must be released from seat frame
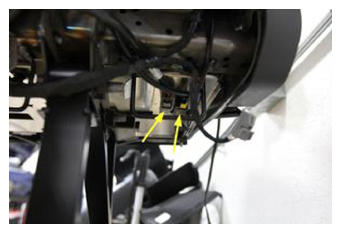 Courtesy of TESLA, INC. Courtesy of TESLA, INC.
|
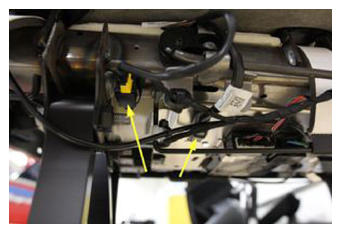 Courtesy of TESLA, INC. Courtesy of TESLA, INC.
|
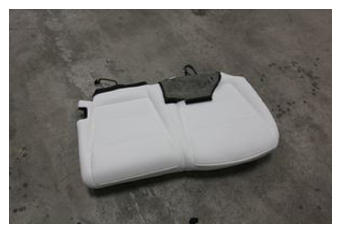
- Remove lower seat cushion from LH 60 seat assembly
NOTE:
Use caution feeding J-hooks and connectors through seat frame
 Courtesy of TESLA, INC. Courtesy of TESLA, INC.
|
- Remove fastener securing actuator to bracket
NOTE:
1x screw, T15, 1 N.m
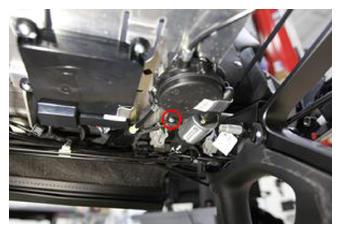 Courtesy of TESLA, INC. Courtesy of TESLA, INC.
|
- Release the actuator from the bracket and remove the bracket from seat
NOTE:
2x tabs
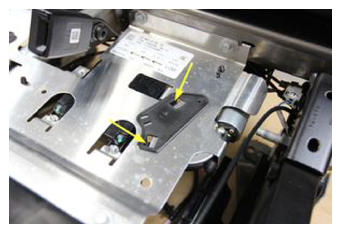 Courtesy of TESLA, INC. Courtesy of TESLA, INC.
|
- Remove screw securing splitter box to 60 seat assembly
NOTE:
1x screw, T20, 1.5 N.m
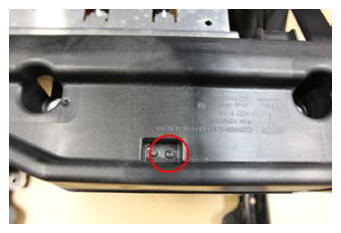 Courtesy of TESLA, INC. Courtesy of TESLA, INC.
|
- Open splitter box
NOTE:
2x cable ties, 2x tabs
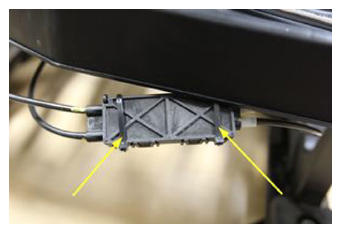 Courtesy of TESLA, INC. Courtesy of TESLA, INC.
|
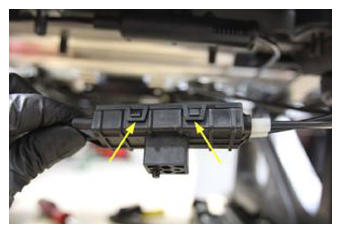 Courtesy of TESLA, INC. Courtesy of TESLA, INC.
|
- Disconnect recline release actuator cable from box
NOTE:
Silver cable
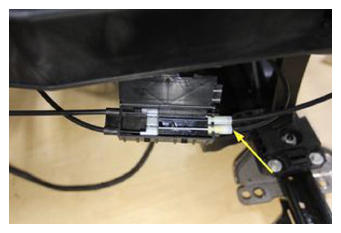 Courtesy of TESLA, INC. Courtesy of TESLA, INC.
|
- Disconnect recline release actuator
NOTE:
1x connector
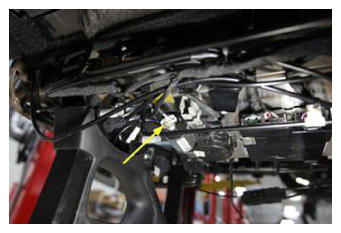 Courtesy of TESLA, INC. Courtesy of TESLA, INC.
|
- Fold 60 seat back down
NOTE:
Install handle back on but remove the spring
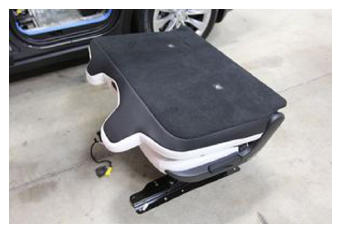 Courtesy of TESLA, INC. Courtesy of TESLA, INC.
|
- Unzip the 60 seat back upholstery on both sides
NOTE:
Ends of zippers are tucked underneath upholstery, Using a pick will aid in moving the zipper
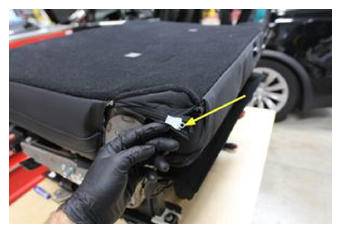 Courtesy of TESLA, INC. Courtesy of TESLA, INC.
|
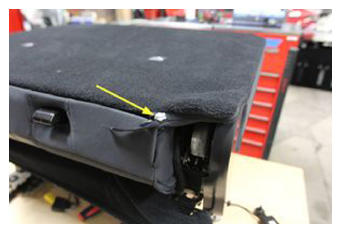 Courtesy of TESLA, INC. Courtesy of TESLA, INC.
|
- Release the 60 seat back upholstery and lift up
NOTE:
Release J-hook holding the back down
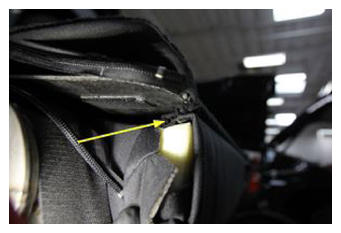 Courtesy of TESLA, INC. Courtesy of TESLA, INC.
|
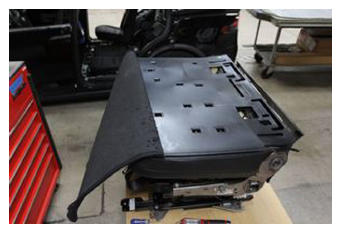 Courtesy of TESLA, INC. Courtesy of TESLA, INC.
|
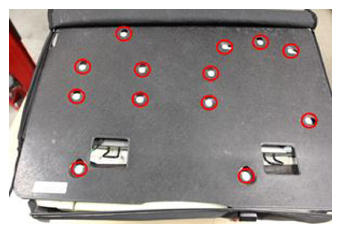
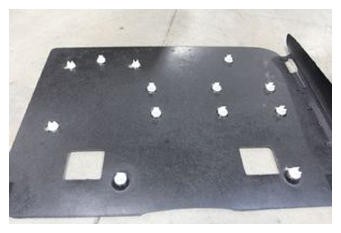
- Remove plastic seat back from 60 seat assembly
NOTE:
13x clips, Clips are secured to wired seat back
 Courtesy of TESLA, INC. Courtesy of TESLA, INC.
|
 Courtesy of TESLA, INC. Courtesy of TESLA, INC.
|
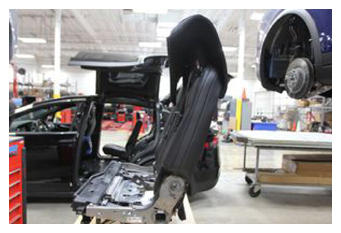
- Unfold the 60 seat assembly
 Courtesy of TESLA, INC. Courtesy of TESLA, INC.
|
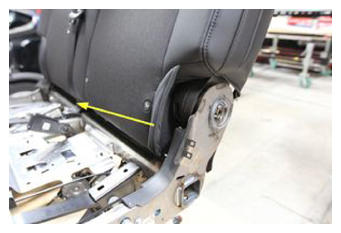
- Release the lower part of the 60 seat back cushion from seat frame
 Courtesy of TESLA, INC. Courtesy of TESLA, INC.
|
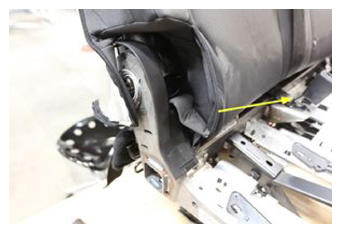 Courtesy of TESLA, INC. Courtesy of TESLA, INC.
|
- Remove elastic bands at RH outer hinge cover
NOTE:
2x bands
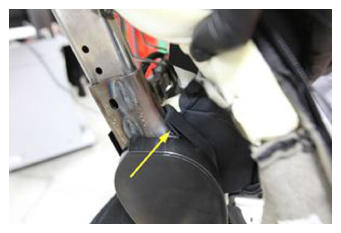 Courtesy of TESLA, INC. Courtesy of TESLA, INC.
|
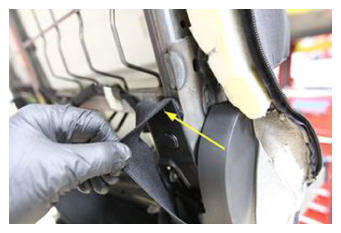 Courtesy of TESLA, INC. Courtesy of TESLA, INC.
|
- Remove RH outer hinge cover
NOTE:
2x clips, 4x tabs, Pull away from seat to release clips, then release tabs from bottom up, Lift to release top edge from seat frame
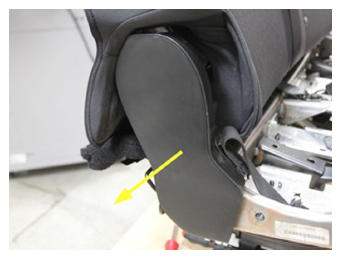 Courtesy of TESLA, INC. Courtesy of TESLA, INC.
|
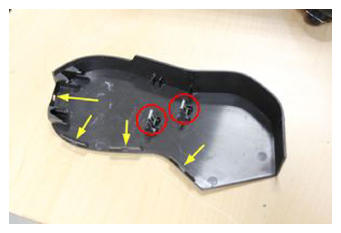 Courtesy of TESLA, INC. Courtesy of TESLA, INC.
|
- Remove RH lower inner hinge cover
NOTE:
1x push clip
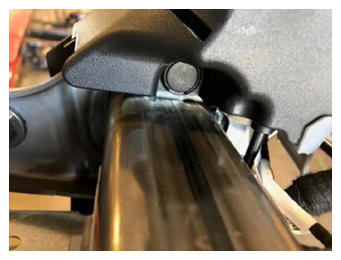 Courtesy of TESLA, INC. Courtesy of TESLA, INC.
|
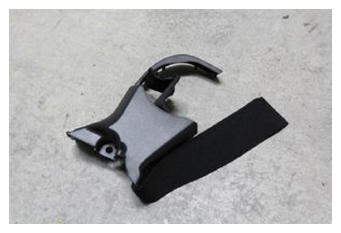 Courtesy of TESLA, INC. Courtesy of TESLA, INC.
|
- Release recline release actuator cable clip from seat frame
NOTE:
1x clip, Mounted along lower rear of seat frame
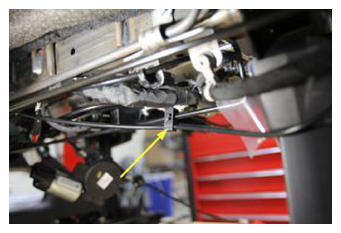 Courtesy of TESLA, INC. Courtesy of TESLA, INC.
|
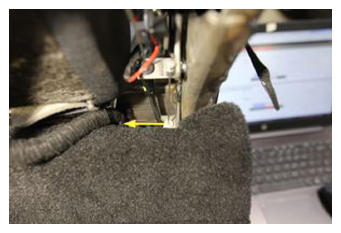
- Remove recline release actuator cable from RH side cable mount
 Courtesy of TESLA, INC. Courtesy of TESLA, INC.
|
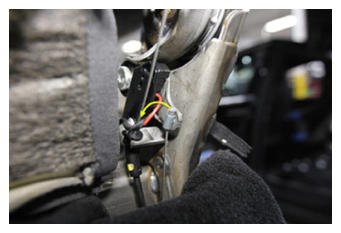
- Remove recline release actuator cable from RH side hinge lever
NOTE:
1x cable, Rotate 90 degrees to align tab, then pull away from lever
 Courtesy of TESLA, INC. Courtesy of TESLA, INC.
|
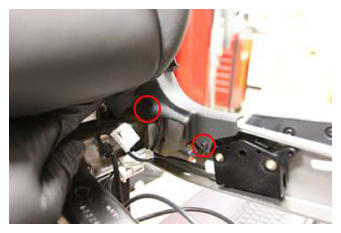
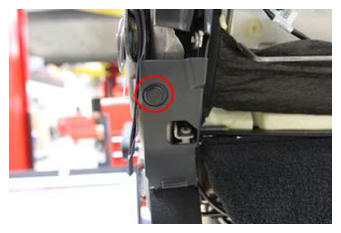
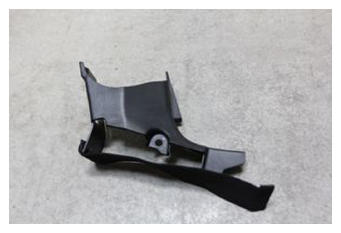
- Remove LH lower inner hinge cover
NOTE:
1x screw, T20, 1.5 N.m, 2x push clips
 Courtesy of TESLA, INC. Courtesy of TESLA, INC.
|
 Courtesy of TESLA, INC. Courtesy of TESLA, INC.
|
 Courtesy of TESLA, INC. Courtesy of TESLA, INC.
|
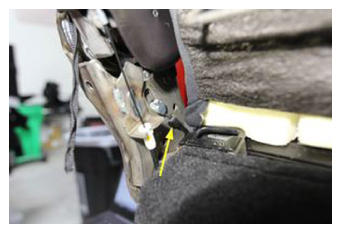
- Remove LH side cable clip from seat frame
NOTE:
1x clip
 Courtesy of TESLA, INC. Courtesy of TESLA, INC.
|
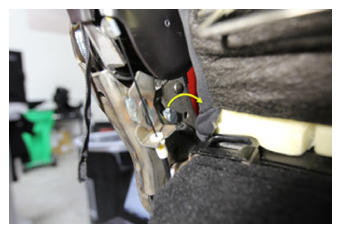
- Remove recline release actuator cable from LH side hinge lever
NOTE:
1x cable, Rotate 90 degrees to align tab, then pull away from lever
 Courtesy of TESLA, INC. Courtesy of TESLA, INC.
|
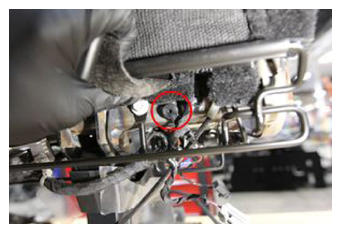
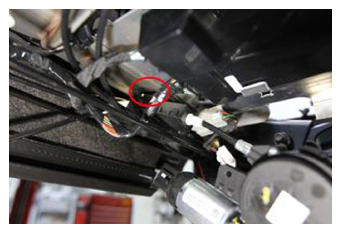
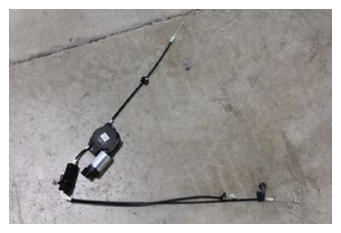
- Remove recline release actuator cable assembly from 60 seat assembly
NOTE:
2x clips, one securing splitter box near center, and one securing cable on RH side, Note routing of cables for installation
 Courtesy of TESLA, INC. Courtesy of TESLA, INC.
|
 Courtesy of TESLA, INC. Courtesy of TESLA, INC.
|
 Courtesy of TESLA, INC. Courtesy of TESLA, INC.
|
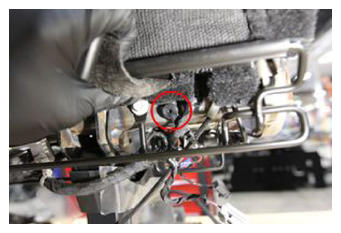
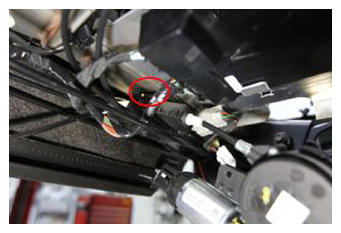
- Install recline release actuator cable assembly to 60 seat assembly
NOTE:
2x clips, Follow routing as previously noted
 Courtesy of TESLA, INC. Courtesy of TESLA, INC.
|
 Courtesy of TESLA, INC. Courtesy of TESLA, INC.
|
- Secure recline release actuator cable to LH side hinge lever
NOTE:
1x cable, Hold hinge lever down so hole is visible through slot, Insert cable end and then rotate 90 degrees to secure
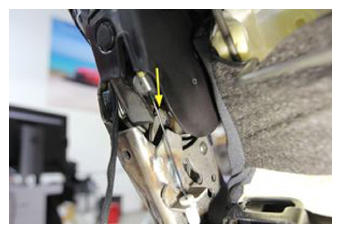 Courtesy of TESLA, INC. Courtesy of TESLA, INC.
|
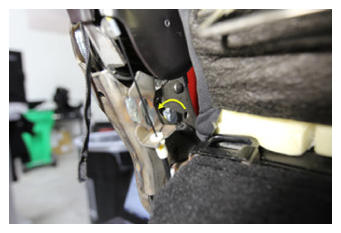 Courtesy of TESLA, INC. Courtesy of TESLA, INC.
|
- Secure LH side cable clip to seat frame
NOTE:
1x clip
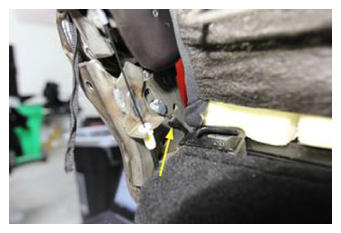 Courtesy of TESLA, INC. Courtesy of TESLA, INC.
|
- Install LH lower inner hinge cover
NOTE:
1x screw, T20, 1.5 N.m, 2x push clips
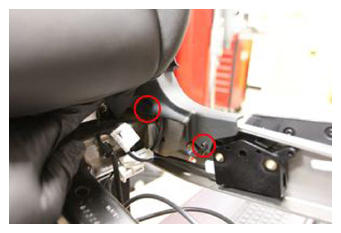 Courtesy of TESLA, INC. Courtesy of TESLA, INC.
|
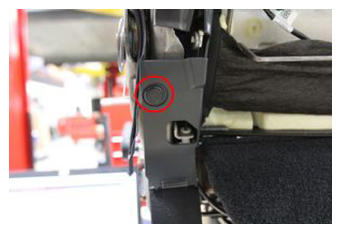 Courtesy of TESLA, INC. Courtesy of TESLA, INC.
|
- Secure recline release actuator cable to RH side hinge lever
NOTE:
1x cable, Hold hinge lever down to allow cable to reach hole, Insert cable end and then rotate 90 degrees to secure
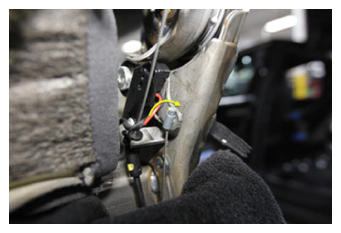 Courtesy of TESLA, INC. Courtesy of TESLA, INC.
|
- Secure recline release actuator cable to RH side cable mount
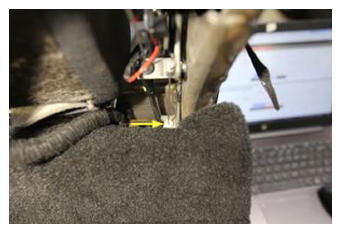 Courtesy of TESLA, INC. Courtesy of TESLA, INC.
|
- Secure recline release actuator cable clip to seat frame
NOTE:
1x clip, Mounted along lower rear of seat frame
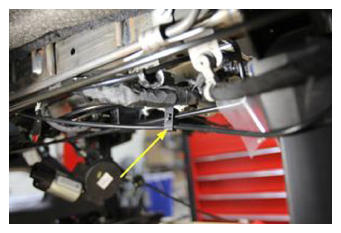 Courtesy of TESLA, INC. Courtesy of TESLA, INC.
|
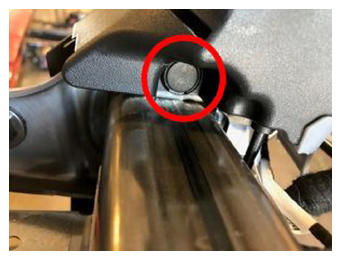
- Install RH lower inner hinge cover
NOTE:
1x push clip
 Courtesy of TESLA, INC. Courtesy of TESLA, INC.
|
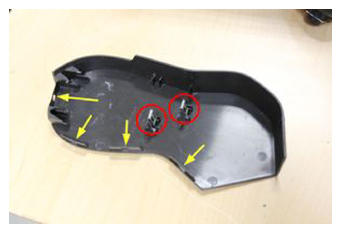
- Install RH outer hinge cover
NOTE:
2x clips, 4x tabs, Slide upper tabs down onto seat frame, then secure clips and tabs
 Courtesy of TESLA, INC. Courtesy of TESLA, INC.
|
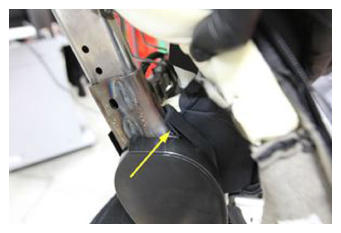
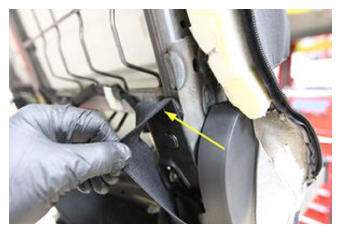
- Secure elastic bands at RH outer hinge cover
NOTE:
2x bands
 Courtesy of TESLA, INC. Courtesy of TESLA, INC.
|
 Courtesy of TESLA, INC. Courtesy of TESLA, INC.
|
- Push lower part of the backrest cushion into position
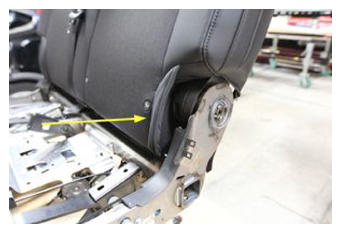 Courtesy of TESLA, INC. Courtesy of TESLA, INC.
|
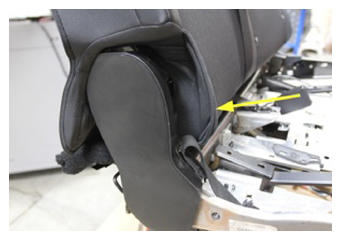 Courtesy of TESLA, INC. Courtesy of TESLA, INC.
|
- Fold 60 seat back down
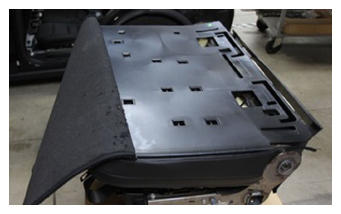 Courtesy of TESLA, INC. Courtesy of TESLA, INC.
|
- Install plastic seat back onto 60 seat assembly
NOTE:
13x clips, Clips are secured to wired seat back
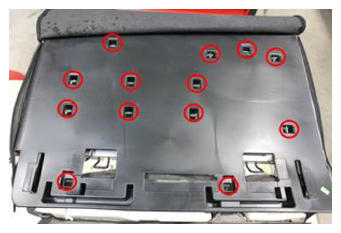 Courtesy of TESLA, INC. Courtesy of TESLA, INC.
|
- Zip up the 60 seat back upholstery on both sides
NOTE:
Using a pick will aid in moving the zipper, Tuck ends of zippers underneath upholstery, Use caution to not pull zipper off track
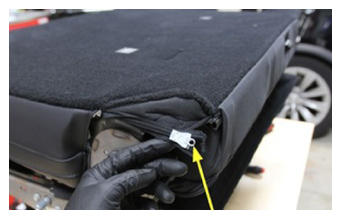 Courtesy of TESLA, INC. Courtesy of TESLA, INC.
|
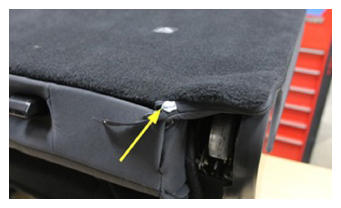 Courtesy of TESLA, INC. Courtesy of TESLA, INC.
|
- Secure lower portion of 60 seat back upholstery
NOTE:
Secure J-hook along lower edge
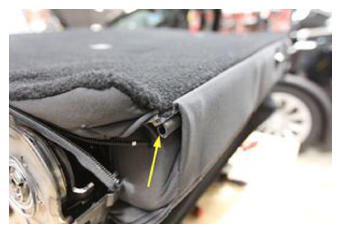 Courtesy of TESLA, INC. Courtesy of TESLA, INC.
|
- Unfold the 60 seat assembly
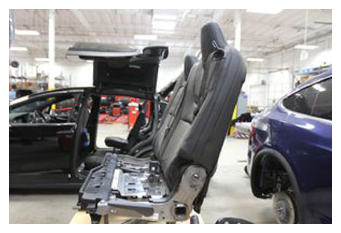 Courtesy of TESLA, INC. Courtesy of TESLA, INC.
|
- Connect recline release actuator
NOTE:
1x connector
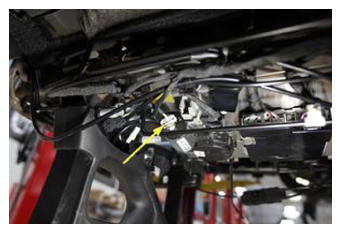 Courtesy of TESLA, INC. Courtesy of TESLA, INC.
|
- Connect recline release actuator cable to splitter box
NOTE:
Silver cable
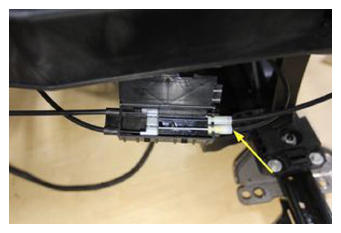 Courtesy of TESLA, INC. Courtesy of TESLA, INC.
|
- Close splitter box and secure with cable ties
NOTE:
2x tabs, 2x cable ties, Cut off excess tie
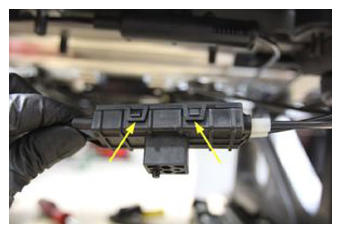 Courtesy of TESLA, INC. Courtesy of TESLA, INC.
|
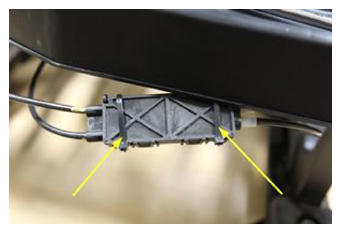 Courtesy of TESLA, INC. Courtesy of TESLA, INC.
|
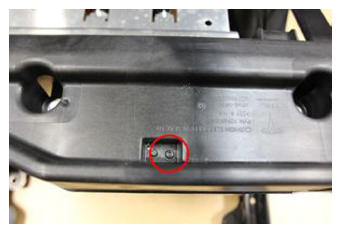
- Secure splitter box to 60 seat assembly
NOTE:
1x screw, T20, 1.5 N.m
 Courtesy of TESLA, INC. Courtesy of TESLA, INC.
|
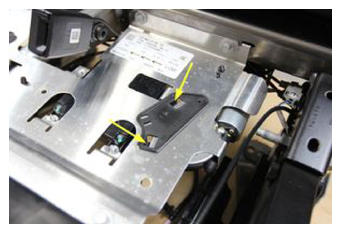
- Install bracket into seat and secure actuator to bracket
NOTE:
2x tabs
 Courtesy of TESLA, INC. Courtesy of TESLA, INC.
|
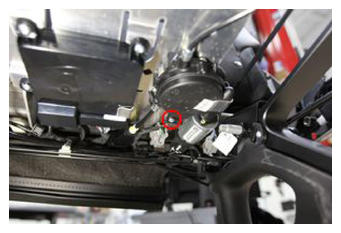
- Install fastener securing actuator to bracket
NOTE:
1x screw, T15, 1 N.m
 Courtesy of TESLA, INC. Courtesy of TESLA, INC.
|
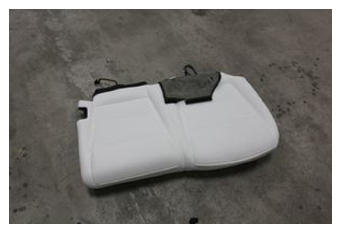
- Install cushion onto the seat
NOTE:
Use caution feeding J-hooks and connectors through seat frame
 Courtesy of TESLA, INC. Courtesy of TESLA, INC.
|
- Connect seat cushion connectors
NOTE:
2x gray connectors, 2x black connectors, Secure black connectors to seat frame
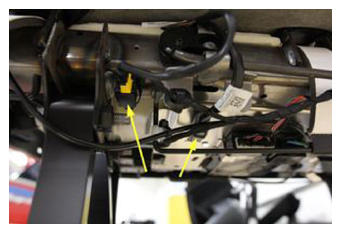 Courtesy of TESLA, INC. Courtesy of TESLA, INC.
|
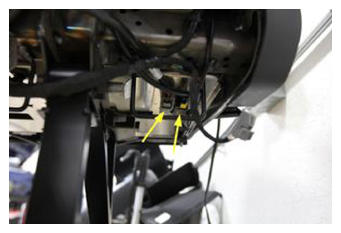 Courtesy of TESLA, INC. Courtesy of TESLA, INC.
|
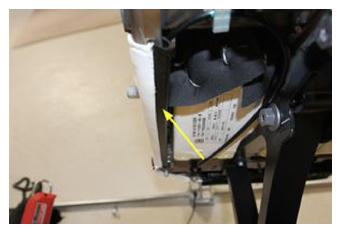
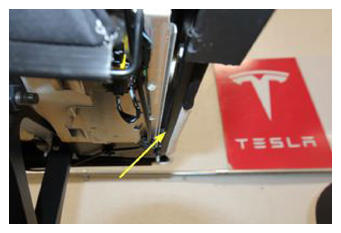
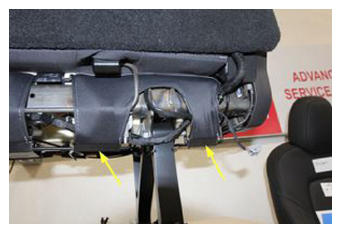
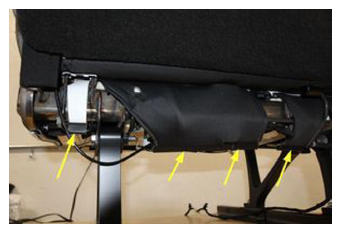
- Secure upholstery to under side of 60 seat assembly
NOTE:
11x J-hooks, Position cushion onto seat frame and then fold seat back down for better access, Fold seat back up once complete
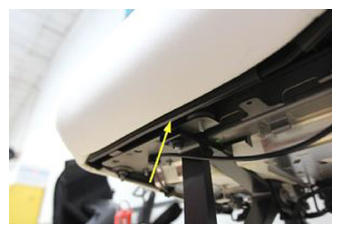 Courtesy of TESLA, INC. Courtesy of TESLA, INC.
|
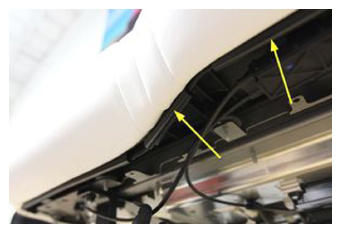 Courtesy of TESLA, INC. Courtesy of TESLA, INC.
|
 Courtesy of TESLA, INC. Courtesy of TESLA, INC.
|
 Courtesy of TESLA, INC. Courtesy of TESLA, INC.
|
 Courtesy of TESLA, INC. Courtesy of TESLA, INC.
|
 Courtesy of TESLA, INC. Courtesy of TESLA, INC.
|
- Install LH outer seat belt to the 60 seat assembly
NOTE:
1x patch bolt, T50, 45 N.m, Install new patch bolt
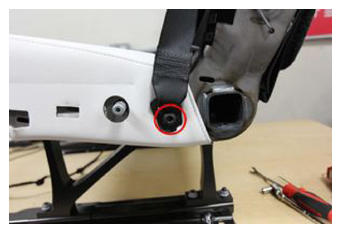 Courtesy of TESLA, INC. Courtesy of TESLA, INC.
|
- Install LH outer recliner cover
NOTE:
1x bolt, 10 mm, 6 N.m, 1x push clip, 4x clips
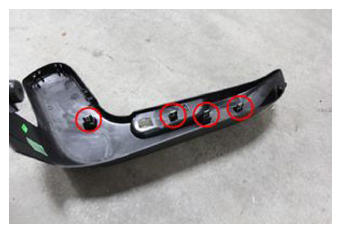 Courtesy of TESLA, INC. Courtesy of TESLA, INC.
|
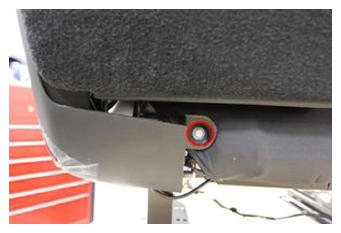 Courtesy of TESLA, INC. Courtesy of TESLA, INC.
|
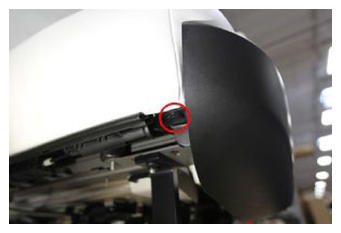 Courtesy of TESLA, INC. Courtesy of TESLA, INC.
|
- Install 60 seat assembly release handle
NOTE:
1x spring clip
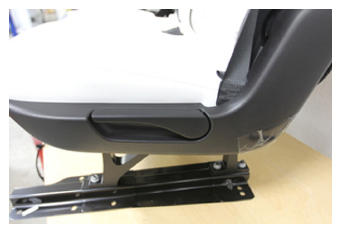 Courtesy of TESLA, INC. Courtesy of TESLA, INC.
|
- Install LH center seat belt buckle onto seat
NOTE:
1x patch bolt, T50, 45 N.m, Install new patch bolt, 1x connector, 1x edge clip
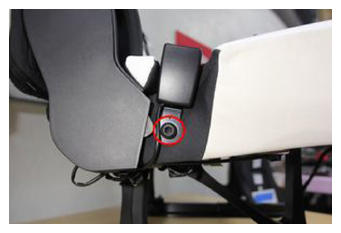 Courtesy of TESLA, INC. Courtesy of TESLA, INC.
|
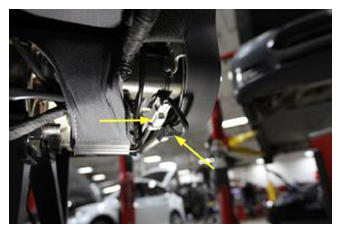 Courtesy of TESLA, INC. Courtesy of TESLA, INC.
|
- Secure toe kick to 60 seat assembly
NOTE:
6x J-hooks, Secure inner 4 clips, then lower outer 2
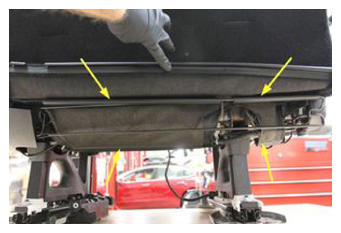 Courtesy of TESLA, INC. Courtesy of TESLA, INC.
|
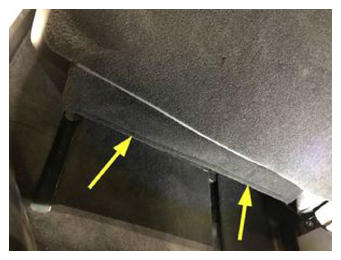 Courtesy of TESLA, INC. Courtesy of TESLA, INC.
|
- Fold 60 seat back down
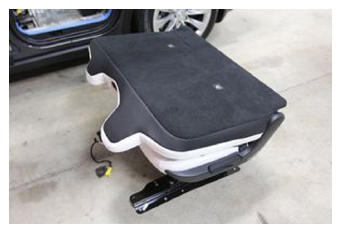 Courtesy of TESLA, INC. Courtesy of TESLA, INC.
|
- Install 60 seat assembly into vehicle
NOTE:
Recommend assistance, Make sure guide pins are aligned properly
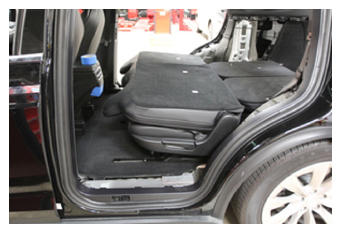 Courtesy of TESLA, INC. Courtesy of TESLA, INC.
|
- Unfold the 60 seat assembly
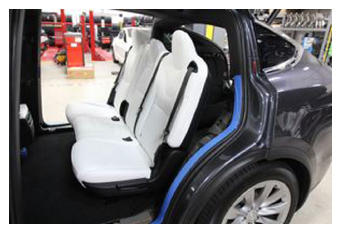 Courtesy of TESLA, INC. Courtesy of TESLA, INC.
|
- Install forward most 60 seat track bolts hand tight
NOTE:
2x bolts, 11 mm, 45 N.m
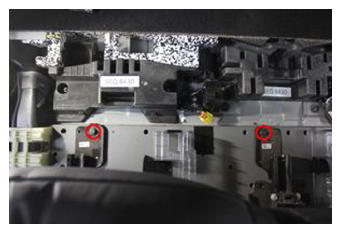 Courtesy of TESLA, INC. Courtesy of TESLA, INC.
|
- Secure 60 seat harness to LH floor support bracket
NOTE:
2x clips
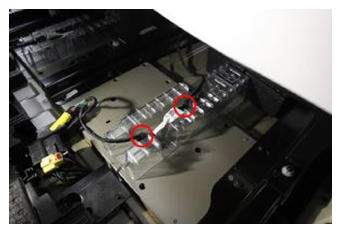 Courtesy of TESLA, INC. Courtesy of TESLA, INC.
|
- Connect 60 seat assembly harness
NOTE:
2x connectors, Secure connector housing to bracket
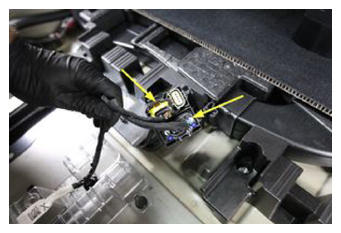 Courtesy of TESLA, INC. Courtesy of TESLA, INC.
|
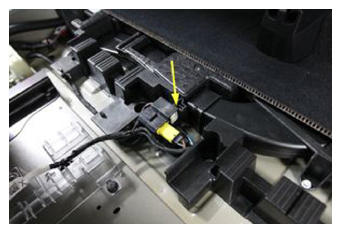 Courtesy of TESLA, INC. Courtesy of TESLA, INC.
|
- Connect first responder loop and 12V negative terminal
NOTE:
1x connector, 1x nut, 10 mm, 5 N.m
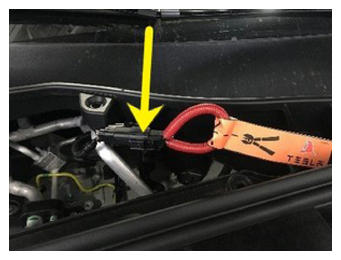 Courtesy of TESLA, INC. Courtesy of TESLA, INC.
|
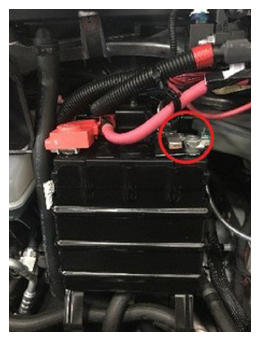 Courtesy of TESLA, INC. Courtesy of TESLA, INC.
|
- Move 60 seat fully forward using easy entry
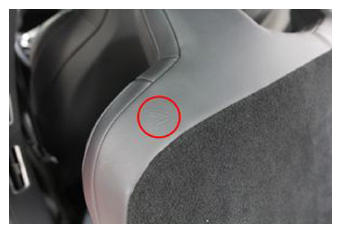 Courtesy of TESLA, INC. Courtesy of TESLA, INC.
|
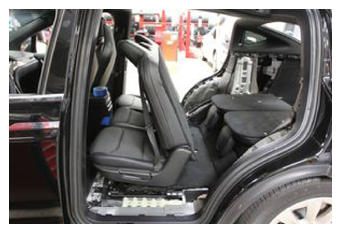 Courtesy of TESLA, INC. Courtesy of TESLA, INC.
|
- Install rear center 60 seat track bolts
NOTE:
2x bolts, 11 mm, 45 N.m
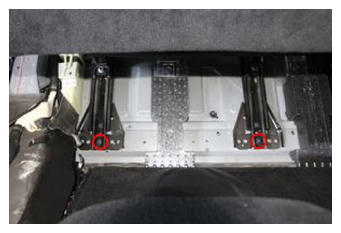 Courtesy of TESLA, INC. Courtesy of TESLA, INC.
|
- Install remaining rear 60 seat track bolts
NOTE:
4x bolts, 11 mm, 45 N.m
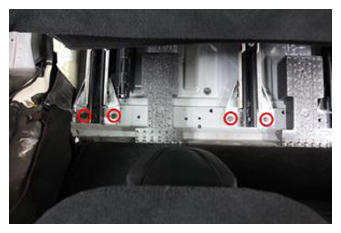 Courtesy of TESLA, INC. Courtesy of TESLA, INC.
|
- Move 60 seat back and out of easy entry position
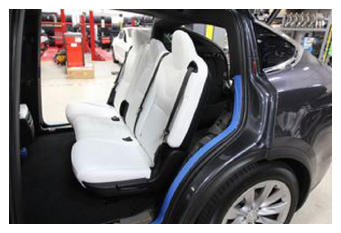 Courtesy of TESLA, INC. Courtesy of TESLA, INC.
|
- Torque forward most 60 seat track bolts
NOTE:
2x bolts, 11 mm, 45 N.m
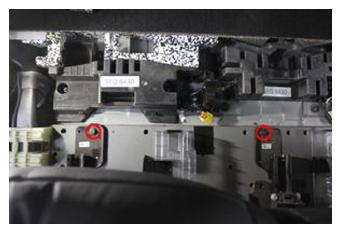 Courtesy of TESLA, INC. Courtesy of TESLA, INC.
|
- Install remaining front 60 seat track bolts
NOTE:
4x bolts, 11 mm, 45 N.m
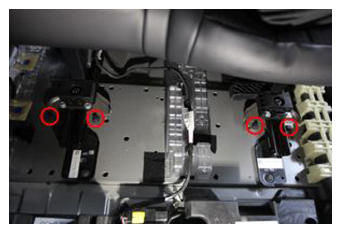 Courtesy of TESLA, INC. Courtesy of TESLA, INC.
|
- Install center bench seat floor support
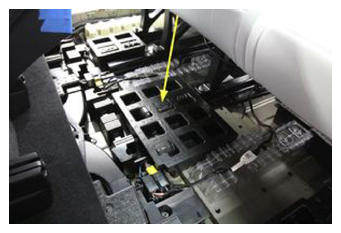 Courtesy of TESLA, INC. Courtesy of TESLA, INC.
|
- Install LH bench seat floor support
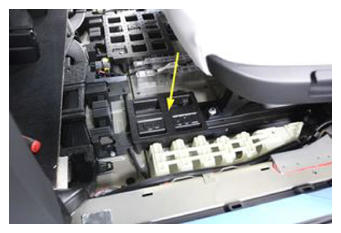 Courtesy of TESLA, INC. Courtesy of TESLA, INC.
|
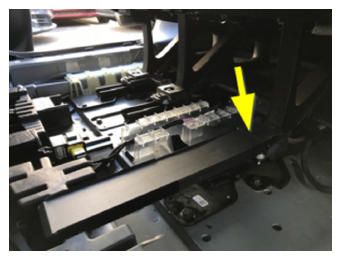
- Install LH inner sliding closeout panel
NOTE:
1x clip, Need to lay sticker back down to cover the fastener
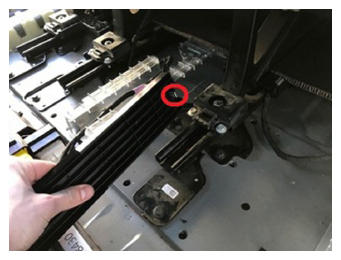 Courtesy of TESLA, INC. Courtesy of TESLA, INC.
|
 Courtesy of TESLA, INC. Courtesy of TESLA, INC.
|
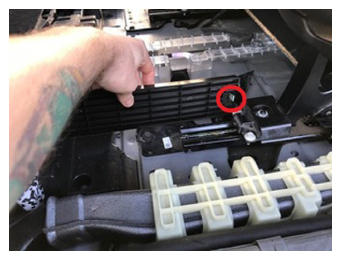
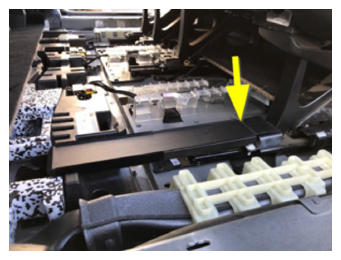
- Install LH outer sliding closeout panel
NOTE:
1x clip, Need to lay sticker back down to cover the fastener
 Courtesy of TESLA, INC. Courtesy of TESLA, INC.
|
 Courtesy of TESLA, INC. Courtesy of TESLA, INC.
|
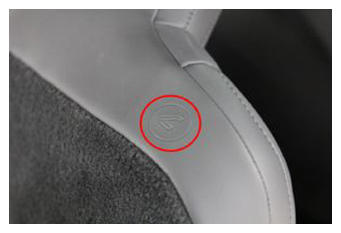
- Move 40 seat fully forward using easy entry
 Courtesy of TESLA, INC. Courtesy of TESLA, INC.
|
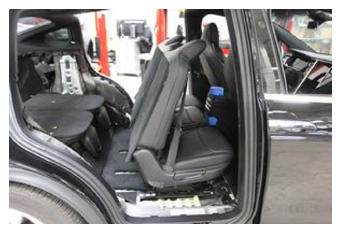 Courtesy of TESLA, INC. Courtesy of TESLA, INC.
|
- Move 60 seat fully forward using easy entry
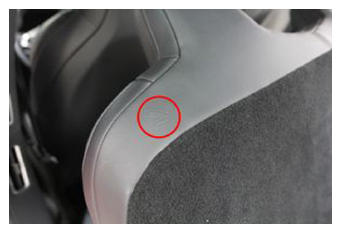 Courtesy of TESLA, INC. Courtesy of TESLA, INC.
|
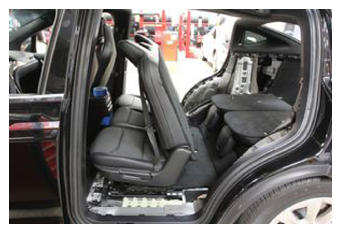 Courtesy of TESLA, INC. Courtesy of TESLA, INC.
|
- Install 2nd row floor panel 3
NOTE:
2x clips, Use caution near HVAC ducts
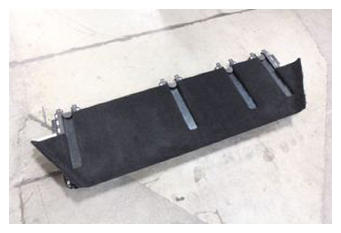 Courtesy of TESLA, INC. Courtesy of TESLA, INC.
|
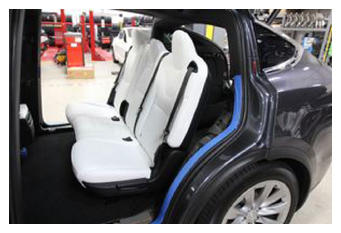
- Move 60 seat back and out of easy entry position
NOTE:
Moving seat fully rearward will secure sliding plates to seat
 Courtesy of TESLA, INC. Courtesy of TESLA, INC.
|
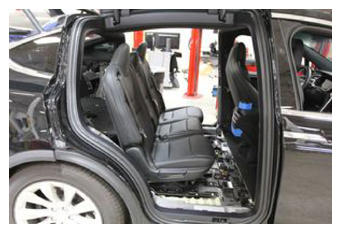
- Move 40 seat back and out of easy entry position
NOTE:
Moving seat fully rearward will secure sliding plates to seat
 Courtesy of TESLA, INC. Courtesy of TESLA, INC.
|
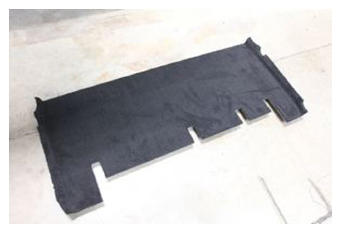
- Install 2nd row floor panel 2
NOTE:
6x clips, Replace clips if damaged, Install rear of panel into position and then secure clips
 Courtesy of TESLA, INC. Courtesy of TESLA, INC.
|
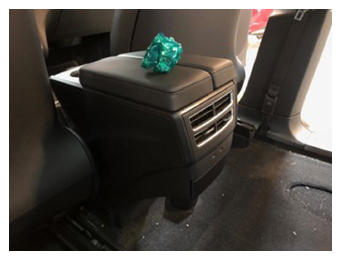
- Remove tape from rear center console trim
 Courtesy of TESLA, INC. Courtesy of TESLA, INC.
|
- Move 40 seat fully forward using easy entry
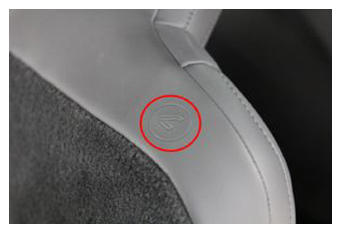 Courtesy of TESLA, INC. Courtesy of TESLA, INC.
|
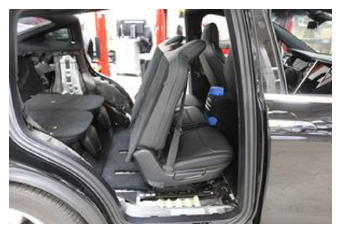 Courtesy of TESLA, INC. Courtesy of TESLA, INC.
|
- Move 60 seat fully forward using easy entry
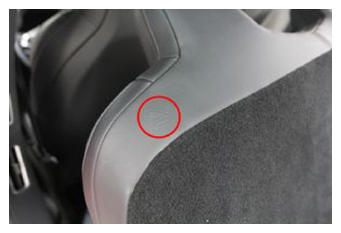 Courtesy of TESLA, INC. Courtesy of TESLA, INC.
|
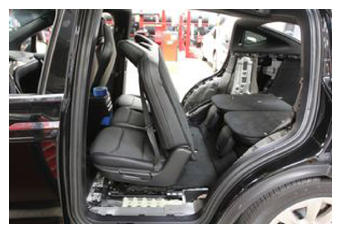 Courtesy of TESLA, INC. Courtesy of TESLA, INC.
|
- Install RH C-pillar lower panel and secure clips along front edge
NOTE:
10x clips
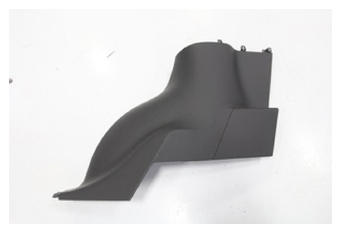 Courtesy of TESLA, INC. Courtesy of TESLA, INC.
|
- Install screw securing front of RH lower C-pillar
NOTE:
1x patch screw, T25, 2.5 N.m, Install new screw
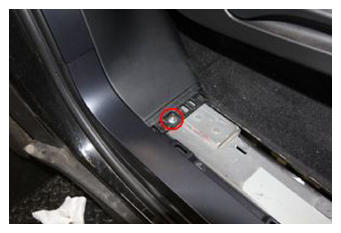 Courtesy of TESLA, INC. Courtesy of TESLA, INC.
|
- Install RH rear door sill trim
NOTE:
1x patch bolt, T25, 2.5 N.m, Install new patch bolt
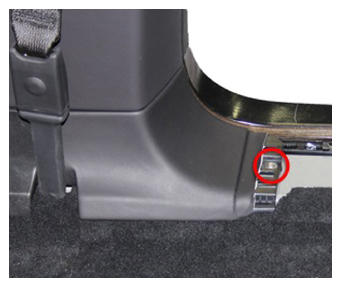 Courtesy of TESLA, INC. Courtesy of TESLA, INC.
|
- Install RH welcome plate
NOTE:
8x clips
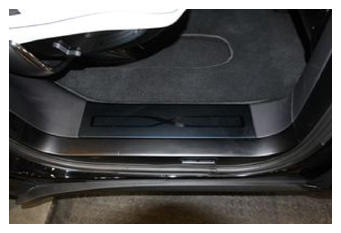 Courtesy of TESLA, INC. Courtesy of TESLA, INC.
|
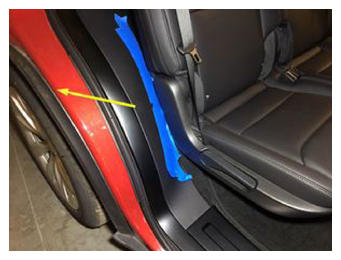
- Remove masking tape from the RH lower C-pillar
 Courtesy of TESLA, INC. Courtesy of TESLA, INC.
|
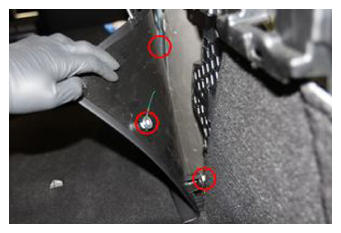
- Secure clips holding rear edge of RH C-pillar lower panel to rear trunk side carpet panel
NOTE:
3x clips, 1x magnet
 Courtesy of TESLA, INC. Courtesy of TESLA, INC.
|
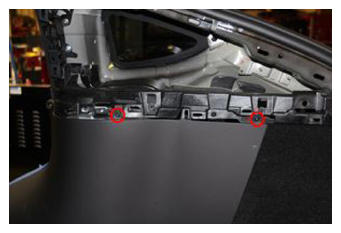
- Install fasteners securing C-pillar lower panel to RH parcel shelf support
NOTE:
2x screws, T20, 2 N.m
 Courtesy of TESLA, INC. Courtesy of TESLA, INC.
|
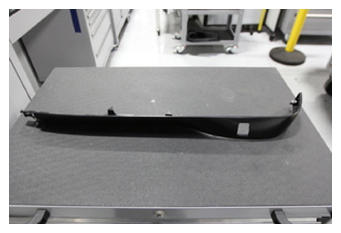
- Install RH C-pillar mid trim
NOTE:
9x clips, Install front section first, then work around to rear
 Courtesy of TESLA, INC. Courtesy of TESLA, INC.
|
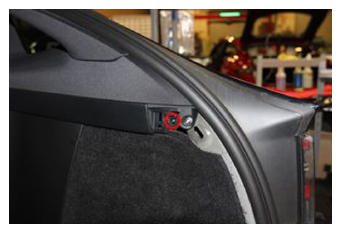
- Install screw securing RH C-pillar mid trim
NOTE:
1x screw, T20, 2 N.m
 Courtesy of TESLA, INC. Courtesy of TESLA, INC.
|
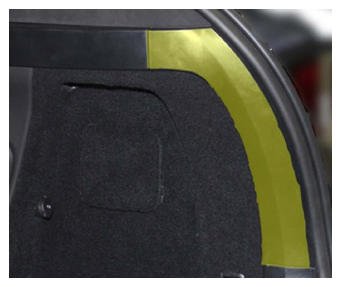
- Install RH trunk sill side trim
NOTE:
4x clips
 Courtesy of TESLA, INC. Courtesy of TESLA, INC.
|
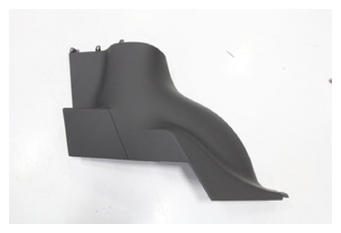
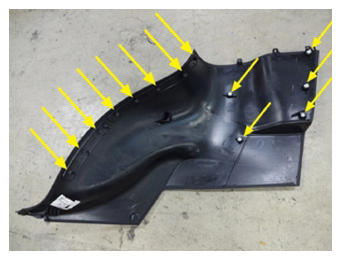
- Install LH lower C-pillar and secure clips along front edge
NOTE:
13x clips
 Courtesy of TESLA, INC. Courtesy of TESLA, INC.
|
 Courtesy of TESLA, INC. Courtesy of TESLA, INC.
|
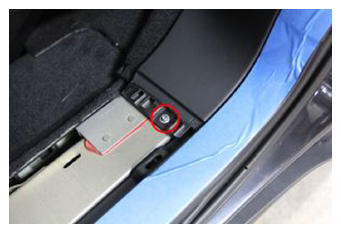
- Install screw securing front of LH lower C-pillar
NOTE:
1x patch screw, T25, 2.5 N.m, Install new screw
 Courtesy of TESLA, INC. Courtesy of TESLA, INC.
|
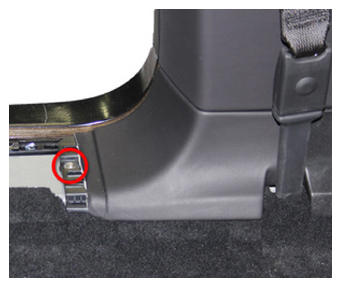
- Install LH rear door sill
NOTE:
1x patch bolt, T25, 3 N.m, 2x clips, Install new patch bolt
 Courtesy of TESLA, INC. Courtesy of TESLA, INC.
|
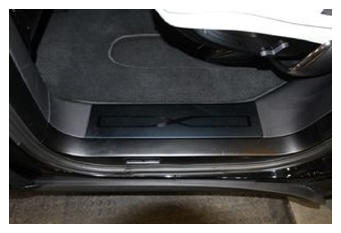
- Install LH welcome plate
NOTE:
8x clips
 Courtesy of TESLA, INC. Courtesy of TESLA, INC.
|
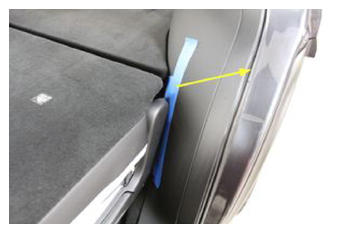
- Remove masking tape from the LH lower C-pillar
 Courtesy of TESLA, INC. Courtesy of TESLA, INC.
|
- Secure clips at rear edge of LH C-pillar lower panel
NOTE:
2x clips
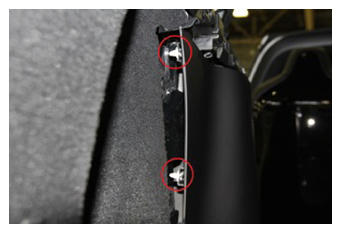 Courtesy of TESLA, INC. Courtesy of TESLA, INC.
|
- Install fasteners securing C-pillar lower panel to LH parcel shelf support
NOTE:
2x screws, T20, 2 N.m
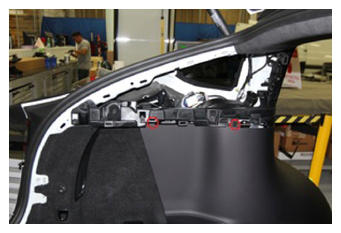 Courtesy of TESLA, INC. Courtesy of TESLA, INC.
|
- Install LH C-pillar mid trim and secure clips
NOTE:
9x clips, Install front section first, then work around to rear
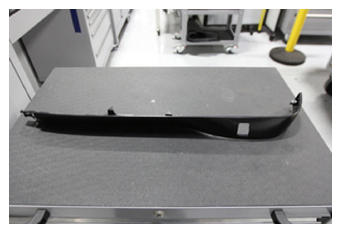 Courtesy of TESLA, INC. Courtesy of TESLA, INC.
|
- Install screw securing LH C-pillar mid trim
NOTE:
1x screw, T20, 2 N.m
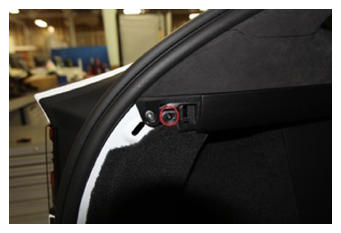 Courtesy of TESLA, INC. Courtesy of TESLA, INC.
|
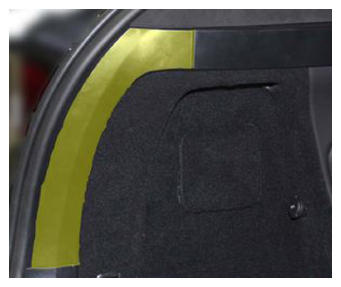
- Install LH trunk sill side trim
NOTE:
4x clips
 Courtesy of TESLA, INC. Courtesy of TESLA, INC.
|
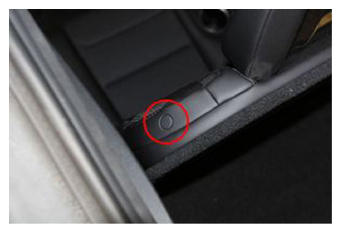
- Fold LH 3rd row seat up
NOTE:
Press button located on LH 3rd row seat back assembly near headrest, lift seat back into an upright position
 Courtesy of TESLA, INC. Courtesy of TESLA, INC.
|
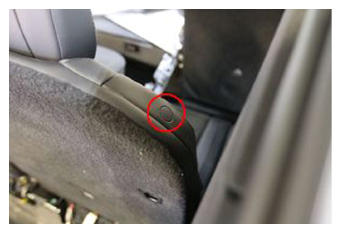
- Fold RH 3rd row seat up
 Courtesy of TESLA, INC. Courtesy of TESLA, INC.
|
- Close liftgate
 Courtesy of TESLA, INC. Courtesy of TESLA, INC.
|
- Move 60 seat back and out of easy entry position
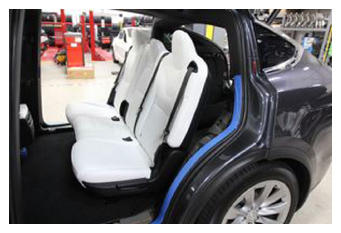 Courtesy of TESLA, INC. Courtesy of TESLA, INC.
|
- Remove tape from LH racetrack trim
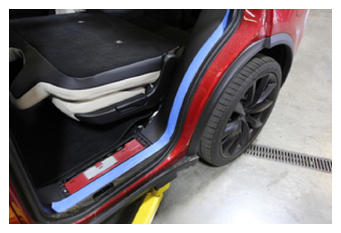 Courtesy of TESLA, INC. Courtesy of TESLA, INC.
|
- Move 40 seat back and out of easy entry position
NOTE:
Moving seat fully rearward will secure sliding plates to seat
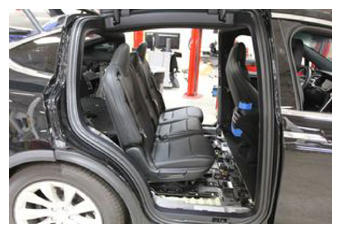 Courtesy of TESLA, INC. Courtesy of TESLA, INC.
|
- Remove tape from RH racetrack trim
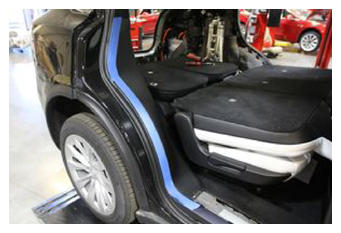 Courtesy of TESLA, INC. Courtesy of TESLA, INC.
|
- Install 2nd row floor mat
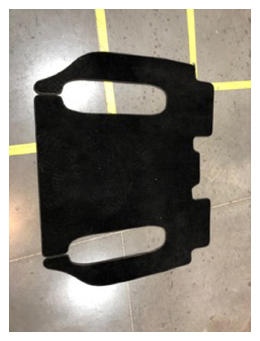 Courtesy of TESLA, INC. Courtesy of TESLA, INC.
|
- Install HEPA filter housing
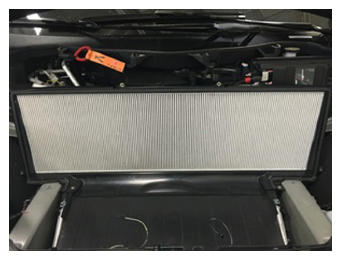 Courtesy of TESLA, INC. Courtesy of TESLA, INC.
|
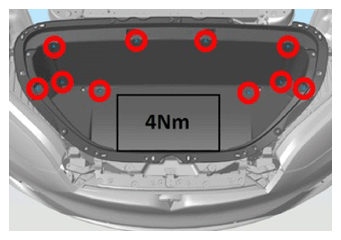
- Install underhood storage unit
NOTE:
10x bolts, 10 mm, 4 N.m, 10x bolts, 10 mm, 7 N.m
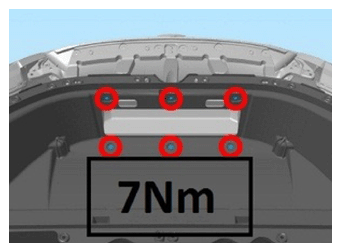 Courtesy of TESLA, INC.
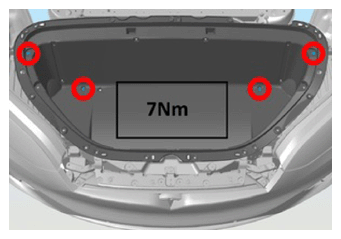 Courtesy of TESLA, INC.
 Courtesy of TESLA, INC.
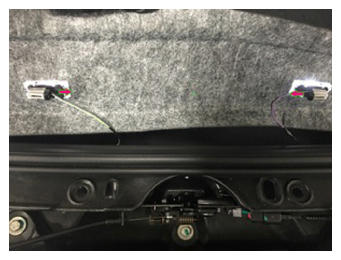
- Install frunk carpet
NOTE:
2x connectors
 Courtesy of TESLA, INC. Courtesy of TESLA, INC.
|
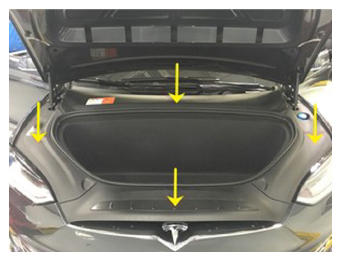
- Install underhood aprons
NOTE:
4x aprons
 Courtesy of TESLA, INC. Courtesy of TESLA, INC.
|
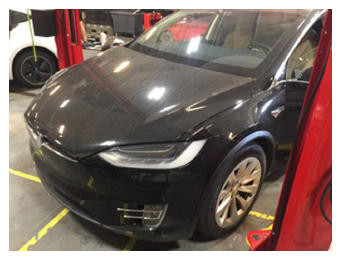
- Close hood
 Courtesy of TESLA, INC. Courtesy of TESLA, INC.
|
- Move RH front seat to original position
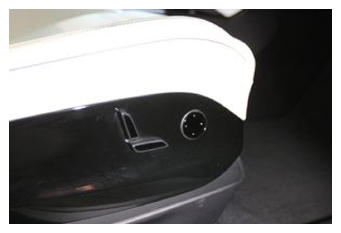 Courtesy of TESLA, INC. Courtesy of TESLA, INC.
|
- Close RH front door
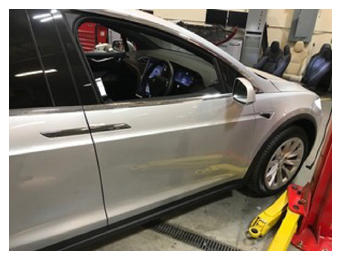 Courtesy of TESLA, INC. Courtesy of TESLA, INC.
|
- Move LH front seat to original position
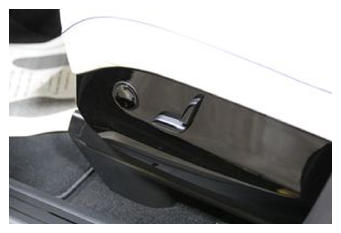 Courtesy of TESLA, INC. Courtesy of TESLA, INC.
|
- Calibrate falcon doors using MCU
NOTE:
Required after 12V and FRL disconnect
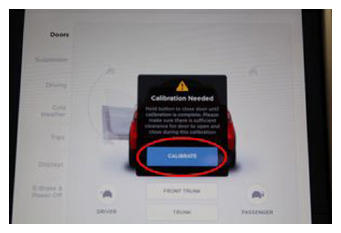 Courtesy of TESLA, INC. Courtesy of TESLA, INC.
|
- Close LH front door
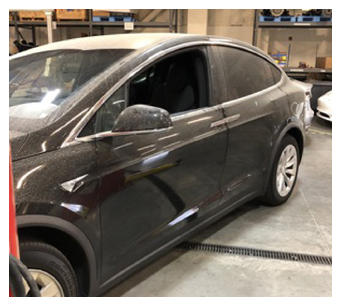 Courtesy of TESLA, INC. Courtesy of TESLA, INC.
|