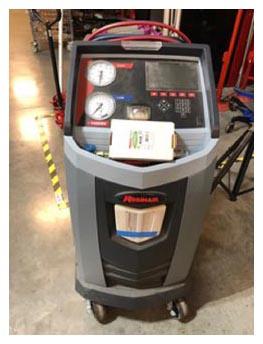
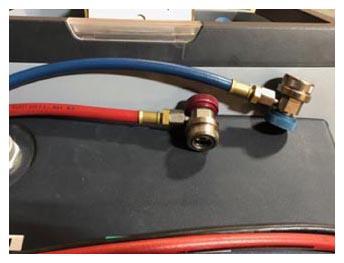
- Set up A/C machine and perform hose flush.
NOTE:
Touch time only.
 Courtesy of TESLA, INC. Courtesy of TESLA, INC.
|
 Courtesy of TESLA, INC. Courtesy of TESLA, INC.
|
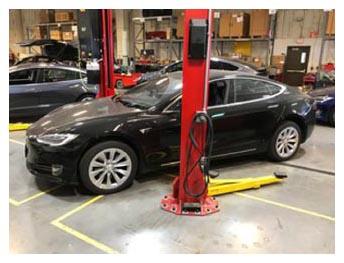
- Set and align vehicle close and straight to the hoist.
NOTE:
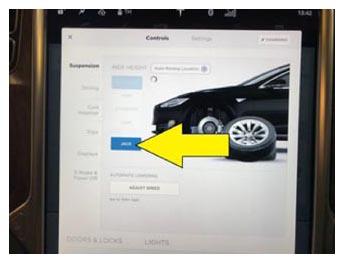
Set jack mode if equipped with air suspension.
 Courtesy of TESLA, INC. Courtesy of TESLA, INC.
|
 Courtesy of TESLA, INC. Courtesy of TESLA, INC.
|
- Position wheel chocks at LH rear wheel.
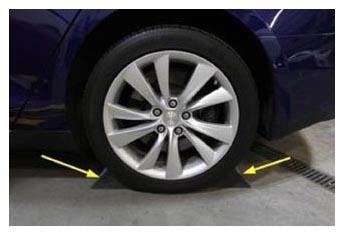 Courtesy of TESLA, INC. Courtesy of TESLA, INC.
|
- Place vehicle into "Tow Mode".
NOTE:
Via Controls > Settings > Service and Reset.
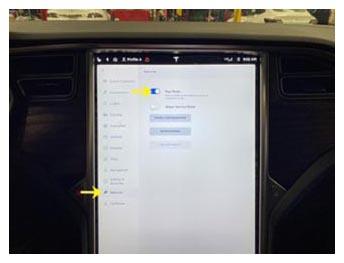 Courtesy of TESLA, INC. Courtesy of TESLA, INC.
|
- Open hood.
NOTE:
Using MCU touchscreen > Controls > Frunk Trunk.
- Remove rear underhood apron.
NOTE:
8x clips.
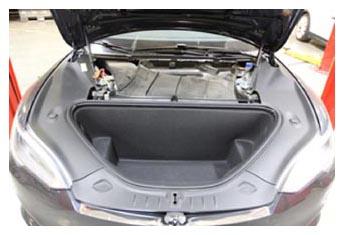 Courtesy of TESLA, INC. Courtesy of TESLA, INC.
|
- Remove RH underhood apron.
NOTE:
9x clips.
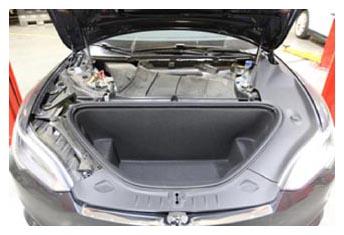 Courtesy of TESLA, INC. Courtesy of TESLA, INC.
|
- Remove LH underhood apron.
NOTE:
9x clips.
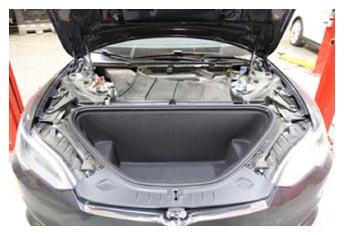 Courtesy of TESLA, INC. Courtesy of TESLA, INC.
|
- Release drainage hoses from HEPA filter inlet duct.
NOTE:
2x hoses.
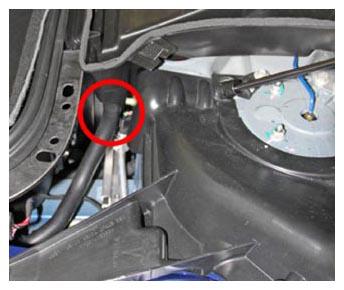 Courtesy of TESLA, INC. Courtesy of TESLA, INC.
|
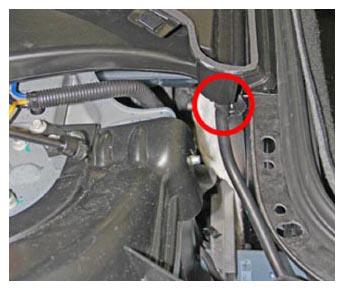 Courtesy of TESLA, INC. Courtesy of TESLA, INC.
|
- Remove clips securing HEPA filter inlet duct to cowl panel.
NOTE:
3x push clips.
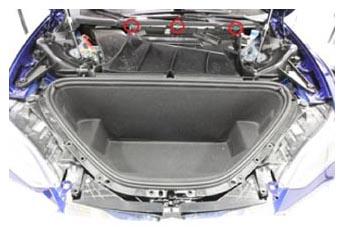 Courtesy of TESLA, INC. Courtesy of TESLA, INC.
|
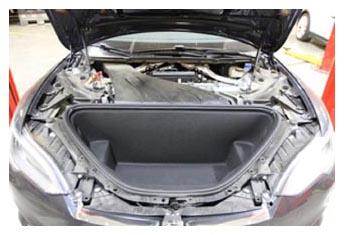
- Remove HEPA filter inlet duct.
NOTE:
2x clips on HEPA filter.
 Courtesy of TESLA, INC. Courtesy of TESLA, INC.
|
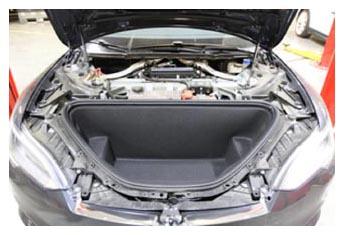
- Remove HEPA filter outlet duct from vehicle.
NOTE:
Lift up, pull towards front of vehicle, then rotate clockwise.
 Courtesy of TESLA, INC. Courtesy of TESLA, INC.
|
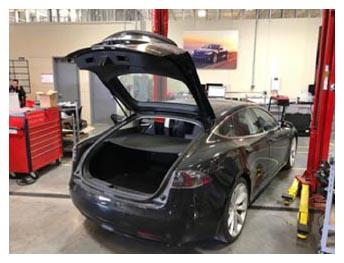
- Open liftgate.
 Courtesy of TESLA, INC. Courtesy of TESLA, INC.
|
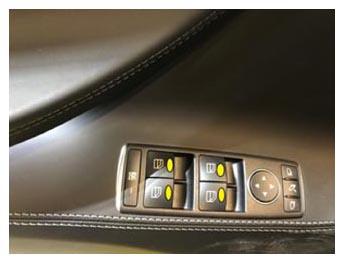
- Lower all 4 windows.
 Courtesy of TESLA, INC. Courtesy of TESLA, INC.
|
- Open all four doors.
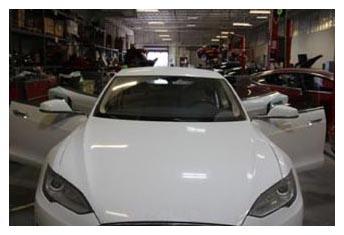 Courtesy of TESLA, INC. Courtesy of TESLA, INC.
|
- Remove all floor mats.
- Remove lower storage cover, connect laptop with Toolbox 2 and perform A/C drain/refill routine.
NOTE:
Pathway in toolbox is as follows, Panels > Thermal > Fluid Drain and fill > Check the box for Refrigerant Drain and Fill > Click the Play Button to begin routine.
- Open "DAS2 Download/Upload Calibration" panel.
NOTE:
Pathway is as follows: Panels > Driver Assist > DAS2 Download/Upload Calibration.
- Select "Download Calibration" routine and press Play.
NOTE:
This saves all camera calibration to the laptop.
- Clone MCU using Toolbox software.
NOTE:
Open Toolbox, select Panels->Gateway and Center Display->MCU Cloner->Click the MCU Backup button to clone MCU, Allow cloner to run, Confirm clone was successful and click finish.
- Download the correct Map Package for the vehicles region using toolbox.
NOTE:
In toolbox pathway is as follows Panels -> Firmware -> Map Update -> Select the map package for the vehicle region from the menu-> Allow the maps to download to your laptops hard drive before closing this panel. Continue with steps for removing the surrounding trim to the MCU while download is in progress, It is not necessary for the laptop to remain connected to the vehicle while downloading the map package to your laptop.
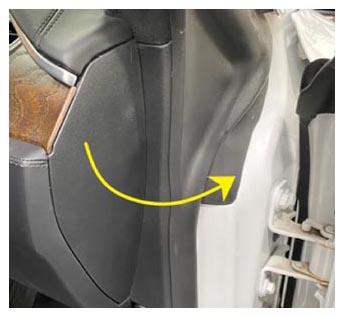
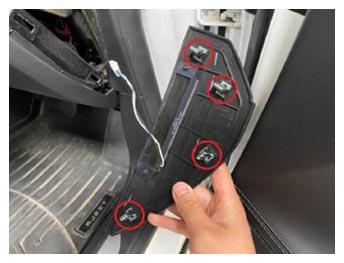
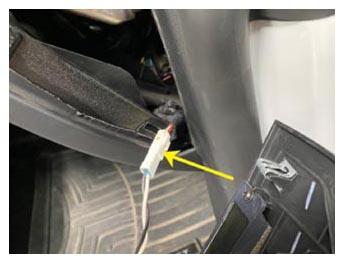
- Remove RH IP side cover.
NOTE:
3x clips, 1x connector.
 Courtesy of TESLA, INC. Courtesy of TESLA, INC.
|
 Courtesy of TESLA, INC. Courtesy of TESLA, INC.
|
 Courtesy of TESLA, INC. Courtesy of TESLA, INC.
|
- Remove RH A-pillar middle trim.
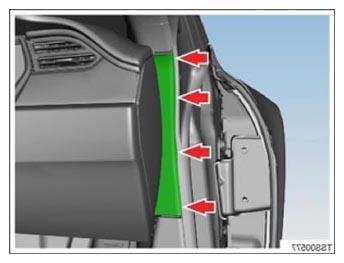 Courtesy of TESLA, INC. Courtesy of TESLA, INC.
|
- Remove RH lower A-pillar trim.
NOTE:
4x clips, The number of clips securing the trim varies depending on vehicle production date, Replace any damaged or missing clips prior to re-installing sill trim.
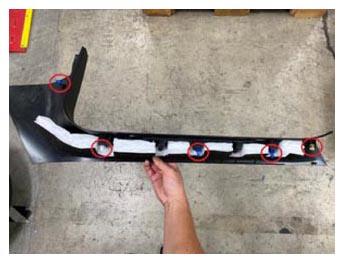 Courtesy of TESLA, INC. Courtesy of TESLA, INC.
|
- Connect hoses to vehicle and perform A/C recovery.
NOTE:
(Touch time only) Total recovery times: 18:36, 14:59, 13:57 Ensure quick connects are fully engaged, turn the connector dials clockwise to fully connect to A/C service ports.
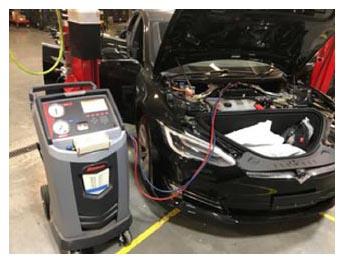 Courtesy of TESLA, INC. Courtesy of TESLA, INC.
|
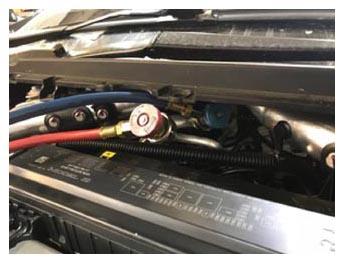 Courtesy of TESLA, INC. Courtesy of TESLA, INC.
|
- Remove RH side lower IP trim.
NOTE:
1x screw, T20, 2 N.m, 9x clips.
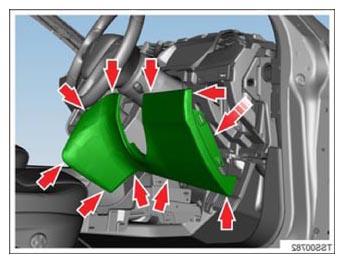 Courtesy of TESLA, INC. Courtesy of TESLA, INC.
|
- Remove cover for RH A Pillar trim fastener.
NOTE:
Take care not to damage the A pillar trim.
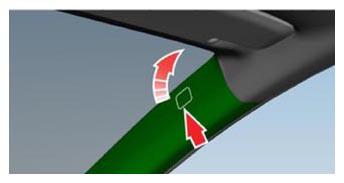 Courtesy of TESLA, INC. Courtesy of TESLA, INC.
|
- Remove fastener securing the RH A Pillar trim to the A Pillar.
NOTE:
1x screw, 7 mm, 2 N.m, 1x washer.
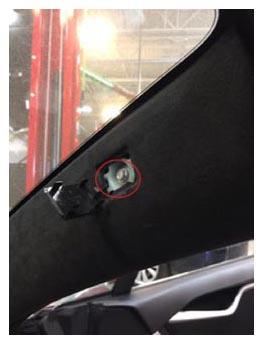 Courtesy of TESLA, INC. Courtesy of TESLA, INC.
|
- Remove the RH A Pillar trim.
NOTE:
2x locating tabs, 2x clips, locating tabs are secured to the mesh defrost grill assembly.
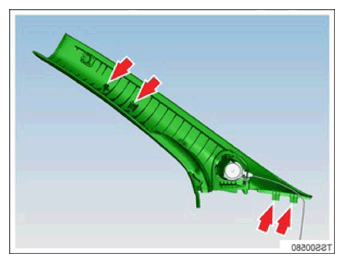 Courtesy of TESLA, INC. Courtesy of TESLA, INC.
|
- Remove the lower binnacle cover from the IP area of the vehicle.
NOTE:
4x clips.
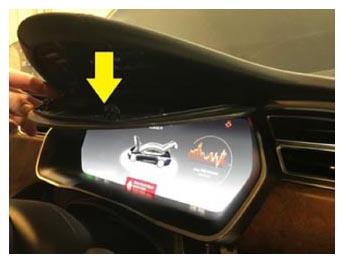 Courtesy of TESLA, INC. Courtesy of TESLA, INC.
|
- Remove screws securing top pad at binnacle area.
NOTE:
2x screws, T20, 1 N.m.
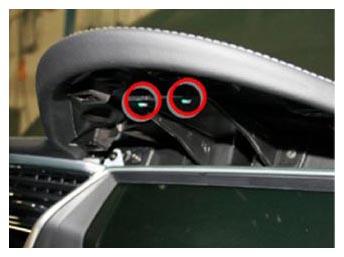 Courtesy of TESLA, INC. Courtesy of TESLA, INC.
|
- Remove screw securing RH IP side of top pad.
NOTE:
1x screw, T20, 2 N.m.
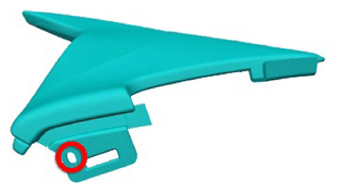 Courtesy of TESLA, INC. Courtesy of TESLA, INC.
|
- Move steering wheel fully outward and down.
NOTE:
Don't move outward too much otherwise driver seat may not be easily removed.
- Remove LH IP side cover.
NOTE:
4x clips, 1x connector.
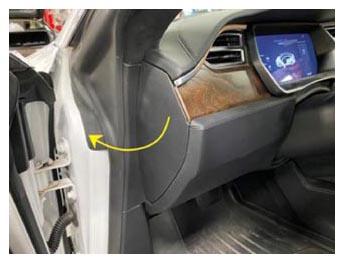 Courtesy of TESLA, INC. Courtesy of TESLA, INC.
|
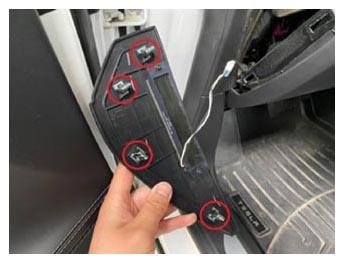 Courtesy of TESLA, INC. Courtesy of TESLA, INC.
|
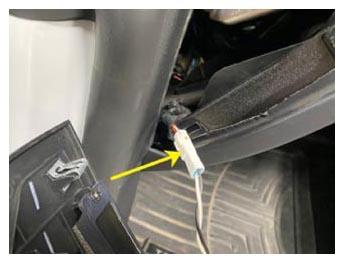 Courtesy of TESLA, INC. Courtesy of TESLA, INC.
|
- Remove LH middle A-pillar trim.
NOTE:
2x clips.
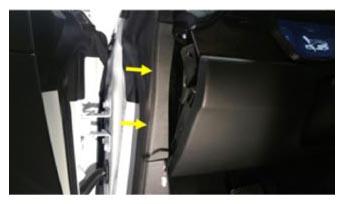 Courtesy of TESLA, INC. Courtesy of TESLA, INC.
|
- Remove LH lower A-pillar trim.
NOTE:
4x clips, The number of clips securing the trim varies depending on vehicle production date, Replace any damaged or missing clips prior to re-installing sill trim.
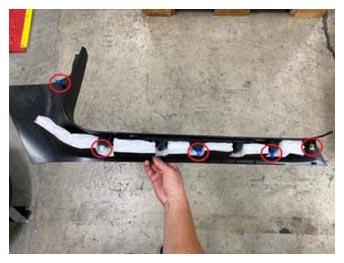 Courtesy of TESLA, INC. Courtesy of TESLA, INC.
|
- Release cover for LH A pillar trim fastener.
NOTE:
Take care not to damage the A pillar trim.
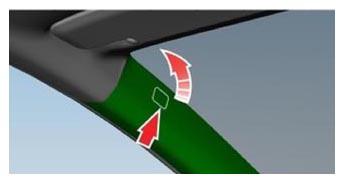 Courtesy of TESLA, INC. Courtesy of TESLA, INC.
|
- Remove fastener securing the A pillar trim to the A pillar.
NOTE:
1x screw, 7 mm, 2 N.m, 1x washer.
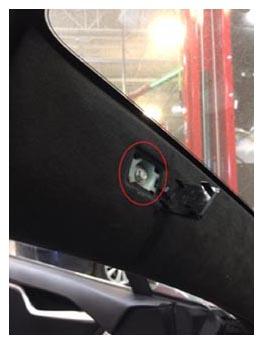 Courtesy of TESLA, INC. Courtesy of TESLA, INC.
|
- Remove the LH A pillar trim.
NOTE:
2x locating tabs, 2x clips, locating tabs are secured to the mesh defrost grill assembly.
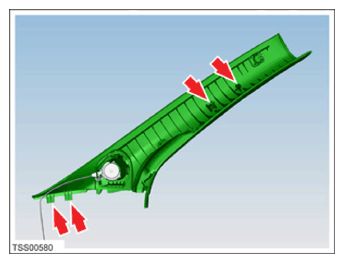 Courtesy of TESLA, INC. Courtesy of TESLA, INC.
|
- Open glovebox.
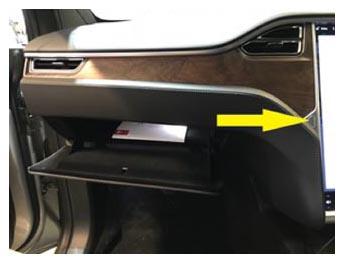 Courtesy of TESLA, INC. Courtesy of TESLA, INC.
|
- Remove LH lower IP trim assembly.
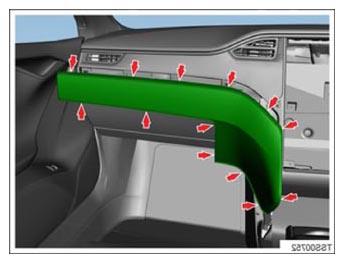 Courtesy of TESLA, INC. Courtesy of TESLA, INC.
|
- Remove the lower glove box trim.
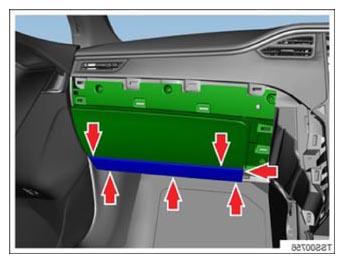 Courtesy of TESLA, INC. Courtesy of TESLA, INC.
|
- Remove the glove box screws.
NOTE:
6x screws, T20, 2.3 N.m.
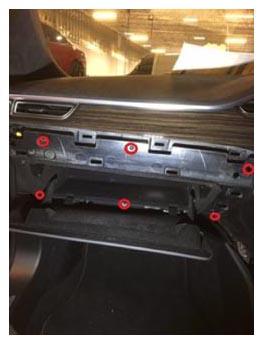 Courtesy of TESLA, INC. Courtesy of TESLA, INC.
|
- Remove glove box from vehicle and disconnect the connections from the back of the glove box.
NOTE:
3x connectors.
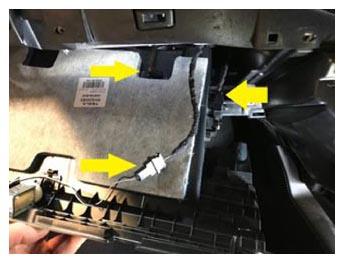 Courtesy of TESLA, INC. Courtesy of TESLA, INC.
|
- Remove LH footwell cover.
NOTE:
2x clips, 1x connector.
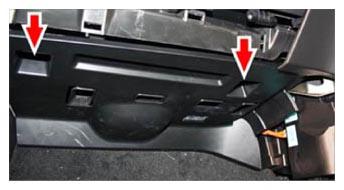 Courtesy of TESLA, INC. Courtesy of TESLA, INC.
|
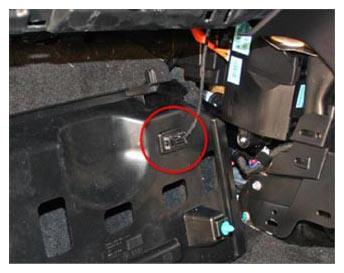 Courtesy of TESLA, INC. Courtesy of TESLA, INC.
|
- Remove screw securing LH top pad to IP carrier.
NOTE:
1x screw, T20, 1 N.m.
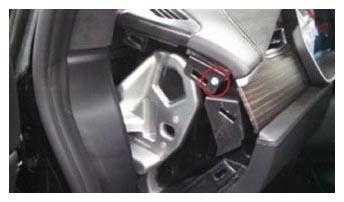 Courtesy of TESLA, INC. Courtesy of TESLA, INC.
|
- Cover the aluminum strip on the top pad and MCU bezel with tape protection.
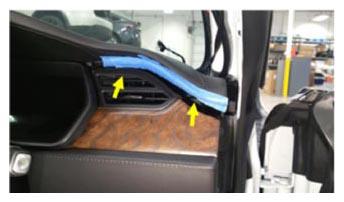 Courtesy of TESLA, INC. Courtesy of TESLA, INC.
|
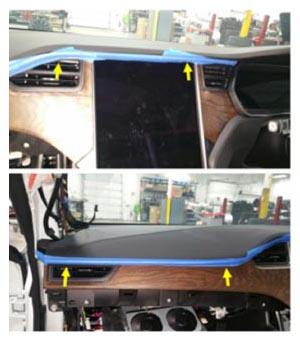 Courtesy of TESLA, INC. Courtesy of TESLA, INC.
|
- Release the top pad using the airbag tools.
NOTE:
Lifting with an inflatable wedge is recommended to reduce the risk of bending the top pad. Place the inflatable wedge above the vent outlet at the left and right side of the touchscreen.
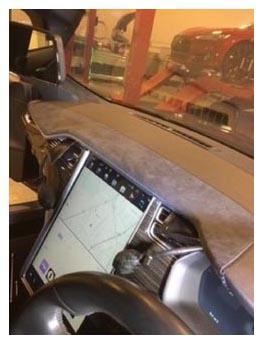 Courtesy of TESLA, INC. Courtesy of TESLA, INC.
|
- Remove screws securing LH side instrument panel finisher assembly to the IP carrier.
NOTE:
2x screws, T20, 2 N.m.
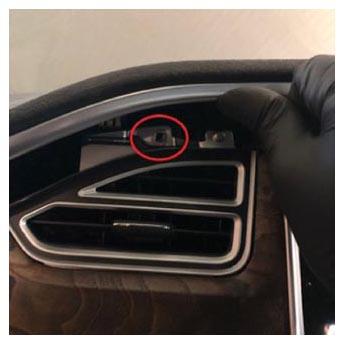 Courtesy of TESLA, INC. Courtesy of TESLA, INC.
|
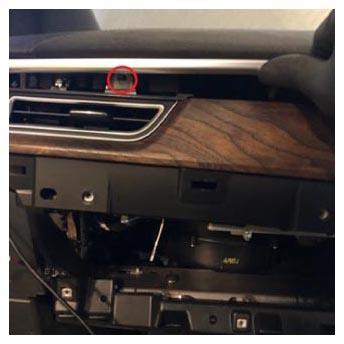 Courtesy of TESLA, INC. Courtesy of TESLA, INC.
|
- Release the clips for the LH IP finisher and remove from vehicle.
NOTE:
4x clips.
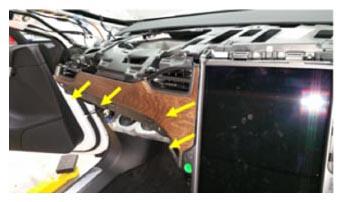 Courtesy of TESLA, INC. Courtesy of TESLA, INC.
|
- Release clips securing steering gap hider to IC bezel.
NOTE:
2x clips.
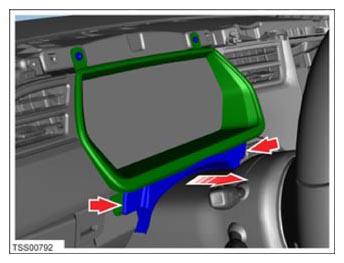 Courtesy of TESLA, INC. Courtesy of TESLA, INC.
|
- Remove screws securing instrument cluster bezel to IP carrier and remove bezel.
NOTE:
4x screws, T20, 2 N.m.
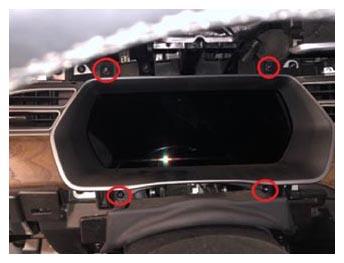 Courtesy of TESLA, INC. Courtesy of TESLA, INC.
|
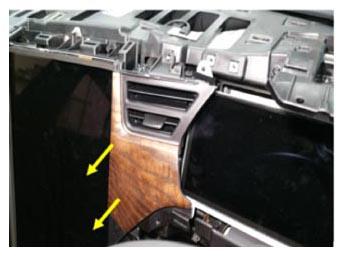
- Remove screws securing RH inner IP finisher with vent to IP carrier.
NOTE:
2x screws, T20, 2 N.m.
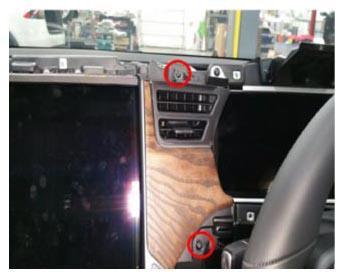 Courtesy of TESLA, INC. Courtesy of TESLA, INC.
|
- Release clips securing RH inner IP finisher with vent to the IP carrier and remove from vehicle.
NOTE:
3x clips.
 Courtesy of TESLA, INC. Courtesy of TESLA, INC.
|
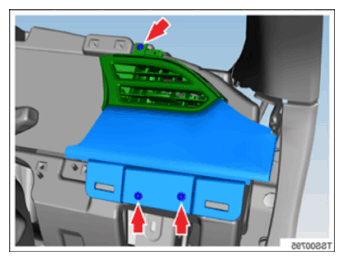
- Remove screws securing RH outer IP finisher to the IP carrier.
NOTE:
3x screws, T20, 2.3 N.m.
 Courtesy of TESLA, INC. Courtesy of TESLA, INC.
|
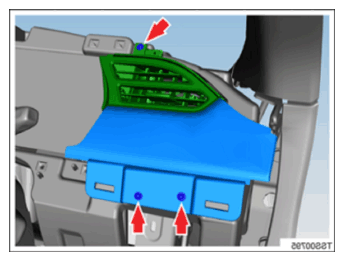
- Remove RH outer IP finisher from IP carrier.
NOTE:
2x clips.
 Courtesy of TESLA, INC. Courtesy of TESLA, INC.
|
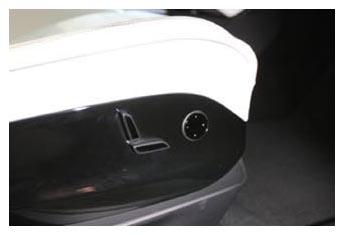
- Move RH front seat fully forward.
 Courtesy of TESLA, INC. Courtesy of TESLA, INC.
|
- Remove the RH seat rear track covers.
NOTE:
2x covers.
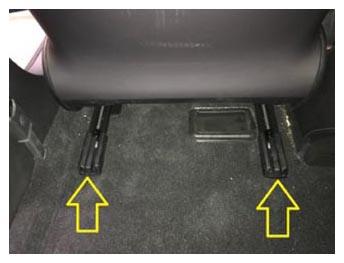 Courtesy of TESLA, INC. Courtesy of TESLA, INC.
|
- Remove and discard bolts securing both RH seat tracks to the floor panel.
NOTE:
1x patch bolt, T40P, 17 N.m, 1x patch bolt, T45P, 34 N.m, Discard bolts after removal.
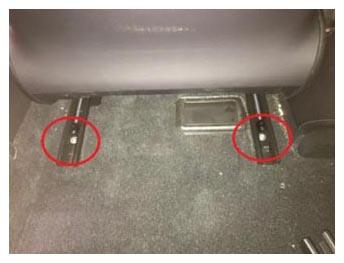 Courtesy of TESLA, INC. Courtesy of TESLA, INC.
|
- Power the RH seat fully rearward for access.
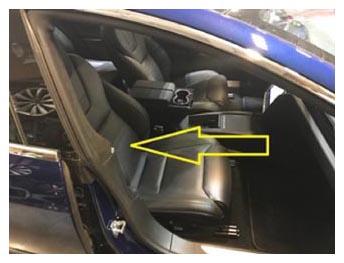 Courtesy of TESLA, INC. Courtesy of TESLA, INC.
|
- Remove the RH front seat front track covers.
NOTE:
2x covers.
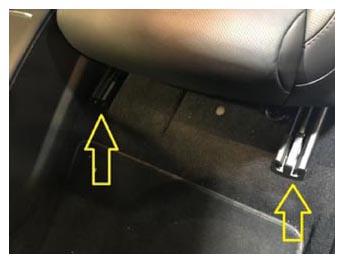 Courtesy of TESLA, INC. Courtesy of TESLA, INC.
|
- Remove and discard bolts securing both RH seat tracks to the floor panel.
NOTE:
1x patch bolt, T40P, 17 N.m, 1x patch bolt, T45P, 34 N.m, Discard bolts after removal.
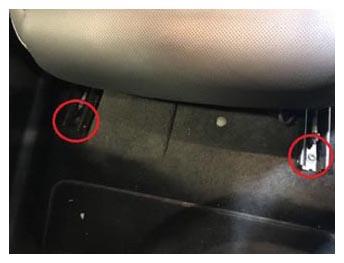 Courtesy of TESLA, INC. Courtesy of TESLA, INC.
|
- Adjust the position of the RH seat for easy removal.
NOTE:
Middle of track, most upright position, seat fully up off the floor.
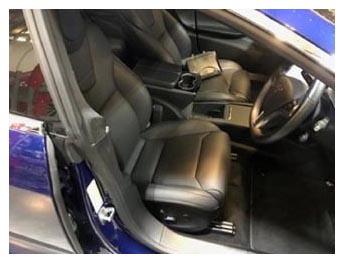 Courtesy of TESLA, INC. Courtesy of TESLA, INC.
|
- Move LH front seat forward.
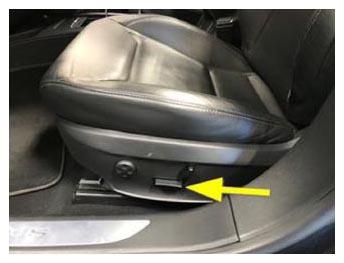 Courtesy of TESLA, INC. Courtesy of TESLA, INC.
|
- Remove the LH front seat rear track covers.
NOTE:
2x covers.
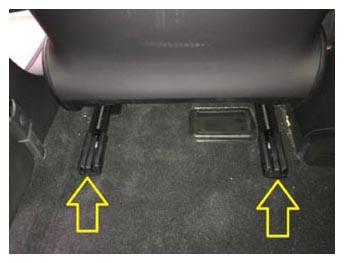 Courtesy of TESLA, INC. Courtesy of TESLA, INC.
|
- Remove bolts securing rear of LH front seat tracks to the floor panel.
NOTE:
1x patch bolt, T40P, 17 N.m, 1x patch bolt, T45P, 34 N.m, Discard after removal.
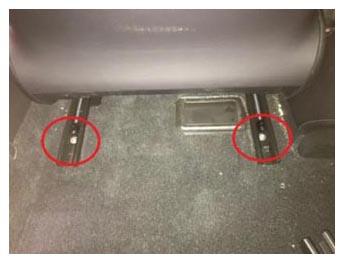 Courtesy of TESLA, INC. Courtesy of TESLA, INC.
|
- Move LH front seat backward.
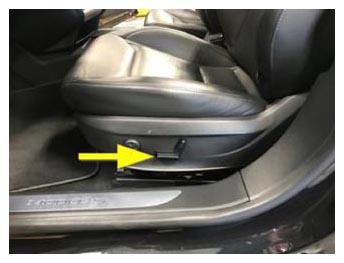 Courtesy of TESLA, INC. Courtesy of TESLA, INC.
|
- Remove LH front seat front track covers.
NOTE:
2x covers.
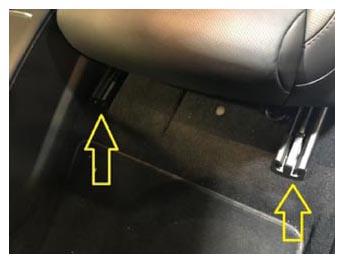 Courtesy of TESLA, INC. Courtesy of TESLA, INC.
|
- Remove and discard bolts securing both LH seat tracks to the floor panel.
NOTE:
1x patch bolt, T40P, 17 N.m, 1x patch bolt, T45P, 34 N.m, Discard after removal.
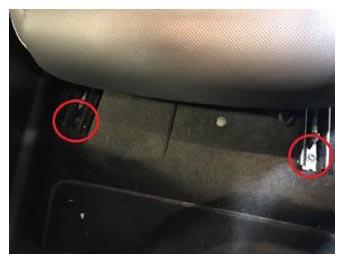 Courtesy of TESLA, INC. Courtesy of TESLA, INC.
|
- Adjust the position of the LH seat for easy removal.
NOTE:
Middle of track, most upright position, seat fully up off the floor.
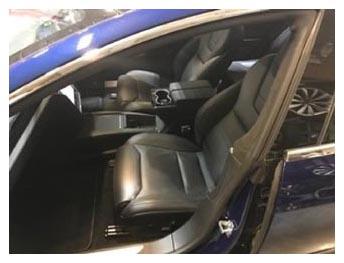 Courtesy of TESLA, INC. Courtesy of TESLA, INC.
|
- Power down vehicle using MCU.
NOTE:
Controls > E-brake and Power Off > Power off.
- Disconnect 12V negative terminal and First Responder Loop.
NOTE:
1x nut, 10 mm, 5 N.m, 1x connector, Wait at least 2 minutes before disconnecting modules or HV components.
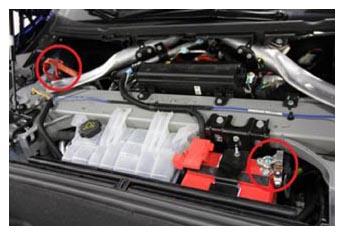 Courtesy of TESLA, INC. Courtesy of TESLA, INC.
|
- Disconnect the LH seat connectors.
NOTE:
3x connectors.
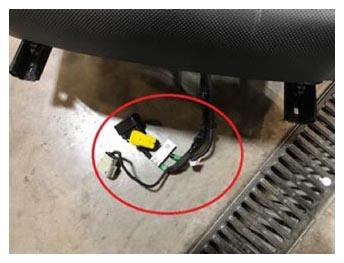 Courtesy of TESLA, INC. Courtesy of TESLA, INC.
|
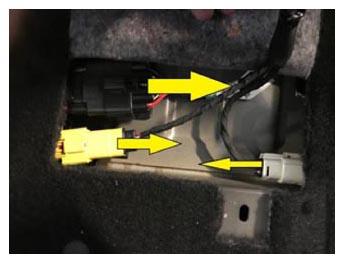 Courtesy of TESLA, INC. Courtesy of TESLA, INC.
|
- Remove LH front seat from vehicle.
NOTE:
Recommend assistance, Use caution to not damage other components.
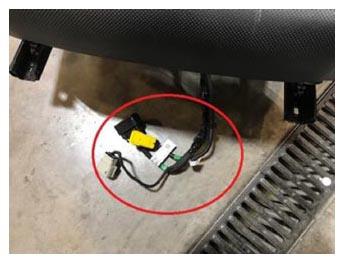
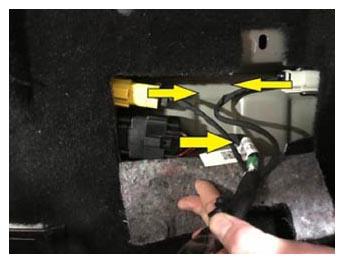
- Disconnect the RH seat connectors.
NOTE:
3x connectors.
 Courtesy of TESLA, INC. Courtesy of TESLA, INC.
|
 Courtesy of TESLA, INC. Courtesy of TESLA, INC.
|
- Remove RH front seat from vehicle.
NOTE:
Recommend assistance, Use caution to not damage other components.
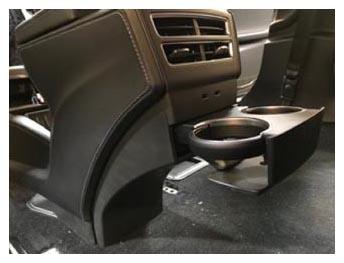
- Open rear cup holder.
 Courtesy of TESLA, INC. Courtesy of TESLA, INC.
|
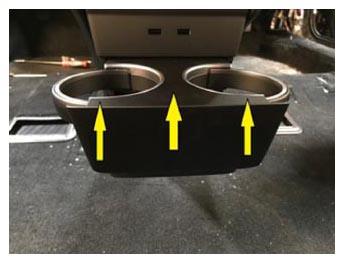
- Remove rear cup holder trim panel.
NOTE:
3x tabs, Slide panel straight up to remove.
 Courtesy of TESLA, INC. Courtesy of TESLA, INC.
|
- Remove RH center console wrapped panel.
NOTE:
22x clips, Replace any damaged or missing clips.
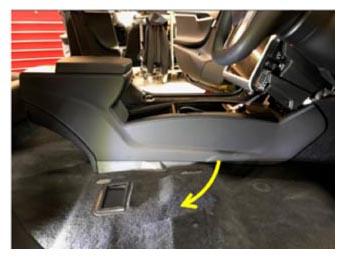 Courtesy of TESLA, INC. Courtesy of TESLA, INC.
|
- Remove LH center console wrapped panel.
NOTE:
22x clips, Replace any damaged or missing clips.
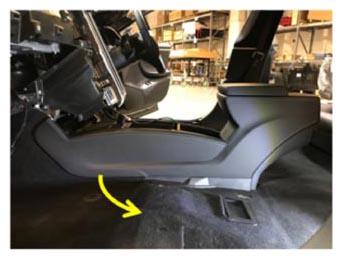 Courtesy of TESLA, INC. Courtesy of TESLA, INC.
|
- Remove rear center console vent.
NOTE:
2x connectors, 4x tabs, Pull vent straight out, gently release locking tabs for USB connectors and slide out.
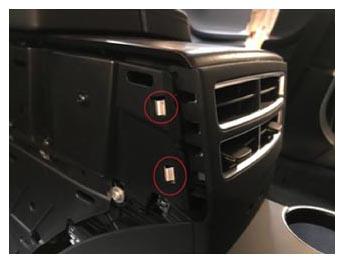 Courtesy of TESLA, INC. Courtesy of TESLA, INC.
|
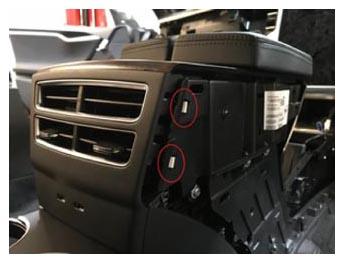 Courtesy of TESLA, INC. Courtesy of TESLA, INC.
|
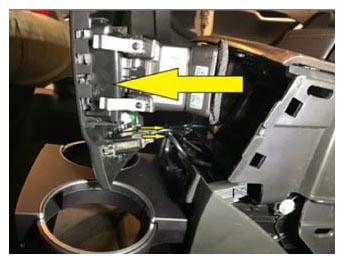 Courtesy of TESLA, INC. Courtesy of TESLA, INC.
|
- Close cup holder.
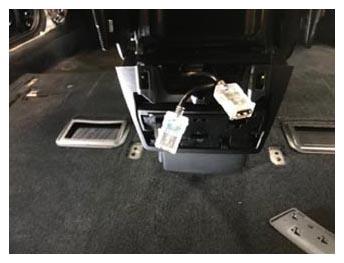 Courtesy of TESLA, INC. Courtesy of TESLA, INC.
|
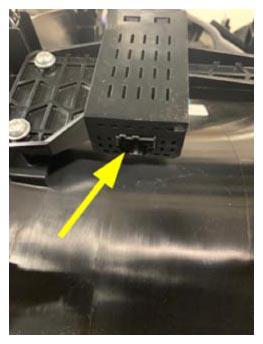
- Remove rear panel from console.
NOTE:
6x clips, 3x connectors.
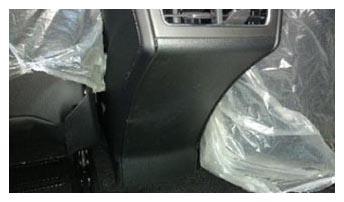 Courtesy of TESLA, INC. Courtesy of TESLA, INC.
|
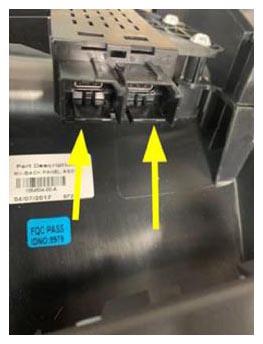 Courtesy of TESLA, INC. Courtesy of TESLA, INC.
|
 Courtesy of TESLA, INC. Courtesy of TESLA, INC.
|
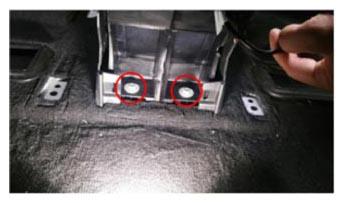
- Remove bolts securing rear of console to body.
NOTE:
2x bolts, 10 mm, 7 N.m.
 Courtesy of TESLA, INC. Courtesy of TESLA, INC.
|
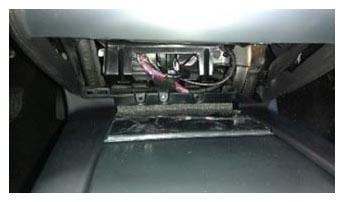
- Remove screw securing front of console to IP carrier.
NOTE:
1x screw, T20, 2 N.m.
 Courtesy of TESLA, INC. Courtesy of TESLA, INC.
|
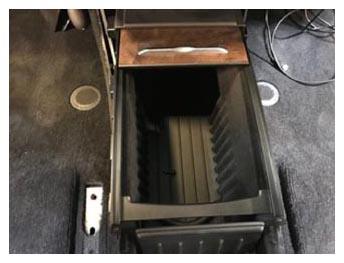
- Open console sliding door.
 Courtesy of TESLA, INC. Courtesy of TESLA, INC.
|
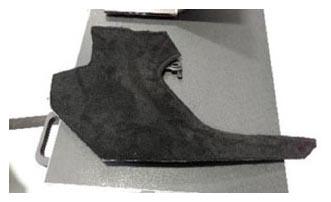
- Remove LH side console closeout panel.
NOTE:
6x clips, Pull side panel back and slide closeout panel down behind side panel.
 Courtesy of TESLA, INC. Courtesy of TESLA, INC.
|
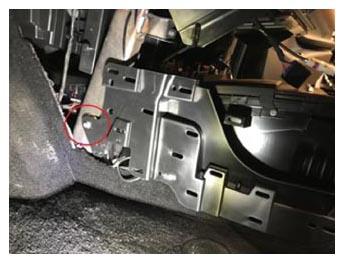
- Remove bolt securing LH front of console to IP.
NOTE:
1x bolt, 10 mm, 2.5 N.m.
 Courtesy of TESLA, INC. Courtesy of TESLA, INC.
|
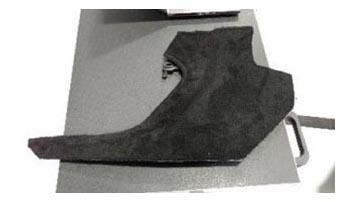
- Remove RH side console closeout panel.
NOTE:
5x clips.
 Courtesy of TESLA, INC. Courtesy of TESLA, INC.
|
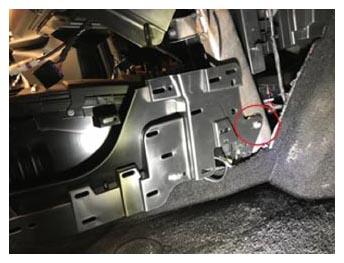
- Remove bolt securing RH front of console to IP.
NOTE:
1x bolt, 10 mm, 2.5 N.m.
 Courtesy of TESLA, INC. Courtesy of TESLA, INC.
|
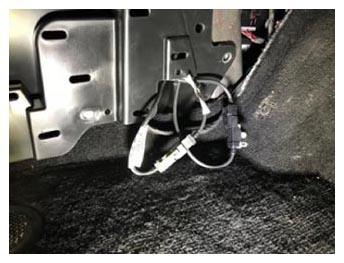
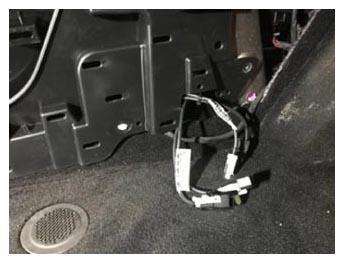
- Disconnect 2 USB connectors and release from console trim.
NOTE:
2x connectors, 2x fir tree clips, RH front of console.
 Courtesy of TESLA, INC. Courtesy of TESLA, INC.
|
 Courtesy of TESLA, INC. Courtesy of TESLA, INC.
|
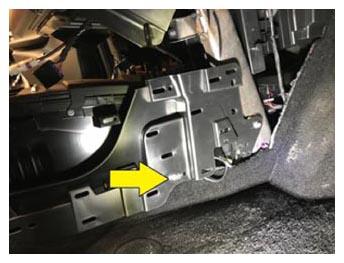
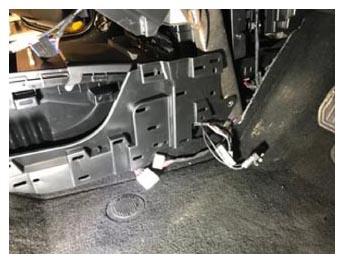
- Release clip securing connector and disconnect 12V harness connector.
NOTE:
1x connector, 1x clip, RH front of console, on backside of panel.
 Courtesy of TESLA, INC. Courtesy of TESLA, INC.
|
 Courtesy of TESLA, INC. Courtesy of TESLA, INC.
|
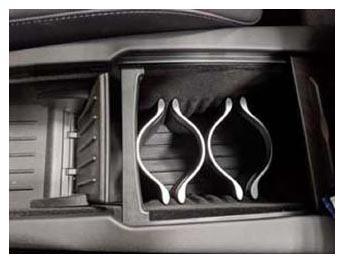
- Remove cup holder inserts.
NOTE:
4x inserts, If equipped.
 Courtesy of TESLA, INC. Courtesy of TESLA, INC.
|
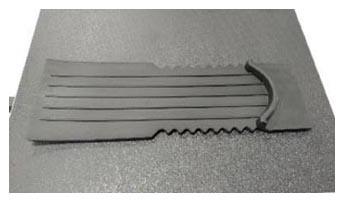
- Remove console floor panel.
 Courtesy of TESLA, INC. Courtesy of TESLA, INC.
|
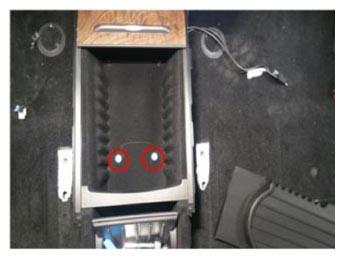
- Remove bolts securing middle of console to body.
NOTE:
2x bolts, 10 mm, 3 N.m.
 Courtesy of TESLA, INC. Courtesy of TESLA, INC.
|
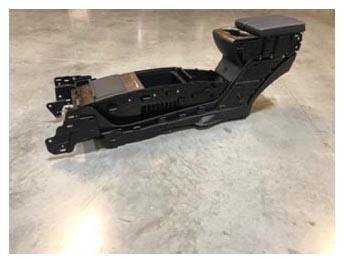
- Lift rear of console up, pull backwards, and lift up and remove from vehicle.
NOTE:
Recommend assistance.
 Courtesy of TESLA, INC. Courtesy of TESLA, INC.
|
- Put on ESD wrist strap.
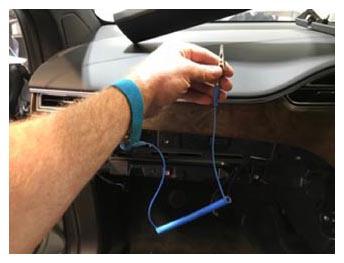 Courtesy of TESLA, INC. Courtesy of TESLA, INC.
|
- Connect ESD wrist strap to vehicle ground.
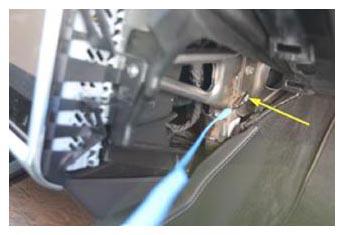 Courtesy of TESLA, INC. Courtesy of TESLA, INC.
|
- Release ground strap from top of MCU.
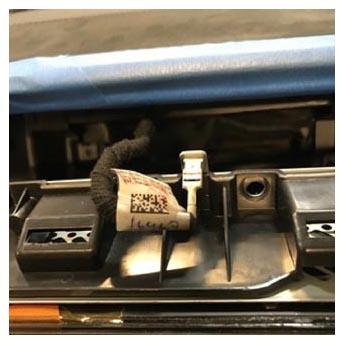 Courtesy of TESLA, INC. Courtesy of TESLA, INC.
|
- Remove the MCU mounting screws.
NOTE:
4x screws, T25, 4.5 N.m.
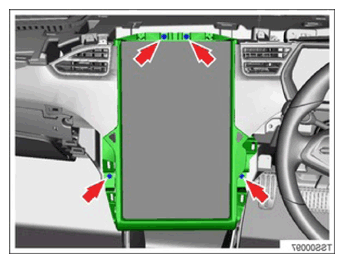 Courtesy of TESLA, INC. Courtesy of TESLA, INC.
|
- Tilt the MCU out from the IP carrier at the top in order to access connectors.
CAUTION:
Do not pull on harnesses as it can damage the connectors.
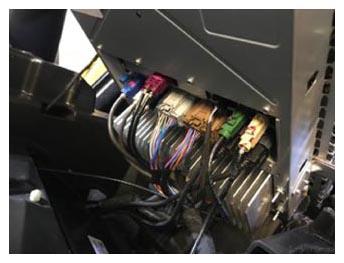 Courtesy of TESLA, INC. Courtesy of TESLA, INC.
|
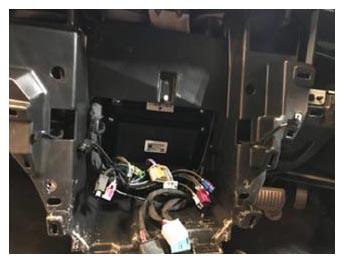
- Disconnect harness connectors to MCU.
NOTE:
17x connectors, recommend assistance.
 Courtesy of TESLA, INC. Courtesy of TESLA, INC.
|
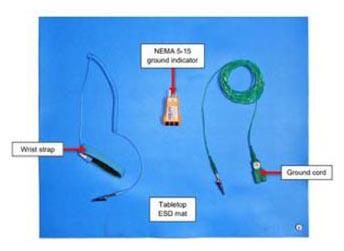
- Prepare ESD kit.
CAUTION:
Improper use of ESD kit can result in damage to MCU and/or touchscreen.
CAUTION:
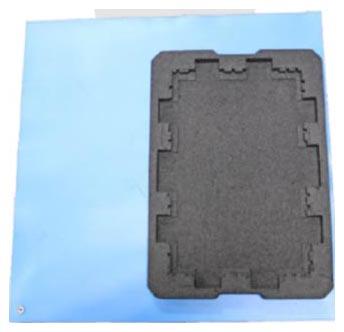
Make sure that ESD foam container is free of debris so that touchscreen is not damaged in a later step.
 Courtesy of TESLA, INC. Courtesy of TESLA, INC.
|
- Place an ESD foam container on the right side of the ESD mat.
 Courtesy of TESLA, INC. Courtesy of TESLA, INC.
|
- Gently place the MCU on the ESD foam container with the touchscreen facing down.
CAUTION:
To avoid damaging components inside the MCU, the ESD wrist strap must be grounded and worn throughout this procedure until instructed to remove it.
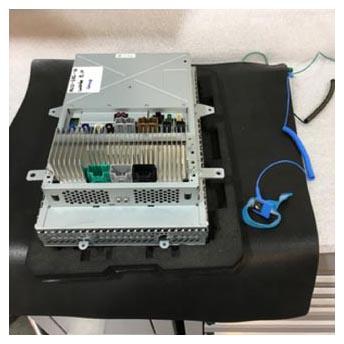 Courtesy of TESLA, INC. Courtesy of TESLA, INC.
|
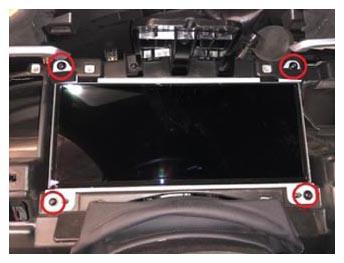
- Remove fasteners securing instrument cluster to IP carrier.
NOTE:
4x screws, T20, 2 N.m.
 Courtesy of TESLA, INC. Courtesy of TESLA, INC.
|
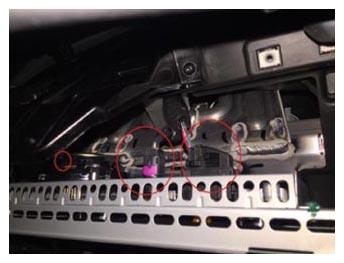
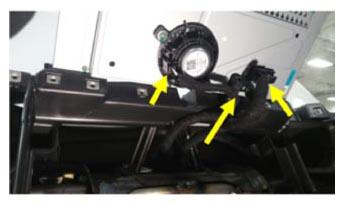
- Disconnect the electrical connectors from the rear of the instrument cluster and remove from IP carrier.
NOTE:
3x connectors, tilt the IC away from the IP carrier to access connections, Take care not to put excessive strain on the wiring and connectors to the IC (1x chime connector pulls straight out, 1x flip lock type connector, 1x coaxial connector, release tab is on the underside of the connector), After removal place the IC on ESD safe surface.
 Courtesy of TESLA, INC. Courtesy of TESLA, INC.
|
 Courtesy of TESLA, INC. Courtesy of TESLA, INC.
|
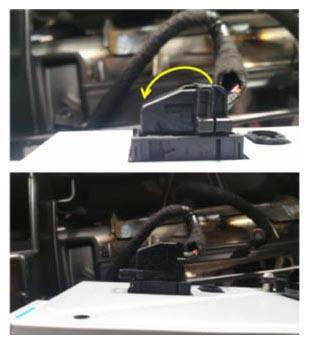 Courtesy of TESLA, INC. Courtesy of TESLA, INC.
|
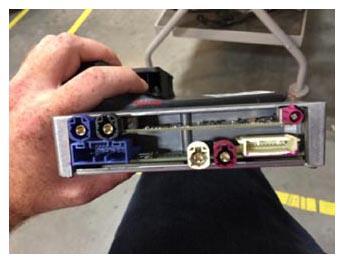
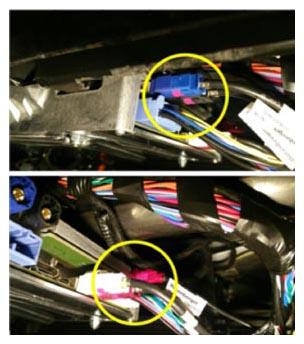
- Disconnect connectors from RH side of DAS ECU.
NOTE:
7x connectors, DAS 2.0 has 4x connectors.
 Courtesy of TESLA, INC. Courtesy of TESLA, INC.
|
 Courtesy of TESLA, INC. Courtesy of TESLA, INC.
|
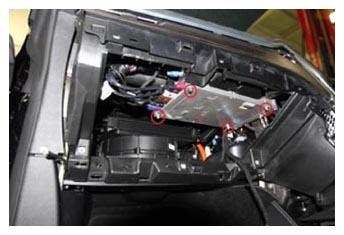
- Remove fasteners securing the ECU to the cross car beam.
NOTE:
4x nuts, 8 mm, 3 N.m, Discard after removal.
 Courtesy of TESLA, INC. Courtesy of TESLA, INC.
|
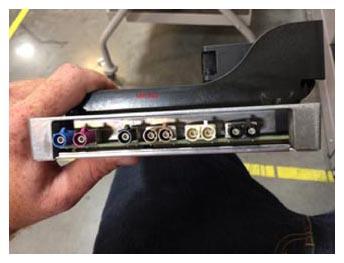
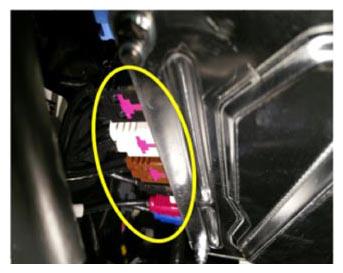
- Disconnect connectors from LH side of DAS ECU and remove from vehicle.
NOTE:
7x connectors, DAS 2.5 has 6x connectors.
 Courtesy of TESLA, INC. Courtesy of TESLA, INC.
|
 Courtesy of TESLA, INC. Courtesy of TESLA, INC.
|
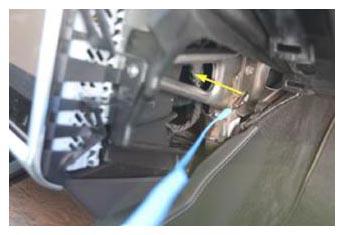
- Disconnect ESD wrist strap from vehicle ground.
 Courtesy of TESLA, INC. Courtesy of TESLA, INC.
|
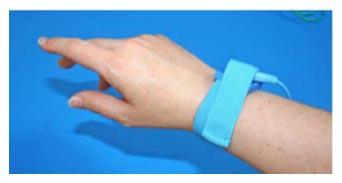
- Remove the ESD wrist strap.
 Courtesy of TESLA, INC. Courtesy of TESLA, INC.
|
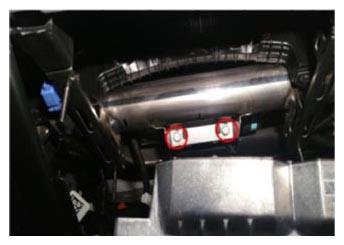
- Remove the passenger airbag mounting bolts.
NOTE:
2x bolts, 10 mm, 10 N.m.
 Courtesy of TESLA, INC. Courtesy of TESLA, INC.
|
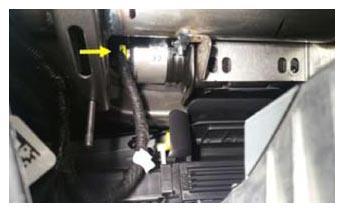
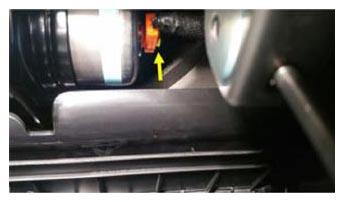
- Disconnect passenger airbag connectors.
NOTE:
2x connectors, Release locking tab.
 Courtesy of TESLA, INC. Courtesy of TESLA, INC.
|
 Courtesy of TESLA, INC. Courtesy of TESLA, INC.
|
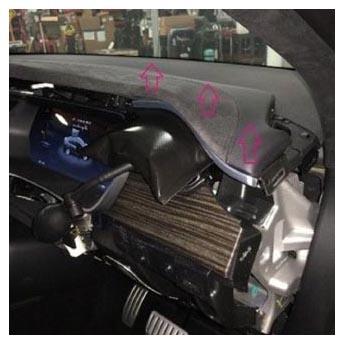
- Release top pad at leading edge, from RH outer finisher to inner finisher.
NOTE:
8x clips.
 Courtesy of TESLA, INC. Courtesy of TESLA, INC.
|
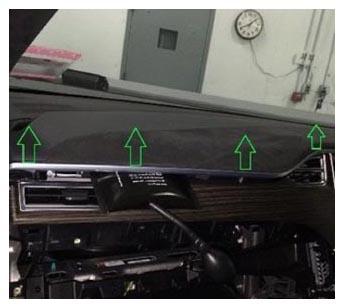
- Release the LH side of the top pad working from right to left.
NOTE:
9x clips, Use caution to not crease aluminum trim when lifting top pad.
 Courtesy of TESLA, INC. Courtesy of TESLA, INC.
|
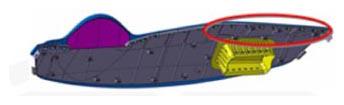
- Release remaining clips, remove top pad from vehicle, and place onto protective surface.
NOTE:
6x clips, Recommend assistance.
 Courtesy of TESLA, INC. Courtesy of TESLA, INC.
|
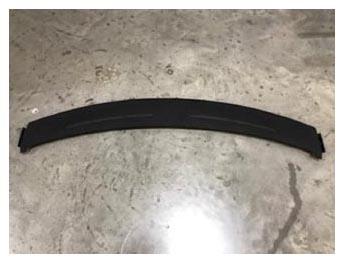
- Remove defrost mesh grille assembly.
NOTE:
10x clips.
 Courtesy of TESLA, INC. Courtesy of TESLA, INC.
|
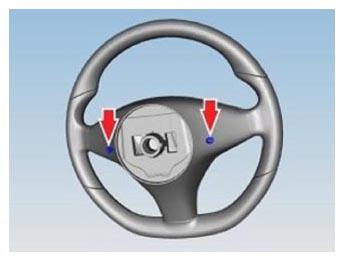
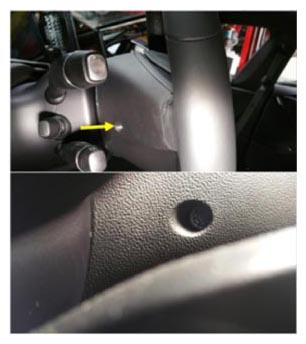
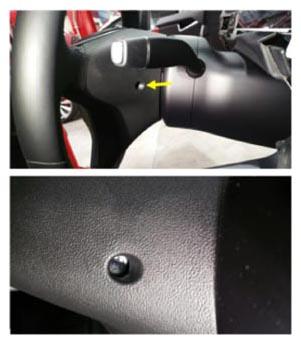
- Unbolt the screws securing airbag to steering wheel.
NOTE:
2x screws, T25, 7 N.m, The screws will remain inside the steering wheel, If required rotate the steering wheel to gain access to screws, Afterwards return steering wheel to straight and center position.
 Courtesy of TESLA, INC. Courtesy of TESLA, INC.
|
 Courtesy of TESLA, INC. Courtesy of TESLA, INC.
|
 Courtesy of TESLA, INC. Courtesy of TESLA, INC.
|
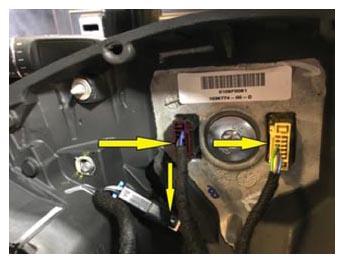
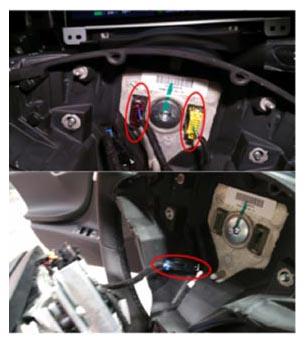
- Carefully release the driver's airbag from the steering wheel assembly and disconnect the airbag and steering wheel controls.
NOTE:
3x connectors.
 Courtesy of TESLA, INC. Courtesy of TESLA, INC.
|
 Courtesy of TESLA, INC. Courtesy of TESLA, INC.
|
- Remove bolt that secures the steering wheel to the column.
NOTE:
1x patch bolt, 10 mm allen, 80 N.m, Discard after removal.
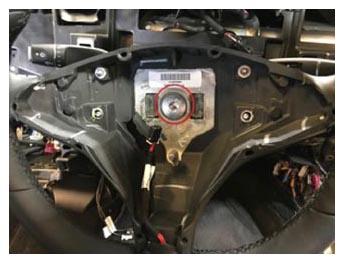 Courtesy of TESLA, INC. Courtesy of TESLA, INC.
|
- Position the wheels straight ahead and mark the steering wheel relative position to the column.
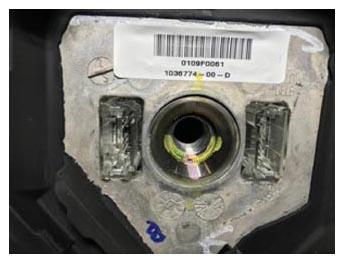 Courtesy of TESLA, INC. Courtesy of TESLA, INC.
|
- Remove steering wheel.
- Tape the clockspring cassette to prevent rotation.
NOTE:
Do not rotate the clockspring.
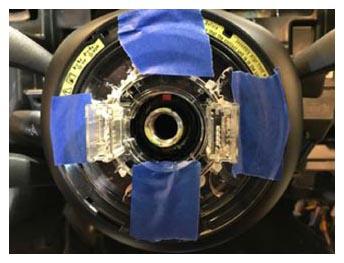 Courtesy of TESLA, INC. Courtesy of TESLA, INC.
|
- Rock SCCM back and forth to release from column.
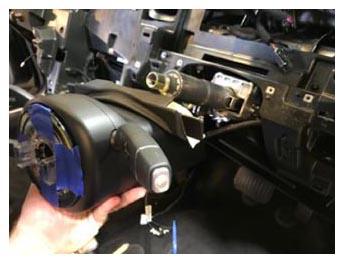 Courtesy of TESLA, INC. Courtesy of TESLA, INC.
|
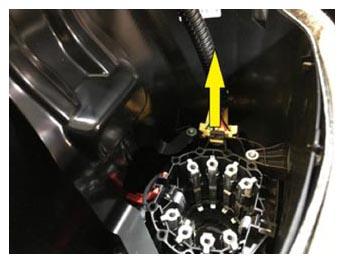
- Release harness connector from SCCM and remove SCCM.
NOTE:
1x connector, Remove black locking tab then depress connector release tab to release connector, Locking tab is one time use discard after removal.
 Courtesy of TESLA, INC. Courtesy of TESLA, INC.
|
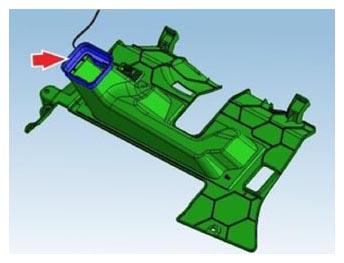
- Remove RH footwell cover.
NOTE:
2x clips, 1x connector.
 Courtesy of TESLA, INC. Courtesy of TESLA, INC.
|
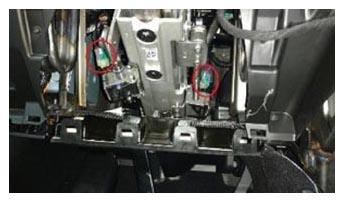
- Disconnect harness connectors for steering column motors.
NOTE:
2x connectors.
 Courtesy of TESLA, INC. Courtesy of TESLA, INC.
|
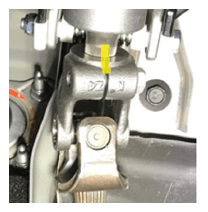
- Mark the steering column relative position to the lower shaft joint.
 Courtesy of TESLA, INC. Courtesy of TESLA, INC.
|
- Remove bolt securing lower shaft to steering column.
NOTE:
1x bolt, 13 mm, 30 N.m.
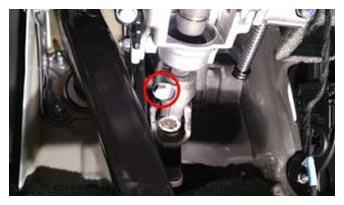 Courtesy of TESLA, INC. Courtesy of TESLA, INC.
|
- Release steering column from lower shaft.
NOTE:
Slide joint down lower shaft.
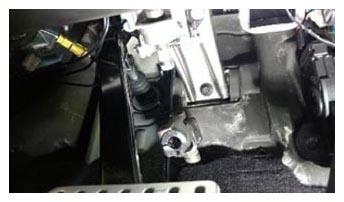 Courtesy of TESLA, INC. Courtesy of TESLA, INC.
|
- Remove fasteners securing steering column to cross car beam.
NOTE:
2x bolts, 13 mm, 17 N.m, 2x nuts, 13 mm, 30 N.m.
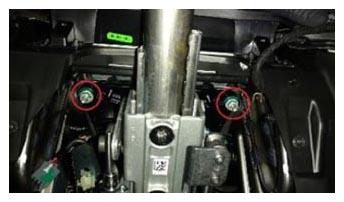 Courtesy of TESLA, INC. Courtesy of TESLA, INC.
|
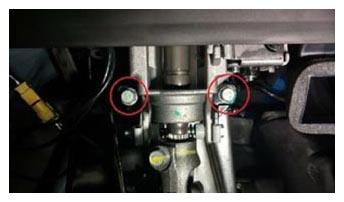 Courtesy of TESLA, INC. Courtesy of TESLA, INC.
|
- Remove steering column from vehicle.
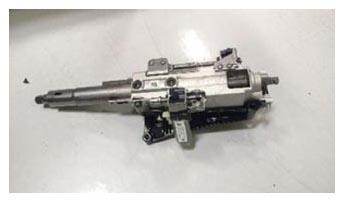 Courtesy of TESLA, INC. Courtesy of TESLA, INC.
|
- Remove the fasteners securing the IP carrier to the dash frame.
NOTE:
15x screws, T20, 2 N.m.
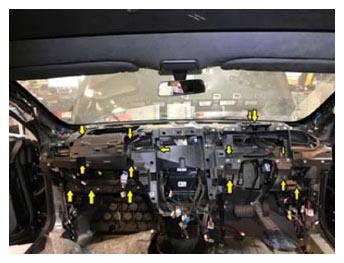 Courtesy of TESLA, INC. Courtesy of TESLA, INC.
|
- Pull the IP carrier forward for better access for speaker and edge clip removal.
NOTE:
Take care to avoid stressing the connectors to the dash speakers and avoid damaging components in the process of moving the IP carrier forward for better access to edge clips and connections.
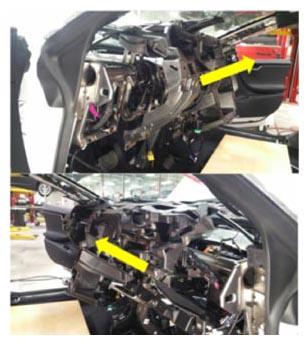 Courtesy of TESLA, INC. Courtesy of TESLA, INC.
|
- Remove RH side dash speaker.
NOTE:
2x screws, T20, 2 N.m, 1x connector.
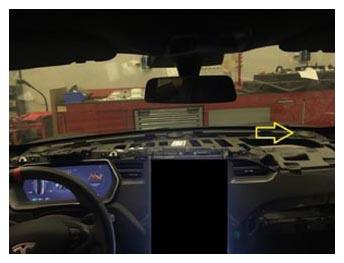 Courtesy of TESLA, INC. Courtesy of TESLA, INC.
|
- Remove center dash speaker.
NOTE:
2x screws, T20, 2 N.m, 1x connector.
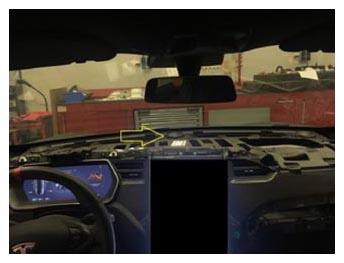 Courtesy of TESLA, INC. Courtesy of TESLA, INC.
|
- Remove LH dash speaker.
NOTE:
2x screws, T20, 2 N.m, 1x connector.
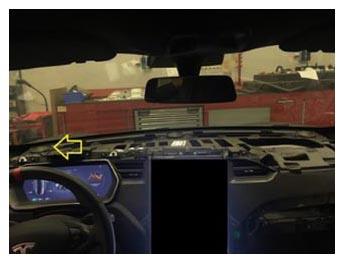 Courtesy of TESLA, INC. Courtesy of TESLA, INC.
|
- Remove all edge clips secured to the IP carrier.
NOTE:
2x clips LH and RH RKE, 2x clips tweeter harness, 1x clip steering column air bag harness, 1x clip MCU harness.
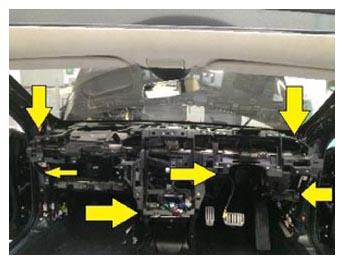 Courtesy of TESLA, INC. Courtesy of TESLA, INC.
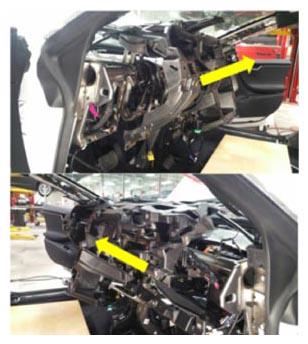
|
- Remove IP carrier from vehicle.
NOTE:
Recommend assistance, Lift up air duct from HVAC assembly, 1x center dash speaker tape to duct.
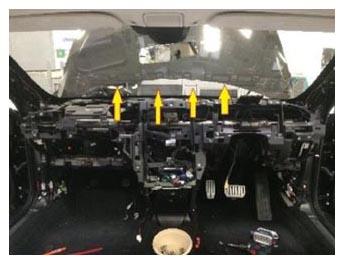 Courtesy of TESLA, INC. Courtesy of TESLA, INC.
|
 Courtesy of TESLA, INC. Courtesy of TESLA, INC.
|
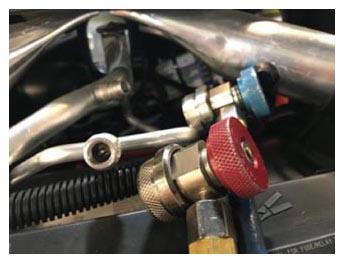
- Remove A/C lines from vehicle.
NOTE:
Press clear lines once lines have been removed.
 Courtesy of TESLA, INC. Courtesy of TESLA, INC.
|
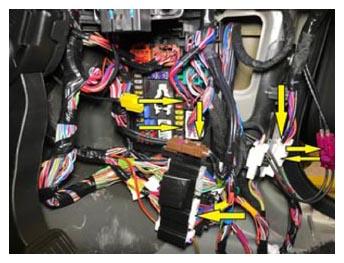
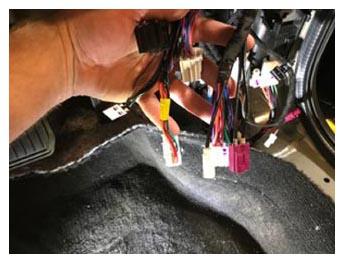
- Disconnect the cross car beam harness connectors at the RH lower A pillar.
NOTE:
7x connectors, Only release connectors that run to the harness on the cross car beam.
 Courtesy of TESLA, INC. Courtesy of TESLA, INC.
|
 Courtesy of TESLA, INC. Courtesy of TESLA, INC.
|
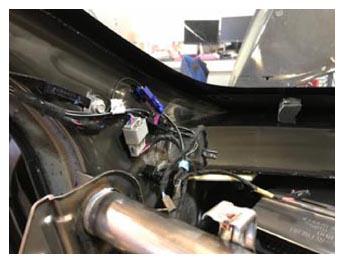
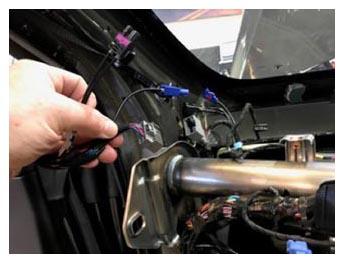
- Remove LH upper A-pillar harness connectors from body and disconnect.
NOTE:
3x connectors, 3x clips.
 Courtesy of TESLA, INC. Courtesy of TESLA, INC.
|
 Courtesy of TESLA, INC. Courtesy of TESLA, INC.
|
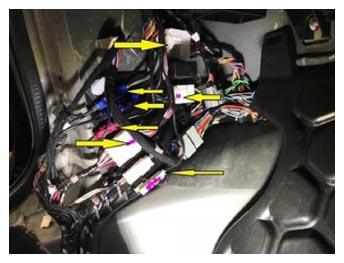
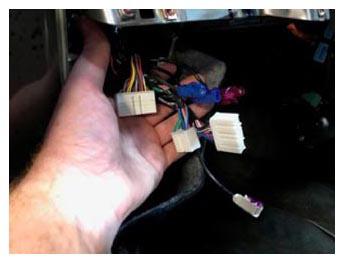
- Remove cross car beam harness connectors at lower LH lower A pillar.
NOTE:
7x connectors, Only release connectors that run to the harness on the cross car beam.
 Courtesy of TESLA, INC. Courtesy of TESLA, INC.
|
 Courtesy of TESLA, INC. Courtesy of TESLA, INC.
|
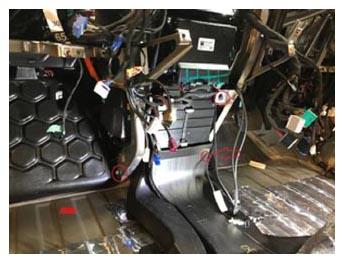
- Remove the bolts securing the HVAC assembly and body to the cross car beam.
NOTE:
3x bolts, 10 mm, 10 N.m.
 Courtesy of TESLA, INC. Courtesy of TESLA, INC.
|
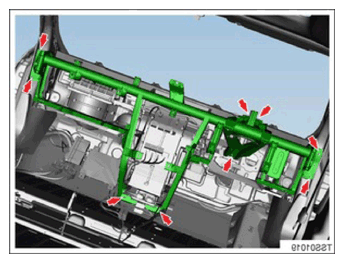
- Remove bolts securing cross car beam to body.
NOTE:
7x bolts, 13 mm, 27 N.m.
 Courtesy of TESLA, INC. Courtesy of TESLA, INC.
|
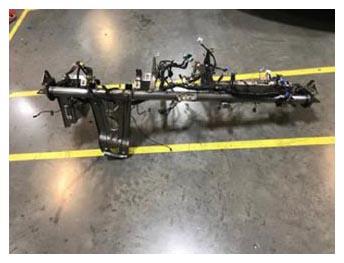
- Remove cross car beam from vehicle.
NOTE:
Recommend assistance, Exercise caution when removing the cross car beam, the brake switch is attached to the cross car beam and is susceptible to failure.
 Courtesy of TESLA, INC. Courtesy of TESLA, INC.
|
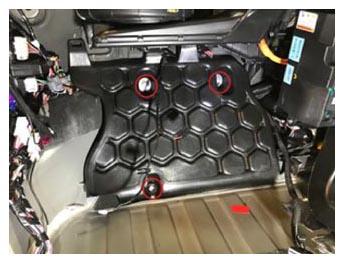
- Remove the LH footwell harness cover.
NOTE:
3x bolts, 10 mm, 4 N.m.
 Courtesy of TESLA, INC. Courtesy of TESLA, INC.
|
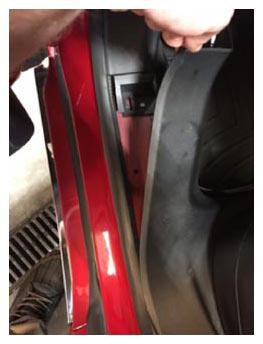
- Release LH rear sill panel to gain access to lower B-pillar trim fastener.
NOTE:
2x clips, Replace any damaged or missing clips.
 Courtesy of TESLA, INC. Courtesy of TESLA, INC.
|
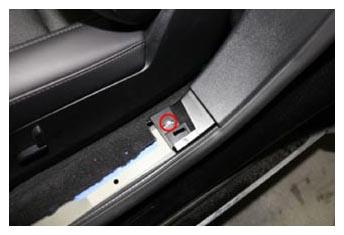
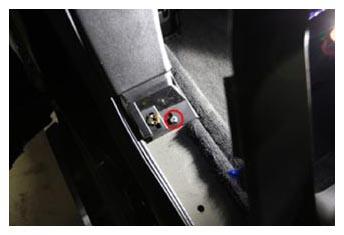
- Remove fasteners securing LH lower B-pillar trim.
NOTE:
2x screws, T25, 2 N.m.
 Courtesy of TESLA, INC. Courtesy of TESLA, INC.
|
 Courtesy of TESLA, INC. Courtesy of TESLA, INC.
|
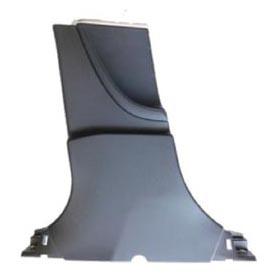
- Remove LH lower B-pillar trim.
NOTE:
6x plastic clips to body, 2x metal clips to upper B-pillar, Replace any damaged or missing clips, Lift the trim to clear the seat and pre-tensioner.
 Courtesy of TESLA, INC. Courtesy of TESLA, INC.
|
- Release LH upper B-pillar trim from body and allow to hang freely.
NOTE:
2x metal clips to body, 1x locating tab to headliner, Replace any damaged or missing clips.
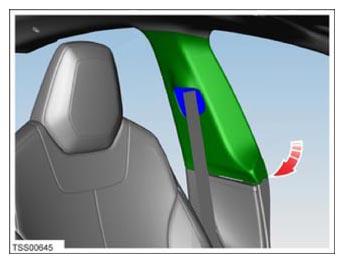 Courtesy of TESLA, INC. Courtesy of TESLA, INC.
|
- Release RH rear sill panel to gain access to lower B pillar trim fastener.
NOTE:
2x clips, Replace any damaged or missing clips.
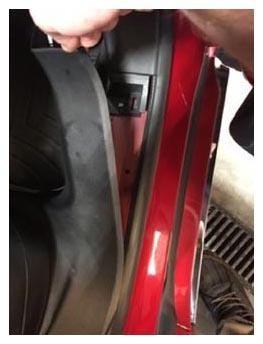 Courtesy of TESLA, INC. Courtesy of TESLA, INC.
|
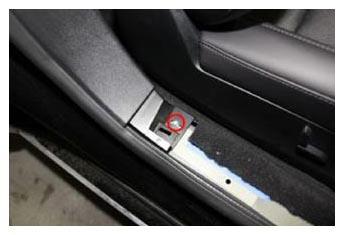
- Remove fasteners securing RH lower B-pillar trim.
NOTE:
2x screws, T25, 2 N.m.
 Courtesy of TESLA, INC. Courtesy of TESLA, INC.
|
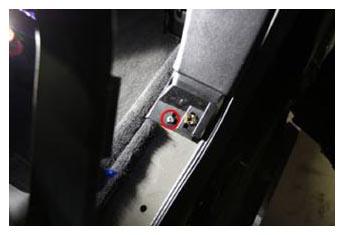 Courtesy of TESLA, INC. Courtesy of TESLA, INC.
|
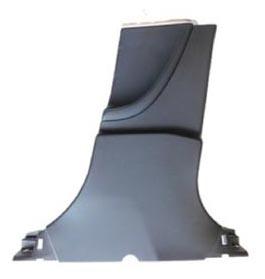
- Remove RH lower B-pillar trim.
NOTE:
6x plastic clips to body, 2x metal clips to upper B-pillar, Replace any damaged or missing clips.
 Courtesy of TESLA, INC. Courtesy of TESLA, INC.
|
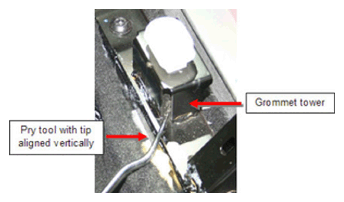
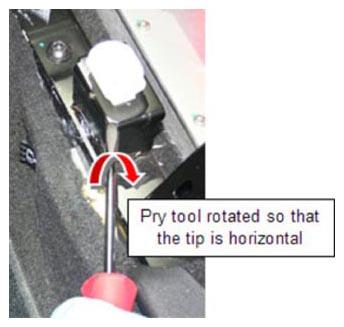
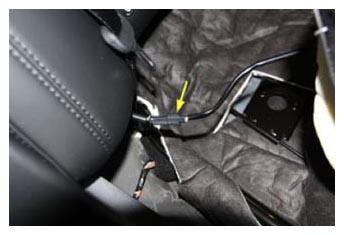
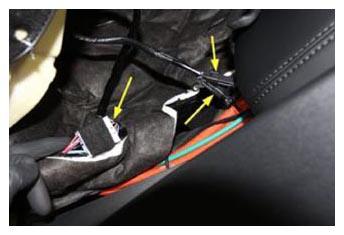
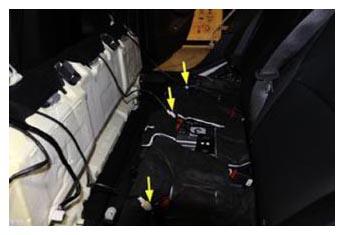
- Remove rear seat bottom cushion.
NOTE:
2x clips, 7x connectors, Number of connectors may vary based on configuration, Release the leading edge of the seat on either side.
 Courtesy of TESLA, INC. Courtesy of TESLA, INC.
|
 Courtesy of TESLA, INC. Courtesy of TESLA, INC.
|
 Courtesy of TESLA, INC. Courtesy of TESLA, INC.
|
 Courtesy of TESLA, INC. Courtesy of TESLA, INC.
|
 Courtesy of TESLA, INC. Courtesy of TESLA, INC.
|
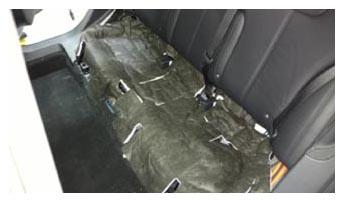
- Remove NVH padding from underneath 2nd row seat cushion.
NOTE:
If equipped.
 Courtesy of TESLA, INC. Courtesy of TESLA, INC.
|
 Courtesy of TESLA, INC. Courtesy of TESLA, INC.
|
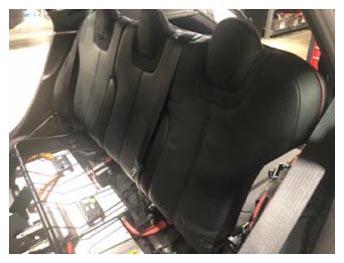
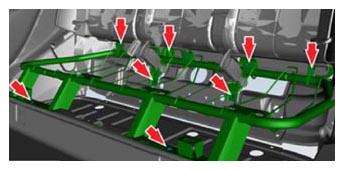
- Remove bolts securing rear cushion seat base frame.
NOTE:
7x bolts, 11 mm, 26 N.m.
 Courtesy of TESLA, INC. Courtesy of TESLA, INC.
|
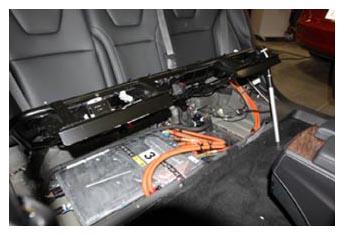
- Lift up and support seat bottom frame.
NOTE:
Release harness clips if necessary.
 Courtesy of TESLA, INC. Courtesy of TESLA, INC.
|
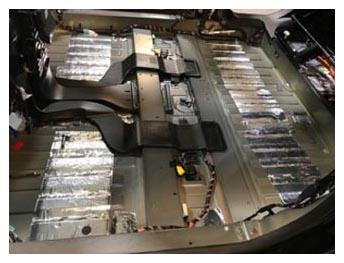
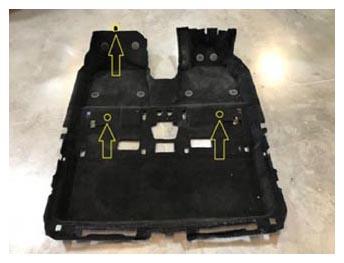
- Remove main carpet from vehicle.
NOTE:
3x fir tree clips.
 Courtesy of TESLA, INC. Courtesy of TESLA, INC.
|
 Courtesy of TESLA, INC. Courtesy of TESLA, INC.
|
- Remove parcel shelf.
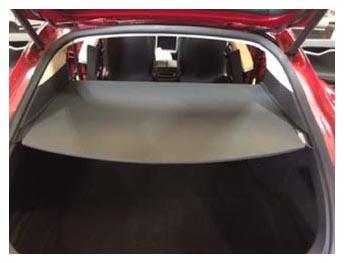 Courtesy of TESLA, INC. Courtesy of TESLA, INC.
|
- Fold both 2nd row seatbacks down.
NOTE:
2x seat release levers, Protect seat back from potential damage from seat frame by placing a fender cover between the seat backs and frame.
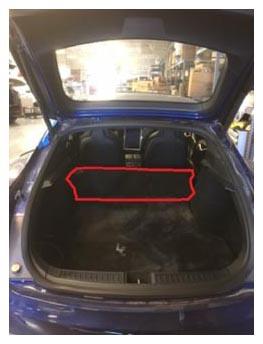 Courtesy of TESLA, INC. Courtesy of TESLA, INC.
|
- Remove LH rear C-pillar trim.
NOTE:
1x screw, T25, 3 N.m, 4x clips.
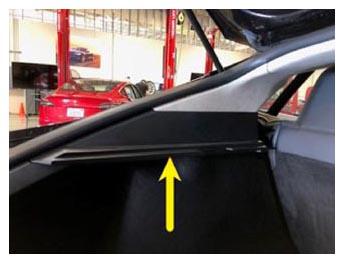 Courtesy of TESLA, INC. Courtesy of TESLA, INC.
|
- Remove the LH rear mid C-pillar trim.
NOTE:
4x clips.
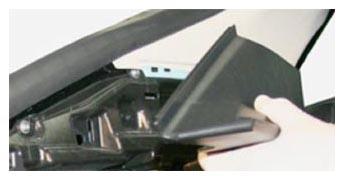 Courtesy of TESLA, INC. Courtesy of TESLA, INC.
|
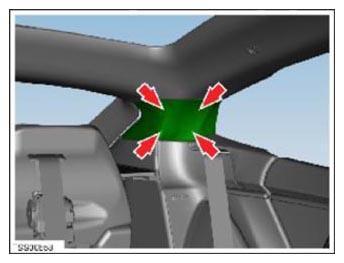
- Remove LH upper C pillar trim.
NOTE:
3x clips.
 Courtesy of TESLA, INC. Courtesy of TESLA, INC.
|
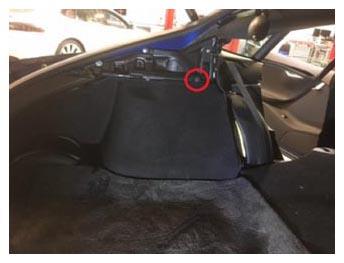
- Remove the LH trunk side trim clip.
NOTE:
1x fir tree clip.
 Courtesy of TESLA, INC. Courtesy of TESLA, INC.
|
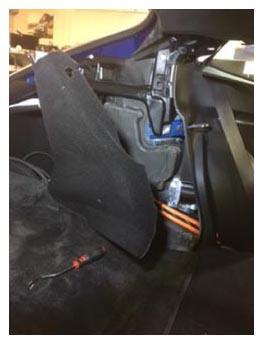
- Pull on the LH trunk side trim to expose the LH bolster clip.
 Courtesy of TESLA, INC. Courtesy of TESLA, INC.
|
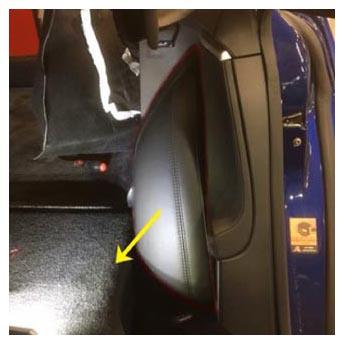
- Remove the LH side rear seat bolster from the vehicle.
NOTE:
1x clip, Release clip from the rear, Do not pull the bolster because of risk of bending.
 Courtesy of TESLA, INC. Courtesy of TESLA, INC.
|
- Separate LH C-pillar mid from LH C-pillar lower.
NOTE:
4x clips, Use caution to not damage any components with C-pillar mid.
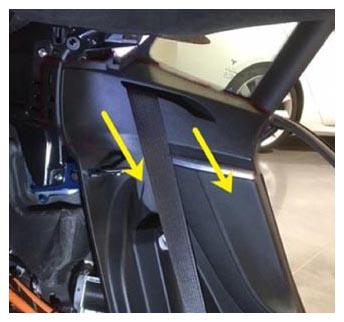 Courtesy of TESLA, INC. Courtesy of TESLA, INC.
|
- Remove the mounting hardware for the LH lower C-pillar.
NOTE:
2x push clips.
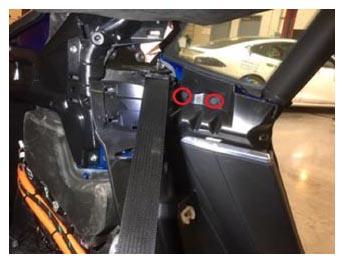 Courtesy of TESLA, INC. Courtesy of TESLA, INC.
|
- Use the air bag tool to push the LH lower C-pillar away from the body of the vehicle.
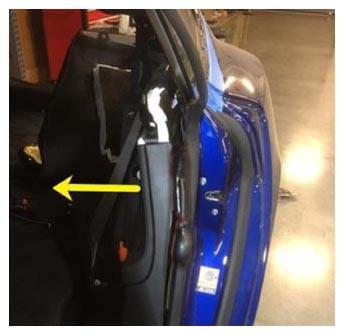 Courtesy of TESLA, INC. Courtesy of TESLA, INC.
|
- Remove LH lower C-pillar trim.
NOTE:
4x clips.
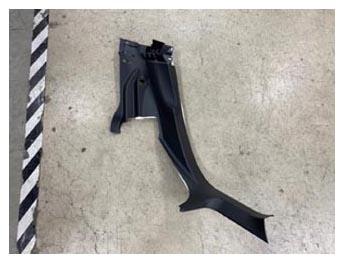 Courtesy of TESLA, INC. Courtesy of TESLA, INC.
|
- Remove trunk load floor.
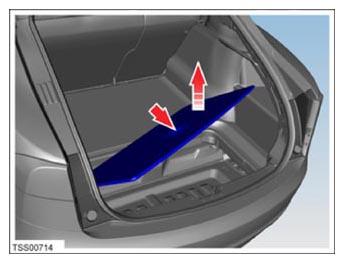 Courtesy of TESLA, INC. Courtesy of TESLA, INC.
|
- Remove trunk sill panel.
NOTE:
4x clips, 4x guides.
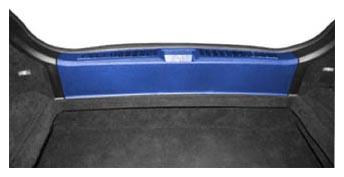 Courtesy of TESLA, INC. Courtesy of TESLA, INC.
|
- Remove trunk floor carpet.
NOTE:
4x fir tree clips.
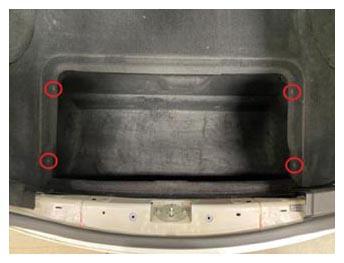 Courtesy of TESLA, INC. Courtesy of TESLA, INC.
|
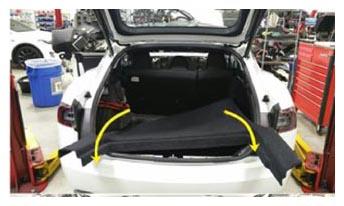 Courtesy of TESLA, INC. Courtesy of TESLA, INC.
|
- Remove LH trunk side garnish trim.
NOTE:
2x clips, 1x guide.
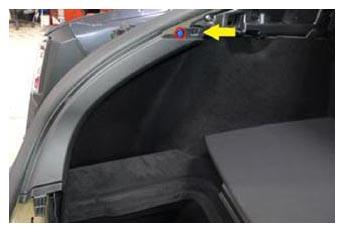 Courtesy of TESLA, INC. Courtesy of TESLA, INC.
|
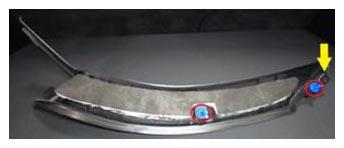 Courtesy of TESLA, INC. Courtesy of TESLA, INC.
|
- Remove rear trunk LH side trim panel.
NOTE:
1x connector.
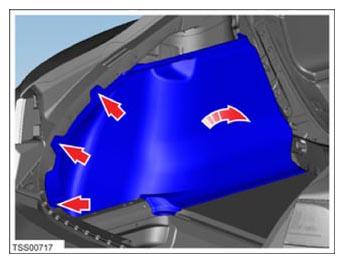 Courtesy of TESLA, INC. Courtesy of TESLA, INC.
|
- Remove RH rear C-pillar trim.
NOTE:
1x screw, T25, 3 N.m, 4x clips.
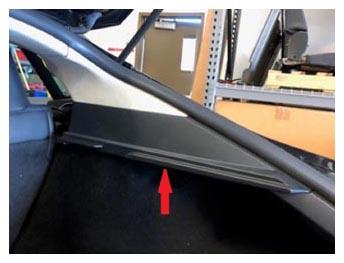 Courtesy of TESLA, INC. Courtesy of TESLA, INC.
|
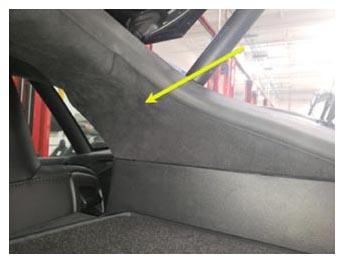
- Remove RH upper C-pillar trim.
NOTE:
4x clips.
 Courtesy of TESLA, INC. Courtesy of TESLA, INC.
|
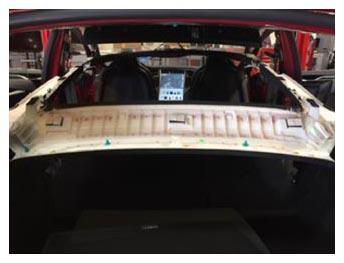
- Release rear headliner clips and partially lower headliner.
NOTE:
This allows for access to curtain air bag connector in later step. Take care not to damage other components. Recommend Assistance.
 Courtesy of TESLA, INC. Courtesy of TESLA, INC.
|
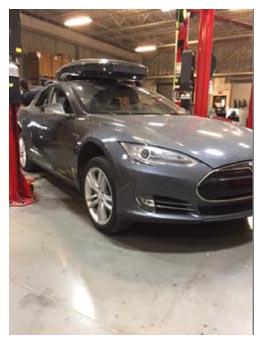
- Remove the wheel chocks, push the vehicle in position to be lifted by hoist, then reinstall wheel chocks.
NOTE:
Recommend assistance, Ensure doors are clear of the lift posts before pushing forward, Flip the door latches to closed position to prevent doors from latching while vehicle is powered down.
 Courtesy of TESLA, INC. Courtesy of TESLA, INC.
|
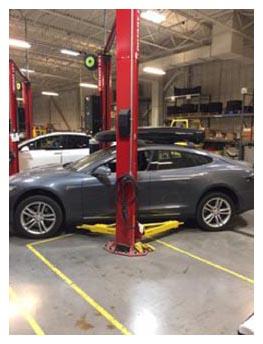
- Position lift posts under vehicle lift points.
 Courtesy of TESLA, INC. Courtesy of TESLA, INC.
|
- Raise vehicle fully and lower lift onto locks.
- Remove clips securing LH shear plate to wheel fairing.
NOTE:
2x push clips.
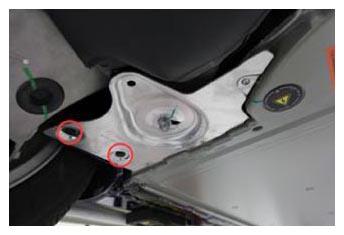 Courtesy of TESLA, INC. Courtesy of TESLA, INC.
|
- Remove LH shear plate.
NOTE:
1x nyloc nut, 15 mm, 35 N.m, 3x screws, T25, 6 N.m, 1x bolt, 10 mm, 4 N.m, Discard nyloc nut after removal.
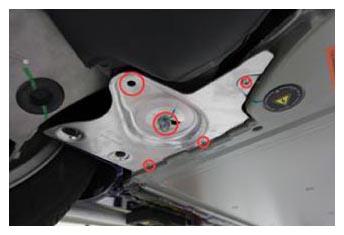 Courtesy of TESLA, INC. Courtesy of TESLA, INC.
|
- Remove clips securing RH shear plate to wheel fairing.
NOTE:
2x push clips.
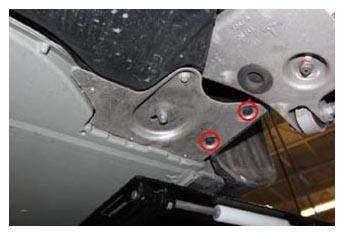 Courtesy of TESLA, INC. Courtesy of TESLA, INC.
|
- Remove RH shear plate.
NOTE:
1x nyloc nut, 15 mm, 35 N.m, 3x screws, T25, 6 N.m, 1x bolt, 10 mm, 4 N.m, Discard nyloc nut after removal.
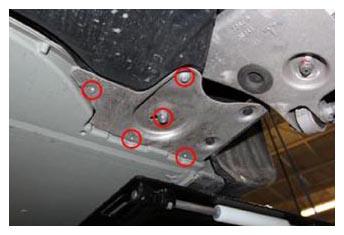 Courtesy of TESLA, INC. Courtesy of TESLA, INC.
|
- Remove clips securing mid aero shield to vehicle.
NOTE:
7x push clips.
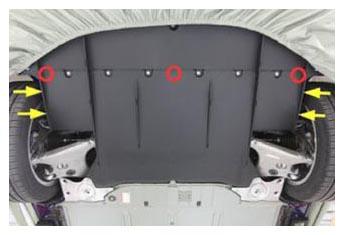 Courtesy of TESLA, INC. Courtesy of TESLA, INC.
|
- Remove bolts securing mid aero shield to vehicle.
NOTE:
7x bolts, 10 mm, 4 N.m.
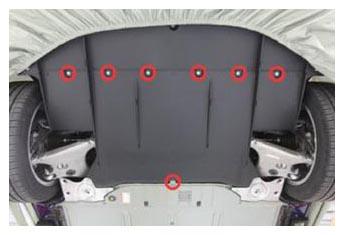 Courtesy of TESLA, INC. Courtesy of TESLA, INC.
|
- Remove mid aero shield from vehicle.
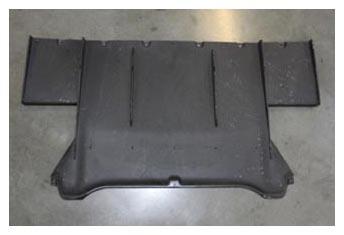 Courtesy of TESLA, INC. Courtesy of TESLA, INC.
|
- Remove ski side covers on RH side.
NOTE:
14x clips, 3x covers.
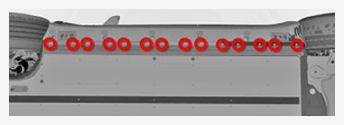 Courtesy of TESLA, INC. Courtesy of TESLA, INC.
|
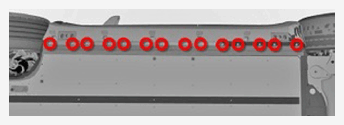
- Remove ski side covers on LH side.
NOTE:
14x clips, 3x covers.
 Courtesy of TESLA, INC. Courtesy of TESLA, INC.
|
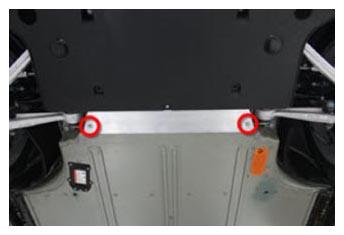
- Remove front lower bash plate extrusion.
NOTE:
2x bolts, T30, 16 N.m, Discard after removal.
 Courtesy of TESLA, INC. Courtesy of TESLA, INC.
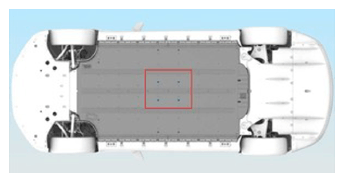
|
- Remove four center bolts securing HV battery.
NOTE:
4x patch bolts, E12, 38 N.m, Discard after removal.
 Courtesy of TESLA, INC. Courtesy of TESLA, INC.
|
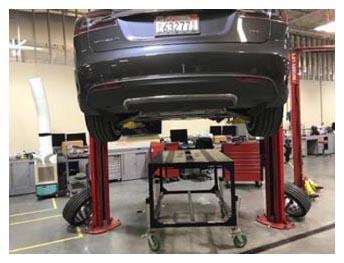
- Position battery table beneath vehicle.
 Courtesy of TESLA, INC. Courtesy of TESLA, INC.
|
- Lower vehicle to table.
NOTE:
Recommend assistance, Align table to vehicle and raise casters to level table if necessary.
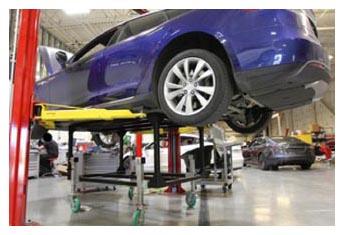 Courtesy of TESLA, INC. Courtesy of TESLA, INC.
|
- Remove remaining eight center bolts securing HV battery.
NOTE:
8x patch bolts, E12, 38 N.m, Discard after removal.
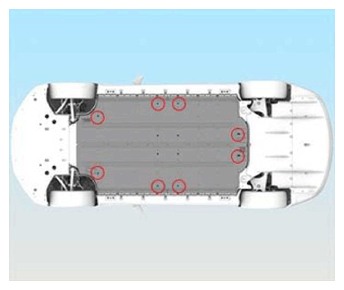 Courtesy of TESLA, INC. Courtesy of TESLA, INC.
|
- Remove front four HV battery bolts.
NOTE:
4x patch bolts, 13 mm, 30 N.m, Discard after removal.
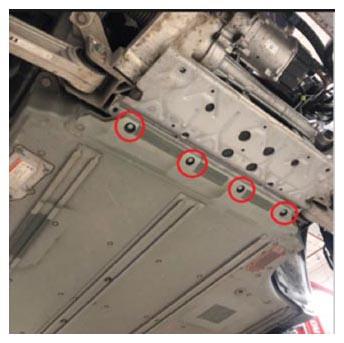 Courtesy of TESLA, INC. Courtesy of TESLA, INC.
|
- Remove 21 mm bolts securing front of HV battery.
NOTE:
2x bolts, 21 mm, 115 N.m, Discard after removal.
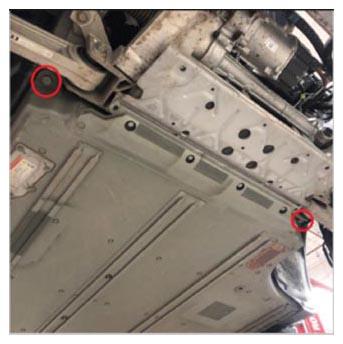 Courtesy of TESLA, INC. Courtesy of TESLA, INC.
|
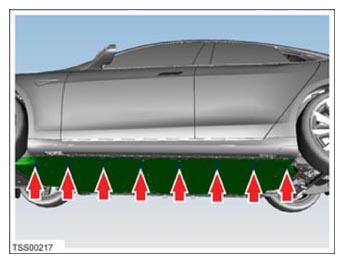
- Remove LH rocker bolts.
NOTE:
8x patch bolts, 13 mm, 55 N.m, Discard after removal.
 Courtesy of TESLA, INC. Courtesy of TESLA, INC.
|
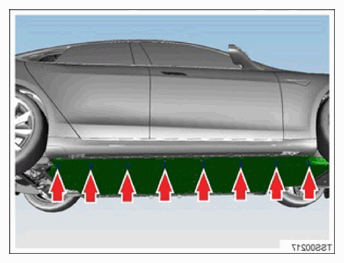
- Remove RH rocker bolts.
NOTE:
8x patch bolts, 13 mm, 55 N.m, Discard after removal.
 Courtesy of TESLA, INC. Courtesy of TESLA, INC.
|
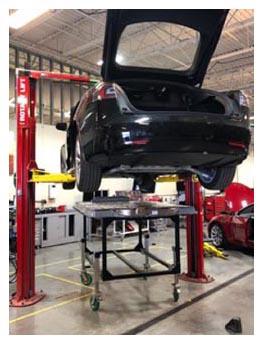
- Raise vehicle off of HV battery.
 Courtesy of TESLA, INC. Courtesy of TESLA, INC.
|
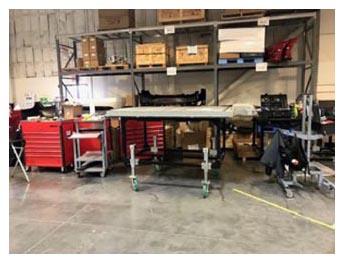
- Move battery away from vehicle.
 Courtesy of TESLA, INC. Courtesy of TESLA, INC.
|
- Remove all items from pockets and ensure not wearing metal items.
- Inspect HV insulating gloves.
NOTE:
Check gloves for damage prior to use, Refer to service document TN-15-92-003
, for information on inspecting HV gloves.
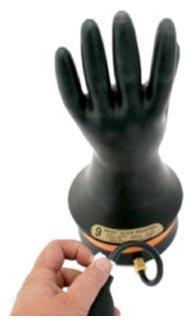 Courtesy of TESLA, INC. Courtesy of TESLA, INC.
|
- Put on HV insulating gloves and leather over gloves.
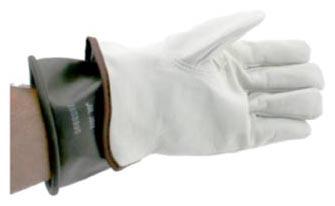 Courtesy of TESLA, INC. Courtesy of TESLA, INC.
|
- Check voltage on HV rapid mate.
NOTE:
B+ to ground, B- to ground, and B+ to B-, If any voltage reading is more than 10V, the pack contactors are not fully opened, Contact Engineering for support.
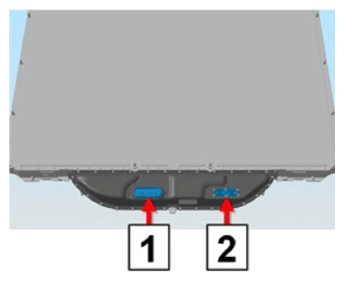 Courtesy of TESLA, INC. Courtesy of TESLA, INC.
|
- Cover the high voltage connector with a HV Rapid Mate cover, and the low voltage connector with a LV Rapid Mate cover.
NOTE:
If these covers are not available, cover the Rapid Mate connectors with masking tape to prevent debris from falling in.
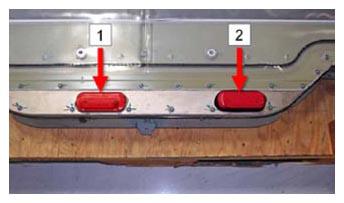 Courtesy of TESLA, INC. Courtesy of TESLA, INC.
|
- Remove bolts and Rear DU HV cable clips from HV battery LV logic connector bracket.
NOTE:
2x bolts, 10 mm, 8 N.m.
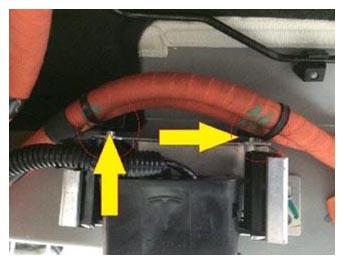 Courtesy of TESLA, INC. Courtesy of TESLA, INC.
|
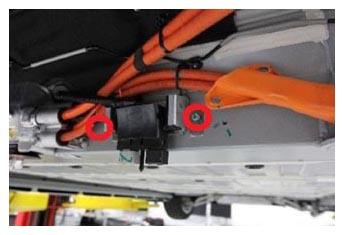 Courtesy of TESLA, INC. Courtesy of TESLA, INC.
|
- Release the HV battery LV logic connector cover from bracket.
NOTE:
6x tabs, 1x edge clip.
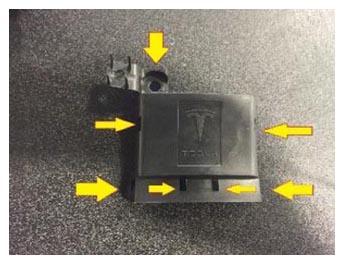 Courtesy of TESLA, INC. Courtesy of TESLA, INC.
|
- Remove the HV battery LV Logic connectors from bracket.
NOTE:
2x tabs, Index which connector goes to which side of the connector for reference on installation.
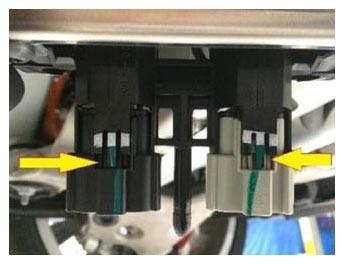 Courtesy of TESLA, INC. Courtesy of TESLA, INC.
|
- Push the logic harness through the body to the rear seat area.
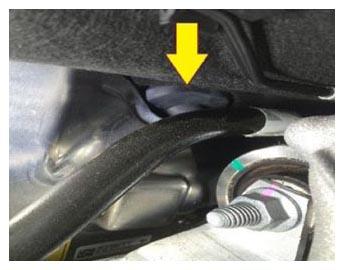 Courtesy of TESLA, INC. Courtesy of TESLA, INC.
|
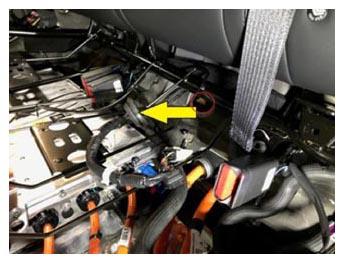 Courtesy of TESLA, INC. Courtesy of TESLA, INC.
|
- Lower vehicle until tires are touching the ground.
- Roll the vehicle back away from the lift posts and install wheel chocks.
NOTE:
Recommend assistance, Done so doors can be fully opened to allow more room to work.
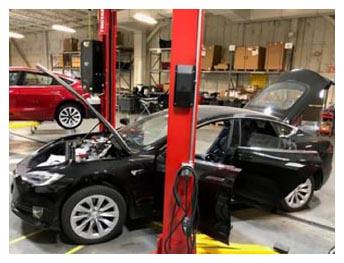 Courtesy of TESLA, INC. Courtesy of TESLA, INC.
|
- Remove the second row RKE antenna from under the rubber NVH mat and feed out under the second row seat frame.
NOTE:
2x dual lock pads, This aids in disconnecting the RKE antennae.
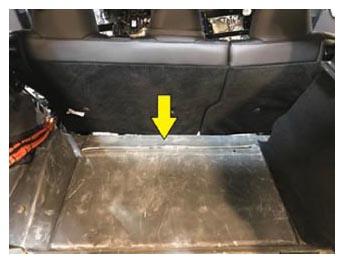 Courtesy of TESLA, INC. Courtesy of TESLA, INC.
|
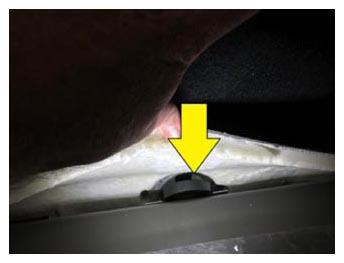 Courtesy of TESLA, INC. Courtesy of TESLA, INC.
|
- Disconnect the second row RKE antenna.
NOTE:
1x connector.
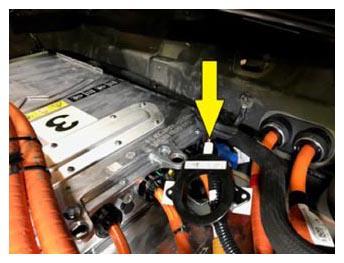 Courtesy of TESLA, INC. Courtesy of TESLA, INC.
|
- Release the harness barrel clip between the charger and the body closes to the connector on the RH side of the vehicle behind the charger.
NOTE:
1x barrel clip.
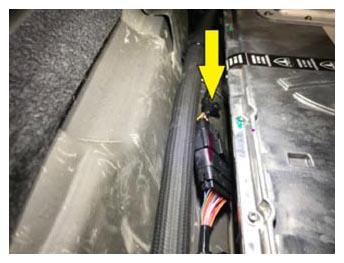 Courtesy of TESLA, INC. Courtesy of TESLA, INC.
|
- Disconnect the connector between the charger and the body.
NOTE:
1x connector.
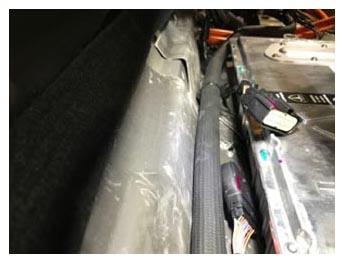 Courtesy of TESLA, INC. Courtesy of TESLA, INC.
|
- Release the harness barrel clip between the charger and the body.
NOTE:
1x barrel clip.
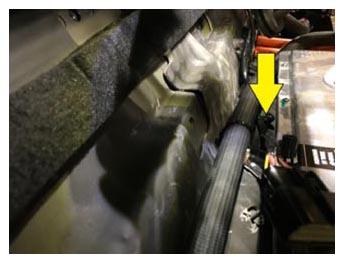 Courtesy of TESLA, INC. Courtesy of TESLA, INC.
|
- Release the harness barrel clip below the ground cable to the charger.
NOTE:
1x barrel clip.
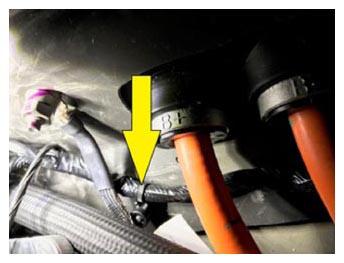 Courtesy of TESLA, INC. Courtesy of TESLA, INC.
|
- Release the harness barrel clip between the coolant hoses.
NOTE:
1x barrel clip.
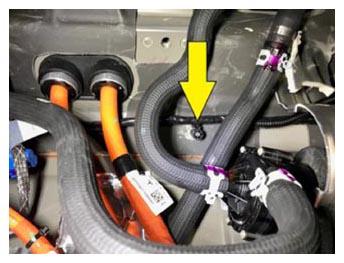 Courtesy of TESLA, INC. Courtesy of TESLA, INC.
|
- Release the barrel clips near the coolant pump.
NOTE:
2x barrel clips.
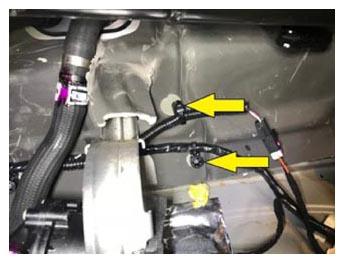 Courtesy of TESLA, INC. Courtesy of TESLA, INC.
|
- Disconnect the connector at the coolant pump.
NOTE:
1x connector.
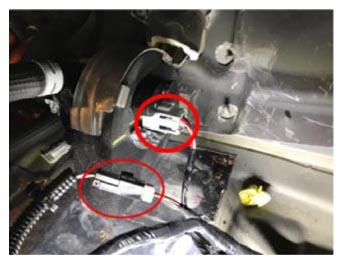 Courtesy of TESLA, INC. Courtesy of TESLA, INC.
|
- Feed the harness out towards the second row door sill.
NOTE:
Gently lift up on HV cables and coolant hoses to feed the harness out, It is also possible to move the coolant pump and surrounding foam to create room for the rubber grommet and connectors to pass by for removal.
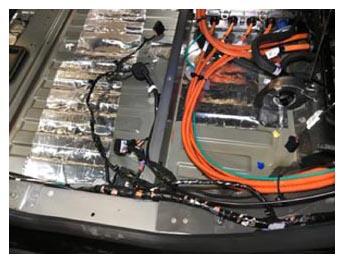 Courtesy of TESLA, INC. Courtesy of TESLA, INC.
|
- Remove ground bolt at C-pillar.
NOTE:
1x bolt, 10 mm, 9 N.m.
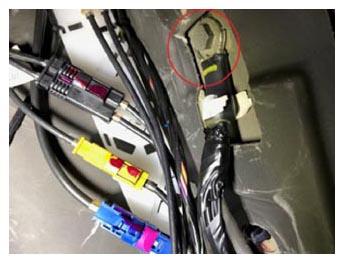 Courtesy of TESLA, INC. Courtesy of TESLA, INC.
|
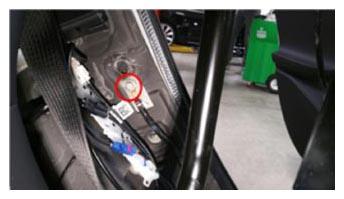 Courtesy of TESLA, INC. Courtesy of TESLA, INC.
|
- Disconnect the LH curtain airbag.
NOTE:
2x clips, 1x locking airbag connector, Lower the LH rear corner of the headliner for access, Take care not to crease the headliner.
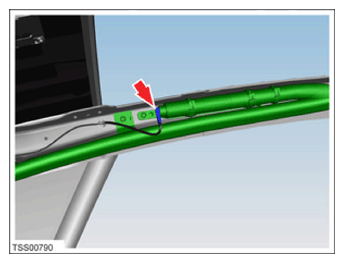 Courtesy of TESLA, INC. Courtesy of TESLA, INC.
|
- Disconnect LH tail light connector.
NOTE:
1x connector.
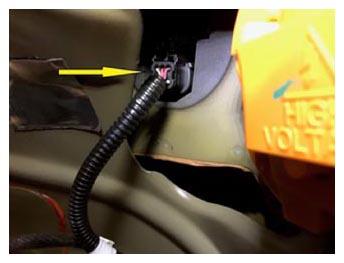 Courtesy of TESLA, INC. Courtesy of TESLA, INC.
|
- Disconnect charge port connector.
NOTE:
1x connector.
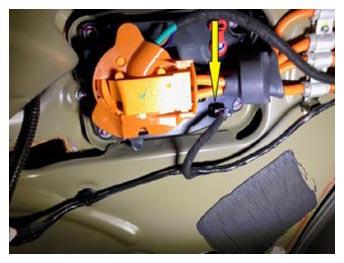 Courtesy of TESLA, INC. Courtesy of TESLA, INC.
|
- Release harness clips in LH trunk area move harness to the C pillar area for further removal.
NOTE:
6x clips, Harness clips share studs with and are installed below the barrel clips for the HV harness.
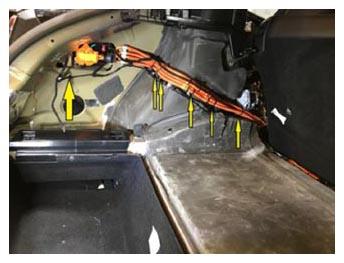 Courtesy of TESLA, INC. Courtesy of TESLA, INC.
|
- Release harness clips at C pillar under HV harness clips.
NOTE:
2x clips, Harness clips share studs with and are installed below the barrel clips for the HV harness.
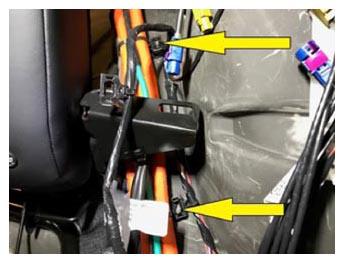 Courtesy of TESLA, INC. Courtesy of TESLA, INC.
|
- Release the harness connector bracket from the C pillar.
NOTE:
2x clips.
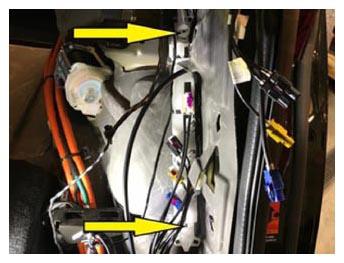 Courtesy of TESLA, INC. Courtesy of TESLA, INC.
|
- Disconnect rear harness connectors from main harness at C pillar connector carrier.
NOTE:
4x connectors.
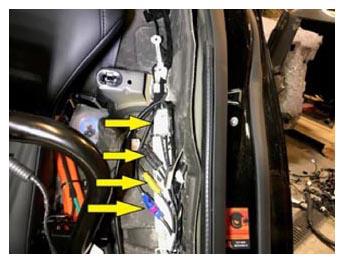 Courtesy of TESLA, INC. Courtesy of TESLA, INC.
|
- Remove latch closeout at LH C pillar.
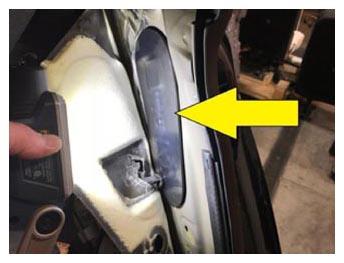 Courtesy of TESLA, INC. Courtesy of TESLA, INC.
|
- Disconnect LH rear door latch connector.
NOTE:
1x connector, slide connector lock upwards to release.
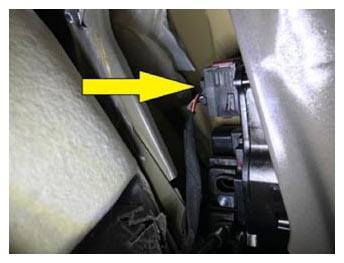 Courtesy of TESLA, INC. Courtesy of TESLA, INC.
|
- Disconnect the C pillar side impact sensor.
NOTE:
1x connector.
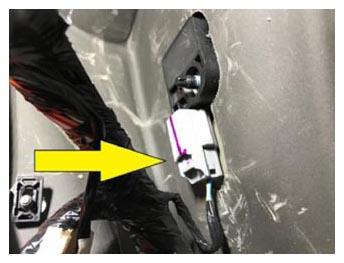 Courtesy of TESLA, INC. Courtesy of TESLA, INC.
|
- Release the harness clips at the C pillar area.
NOTE:
4x clips.
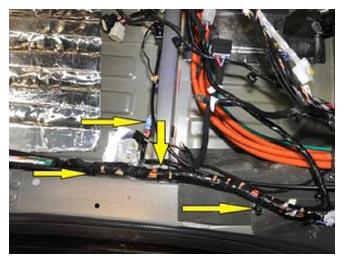 Courtesy of TESLA, INC. Courtesy of TESLA, INC.
|
- Disconnect side impact sensor at B pillar.
NOTE:
1x connector.
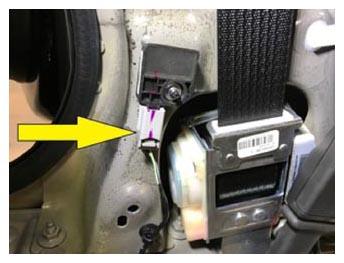 Courtesy of TESLA, INC. Courtesy of TESLA, INC.
|
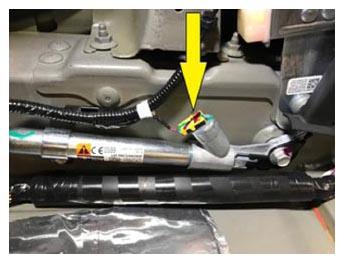
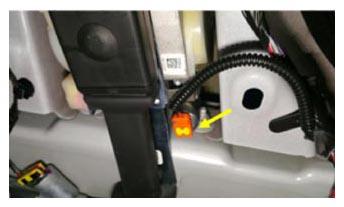
- Disconnect LH seatbelt pretensioner.
NOTE:
2x connectors, Release locking tab.
 Courtesy of TESLA, INC. Courtesy of TESLA, INC.
|
 Courtesy of TESLA, INC. Courtesy of TESLA, INC.
|
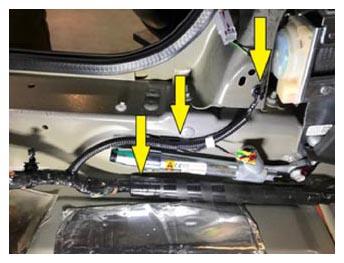
- Release harness clips at B pillar.
NOTE:
3x clips.
 Courtesy of TESLA, INC. Courtesy of TESLA, INC.
|
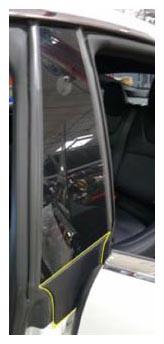
- Remove LH exterior B-pillar finisher.
NOTE:
2x tabs.
 Courtesy of TESLA, INC. Courtesy of TESLA, INC.
|
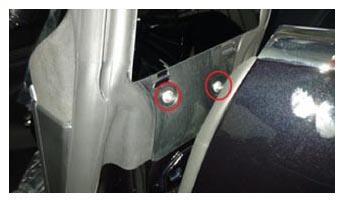
- Remove screws securing LH B-pillar applique.
NOTE:
2x bolts, T25, 4 N.m.
 Courtesy of TESLA, INC. Courtesy of TESLA, INC.
|
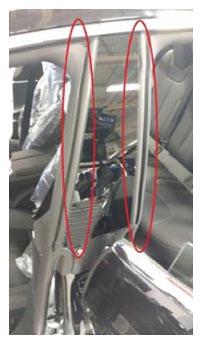
- Release B-pillar seals from applique and body along length of applique.
 Courtesy of TESLA, INC. Courtesy of TESLA, INC.
|
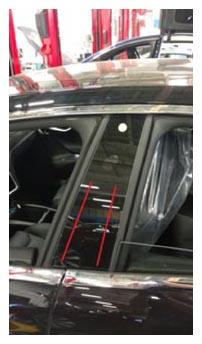
- Pry LH applique away from body starting at the bottom.
NOTE:
2 strips of double-sided tape securing applique to body.
 Courtesy of TESLA, INC. Courtesy of TESLA, INC.
|
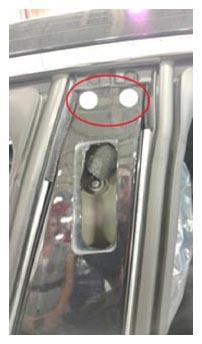
- Pull down to release LH applique from upper clips.
NOTE:
Use caution as camera harness does not have much slack.
 Courtesy of TESLA, INC. Courtesy of TESLA, INC.
|
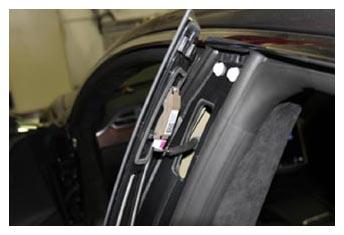
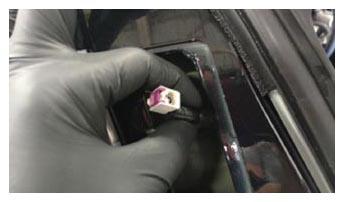
- Hold LH applique away from body and disconnect camera harness connector, then remove applique.
NOTE:
1x connector.
 Courtesy of TESLA, INC. Courtesy of TESLA, INC.
|
 Courtesy of TESLA, INC. Courtesy of TESLA, INC.
|
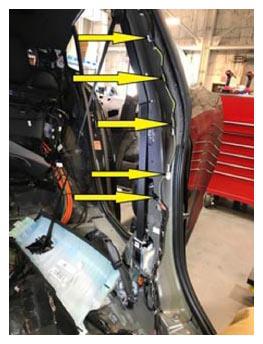
- Release the harness clips at the B pillar.
NOTE:
5x clips.
 Courtesy of TESLA, INC. Courtesy of TESLA, INC.
|
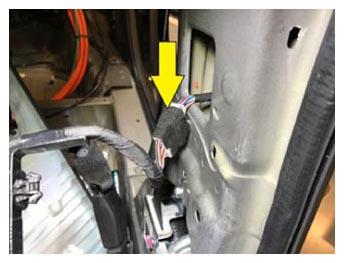
- Disconnect the connector tucked into the B pillar opening.
NOTE:
1x connector.
 Courtesy of TESLA, INC. Courtesy of TESLA, INC.
|
- Disconnect the pyrotechnic connector from the seat belt pretensioner.
NOTE:
1x connector.
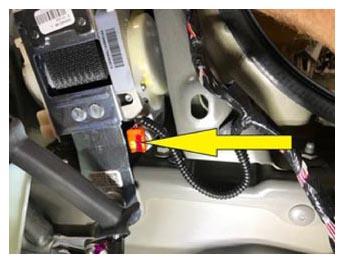 Courtesy of TESLA, INC. Courtesy of TESLA, INC.
|
- Remove all floor vent ducts.
NOTE:
3x ducts, 4x clip tabs, Slide back the rear section of the center duct back then lift upwards to remove, Remove the two outer floor ducts by releasing the tabs and lifting up from the back portion.
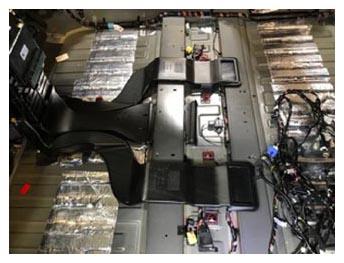 Courtesy of TESLA, INC. Courtesy of TESLA, INC.
|
- Release the harness clips along the floor panel.
NOTE:
15x clips.
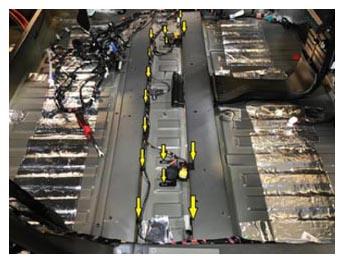 Courtesy of TESLA, INC. Courtesy of TESLA, INC.
|
- Remove the main harness seat connectors from their brackets.
NOTE:
2x clips, Brackets for seat connectors do not come on new harness and are to be reused on installation.
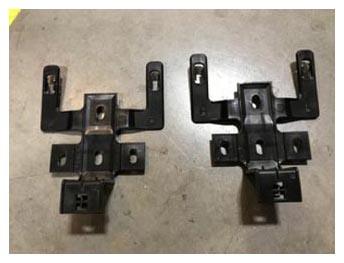 Courtesy of TESLA, INC. Courtesy of TESLA, INC.
|
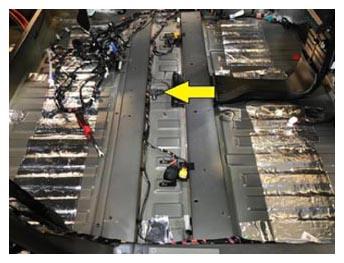
- Disconnect the yaw rate sensor.
NOTE:
1x connector.
 Courtesy of TESLA, INC. Courtesy of TESLA, INC.
|
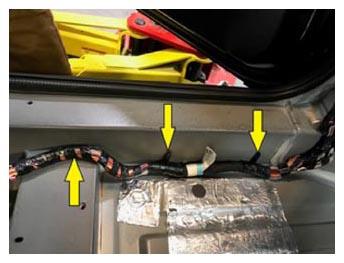
- Release the harness clips along the LH sill panel.
NOTE:
3x clips.
 Courtesy of TESLA, INC. Courtesy of TESLA, INC.
|
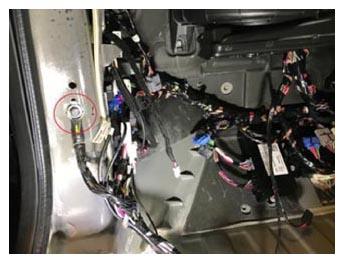
- Remove the ground bolt at the LH lower A pillar.
NOTE:
1x bolt, 10 mm, 9 N.m.
 Courtesy of TESLA, INC. Courtesy of TESLA, INC.
|
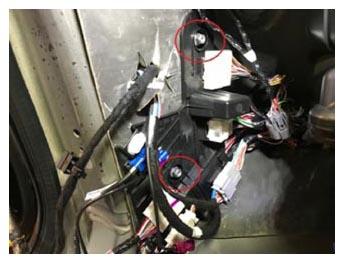
- Remove the fasteners securing the main harness carrier at the LH lower A pillar.
NOTE:
2x nuts, 10 mm, 5 N.m.
 Courtesy of TESLA, INC. Courtesy of TESLA, INC.
|
- Release the A pillar harness connectors from the main harness connectors on the main harness carrier at the LH lower A pillar.
NOTE:
2x connectors, 1x clip.
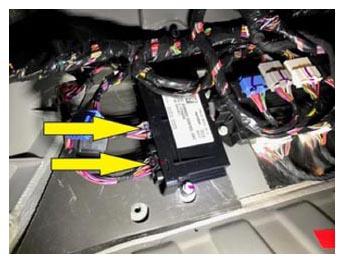
- Disconnect harness from the sunroof control unit at the LH footwell.
NOTE:
2x connectors.
 Courtesy of TESLA, INC. Courtesy of TESLA, INC.
|
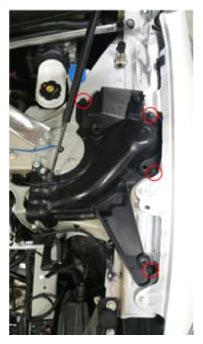
- Remove LH shock tower cover.
NOTE:
4x push clips.
 Courtesy of TESLA, INC. Courtesy of TESLA, INC.
|
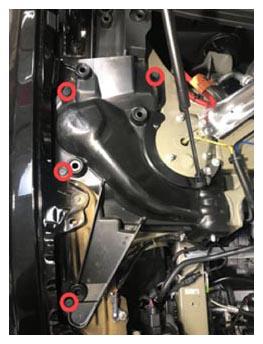
- Remove RH shock tower cover.
NOTE:
4x push clips.
 Courtesy of TESLA, INC. Courtesy of TESLA, INC.
|
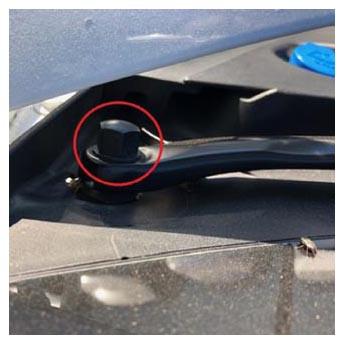
- Remove LH side wiper arm.
NOTE:
1x nut, 17 mm, 31 N.m.
 Courtesy of TESLA, INC. Courtesy of TESLA, INC.
|
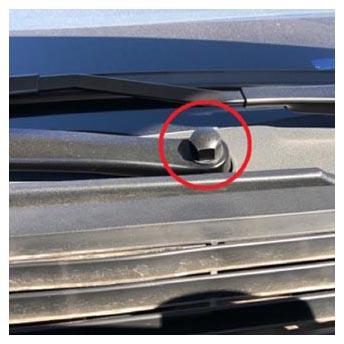
- Remove RH side wiper arm.
NOTE:
1x nut, 17 mm, 31 N.m.
 Courtesy of TESLA, INC. Courtesy of TESLA, INC.
|
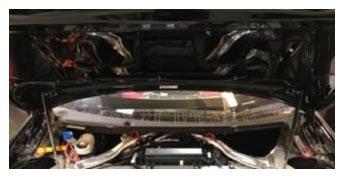
- Remove clips securing cowl panel to vehicle.
NOTE:
4x push clips.
 Courtesy of TESLA, INC. Courtesy of TESLA, INC.
|
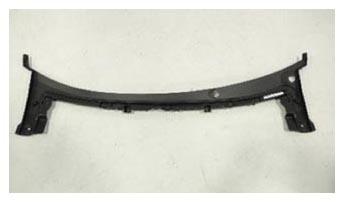
- Release cowl panel from base of windshield and remove.
 Courtesy of TESLA, INC. Courtesy of TESLA, INC.
|
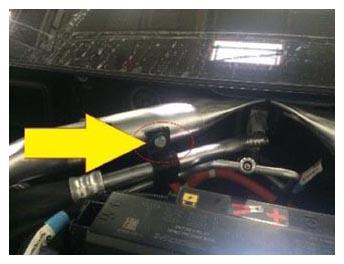
- Remove A/C line bracket bolt from RH cross-brace.
NOTE:
1x bolt, 10 mm, 6 N.m.
 Courtesy of TESLA, INC. Courtesy of TESLA, INC.
|
- Remove fasteners securing TXV to evaporator.
NOTE:
2x bolts, T30, 6 N.m, Inspect o-rings for damage if flushing, Discard o-rings and replace on install.
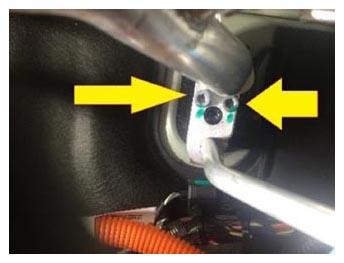 Courtesy of TESLA, INC. Courtesy of TESLA, INC.
|
- Disconnect A/C hoses and TXV from HVAC unit.
NOTE:
Gently pull the lines away from the bulkhead/HVAC box, be sure to retain the O-rings at the TXV.
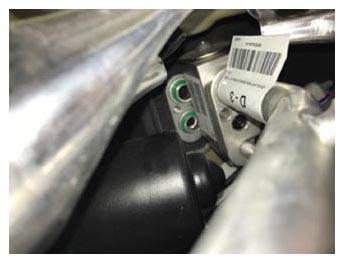 Courtesy of TESLA, INC. Courtesy of TESLA, INC.
|
- Disconnect thermal controller connectors.
NOTE:
4 connectors. Remove the THC module.
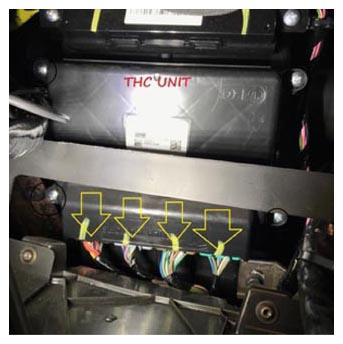 Courtesy of TESLA, INC. Courtesy of TESLA, INC.
|
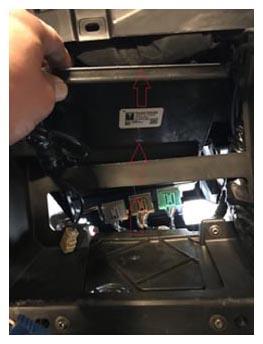 Courtesy of TESLA, INC. Courtesy of TESLA, INC.
|
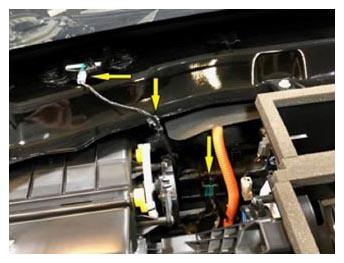
- Disconnect HVAC blower assembly and RKE harness connectors and release harness clip.
NOTE:
2x connectors, 1x edge clip.
 Courtesy of TESLA, INC. Courtesy of TESLA, INC.
|
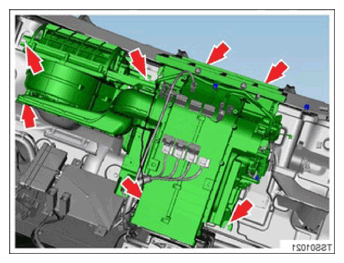
- Remove fasteners securing HVAC assembly to the body.
NOTE:
5x nuts, 10 mm, 6 N.m, 2x bolts, 10 mm, 6 N.m.
 Courtesy of TESLA, INC. Courtesy of TESLA, INC.
|
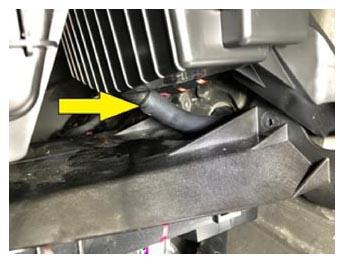
- Release HVAC drain hose from HVAC assembly.
NOTE:
1x hose connection, Place a shop towel underneath the drain hose prior to disconnecting.
 Courtesy of TESLA, INC. Courtesy of TESLA, INC.
|
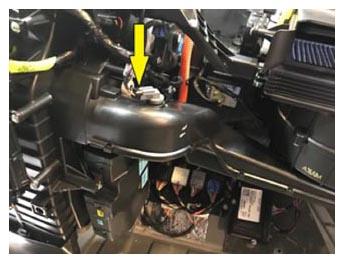
- Disconnect sensor from RH lower air duct on HVAC assembly.
NOTE:
1x connector.
 Courtesy of TESLA, INC. Courtesy of TESLA, INC.
|
- Remove the fasteners securing the RH lower air duct to the HVAC assembly.
NOTE:
2x screws, PH2, 1 N.m.
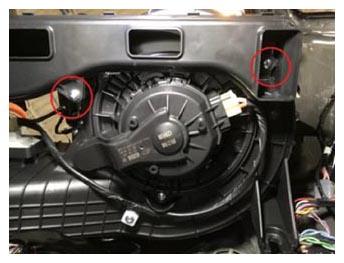 Courtesy of TESLA, INC. Courtesy of TESLA, INC.
|
- Remove the RH lower air duct from the HVAC assembly.
NOTE:
Lower left slide of duct and slide out to the left to release from HVAC assembly.
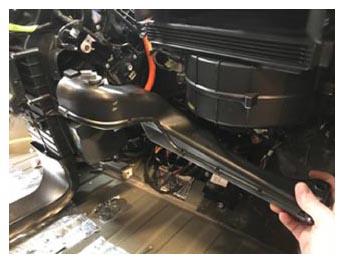 Courtesy of TESLA, INC. Courtesy of TESLA, INC.
|
- Remove the fasteners securing the HVAC assembly cross brace.
NOTE:
2x screws, PH2, 1 N.m.
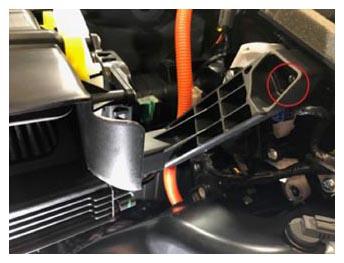 Courtesy of TESLA, INC. Courtesy of TESLA, INC.
|
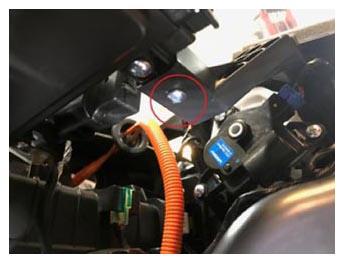 Courtesy of TESLA, INC. Courtesy of TESLA, INC.
|
- Remove the HVAC assembly cross brace.
NOTE:
Gently push brace to the left to release from HVAC box on RH side, Pull the brace towards the rear for the vehicle then side out to the right to release from HVAC assembly.
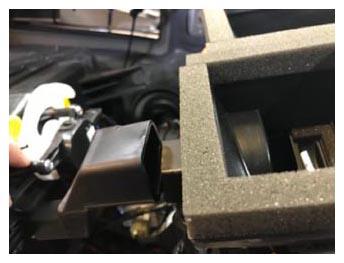 Courtesy of TESLA, INC. Courtesy of TESLA, INC.
|
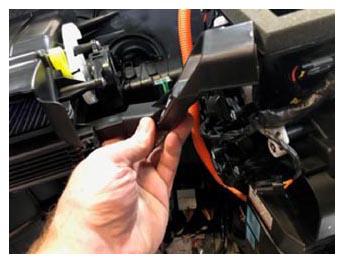 Courtesy of TESLA, INC. Courtesy of TESLA, INC.
|
- Remove fasteners securing the PTC heater to the HVAC assembly.
NOTE:
3x screws, PH2, 1 N.m.
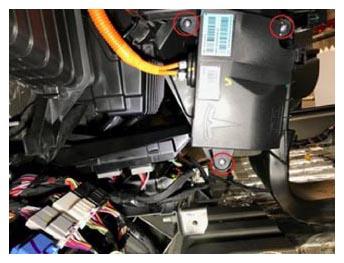 Courtesy of TESLA, INC. Courtesy of TESLA, INC.
|
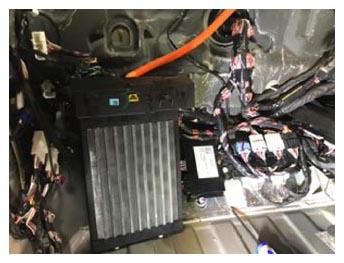
- Remove the PTC heater from the HVAC assembly.
NOTE:
Slide PTC heater out to the left while taking care not to strain the HV cables, Gently move the PTC heater and HV cables behind the HVAC assembly so it can be removed from the vehicle, Take necessary measures to protect the PTC heater and its cables so it can be easily moved out of the way during main body harness replacement as needed.
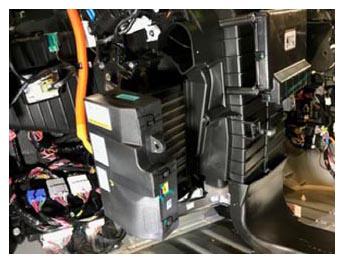 Courtesy of TESLA, INC. Courtesy of TESLA, INC.
|
 Courtesy of TESLA, INC. Courtesy of TESLA, INC.
|
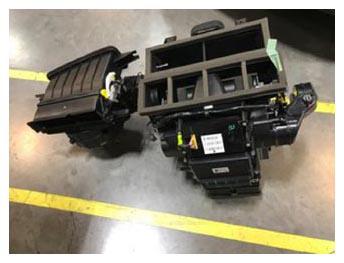
- Remove the HVAC assembly from the vehicle.
NOTE:
Recommend assistance.
 Courtesy of TESLA, INC. Courtesy of TESLA, INC.
|
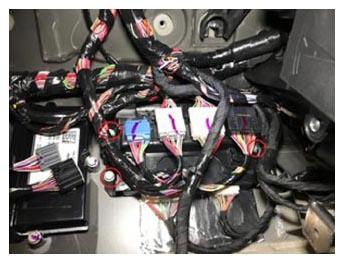
- Remove the fasteners securing the main harness connector carrier in the LH footwell.
NOTE:
3x bolts, 10 mm, 2 N.m.
 Courtesy of TESLA, INC. Courtesy of TESLA, INC.
|
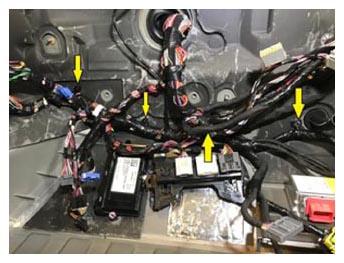
- Release the barrel clips securing the main harness in the LH side of the bulkhead.
NOTE:
4x barrel clips.
 Courtesy of TESLA, INC. Courtesy of TESLA, INC.
|
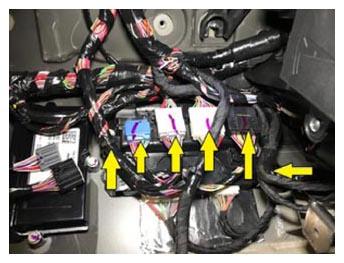
- Disconnect front harness connectors and release clips from the main harness connector carrier.
NOTE:
4x connectors, 2x clips, The blue connector cap is to be transferred to the connector carrier on the new harness.
 Courtesy of TESLA, INC. Courtesy of TESLA, INC.
|
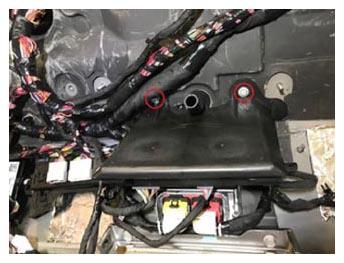
- Remove the fasteners securing the Body Control Module (BCM) to the Bulkhead.
NOTE:
2x bolts, 10 mm, 5 N.m.
 Courtesy of TESLA, INC. Courtesy of TESLA, INC.
|
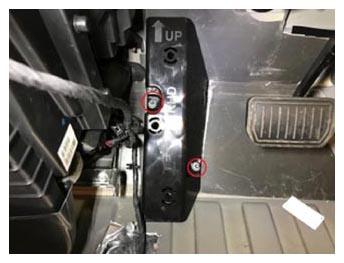
- Remove the dead pedal from the bulkhead.
NOTE:
2x nuts, 13 mm, 5 N.m.
 Courtesy of TESLA, INC. Courtesy of TESLA, INC.
|
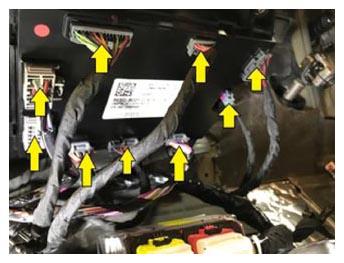
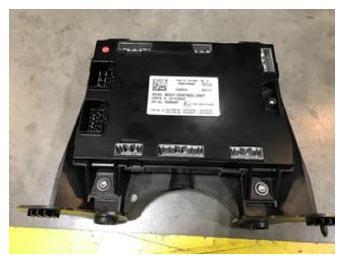
- Release connectors from the BCM.
NOTE:
9x connectors, The BCM may need to be tilted and moved into different positions in order to access and disconnect all connectors.
 Courtesy of TESLA, INC. Courtesy of TESLA, INC.
|
- Remove BCM bracket with BCM.
NOTE:
Slide the BCM and bracket assembly out to the LH footwell area, The fitment between the BCM bracket, the HVAC drain hose, wiring harnesses, and cross car beam assembly is tight, The BCM with bracket will need to be moved at different angles to clear the surrounding components.
 Courtesy of TESLA, INC. Courtesy of TESLA, INC.
|
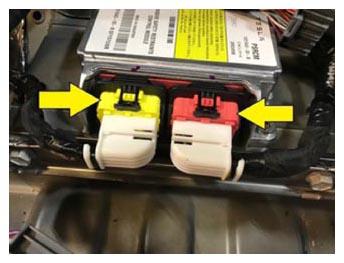
- Disconnect the Passive Safety Restraint Control Module (PRSCM).
NOTE:
2x connectors, Release connector lock tabs and flip connector lever to release.
 Courtesy of TESLA, INC. Courtesy of TESLA, INC.
|
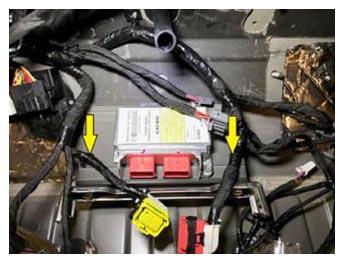
- Release the harness clips at the PRSCM mounting bracket.
NOTE:
2x fir tree clips.
 Courtesy of TESLA, INC. Courtesy of TESLA, INC.
|
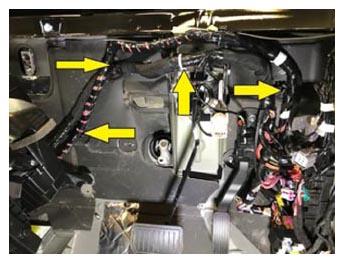
- Release harness clips on RH side of the bulkhead.
NOTE:
3x square clip, 1x fir tree clip, Harness clips share studs with and are installed below the barrel clips for the front trunk harness.
 Courtesy of TESLA, INC. Courtesy of TESLA, INC.
|
- Disconnect the Brake switch.
NOTE:
1x connector.
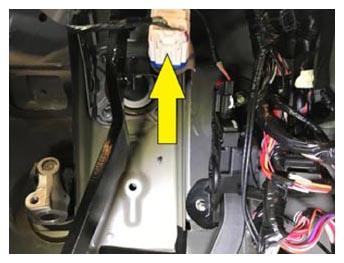 Courtesy of TESLA, INC. Courtesy of TESLA, INC.
|
- Disconnect the accelerator pedal connector.
NOTE:
1x connector, Release red locking tab before releasing connector.
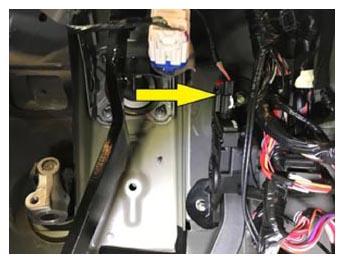 Courtesy of TESLA, INC. Courtesy of TESLA, INC.
|
- Disconnect the main harness connectors at the upper A pillar.
NOTE:
1x connector, windshield defrost, 1x connector, to headliner harness.
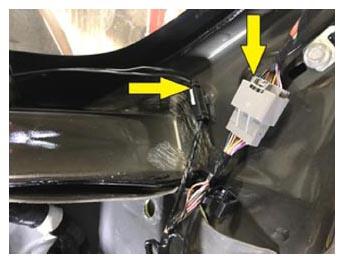 Courtesy of TESLA, INC. Courtesy of TESLA, INC.
|
- Remove the RH A pillar ground connection.
NOTE:
1x bolt, 10 mm, 9 N.m.
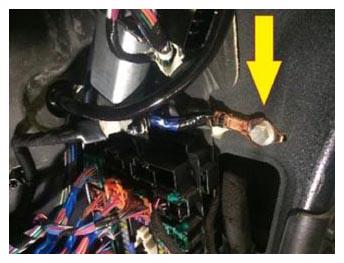 Courtesy of TESLA, INC. Courtesy of TESLA, INC.
|
- Disconnect main harness connectors from the RH A pillar cabin fuse box.
NOTE:
5x connectors.
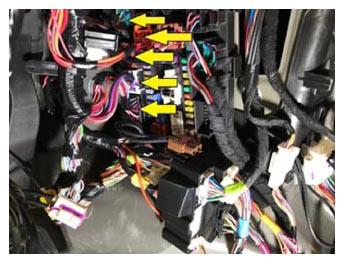 Courtesy of TESLA, INC. Courtesy of TESLA, INC.
|
- Release the lower RH A pillar Connector bracket from the Cabin fuse box.
NOTE:
2x tabs, slide the bracket towards the rear of the vehicle to release.
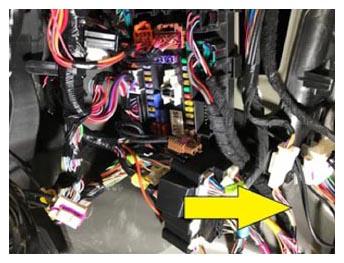 Courtesy of TESLA, INC. Courtesy of TESLA, INC.
|
- Disconnect harness connectors from connector carrier at lower RH A pillar.
NOTE:
3x connectors for LH main body harness, 3x connectors for front trunk harness.
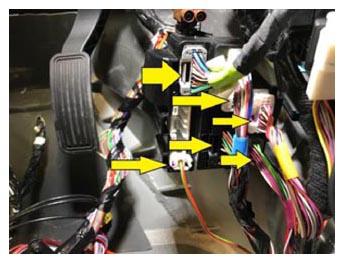 Courtesy of TESLA, INC. Courtesy of TESLA, INC.
|
- Release the front trunk connectors from the RH lower A pillar connector carrier.
NOTE:
5x connectors, Release locking tabs and pull connectors straight out of the carrier, Locking tab to carrier is on the inboard side of the connector carrier.
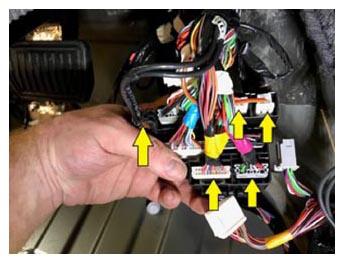 Courtesy of TESLA, INC. Courtesy of TESLA, INC.
|
- Remove the main lower dash harness from the vehicle.
NOTE:
Take care not to damage surrounding components while removing the harness from the vehicle, This is a good time to compare to the new harness provided to ensure parts received are compatible with the vehicle.
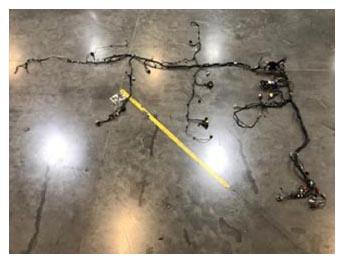 Courtesy of TESLA, INC. Courtesy of TESLA, INC.
|