- Remove the underhood fusebox. Refer to FUSEBOX - UNDERHOOD - 2ND GENERATION (REMOVE AND REPLACE) .
- Remove the LH and RH shock tower brace Shock Tower Brace - LH (Remove And Replace)
.
- Remove the wiper motor assembly, refer to WIPER MOTOR ASSEMBLY (REMOVE AND REPLACE) .
- Remove the brackets (x2) that attach the air suspension reservoir to the vehicle.
NOTE:
Do not disconnect the air lines to the reservoir.
NOTE:
Carefully move the reservoir out of the way, but do not remove it from the vehicle.
- Remove the bolt (x1) that attaches the 12V cable cover to the E-fuse assembly (torque 3.5 N.m).
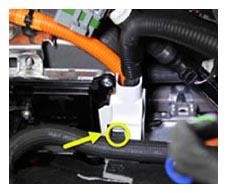 Courtesy of TESLA, INC. Courtesy of TESLA, INC.
|
- Remove the nut (x1) and clips that attach the E-fuse to the battery coolant heater bracket (torque 7 N.m).
- Remove the E-fuse cover.
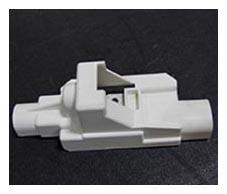 Courtesy of TESLA, INC. Courtesy of TESLA, INC.
|
- Remove the bolt (x1) that attaches the E-fuse to the DCDC positive cable (torque 5 N.m).
- Remove the screws (x3) that attach the E-fuse cover to the E-fuse (torque 2.7 N.m).
NOTE:
Do not move the front drive unit coolant hose.
NOTE:
1 of the screws is different than the other 2. Make sure to pay attention to the screw locations.
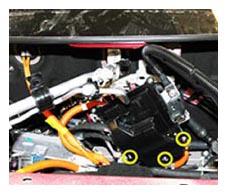 Courtesy of TESLA, INC. Courtesy of TESLA, INC.
|
- Remove the bolt (x1) that attaches the "G" cable to the E-Fuse assembly (torque 5 N.m).
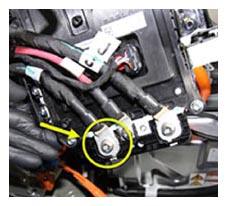 Courtesy of TESLA, INC. Courtesy of TESLA, INC.
|
- Move the "G" cable to the RH side of the vehicle.
NOTE:
This allows for access above the forward junction box.
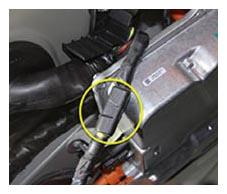
- Use a blade knife to carefully remove the heat-shrink from the inline fuse housing.
WARNING:
Use cut-resistant gloves when performing this step.
CAUTION:
Be careful not to damage any other components or wiring in the area.
- Release the clips (x2) that attach the inline fuse cover to the inline fuse.
 Courtesy of TESLA, INC. Courtesy of TESLA, INC.
|
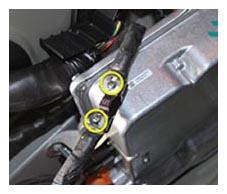
- Remove the screws (x2) that attach the inline fuse and lower fuse housing to the cables (torque 8 N.m).
 Courtesy of TESLA, INC. Courtesy of TESLA, INC.
|