- Remove the LH and RH tail light. See TAILLIGHT - LH (REMOVE AND INSTALL)
.
- Remove the damaged LH and RH liftgate stop stud from the LH lamp can panel.
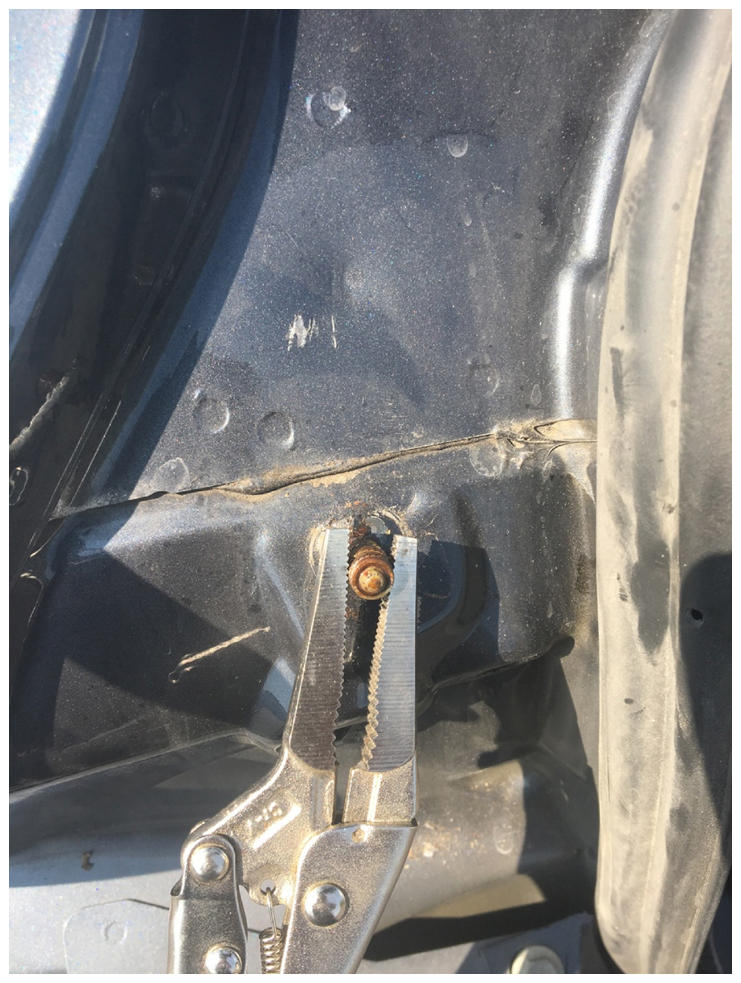 Courtesy of TESLA, INC. Courtesy of TESLA, INC.
|
- Measure the diameter of the hole on the LH and RH lamp can panel that was created after removal of the liftgate stop stud.
NOTE:
The diameter of the hole must not exceed 10.5 mm (0.43 in). If the hole is larger, then the panel should be replaced.
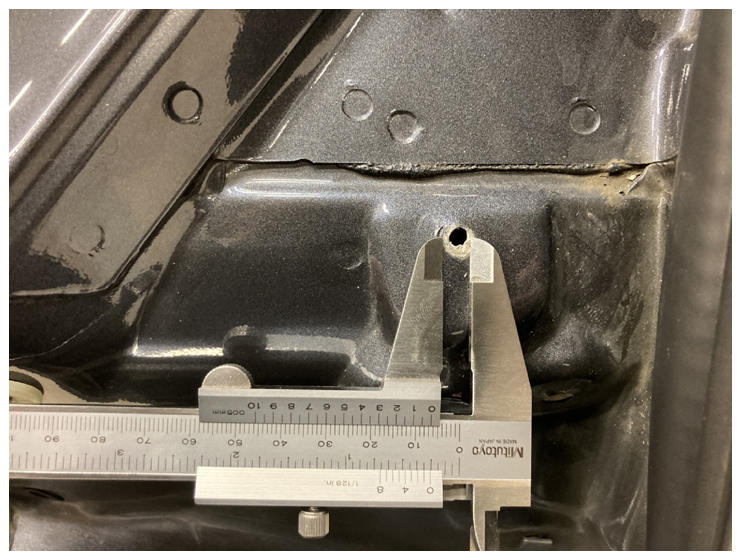 Courtesy of TESLA, INC. Courtesy of TESLA, INC.
|
- Apply a shop towel behind the LH and RH trunk side trim carpet.
NOTE:
Position the shop towel under the LH and RH lamp can panel to catch metal shavings that are created in the next steps.
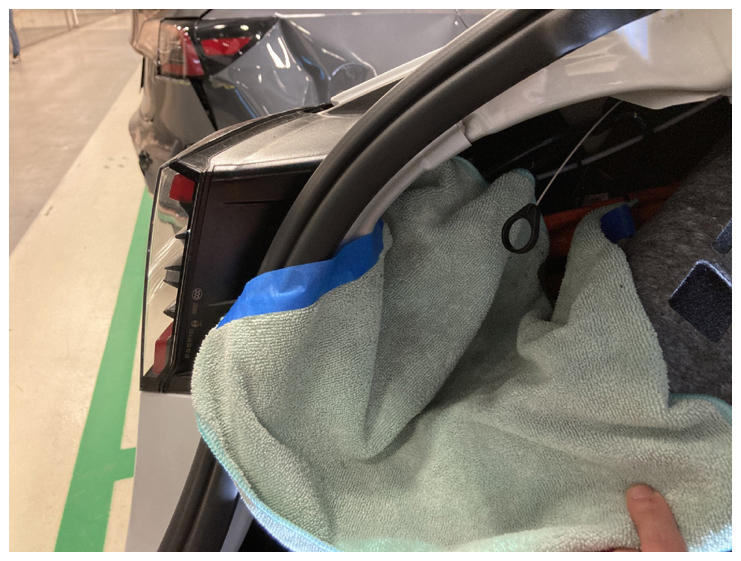 Courtesy of TESLA, INC. Courtesy of TESLA, INC.
|
- Drill out the LH and RH lamp can panel.
NOTE:
Depending on how much rust is present, drill out the hole on each lamp can panel with a 6.5-10.5 mm (1/4 - 13/32 in) drill. Try to remove as much rust as possible but do not exceed 10.5 mm (13/32 in).
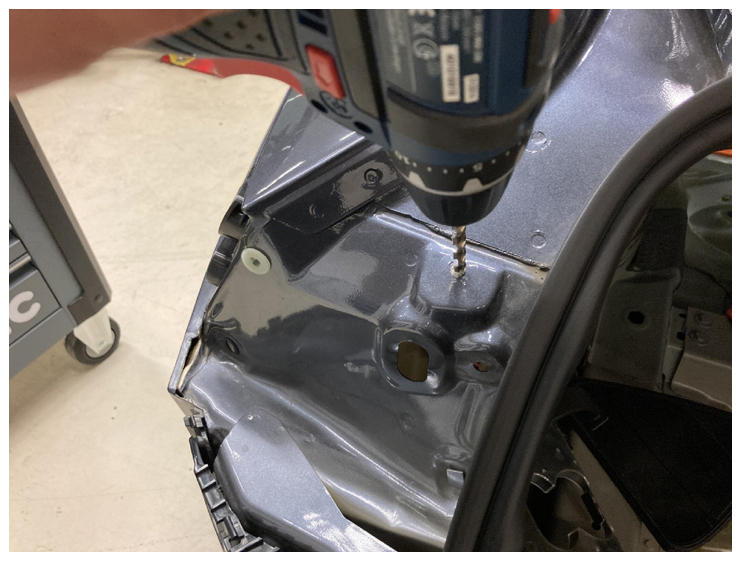 Courtesy of TESLA, INC. Courtesy of TESLA, INC.
|
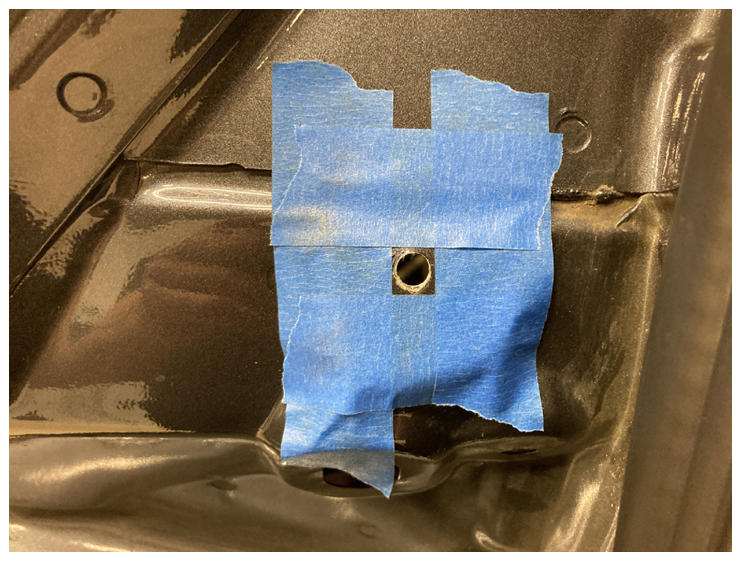
- Apply masking tape around the hole on the LH and RH lamp can panel.
 Courtesy of TESLA, INC. Courtesy of TESLA, INC.
|
- Sand out any remaining rust on the LH and RH lamp can panel.
NOTE:
Clean with an IPA wipe afterwards and allow 1 minute to dry.
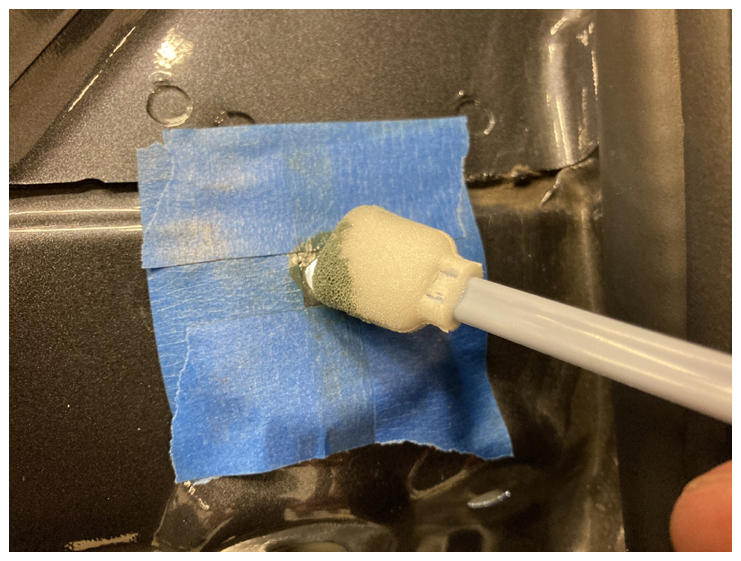
- Apply self-etching primer onto the LH and RH lamp can panel.
NOTE:
Recommend to use a brush to apply primer to prevent paint overspray on the body panel when primer spray is used.
 Courtesy of TESLA, INC. Courtesy of TESLA, INC.
|
- Allow the primer to dry for 5 minutes, and then apply a second coat of primer onto the LH and RH lamp can panel.
- Allow the second coat of primer to dry for 5 minutes, and then apply a third coat of primer to the LH and RH lamp can panel.
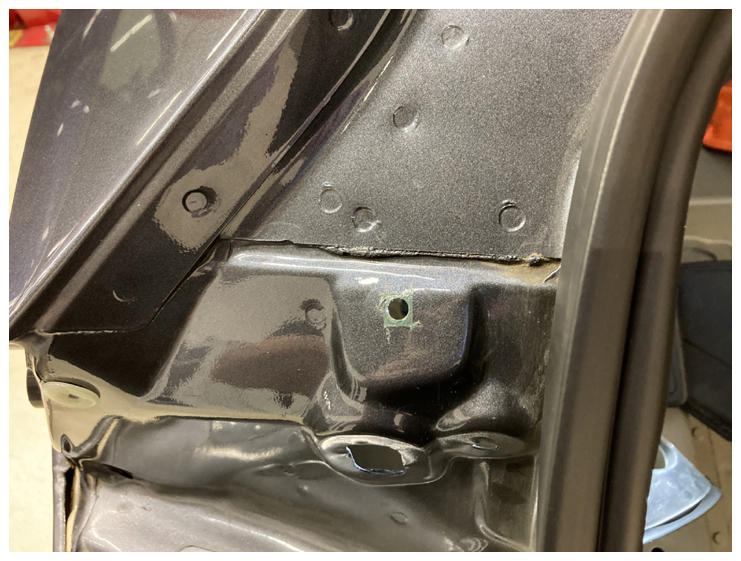
- Remove the masking tape from around the hole on the LH and RH lamp can panel.
 Courtesy of TESLA, INC. Courtesy of TESLA, INC.
|
- Install the LH and RH rear bodyside tail light to the vehicle. See TAILLIGHT - LH (REMOVE AND INSTALL)
.
NOTE:
Install new gaskets to each taillight mounting bolt (x2) and the taillight electrical connector housing (x1).
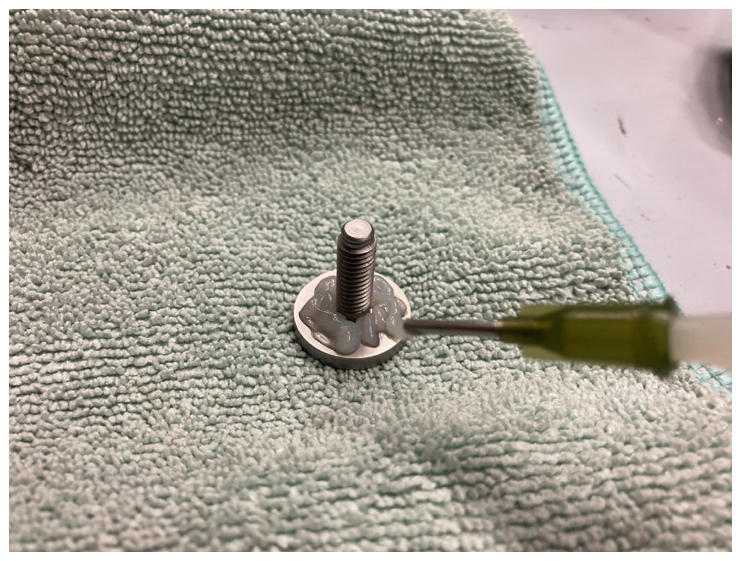
- Apply approved structural adhesive on the slotted pan head screws (x2)
NOTE:
Apply structural adhesive only on the inner side of the head of the screw. Avoid contact with the thread. Refer to the Model 3 Collision Repair Information for Approved Structural Adhesives, see.
 Courtesy of TESLA, INC. Courtesy of TESLA, INC.
|
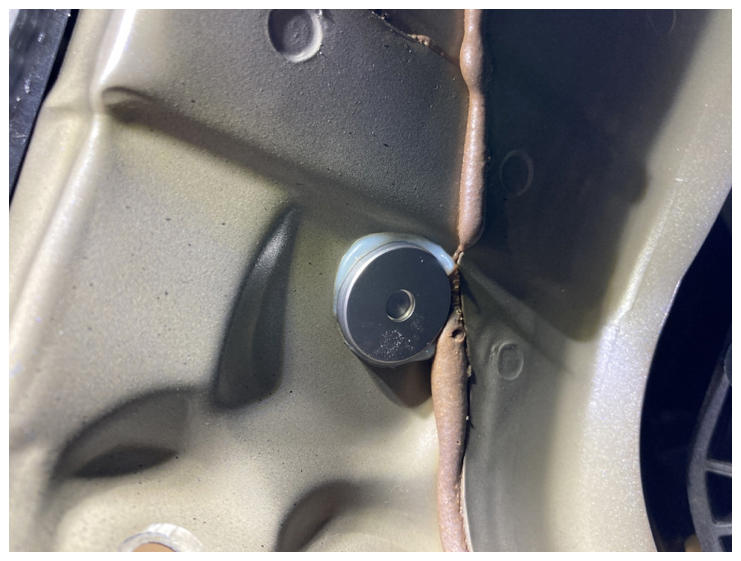
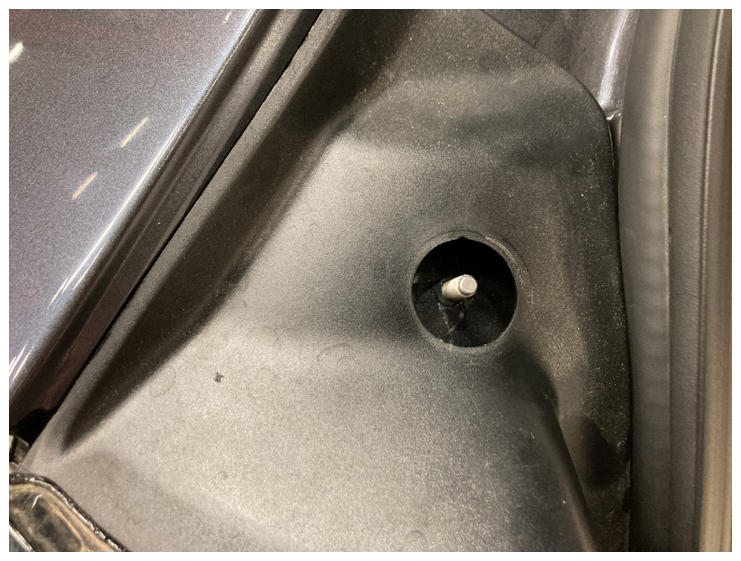
- From the inside of the lamp can panel, install the slotted pan head screw onto the LH and RH lamp can panel.
 Courtesy of TESLA, INC. Courtesy of TESLA, INC.
|
 Courtesy of TESLA, INC. Courtesy of TESLA, INC.
|
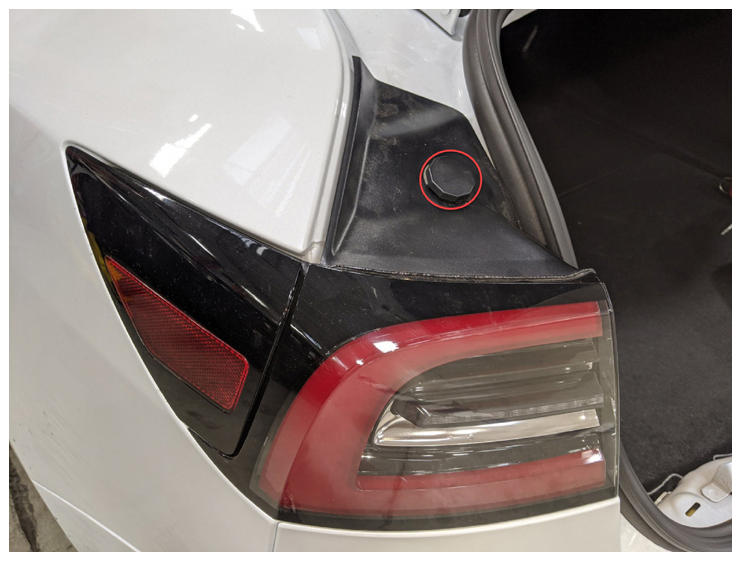
- Install the LH and RH trunk bump stop (torque 1.5 N.m/1.1 ft-lbs.).
NOTE:
Apply a light coat of Molykote M-77 on the studs.
 Courtesy of TESLA, INC. Courtesy of TESLA, INC.
|
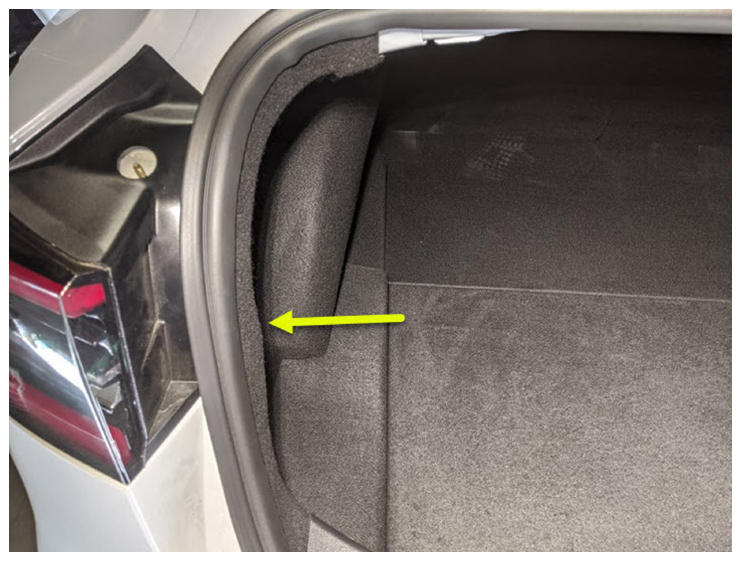
- Remove the shop towel from behind the LH and RH trunk side trim carpet.
- Install the LH and RH trunk side trim carpet.
 Courtesy of TESLA, INC. Courtesy of TESLA, INC.
|
- Install the trunk garnish onto the body.
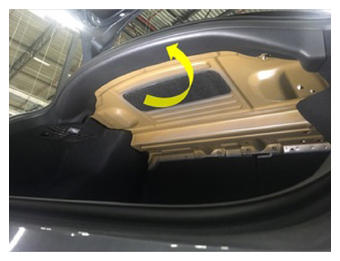 Courtesy of TESLA, INC. Courtesy of TESLA, INC.
|