- Place new main (lower dash) harness in vehicle and lay harness out to its general installation orientation inside the vehicle.
NOTE:
Recommend assistance, Take care not to damage any connectors while routing harness and moving around inside the vehicle.
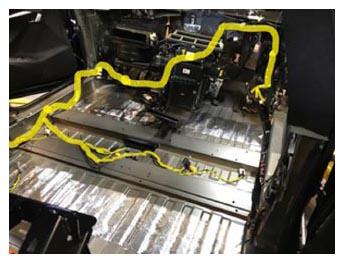 Courtesy of TESLA, INC. Courtesy of TESLA, INC.
|
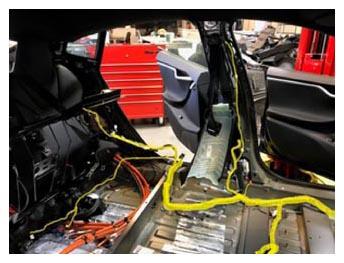 Courtesy of TESLA, INC. Courtesy of TESLA, INC.
|
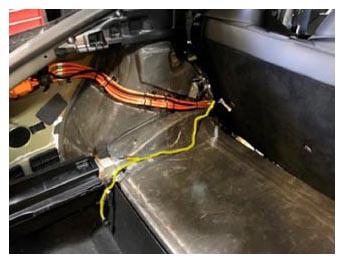 Courtesy of TESLA, INC. Courtesy of TESLA, INC.
|
- Secure the main harness clips at the RH side of the bulkhead.
NOTE:
5x clips. Re-secure the front harness clips over the main harness clips if only main body harness is being replaced.
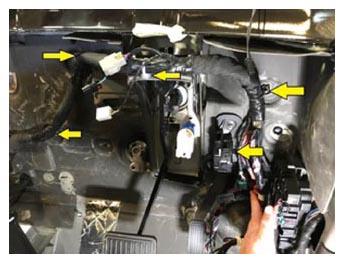 Courtesy of TESLA, INC. Courtesy of TESLA, INC.
|
- Install the front harness connectors into the connector carrier at the lower RH A pillar.
NOTE:
5x connectors, Ensure connectors are fully seated and lock into the connector carrier.
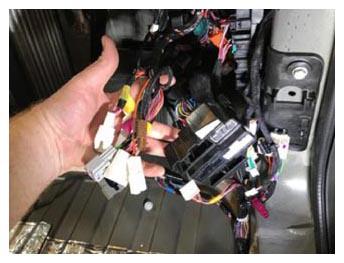 Courtesy of TESLA, INC. Courtesy of TESLA, INC.
|
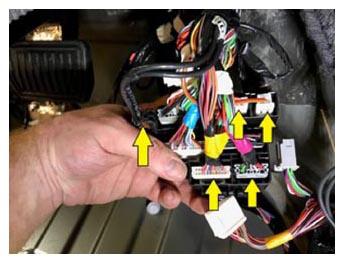 Courtesy of TESLA, INC. Courtesy of TESLA, INC.
|
- Make connections to all connectors on connector carrier at RH lower A pillar.
NOTE:
6x connectors.
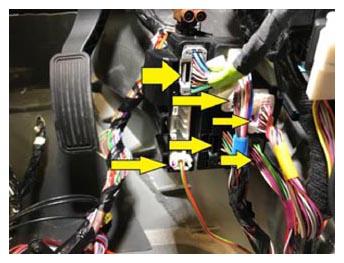 Courtesy of TESLA, INC. Courtesy of TESLA, INC.
|
- Secure the RH Lower A pillar connector carrier bracket to the in cabin fuse box.
NOTE:
2x tabs, Slide carrier on to tabs, Confirm the carrier is secured to the cabin fuse box.
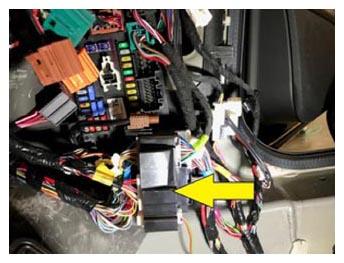 Courtesy of TESLA, INC. Courtesy of TESLA, INC.
|
- Reconnect all main harness connections at the in cabin fuse box.
NOTE:
5x connectors.
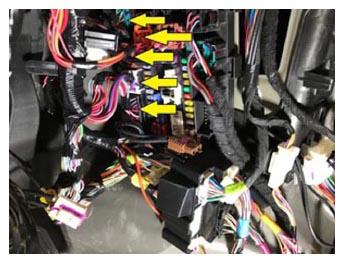 Courtesy of TESLA, INC. Courtesy of TESLA, INC.
|
- Secure main harness RH A pillar ground.
NOTE:
1x bolt, 10 mm, 9 N.m.
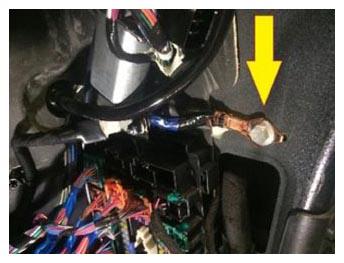 Courtesy of TESLA, INC. Courtesy of TESLA, INC.
|
- Secure connections at RH Upper A pillar.
NOTE:
1x connector, to headliner harness, 1x connector, to windshield defrost, 2x clips.
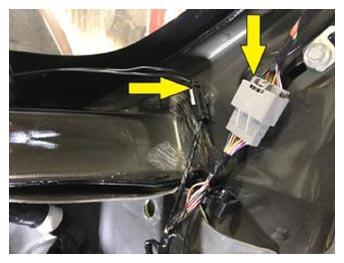 Courtesy of TESLA, INC. Courtesy of TESLA, INC.
|
- Connect accelerator pedal.
NOTE:
1x connector, Ensure locking tab is disengaged prior to making connection and then engaged after fully seating connector.
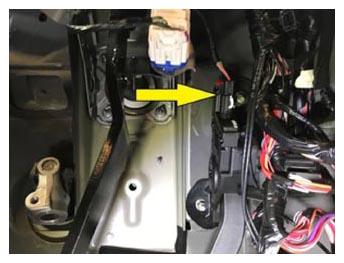 Courtesy of TESLA, INC. Courtesy of TESLA, INC.
|
- Connect the brake switch.
NOTE:
1x connector.
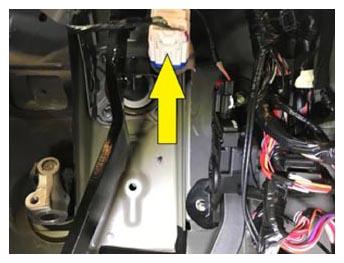 Courtesy of TESLA, INC. Courtesy of TESLA, INC.
|
- Secure main harness clips at the LH side of the bulkhead.
NOTE:
2x square clips, 2x barrel clips.
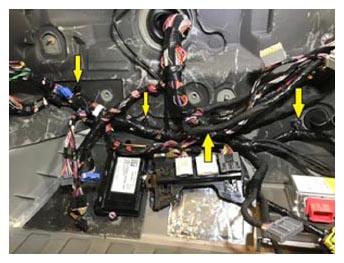 Courtesy of TESLA, INC. Courtesy of TESLA, INC.
|
- Secure harness clips near PSRCM.
NOTE:
2x fir tree clips.
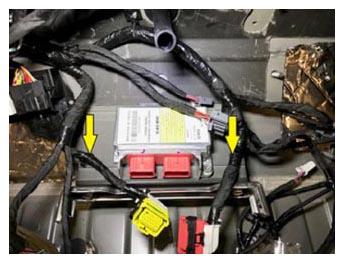 Courtesy of TESLA, INC. Courtesy of TESLA, INC.
|
- Re-secure connections at PSRCM.
NOTE:
2x connectors, Engage connector then flip locking tab to fully seat connector.
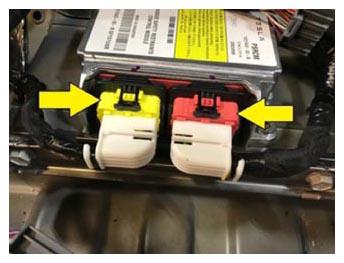 Courtesy of TESLA, INC. Courtesy of TESLA, INC.
|
- Re-secure connections at the BCM.
NOTE:
9x connectors, Ensure all connections have been made and that connectors are fully seated.
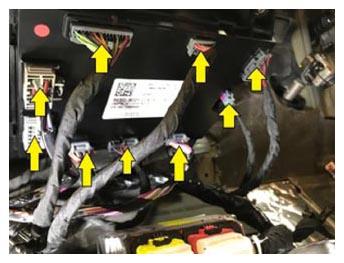 Courtesy of TESLA, INC. Courtesy of TESLA, INC.
|
- Install the fasteners securing the BCM to the bulkhead.
NOTE:
2x bolts, 10 mm, 5 N.m.
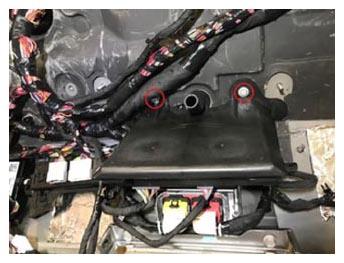 Courtesy of TESLA, INC. Courtesy of TESLA, INC.
|
- Install the dead pedal.
NOTE:
2x nuts, 13 mm, 5 N.m.
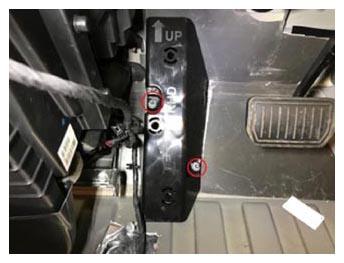 Courtesy of TESLA, INC. Courtesy of TESLA, INC.
|
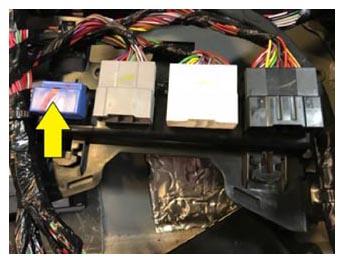
- Transfer the Blue connector cap on the LH footwell connector carrier from the old harness to the new harness.
NOTE:
Release locking tab under open side of connector cap and slide downward to release from old carrier, align tabs and slide upward to install on new harness connector carrier.
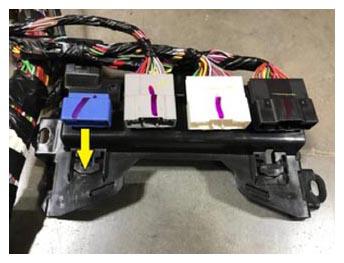 Courtesy of TESLA, INC. Courtesy of TESLA, INC.
|
 Courtesy of TESLA, INC. Courtesy of TESLA, INC.
|
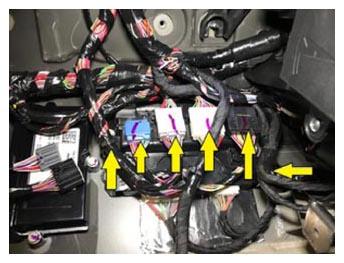
- Connect front harness connectors and secure clips to the main harness connector carrier in the LH footwell.
NOTE:
4x connectors, 2x edge clips.
 Courtesy of TESLA, INC. Courtesy of TESLA, INC.
|
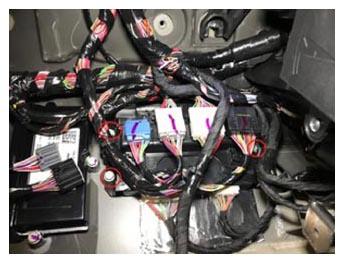
- Install the fasteners securing the connector carrier in the LH footwell area.
NOTE:
3x bolts, 10 mm, 2 N.m, If vehicle is equipped with air suspension, the air suspension control unit sits under the connector carrier and shares the same mounting points and hardware.
 Courtesy of TESLA, INC. Courtesy of TESLA, INC.
|
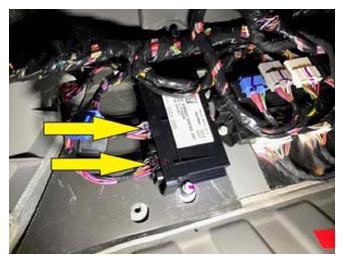
- Connect harness at Sunroof Control Unit if equipped.
NOTE:
2x connectors.
 Courtesy of TESLA, INC. Courtesy of TESLA, INC.
|
- Place the HVAC assembly back into the vehicle for installation.
NOTE:
Recommend assistance, Move all loose harness connections out of the way to prevent damage while re-installing the HVAC assembly in the vehicle.
- Route the PTC heater to the HVAC assembly for installation and slide into HVAC assembly.
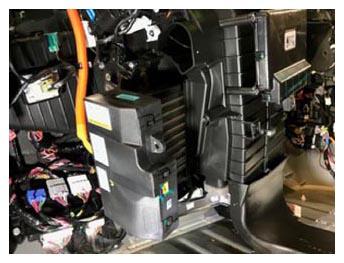 Courtesy of TESLA, INC. Courtesy of TESLA, INC.
|
- Install the fasteners securing the PTC heater to the HVAC assembly.
NOTE:
3x screws, PH2, 1 N.m.
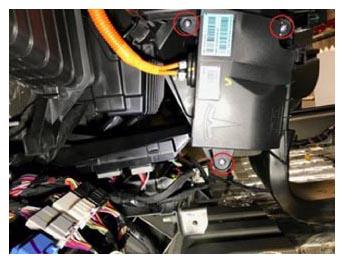 Courtesy of TESLA, INC. Courtesy of TESLA, INC.
|
- Position the HVAC assembly cross brace for installation to the HVAC assembly.
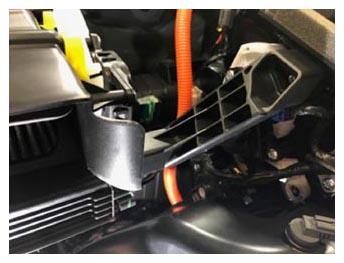 Courtesy of TESLA, INC. Courtesy of TESLA, INC.
|
- Install the fasteners securing the HVAC assembly cross brace to the HVAC assembly.
NOTE:
2x screws, PH2, 1 N.m.
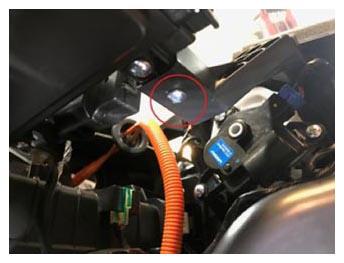 Courtesy of TESLA, INC. Courtesy of TESLA, INC.
|
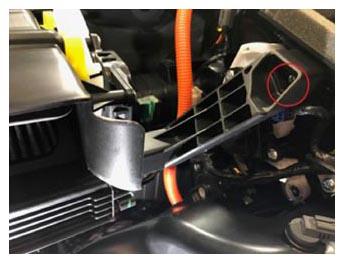 Courtesy of TESLA, INC. Courtesy of TESLA, INC.
|
- Position the HVAC assembly RH lower air duct for installation.
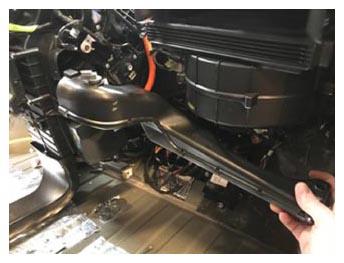 Courtesy of TESLA, INC. Courtesy of TESLA, INC.
|
- Install the fasteners securing the RH lower air duct to the HVAC assembly.
NOTE:
2x screws, PH2, 1 N.m.
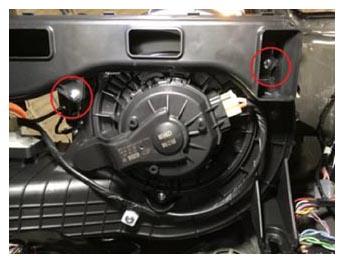 Courtesy of TESLA, INC. Courtesy of TESLA, INC.
|
- Connect sensor for RH lower air duct on HVAC assembly.
NOTE:
1x connector.
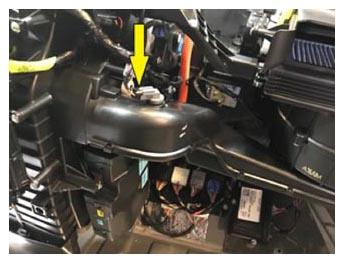 Courtesy of TESLA, INC. Courtesy of TESLA, INC.
|
- Move HVAC assembly into position for installation and secure the drain hose.
NOTE:
1x hose connection.
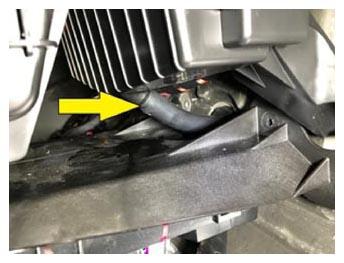 Courtesy of TESLA, INC. Courtesy of TESLA, INC.
|
- Install HVAC floor ducts.
NOTE:
3x ducts, 4x tabs, Make sure ducts are properly aligned to make a good seal and secure the ducts in place with their tabs at the studs on the floor pan.
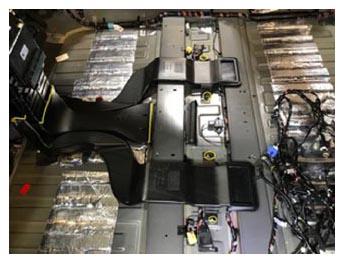 Courtesy of TESLA, INC. Courtesy of TESLA, INC.
|
- Install fasteners securing the HVAC assembly to the body.
NOTE:
5x nuts, 10 mm, 6 N.m, 2x bolts, 10 mm, 6 N.m.
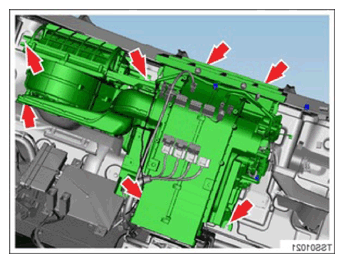 Courtesy of TESLA, INC. Courtesy of TESLA, INC.
|
- Connect HVAC blower assembly and RKE, and secure harness clip.
NOTE:
2x connectors, 2x edge clips.
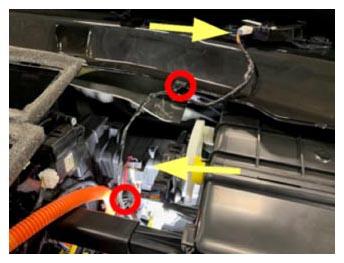 Courtesy of TESLA, INC. Courtesy of TESLA, INC.
|
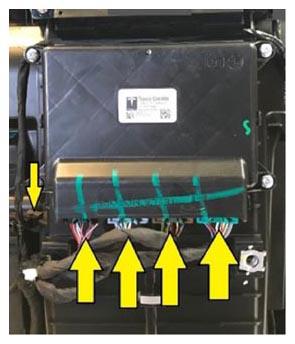
- Connect thermal controller.
NOTE:
4x connectors, 1x edge clips.
 Courtesy of TESLA, INC. Courtesy of TESLA, INC.
|
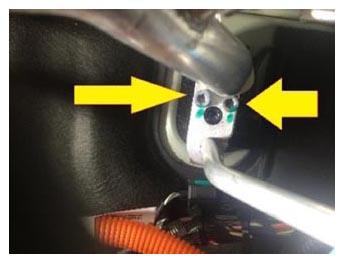
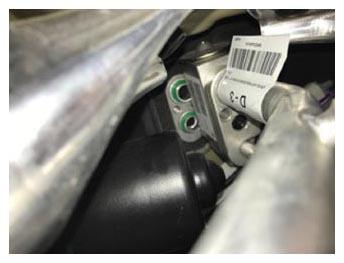
- Connect A/C Lines with TXV to evaporator at the bulkhead.
NOTE:
2x bolts, T30, 6 N.m, Install new O-rings prior to installation.
 Courtesy of TESLA, INC. Courtesy of TESLA, INC.
|
 Courtesy of TESLA, INC. Courtesy of TESLA, INC.
|
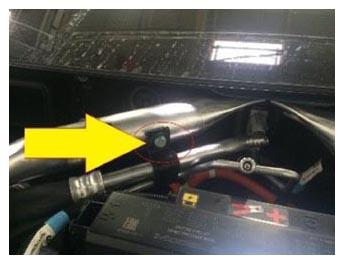
- Secure A/C line bracket at RH cross-brace.
NOTE:
1x bolt, 10 mm, 6 N.m.
 Courtesy of TESLA, INC. Courtesy of TESLA, INC.
|
- Install cowl screen panel.
NOTE:
4x push clips, 2x end tabs, Secure along base of windshield.
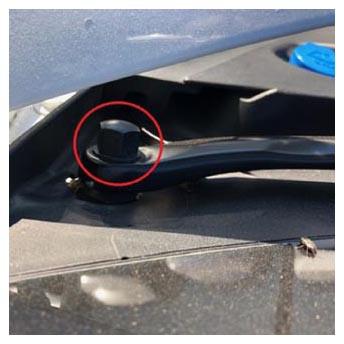
- Install LH side wiper arm.
NOTE:
1x nut, 17 mm, 31 N.m.
 Courtesy of TESLA, INC. Courtesy of TESLA, INC.
|
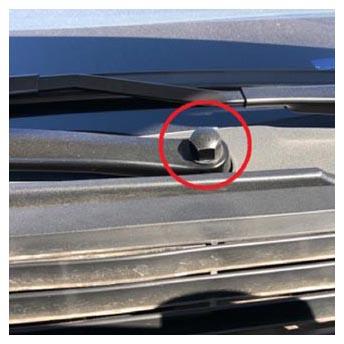
- Install RH side wiper arm.
NOTE:
1x nut, 17 mm, 31 N.m.
 Courtesy of TESLA, INC. Courtesy of TESLA, INC.
|
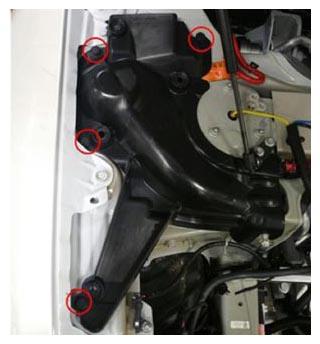
- Install RH shock tower cover.
NOTE:
4x push clips.
 Courtesy of TESLA, INC. Courtesy of TESLA, INC.
|
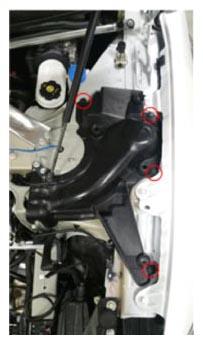
- Install LH shock tower cover.
NOTE:
4x push clips.
 Courtesy of TESLA, INC. Courtesy of TESLA, INC.
|
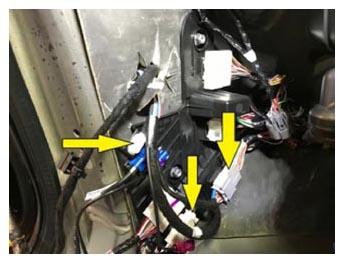
- Connect A pillar harness connectors to main harness connectors at LH lower A pillar harness carrier.
NOTE:
2x connectors, 1x clip.
 Courtesy of TESLA, INC. Courtesy of TESLA, INC.
|
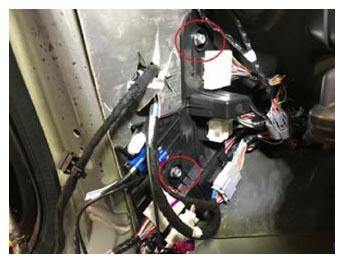
- Install the fasteners securing the LH lower A pillar main harness connector carrier to the LH lower A pillar.
NOTE:
2x nuts, 10 mm, 5 N.m.
 Courtesy of TESLA, INC. Courtesy of TESLA, INC.
|
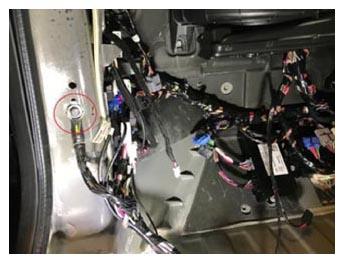
- Secure the main harness ground to the LH Lower A pillar.
NOTE:
1x bolt, 10 mm, 9 N.m.
 Courtesy of TESLA, INC. Courtesy of TESLA, INC.
|
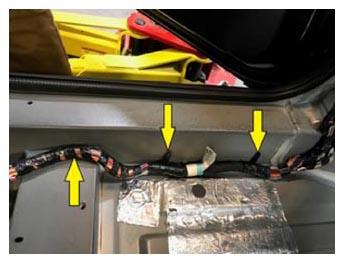
- Install the harness clips along the LH front sill panel.
NOTE:
3x clips.
 Courtesy of TESLA, INC. Courtesy of TESLA, INC.
|
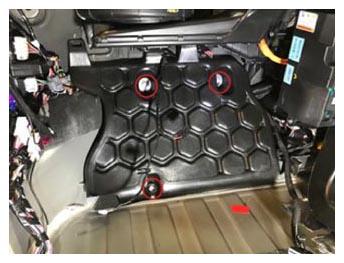
- Install LH footwell harness and connector cover.
NOTE:
3x bolts, 10 mm, 4 N.m.
 Courtesy of TESLA, INC. Courtesy of TESLA, INC.
|
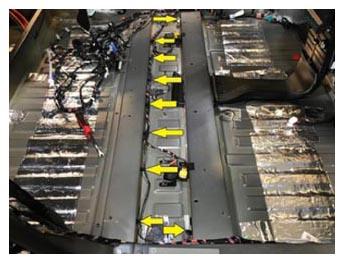
- Secure the main harness clips along the center of the vehicle between B pillars.
NOTE:
9x clips.
 Courtesy of TESLA, INC. Courtesy of TESLA, INC.
|
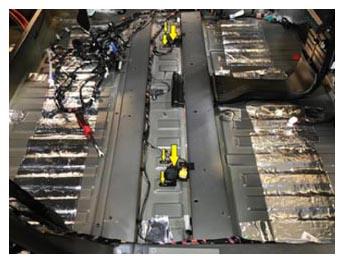
- Secure main harness seat connectors to brackets and secure brackets to floor pan.
NOTE:
6x clips.
 Courtesy of TESLA, INC. Courtesy of TESLA, INC.
|
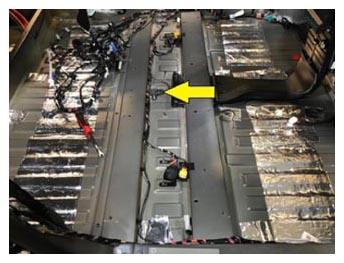
- Connect the main harness to the Yaw rate sensor.
NOTE:
1x connector.
 Courtesy of TESLA, INC. Courtesy of TESLA, INC.
|
- Connect the main harness to the pyrotechnic at the LH seatbelt pretensioner.
NOTE:
1x connector.
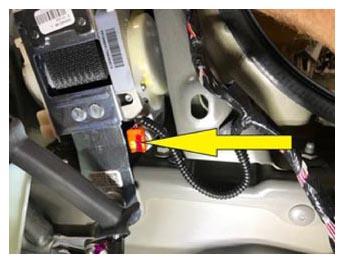 Courtesy of TESLA, INC. Courtesy of TESLA, INC.
|
- Connect the main harness to the harness inside the LH B pillar.
NOTE:
1x connector, 1x clip, after securing connector tuck harness inside of B pillar and secure with harness clip.
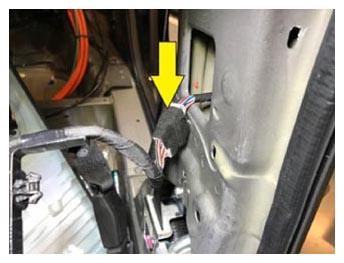 Courtesy of TESLA, INC. Courtesy of TESLA, INC.
|
- Secure the clips for the LH B pillar camera portion of the main harness.
NOTE:
5x clips.
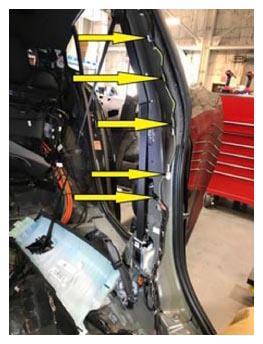 Courtesy of TESLA, INC. Courtesy of TESLA, INC.
|
- Route the B pillar camera portion of the harness inside the B pillar.
NOTE:
1x connector.
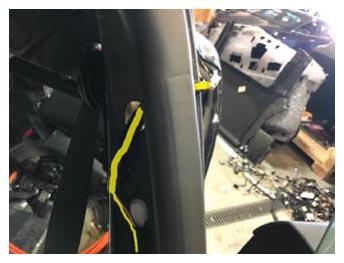 Courtesy of TESLA, INC. Courtesy of TESLA, INC.
|
- Clean LH B-pillar area with IPA wipe and allow to dry.
NOTE:
Remove any remaining adhesive.
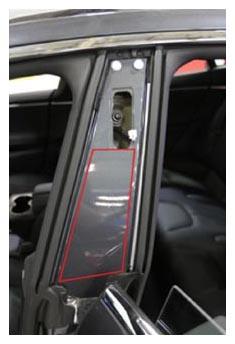 Courtesy of TESLA, INC. Courtesy of TESLA, INC.
|
- Remove lower B-pillar applique cover from new applique.
- Peel backing from double sided tape on LH B-pillar applique.
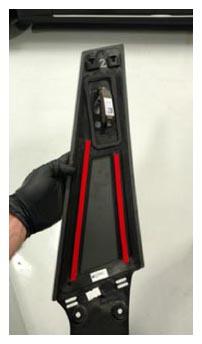 Courtesy of TESLA, INC. Courtesy of TESLA, INC.
|
- Connect camera and install LH side applique.
NOTE:
1x connector, Slide applique up into clips and then press into B-pillar to secure double sided tape.
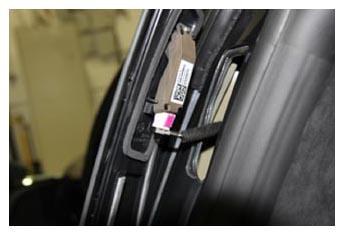 Courtesy of TESLA, INC. Courtesy of TESLA, INC.
|
- Reinstall screws securing LH side applique.
NOTE:
2x screws, T25, 4 N.m.
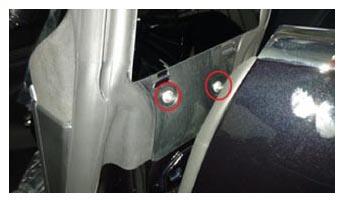 Courtesy of TESLA, INC. Courtesy of TESLA, INC.
|
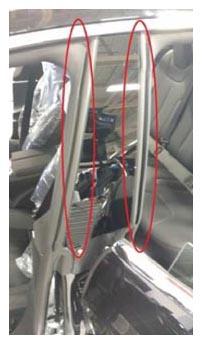
- Secure LH B-pillar seals to applique.
NOTE:
Use P-80 emulsifier to assist with seal installation.
 Courtesy of TESLA, INC. Courtesy of TESLA, INC.
|
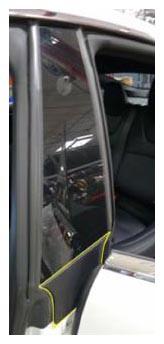
- Reinstall cover over bottom of LH B-pillar applique.
NOTE:
Make sure all clips are fully seated.
 Courtesy of TESLA, INC. Courtesy of TESLA, INC.
|
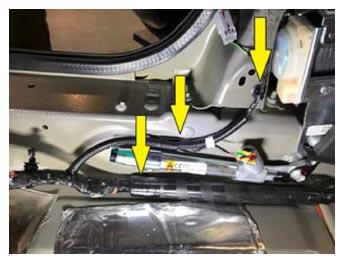
- Secure main harness clips at LH lower portion of B pillar.
NOTE:
3x clips.
 Courtesy of TESLA, INC. Courtesy of TESLA, INC.
|
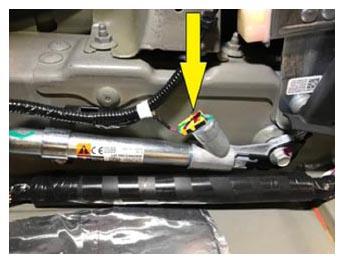
- Connect LH lap belt pre tensioner pyrotechnic.
NOTE:
1x connector.
 Courtesy of TESLA, INC. Courtesy of TESLA, INC.
|
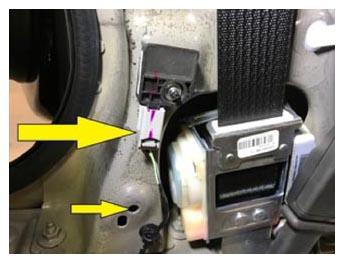
- Connect LH B pillar side impact sensor.
NOTE:
1x connector, 1x clip.
 Courtesy of TESLA, INC. Courtesy of TESLA, INC.
|
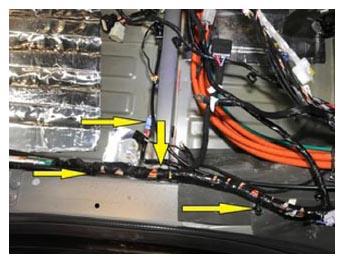
- Secure harness clips to body at lower C pillar area.
NOTE:
4x clips.
 Courtesy of TESLA, INC. Courtesy of TESLA, INC.
|
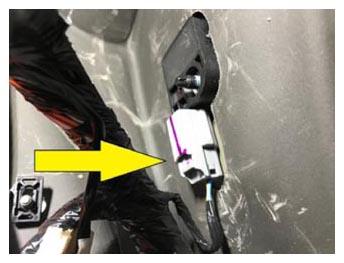
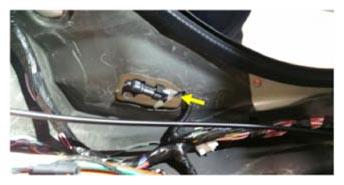
- Connect the C pillar impact sensor.
NOTE:
1x connector.
 Courtesy of TESLA, INC. Courtesy of TESLA, INC.
|
 Courtesy of TESLA, INC. Courtesy of TESLA, INC.
|
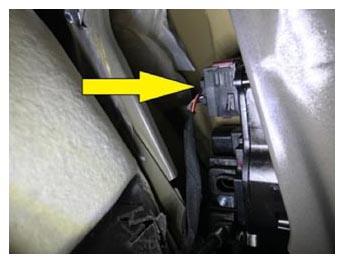
- Pass the LH rear door latch connector through the NVH padding and connect the LH rear door latch.
NOTE:
1x connector.
 Courtesy of TESLA, INC. Courtesy of TESLA, INC.
|
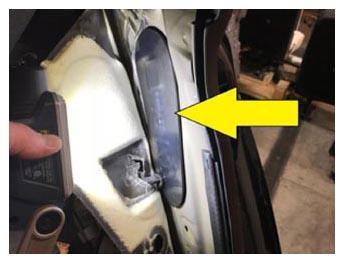
- Install the LH rear door latch closeout cover.
NOTE:
1x cover.
 Courtesy of TESLA, INC. Courtesy of TESLA, INC.
|
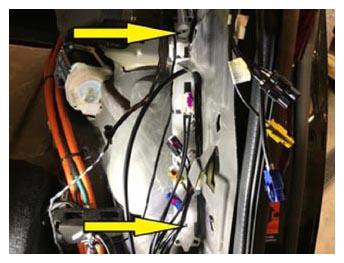
- Secure the main harness connector carrier at the C-pillar.
NOTE:
2x clips.
 Courtesy of TESLA, INC. Courtesy of TESLA, INC.
|
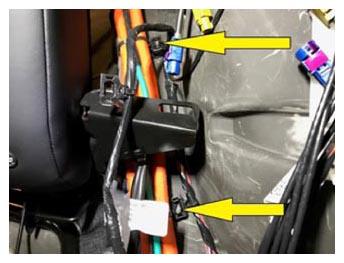
- Secure main harness clips at the C-pillar.
NOTE:
2x clips, Be sure to re-install HV harness barrel clips over main harness clips.
 Courtesy of TESLA, INC. Courtesy of TESLA, INC.
|
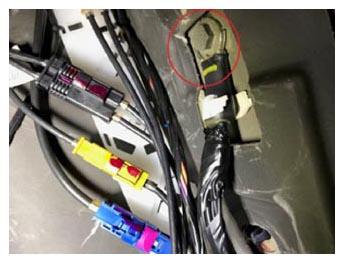
- Secure main harness ground at C-pillar.
NOTE:
1x bolt, 10 mm, 9 N.m.
 Courtesy of TESLA, INC. Courtesy of TESLA, INC.
|
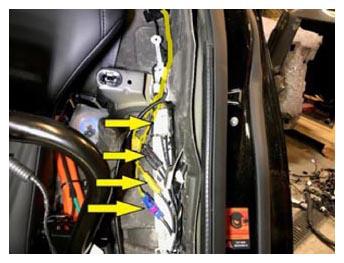
- Connect rear harness connectors to main harness at C-pillar connector carrier.
NOTE:
4x connector, coaxial, Ensure harnesses are routed and secure in the wiring holds on the body and harness carrier.
 Courtesy of TESLA, INC. Courtesy of TESLA, INC.
|
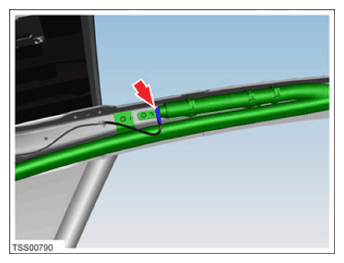
- Route the curtain airbag portion of the main harness up the C-pillar and behind the headliner and connect curtain airbag.
NOTE:
1x connector, 1x fir tree clip, 1x edge clip, Ensure harness is routed behind the deployment path of the curtain airbag.
 Courtesy of TESLA, INC. Courtesy of TESLA, INC.
|
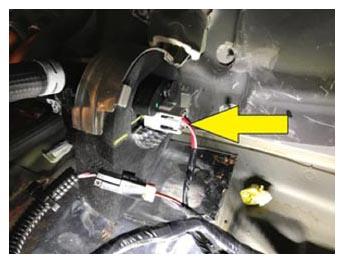
- Connect coolant pump under 2nd row seat bottom frame.
NOTE:
1x connector.
 Courtesy of TESLA, INC. Courtesy of TESLA, INC.
|
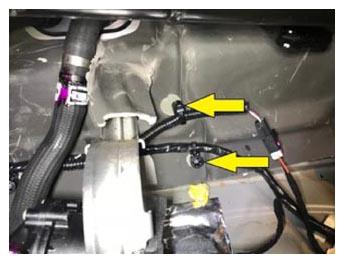
- Secure the main harness clips to the body near the coolant pump.
NOTE:
2x barrel clips, Be sure to route main harness underneath coolant pump bracket, if necessary the coolant pump and surrounding foam can be slid out from under bracket to create room for harness routing.
 Courtesy of TESLA, INC. Courtesy of TESLA, INC.
|
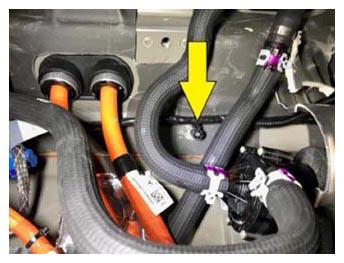
- Secure the next main harness clip between the 2 coolant hoses to the charger.
NOTE:
1x barrel clip, Be sure to route harness underneath coolant hoses and HV harness.
 Courtesy of TESLA, INC. Courtesy of TESLA, INC.
|
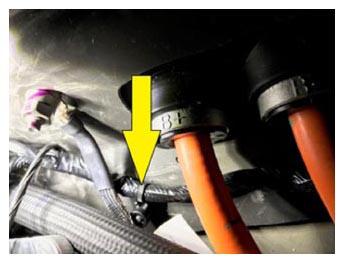
- Secure the next main harness clip below the ground cable for the charger.
NOTE:
1x barrel clip, Be sure to route main harness underneath HV harness.
 Courtesy of TESLA, INC. Courtesy of TESLA, INC.
|
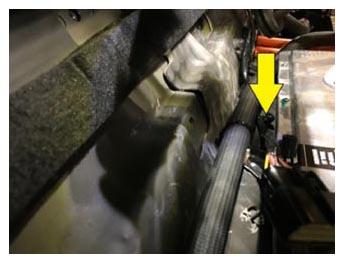
- Secure the next main harness clip between the charger and the body.
NOTE:
1x barrel clip.
 Courtesy of TESLA, INC. Courtesy of TESLA, INC.
|
- Connect the main harness connector between the charger and the body.
NOTE:
1x connector.
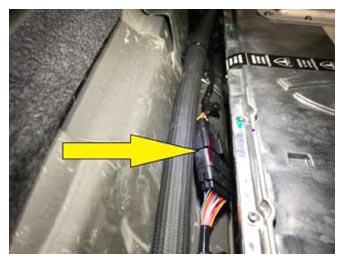 Courtesy of TESLA, INC. Courtesy of TESLA, INC.
|
- Secure the harness clip nearest the connector between the charger an the body.
NOTE:
1x barrel clip.
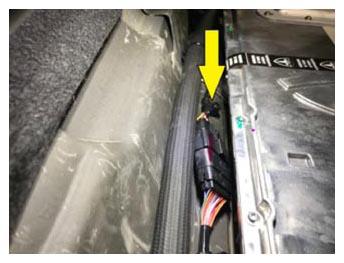 Courtesy of TESLA, INC. Courtesy of TESLA, INC.
|
- Connect the second row RKE antenna.
NOTE:
1x connector.
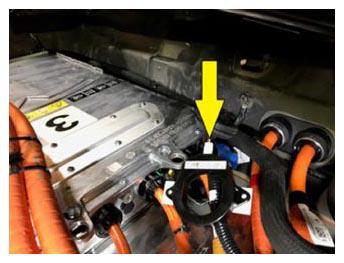 Courtesy of TESLA, INC. Courtesy of TESLA, INC.
|
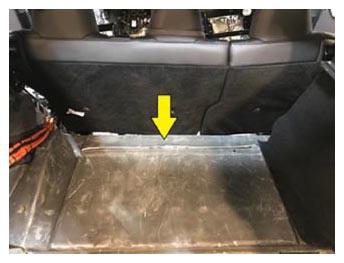
- Route and secure second row RKE antenna under the rubber NVH mat below seat backs.
NOTE:
2x dual lock strips.
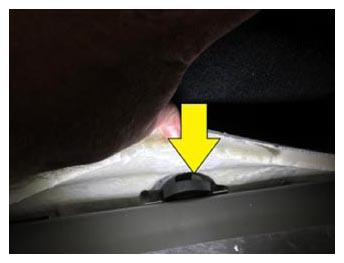 Courtesy of TESLA, INC. Courtesy of TESLA, INC.
|
 Courtesy of TESLA, INC. Courtesy of TESLA, INC.
|
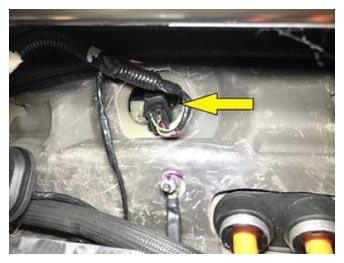
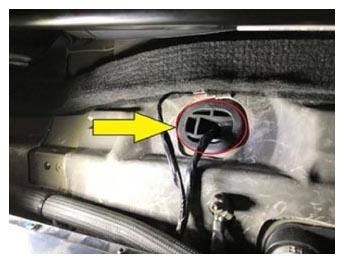
- Pass the HV Battery LV logic connectors through the opening in the body below the second row seat frame and secure rubber grommet seal in place.
NOTE:
2x connectors, 1x grommet, Ensure grommet is fully seated in body cavity to prevent water ingress.
 Courtesy of TESLA, INC. Courtesy of TESLA, INC.
|
 Courtesy of TESLA, INC. Courtesy of TESLA, INC.
|
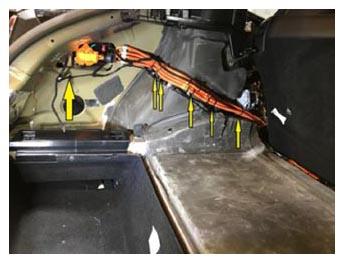
- Secure main harness clips in LH trunk area.
NOTE:
6x clips, Be sure to re-install HV harness barrel clips over main harness clips.
 Courtesy of TESLA, INC. Courtesy of TESLA, INC.
|
- Connect charge port.
NOTE:
1x connector.
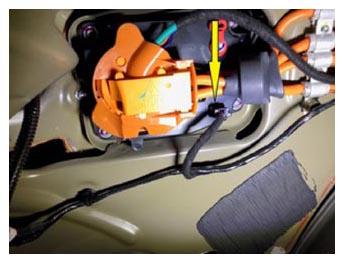 Courtesy of TESLA, INC. Courtesy of TESLA, INC.
|
- Connect LH tail light.
NOTE:
1x connector.
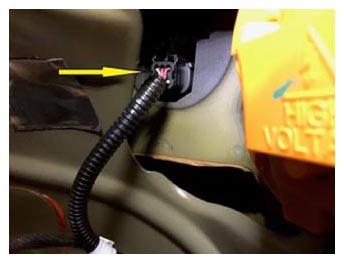 Courtesy of TESLA, INC. Courtesy of TESLA, INC.
|
- Remove the wheel chock and push the vehicle in position to be lifted by hoist then reinstall wheel chock.
NOTE:
Recommend assistance, Ensure doors are clear of the lift posts before pushing forward, flip the door latches to closed position to prevent doors from latching while vehicle is powered down.
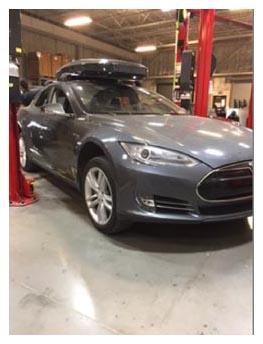 Courtesy of TESLA, INC. Courtesy of TESLA, INC.
|
- Position lift posts under vehicle lift points.
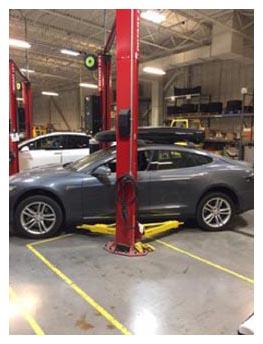 Courtesy of TESLA, INC. Courtesy of TESLA, INC.
|
- Raise vehicle fully and lower onto locks.
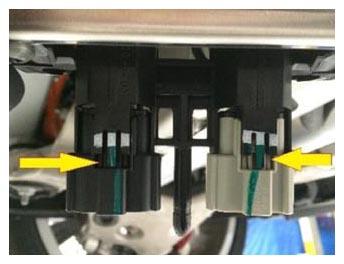
- Install the HV battery LV logic connectors to the LV rapid mate bracket.
NOTE:
2x tabs, make sure the appropriate connector goes to the correct side of the bracket prior to installation, Ensure the bracket connector hold down tabs are not damage otherwise the harness will not be able to release from battery pack in future service scenarios.
 Courtesy of TESLA, INC. Courtesy of TESLA, INC.
|
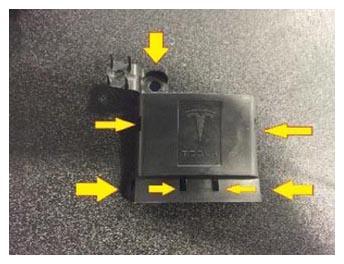
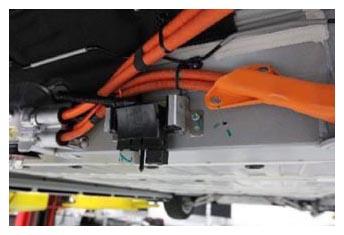
- Install the HV battery LV logic connector cover to the bracket.
NOTE:
6x tabs, 1x edge clip.
 Courtesy of TESLA, INC. Courtesy of TESLA, INC.
|
 Courtesy of TESLA, INC. Courtesy of TESLA, INC.
|
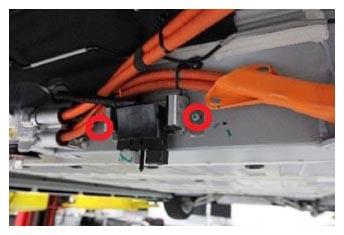
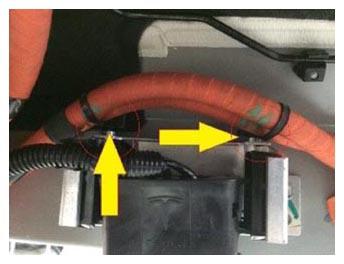
- Install bolts and Rear DU HV cable clips to HV battery LV logic connector bracket.
NOTE:
2x bolts, 10 mm, 8 N.m, 3x clips.
 Courtesy of TESLA, INC. Courtesy of TESLA, INC.
|
 Courtesy of TESLA, INC. Courtesy of TESLA, INC.
|
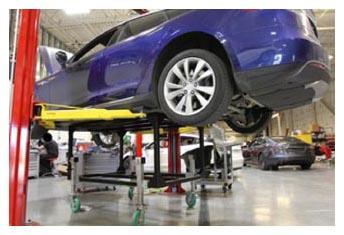
- Position HV battery underneath vehicle.
 Courtesy of TESLA, INC. Courtesy of TESLA, INC.
|
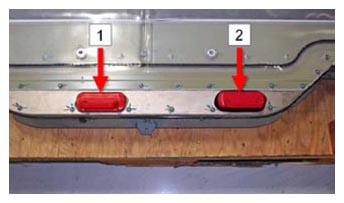
- Remove covers or tape from LV and HV rapid mates.
 Courtesy of TESLA, INC. Courtesy of TESLA, INC.
|
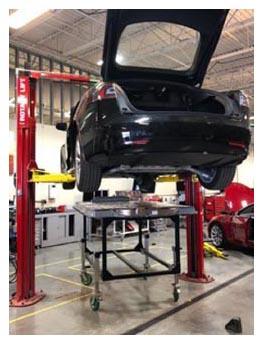
- Lower vehicle onto pack.
NOTE:
Align rapid mate connections before lowering fully, Recommend assistance.
 Courtesy of TESLA, INC. Courtesy of TESLA, INC.
|
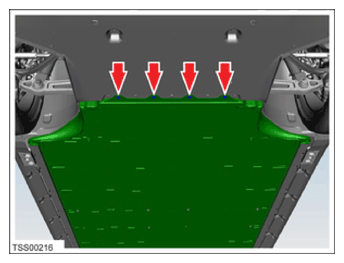
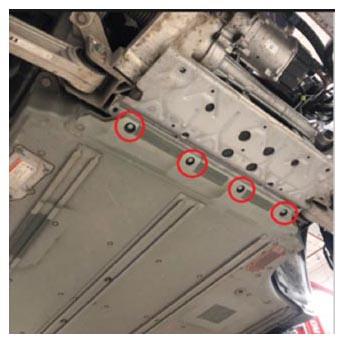
- Loosely install 4 new front bolts for HV battery.
NOTE:
4x patch bolts, 13 mm, 30 N.m, Install new patch bolts, Torque at later step.
 Courtesy of TESLA, INC. Courtesy of TESLA, INC.
|
 Courtesy of TESLA, INC. Courtesy of TESLA, INC.
|
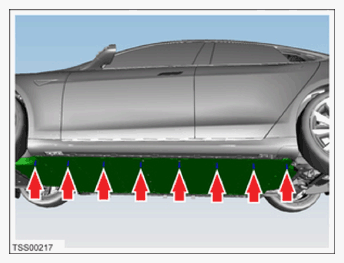
- Loosely install LH rocker bolts.
NOTE:
8x patch bolts, 13 mm, 55 N.m, Install new patch bolts, Torque at later step.
 Courtesy of TESLA, INC. Courtesy of TESLA, INC.
|
- Loosely install RH rocker bolts.
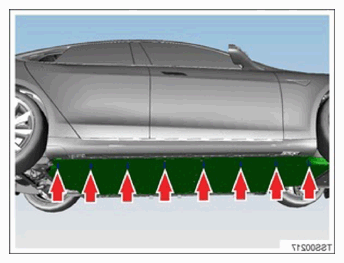
NOTE:
8x patch bolts, 13 mm, 55 N.m, Install new patch bolts, Torque at later step.
 Courtesy of TESLA, INC. Courtesy of TESLA, INC.
|
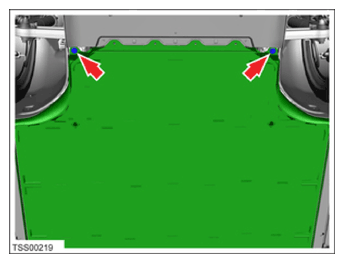
- Loosely install 21 mm bolts at front of HV battery hand tight.
NOTE:
2x bolts, 21 mm, 115 N.m, Install new bolts, Torque at later step.
 Courtesy of TESLA, INC. Courtesy of TESLA, INC.
|
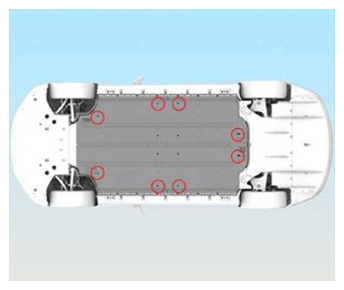
- Loosely install eight outer center bolts hand tight.
NOTE:
8x patch bolts, E12, 38 N.m, Install new patch bolts, Torque at later step.
 Courtesy of TESLA, INC. Courtesy of TESLA, INC.
|
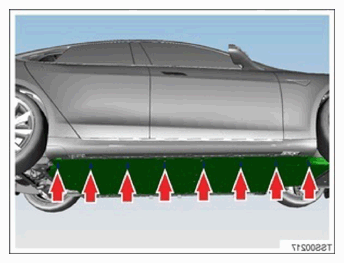
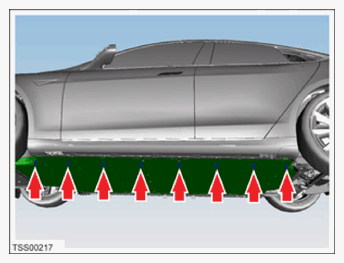
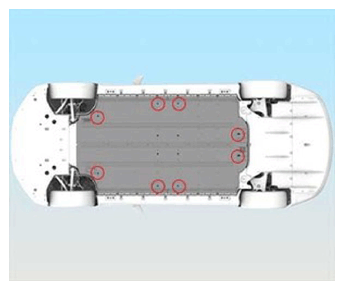
- Torque rocker HV battery bolts on both sides.
NOTE:
16x patch bolts, 13 mm, 55 N.m.
 Courtesy of TESLA, INC. Courtesy of TESLA, INC.
|
 Courtesy of TESLA, INC. Courtesy of TESLA, INC.
|
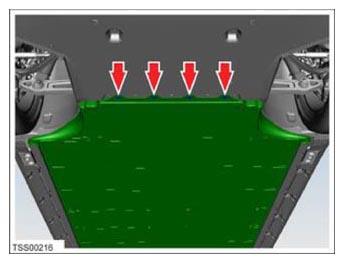
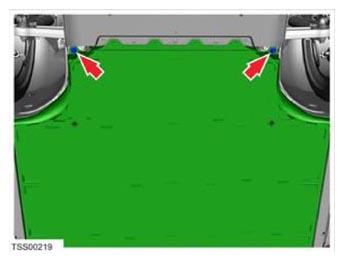
- Torque remaining HV battery bolts.
NOTE:
8x patch bolts, E12, 38 N.m, 2x bolts, 21 mm, 115 N.m, 4x patch bolts, 13 mm, 30 N.m.
 Courtesy of TESLA, INC. Courtesy of TESLA, INC.
|
 Courtesy of TESLA, INC. Courtesy of TESLA, INC.
|
 Courtesy of TESLA, INC. Courtesy of TESLA, INC.
|
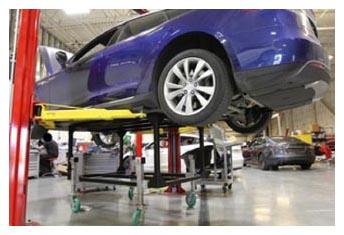
- Raise vehicle and remove battery table.
NOTE:
Recommend assistance.
 Courtesy of TESLA, INC. Courtesy of TESLA, INC.
|
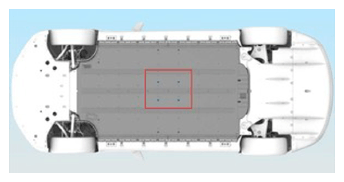
- Install inner center HV battery bolts with battery powered drill.
NOTE:
4x patch bolts, E12, 38 N.m, Install new patch bolts, Do not over tighten bolts.
 Courtesy of TESLA, INC. Courtesy of TESLA, INC.
|
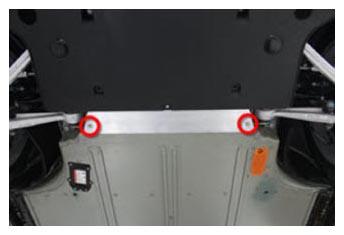
- Install front lower bash plate extrusion.
NOTE:
2x patch bolts, T30, 16 N.m, Install new patch bolts.
 Courtesy of TESLA, INC. Courtesy of TESLA, INC.
|
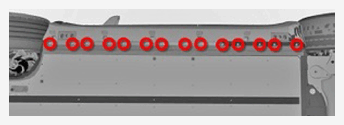
- Install ski side covers onto RH side of HV battery.
NOTE:
14x clips, 3x covers.
 Courtesy of TESLA, INC. Courtesy of TESLA, INC.
|
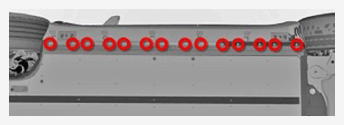
- Install ski side covers onto LH side of HV battery.
NOTE:
14x clips, 3x covers.
 Courtesy of TESLA, INC. Courtesy of TESLA, INC.
|
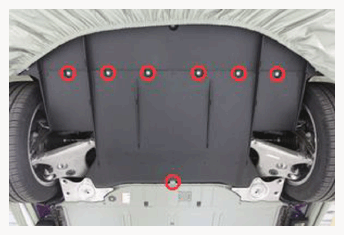
- Place mid-aero shield for installation.
 Courtesy of TESLA, INC. Courtesy of TESLA, INC.
|
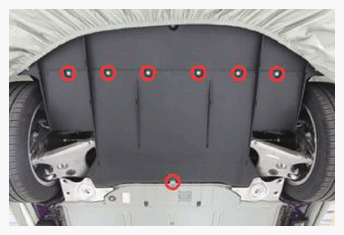
- Position mid aero shield and install bolts securing mid aero shield to vehicle.
NOTE:
7x bolts, 10 mm, 4 N.m.
 Courtesy of TESLA, INC. Courtesy of TESLA, INC.
|
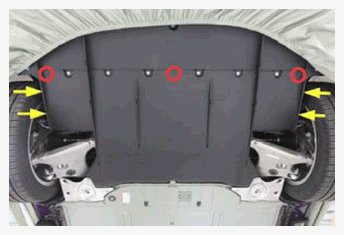
- Install clips securing mid aero shield to vehicle.
NOTE:
7x push clips.
 Courtesy of TESLA, INC. Courtesy of TESLA, INC.
|
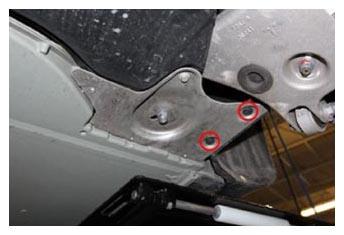
- Install clips securing RH shear plate to wheel fairing.
NOTE:
2x push clips.
 Courtesy of TESLA, INC. Courtesy of TESLA, INC.
|
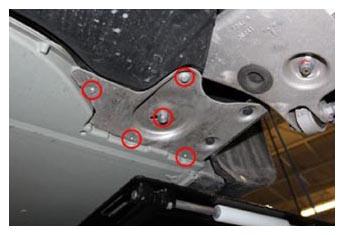
- Install screws, bolt, and nut securing RH shear plate to vehicle.
NOTE:
3x screws, T25, 6 N.m, 1x bolt, 10 mm, 4 N.m, 1x nut, 15 mm, 35 N.m, Install new nut.
 Courtesy of TESLA, INC. Courtesy of TESLA, INC.
|
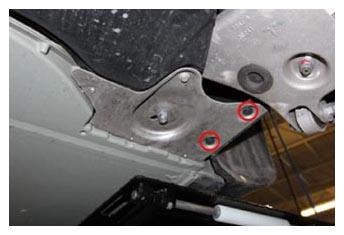
- Install clips securing RH shear plate to wheel fairing.
NOTE:
2x push clips.
 Courtesy of TESLA, INC. Courtesy of TESLA, INC.
|
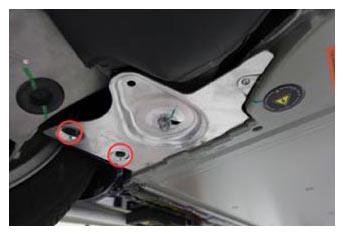
- Install clips securing LH shear plate to wheel fairing.
NOTE:
2x push clips.
 Courtesy of TESLA, INC. Courtesy of TESLA, INC.
|
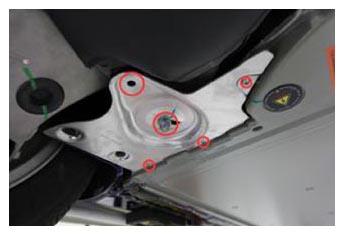
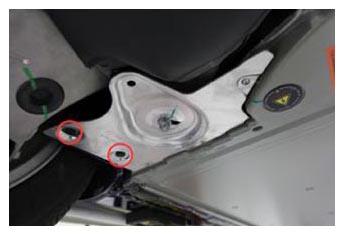
- Install screws, bolt, and nut securing LH shear plate to vehicle.
NOTE:
3x screws, T25, 6 N.m, 1x bolt, 10 mm, 4 N.m, 1x nut, 15 mm, 35 N.m, Install new nut.
 Courtesy of TESLA, INC. Courtesy of TESLA, INC.
|
- Install clips securing LH shear plate to wheel fairing.
NOTE:
2x push clips.
 Courtesy of TESLA, INC. Courtesy of TESLA, INC.
|
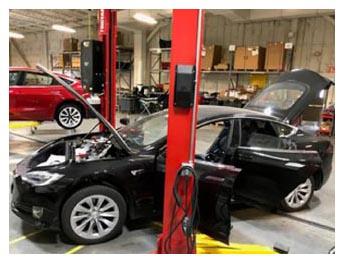
- Lower vehicle until tires are touching the ground.
- Roll the vehicle back away from the lift posts and install wheel chocks.
NOTE:
Recommend assistance, Done so doors can be fully opened to allow more room to work.
 Courtesy of TESLA, INC. Courtesy of TESLA, INC.
|
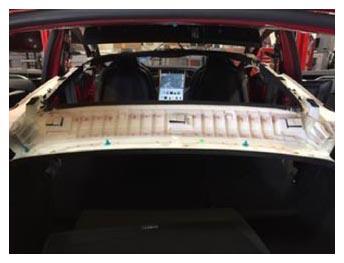
- Install rear portion of headliner into position and clip into place.
NOTE:
5x clips, 3x velcro strips, Replace any damaged or missing clips.
 Courtesy of TESLA, INC. Courtesy of TESLA, INC.
|
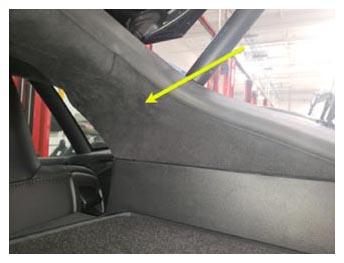
- Install RH upper C-pillar trim.
NOTE:
4x clips.
 Courtesy of TESLA, INC. Courtesy of TESLA, INC.
|
- Install RH rear C-pillar.
NOTE:
1x screw, T25, 3 N.m, 4x clips.
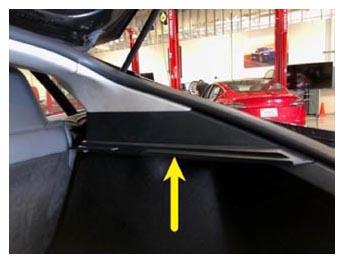 Courtesy of TESLA, INC. Courtesy of TESLA, INC.
|
- Install the LH trunk side trim back onto the body of the vehicle.
NOTE:
1x fir tree clip.
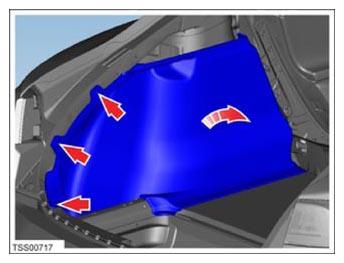 Courtesy of TESLA, INC. Courtesy of TESLA, INC.
|
- Install trunk floor carpet.
NOTE:
4x clips.
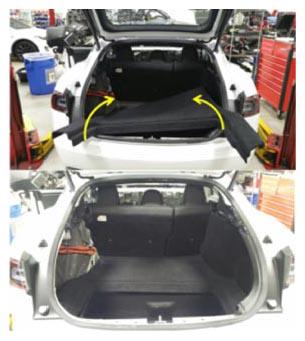 Courtesy of TESLA, INC. Courtesy of TESLA, INC.
|
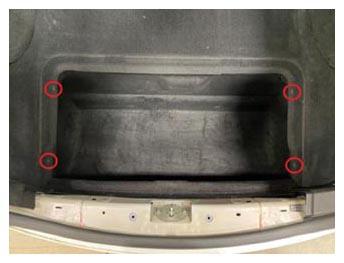 Courtesy of TESLA, INC. Courtesy of TESLA, INC.
|
- Install LH lower C-pillar.
NOTE:
4x clips, 2x push clips.
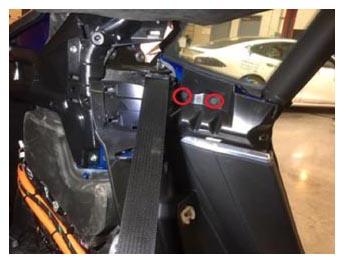 Courtesy of TESLA, INC. Courtesy of TESLA, INC.
|
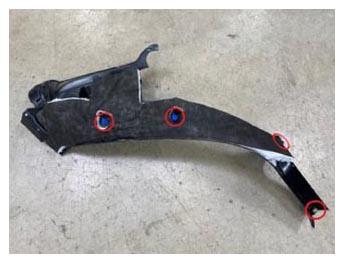 Courtesy of TESLA, INC. Courtesy of TESLA, INC.
|
- Install the mid C-Pillar trim.
NOTE:
4x clips.
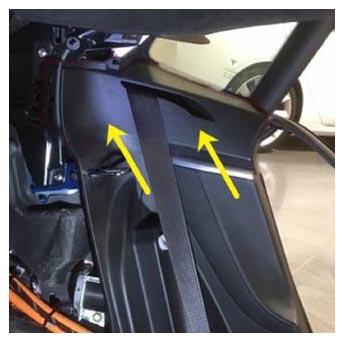 Courtesy of TESLA, INC. Courtesy of TESLA, INC.
|
- Install the LH rear seat back bolster.
NOTE:
1x clip.
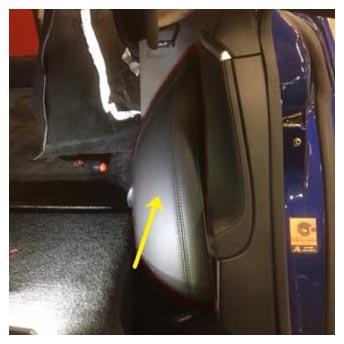 Courtesy of TESLA, INC. Courtesy of TESLA, INC.
|
- Install LH C-pillar upper trim.
NOTE:
4x clips.
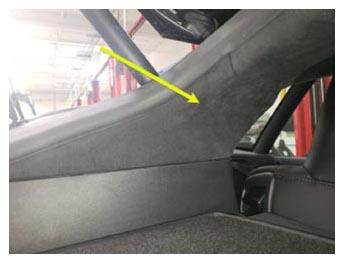 Courtesy of TESLA, INC. Courtesy of TESLA, INC.
|
- Install the LH mid C pillar.
NOTE:
1x screw, T25, 3 N.m.
- Install LH trunk side garnish trim.
NOTE:
2x clips.
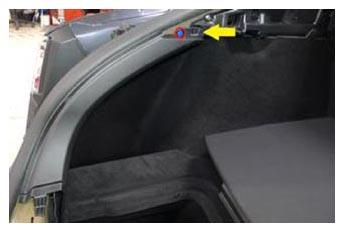 Courtesy of TESLA, INC. Courtesy of TESLA, INC.
|
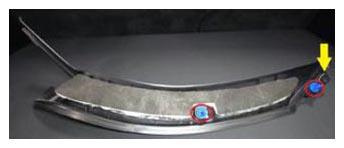 Courtesy of TESLA, INC. Courtesy of TESLA, INC.
|
- Install trunk sill panel.
NOTE:
4x clips, 4x guides.
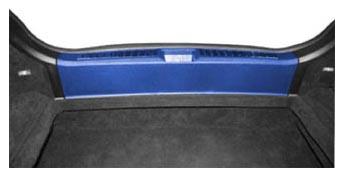 Courtesy of TESLA, INC. Courtesy of TESLA, INC.
|
- Install trunk load floor.
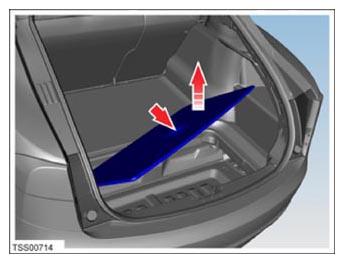 Courtesy of TESLA, INC. Courtesy of TESLA, INC.
|
- Install LH mid C pillar trim.
NOTE:
1x screw, T25, 3 N.m, 4x clips.
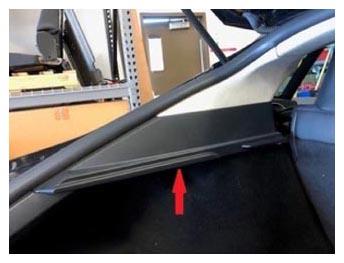 Courtesy of TESLA, INC. Courtesy of TESLA, INC.
|
- Install parcel shelf.
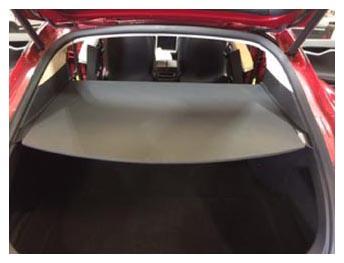 Courtesy of TESLA, INC. Courtesy of TESLA, INC.
|
- Install floor carpet in vehicle.
NOTE:
3x fir tree clips.
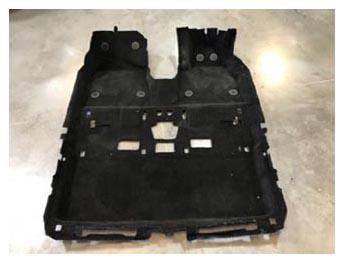 Courtesy of TESLA, INC. Courtesy of TESLA, INC.
|
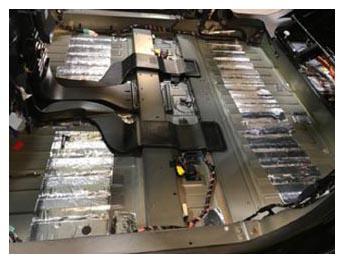 Courtesy of TESLA, INC. Courtesy of TESLA, INC.
|
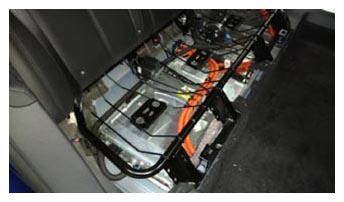
- Lower seat frame into position and secure harness clips to frame.
 Courtesy of TESLA, INC. Courtesy of TESLA, INC.
|
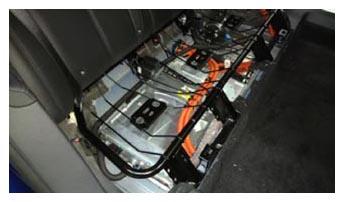
- Lower seat frame into position and secure harness clips to frame.
 Courtesy of TESLA, INC. Courtesy of TESLA, INC.
|
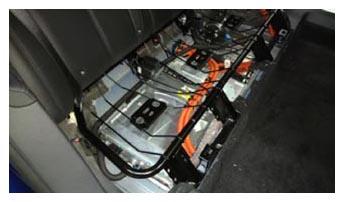
- Install and torque bolts securing seat frame to vehicle.
NOTE:
8x bolts, 11 mm, 26 N.m.
 Courtesy of TESLA, INC. Courtesy of TESLA, INC.
|
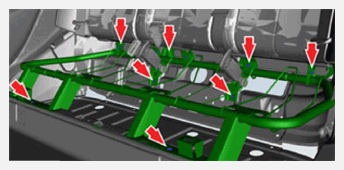 Courtesy of TESLA, INC. Courtesy of TESLA, INC.
|
- Place NVH padding onto seat frame.
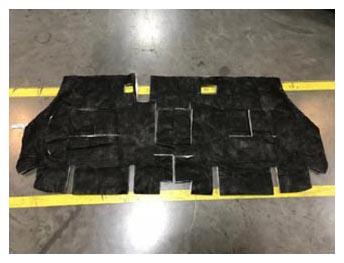 Courtesy of TESLA, INC. Courtesy of TESLA, INC.
|
- Install seat bottom cushion.
NOTE:
2x clips, 4x connectors (7x connectors if equipped with heated 2nd row seats).
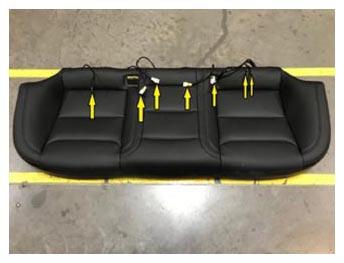 Courtesy of TESLA, INC. Courtesy of TESLA, INC.
|
- Install LH upper B-pillar trim.
NOTE:
2x metal clips, Ensure locating tab at top of B-pillar is aligned to the opening in the body, Replace any broken or missing clips prior to installation.
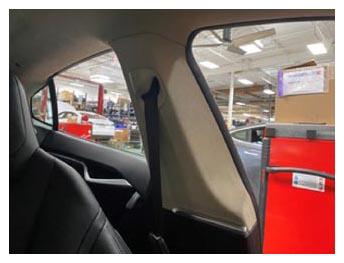 Courtesy of TESLA, INC. Courtesy of TESLA, INC.
|
- Install LH lower B-pillar trim.
NOTE:
6x plastic clips, 2x metal clips, Replace any broken or missing clips prior to installation.
- Install fasteners securing LH lower B-pillar trim.
NOTE:
2x screws, T25, 2 N.m.
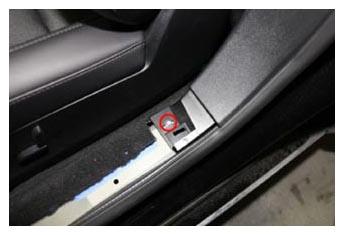 Courtesy of TESLA, INC. Courtesy of TESLA, INC.
|
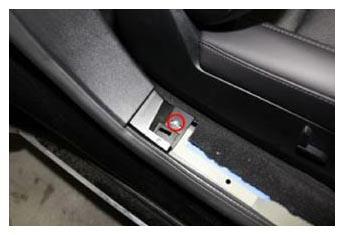 Courtesy of TESLA, INC. Courtesy of TESLA, INC.
|
- Install RH lower B-pillar trim.
NOTE:
6x plastic clips, 2x metal clips, Replace any broken or missing clips prior to installation.
- Install fasteners securing RH lower B-pillar trim.
NOTE:
2x screws, T25, 2 N.m.
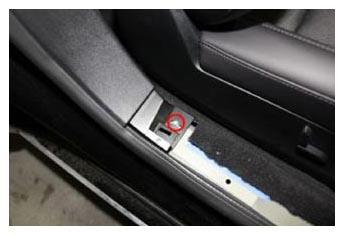 Courtesy of TESLA, INC. Courtesy of TESLA, INC.
|
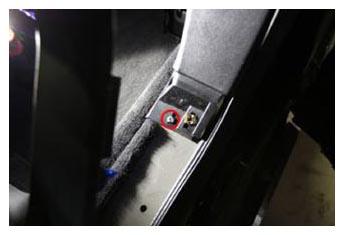 Courtesy of TESLA, INC. Courtesy of TESLA, INC.
|
- Bring the cross car beam into the vehicle for installation.
NOTE:
Exercise caution when installing the cross car beam, the brake switch is attached to the cross car beam and is susceptible to failure, Recommend assistance, take care not to damage any surrounding components while placing the cross car beam into the vehicle.
- Install the fasteners securing the cross car beam to the body.
NOTE:
7x bolts, 13 mm, 27 N.m.
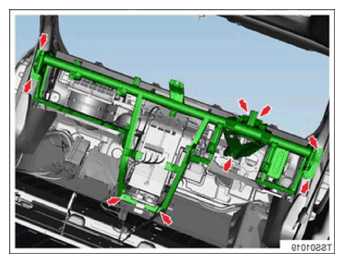 Courtesy of TESLA, INC. Courtesy of TESLA, INC.
|
- Install the fasteners securing the cross car beam to the HVAC assembly.
NOTE:
3x bolts, 10 mm, 10 N.m.
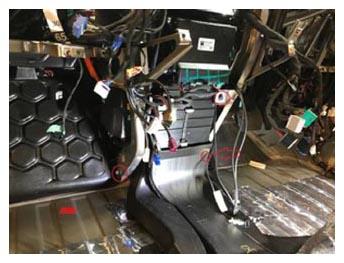 Courtesy of TESLA, INC. Courtesy of TESLA, INC.
|
- Connect cross car beam harness connectors at the LH Lower A pillar area.
NOTE:
7x connectors.
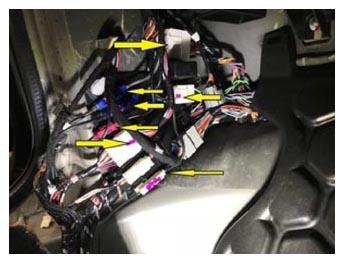 Courtesy of TESLA, INC. Courtesy of TESLA, INC.
|
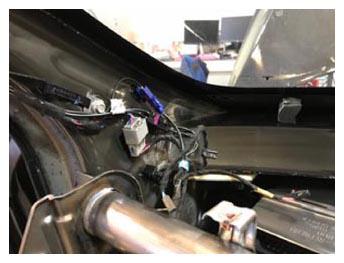
- Connect Headliner harness connections to cross car beam harness connectors at mid LH A pillar.
NOTE:
3x connectors, 2x clips.
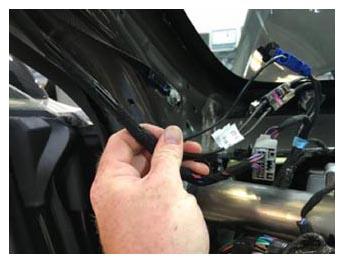 Courtesy of TESLA, INC. Courtesy of TESLA, INC.
|
 Courtesy of TESLA, INC. Courtesy of TESLA, INC.
|
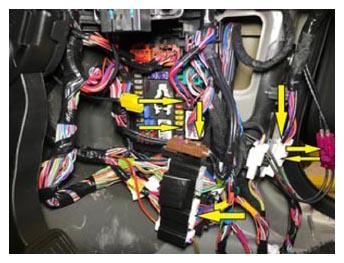
- Connect cross car beam harness to main harness connectors at RH lower A pillar.
NOTE:
7x connectors.
 Courtesy of TESLA, INC. Courtesy of TESLA, INC.
|
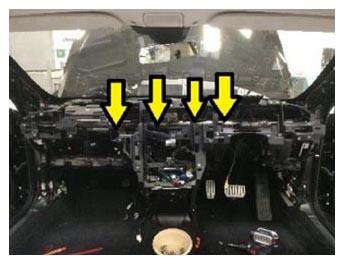
- Install IP carrier into vehicle.
NOTE:
Recommend assistance.
 Courtesy of TESLA, INC. Courtesy of TESLA, INC.
|
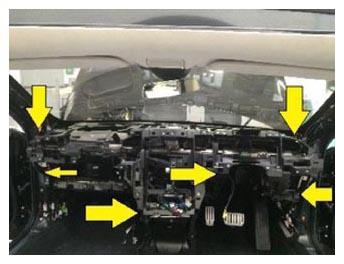
- Install edge clips secured to the IP carrier.
NOTE:
2x clips LH and RH RKE, 2x clips tweeter harness, 1x clip steering column air bag harness, 1x clip MCU harness, Pull the IP carrier forward for better access for edge clips.
 Courtesy of TESLA, INC. Courtesy of TESLA, INC.
|
- Install LH dash speaker.
NOTE:
2x screws, T20, 2 N.m, 1x connector, Pull the IP carrier forward for better access for speakers.
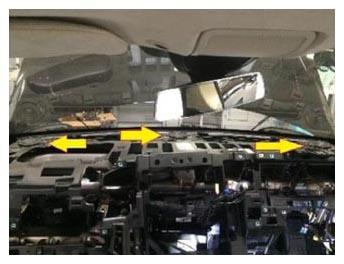 Courtesy of TESLA, INC. Courtesy of TESLA, INC.
|
- Install center dash speaker.
NOTE:
2x screws, T20, 2 N.m, 1x connector, Pull the IP carrier forward for better access for speakers.
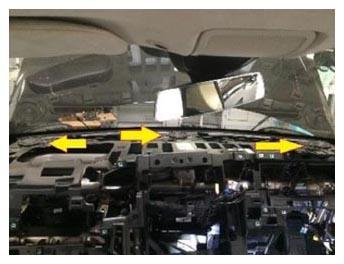 Courtesy of TESLA, INC. Courtesy of TESLA, INC.
|
- Install RH dash speaker.
NOTE:
2x screws, T20, 2 N.m, 1x connector, Pull the IP carrier forward for better access for speakers.
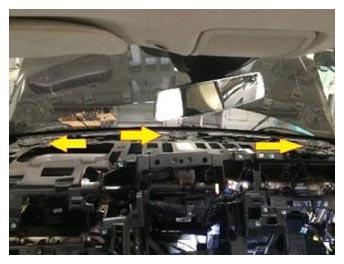 Courtesy of TESLA, INC. Courtesy of TESLA, INC.
|
- Install the fasteners securing the IP carrier to the dash frame.
NOTE:
15x screws, T20, 2 N.m.
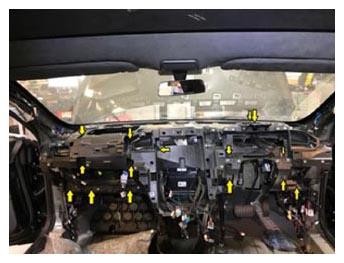 Courtesy of TESLA, INC. Courtesy of TESLA, INC.
|
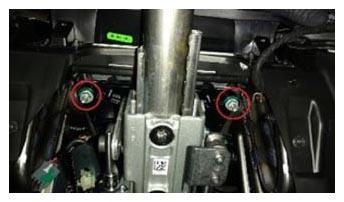
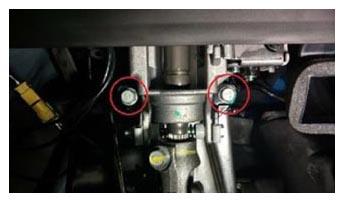
- Place steering column into vehicle for installation.
- Install fasteners securing steering column to cross car beam.
NOTE:
2x bolts, 13 mm, 17 N.m, 2x nuts, 13 mm, 30 N.m.
 Courtesy of TESLA, INC. Courtesy of TESLA, INC.
|
 Courtesy of TESLA, INC. Courtesy of TESLA, INC.
|
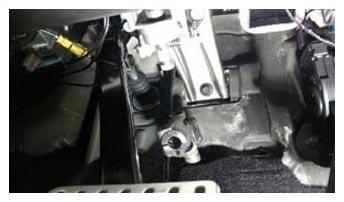
- Connect steering column to lower steering shaft joint.
NOTE:
Slide joint up onto lower shaft, Ensure that the previously indexed paint marks align between the lower steering column and shaft joint.
 Courtesy of TESLA, INC. Courtesy of TESLA, INC.
|
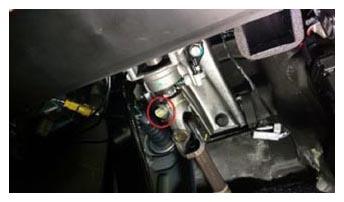
- Install bolt securing lower shaft to steering column.
NOTE:
1x bolt, 13 mm, 30 N.m.
 Courtesy of TESLA, INC. Courtesy of TESLA, INC.
|
- Connect harness connectors for steering column motors.
NOTE:
2x connectors.
- Install RH footwell cover.
NOTE:
2x clips, 1x connector.
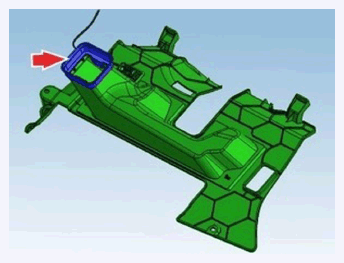 Courtesy of TESLA, INC. Courtesy of TESLA, INC.
|
- Connect harness to steering column control module.
NOTE:
1x connector, Install new retaining clip.
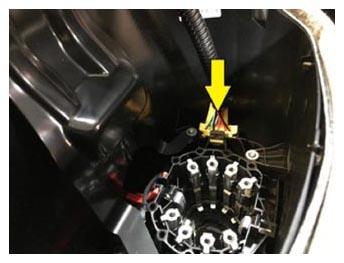 Courtesy of TESLA, INC. Courtesy of TESLA, INC.
|
- Slide steering column control module over upper steering column.
NOTE:
Gently jiggle the SCCM while pressing it onto the column if needed.
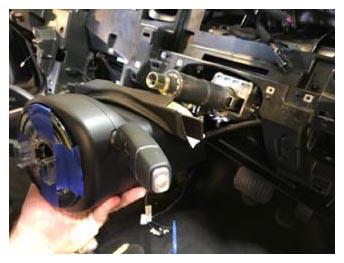 Courtesy of TESLA, INC. Courtesy of TESLA, INC.
|
- Remove tape previously applied to the clockspring.
NOTE:
Do not rotate the clockspring.
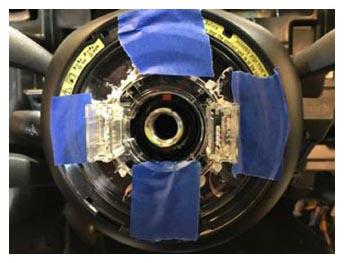 Courtesy of TESLA, INC. Courtesy of TESLA, INC.
|
- Install steering wheel.
NOTE:
Ensure the position of the steering wheel matches the index marks previously made on the column and the wheel.
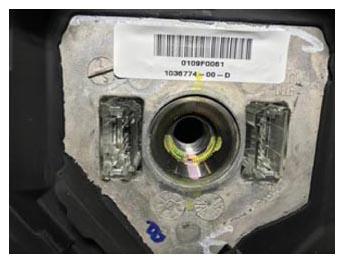 Courtesy of TESLA, INC. Courtesy of TESLA, INC.
|
- Install bolt securing steering wheel to steering column.
NOTE:
1x patch bolt, 10 mm allen, 80 N.m, Install new patch bolt.
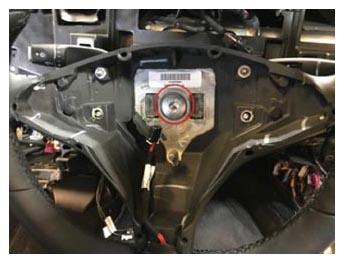 Courtesy of TESLA, INC. Courtesy of TESLA, INC.
|
- Connect the drivers front airbag and steering wheel control connectors.
NOTE:
3x connectors.
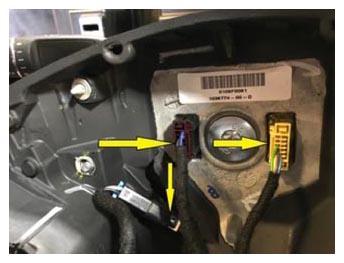 Courtesy of TESLA, INC. Courtesy of TESLA, INC.
|
- Place airbag into steering wheel.
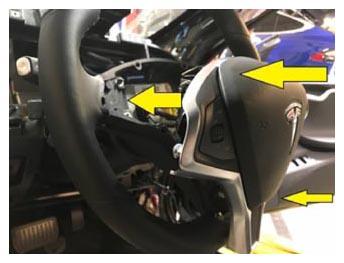 Courtesy of TESLA, INC. Courtesy of TESLA, INC.
|
- Install screws securing airbag to steering wheel.
NOTE:
2x screws, T25, 7 N.m.
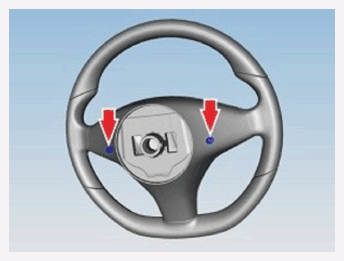 Courtesy of TESLA, INC. Courtesy of TESLA, INC.
|
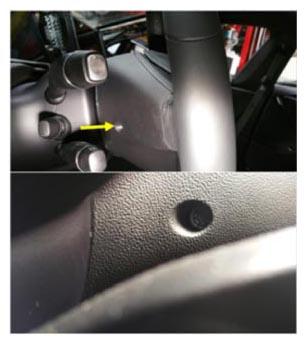 Courtesy of TESLA, INC. Courtesy of TESLA, INC.
|
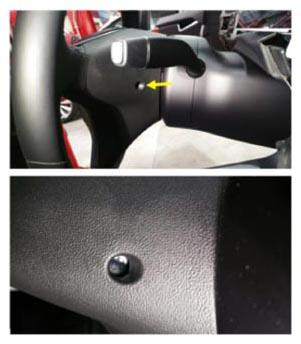 Courtesy of TESLA, INC. Courtesy of TESLA, INC.
|
- Put on ESD wrist strap.
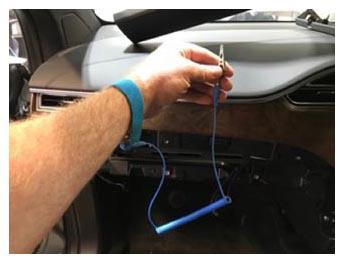 Courtesy of TESLA, INC. Courtesy of TESLA, INC.
|
- Connect ESD wrist strap to vehicle ground.
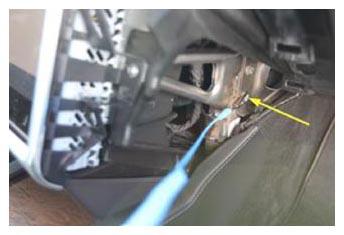 Courtesy of TESLA, INC. Courtesy of TESLA, INC.
|
- Connect Instrument cluster and place IC into position for installation.
NOTE:
3x connectors, 2x alignment dowels.
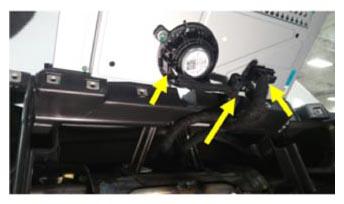 Courtesy of TESLA, INC. Courtesy of TESLA, INC.
|
- Install the fasteners that secure the instrument cluster to the IP carrier.
NOTE:
4x screws, T20, 2 N.m.
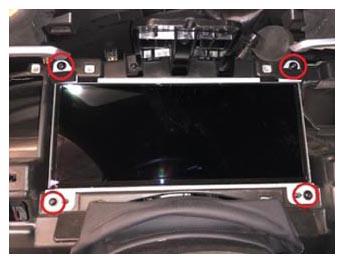 Courtesy of TESLA, INC. Courtesy of TESLA, INC.
|
- Position MCU into vehicle for installation.
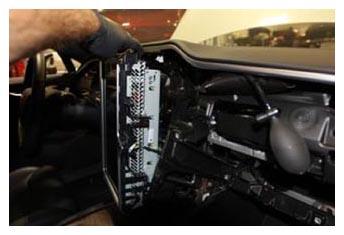 Courtesy of TESLA, INC. Courtesy of TESLA, INC.
|
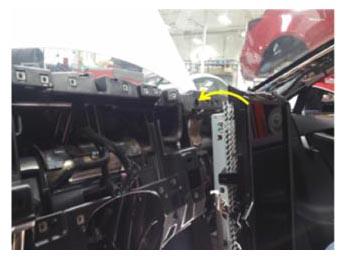 Courtesy of TESLA, INC. Courtesy of TESLA, INC.
|
- Connect harness connectors to MCU.
NOTE:
17x connectors, Number of connectors may vary depending on vehicle configuration and MCU part number revision.
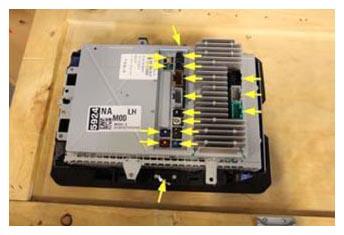 Courtesy of TESLA, INC. Courtesy of TESLA, INC.
|
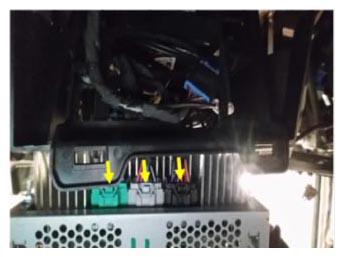 Courtesy of TESLA, INC. Courtesy of TESLA, INC.
|
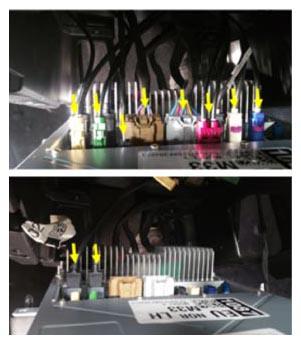 Courtesy of TESLA, INC. Courtesy of TESLA, INC.
|
- Install MCU into IP carrier.
NOTE:
If necessary, gently lift IP top pad to clear the MCU ground tab and ensure the MCU seats fully back into the IP carrier.
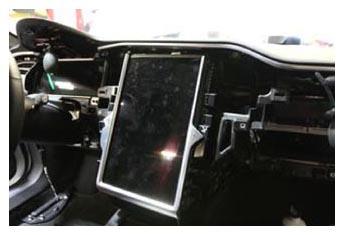 Courtesy of TESLA, INC. Courtesy of TESLA, INC.
|
- Install bolts securing MCU to the IP carrier.
NOTE:
4x screws, T25, 4.5 N.m.
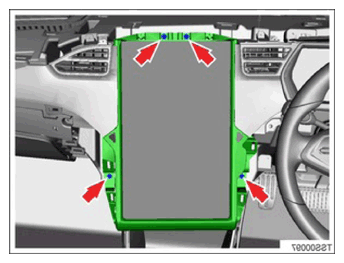 Courtesy of TESLA, INC. Courtesy of TESLA, INC.
|
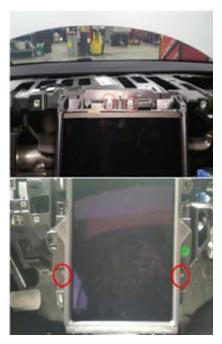 Courtesy of TESLA, INC. Courtesy of TESLA, INC.
|
- Install LH side IP finisher assembly and fasteners.
NOTE:
2x screws, T20, 2.3 N.m, 6x clips.
- Install RH inner IP finisher.
NOTE:
3x clips.
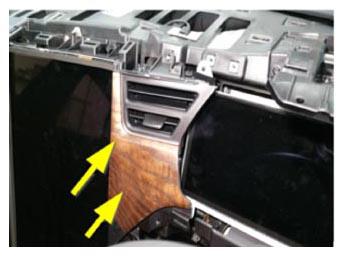 Courtesy of TESLA, INC. Courtesy of TESLA, INC.
|
- Install screws securing RH inner IP finisher.
NOTE:
2x screws, T20, 1 N.m.
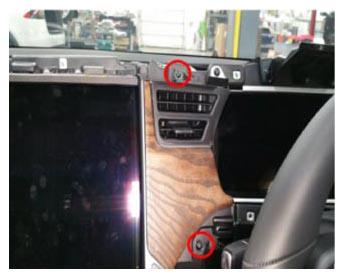 Courtesy of TESLA, INC. Courtesy of TESLA, INC.
|
- Install RH outer IP finisher.
NOTE:
3x screws, T20, 2.3 N.m.
- Install IC bezel and fasteners to the IP carrier.
NOTE:
4x screws, T20, 2 N.m.
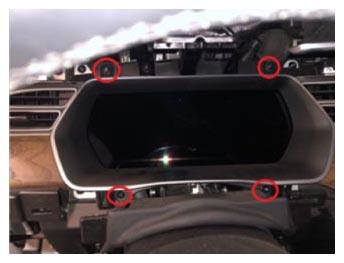 Courtesy of TESLA, INC. Courtesy of TESLA, INC.
|
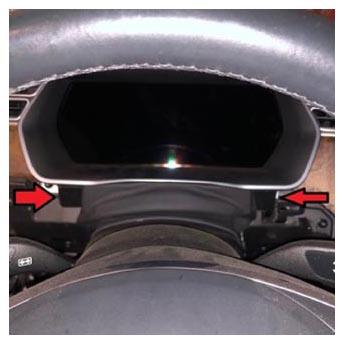
- Install clips securing steering column gap hider to IC bezel.
NOTE:
2x clips, Replace any damaged or missing clips prior to installation.
 Courtesy of TESLA, INC. Courtesy of TESLA, INC.
|
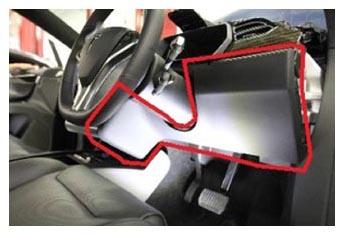
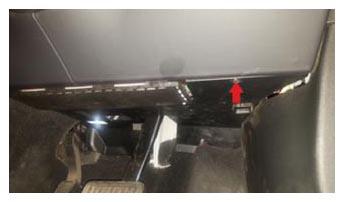
- Install RH side lower IP trim.
NOTE:
1x screw, T20, 2 N.m, 10x clips, Replace any damaged or missing clips prior to installation.
 Courtesy of TESLA, INC. Courtesy of TESLA, INC.
|
 Courtesy of TESLA, INC. Courtesy of TESLA, INC.
|
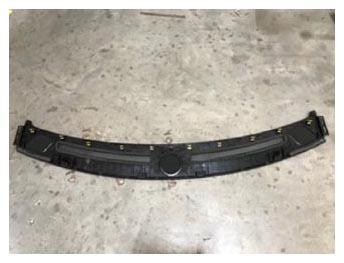
- Install the defrost mesh grille to IP carrier.
NOTE:
10x clips, Replace any damaged or missing clips prior to installation.
 Courtesy of TESLA, INC. Courtesy of TESLA, INC.
|
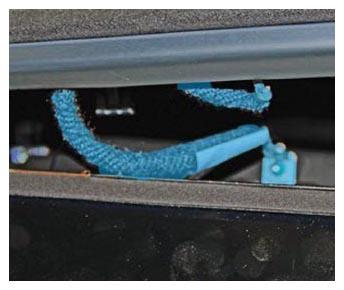
- Set top pad in place and connect ground strap.
NOTE:
1x tab, Recommend assistance.
 Courtesy of TESLA, INC. Courtesy of TESLA, INC.
|
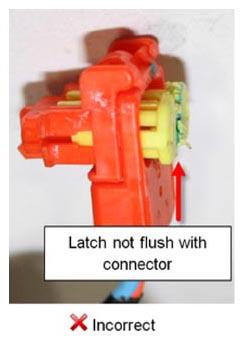
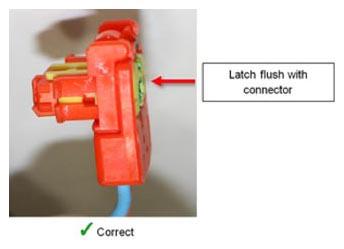
- Install passenger airbag connectors.
NOTE:
2x connectors, Be sure to seat connector locks fully.
 Courtesy of TESLA, INC. Courtesy of TESLA, INC.
|
 Courtesy of TESLA, INC. Courtesy of TESLA, INC.
|
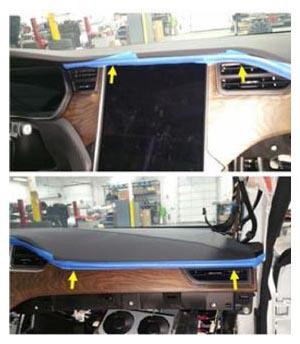
- Remove protective tape from aluminum trim.
 Courtesy of TESLA, INC. Courtesy of TESLA, INC.
|
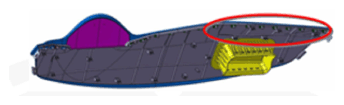
- Fully seat top pad.
NOTE:
23x clips, Make sure all clips are aligned and securely fastened.
 Courtesy of TESLA, INC. Courtesy of TESLA, INC.
|
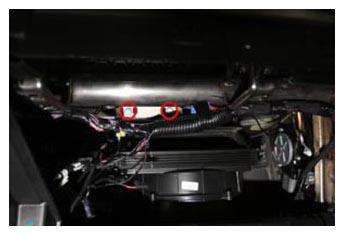
- Install the airbag mounting bolts.
NOTE:
2x bolts, 10 mm, 10 N.m.
 Courtesy of TESLA, INC. Courtesy of TESLA, INC.
|
- Position DAS ECU for installation and secure LH side ECU connectors.
NOTE:
7x connectors, DAS 2.5 has 6x connectors.
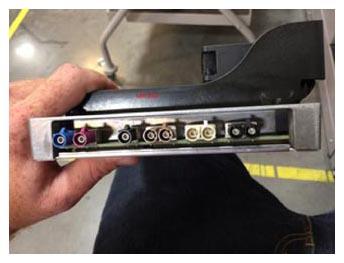 Courtesy of TESLA, INC. Courtesy of TESLA, INC.
|
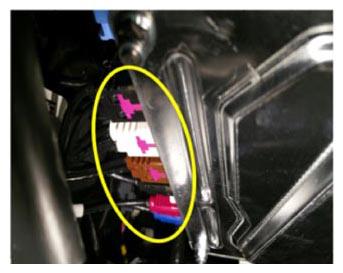 Courtesy of TESLA, INC. Courtesy of TESLA, INC.
|
- Install fasteners securing Autopilot ECU.
NOTE:
4x nuts, 8 mm, 5 N.m, Install new nuts.
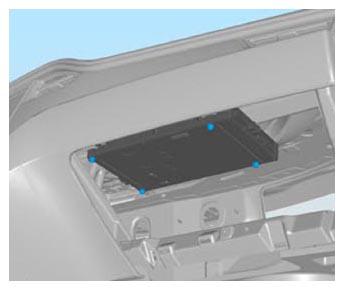 Courtesy of TESLA, INC. Courtesy of TESLA, INC.
|
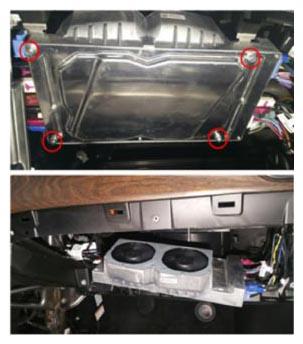 Courtesy of TESLA, INC. Courtesy of TESLA, INC.
|
- Connect RH side DAS ECU connectors.
NOTE:
7x connectors, DAS 2.0 has 4x connectors, Connector "A" must be plugged in before connector "B" when reinstalling DAS ECU.
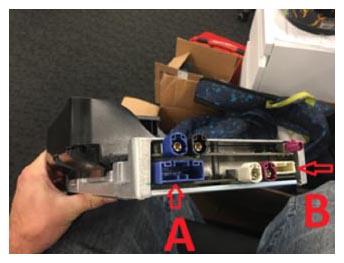 Courtesy of TESLA, INC. Courtesy of TESLA, INC.
|
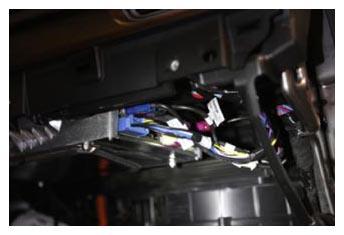 Courtesy of TESLA, INC. Courtesy of TESLA, INC.
|
- Disconnect ESD wrist strap from vehicle ground.
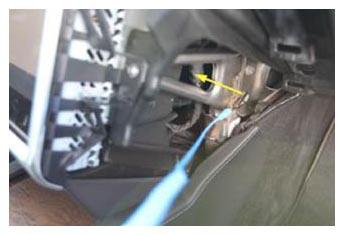 Courtesy of TESLA, INC. Courtesy of TESLA, INC.
|
- Remove ESD wrist strap.
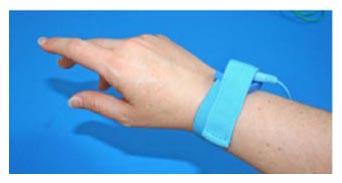 Courtesy of TESLA, INC. Courtesy of TESLA, INC.
|
- Install LH footwell cover.
NOTE:
2x tabs, 2x clips, 1x connector, Align the tabs on the footwell cover into the slots in the footwell bracket cover before securing the clips.
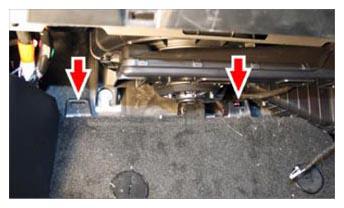 Courtesy of TESLA, INC. Courtesy of TESLA, INC.
|
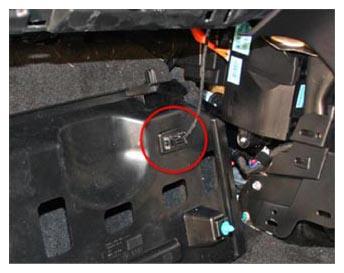 Courtesy of TESLA, INC. Courtesy of TESLA, INC.
|
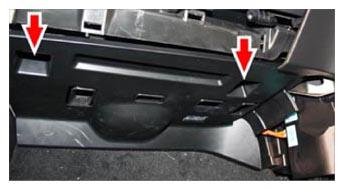 Courtesy of TESLA, INC. Courtesy of TESLA, INC.
|
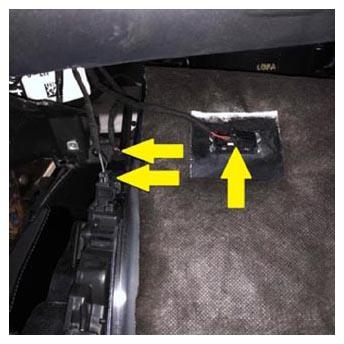
- Install glove box into vehicle.
NOTE:
3x connectors, 6x screws, T20, 2.3 N.m.
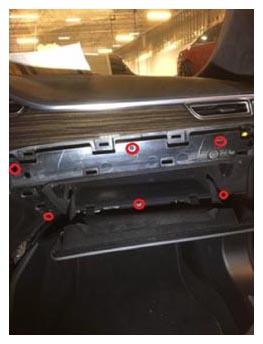 Courtesy of TESLA, INC. Courtesy of TESLA, INC.
|
 Courtesy of TESLA, INC. Courtesy of TESLA, INC.
|
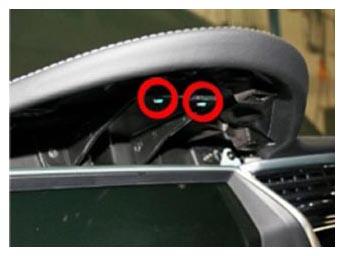
- Install screws securing top pad at binnacle area.
NOTE:
2x screws, T20, 1 N.m.
 Courtesy of TESLA, INC. Courtesy of TESLA, INC.
|
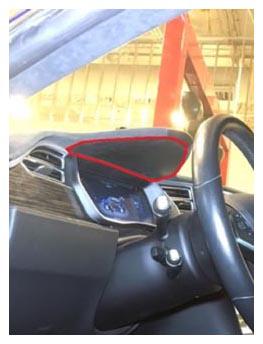
- Install lower binnacle cover.
NOTE:
4x clips, Replace any damaged or missing clips.
 Courtesy of TESLA, INC. Courtesy of TESLA, INC.
|
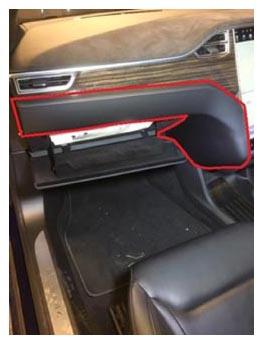
- Install the upper glove box trim into the vehicle.
NOTE:
13x clips, Replace any damaged or missing clips prior to installation.
 Courtesy of TESLA, INC. Courtesy of TESLA, INC.
|
- Close glove box.
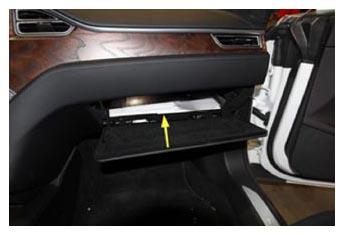 Courtesy of TESLA, INC. Courtesy of TESLA, INC.
|
- Install the lower glove box trim panel.
NOTE:
6x clips, Replace any damaged or missing clips prior to installation.
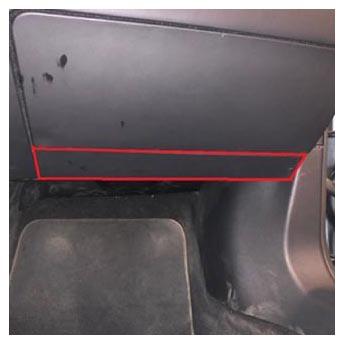 Courtesy of TESLA, INC. Courtesy of TESLA, INC.
|
- Check and ensure IP top pad clips are fully seated into the IP carrier.
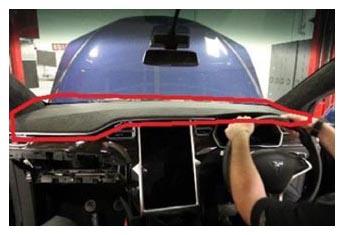 Courtesy of TESLA, INC. Courtesy of TESLA, INC.
|
- Install screw that secures LH side of top pad.
NOTE:
1x screw, T20, 1 N.m.
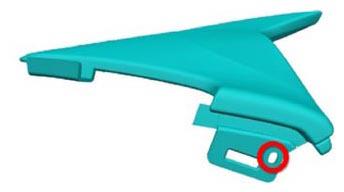 Courtesy of TESLA, INC. Courtesy of TESLA, INC.
|
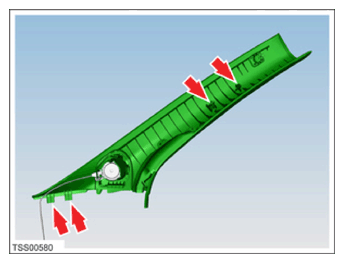
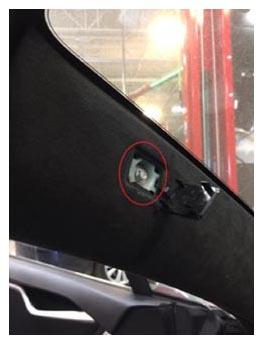
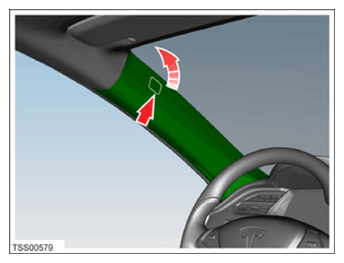
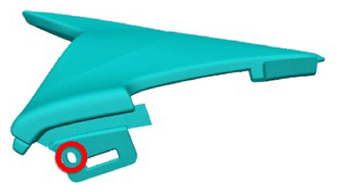
- Install LH upper A pillar trim.
NOTE:
1x screw with washer, 7 mm, 2 N.m, 1x connector, 2x locating tabs, 1x clip, Reinstall A-pillar fastener trim cover after torquing the 7 mm fastener.
 Courtesy of TESLA, INC. Courtesy of TESLA, INC.
|
 Courtesy of TESLA, INC. Courtesy of TESLA, INC.
|
 Courtesy of TESLA, INC. Courtesy of TESLA, INC.
|
- Install screw securing RH side of top pad.
NOTE:
1x screw, T20, 1 N.m.
 Courtesy of TESLA, INC. Courtesy of TESLA, INC.
|
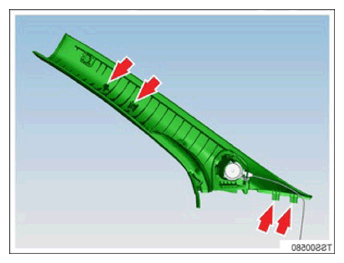
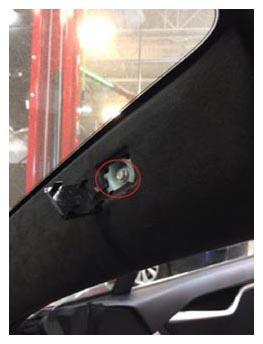
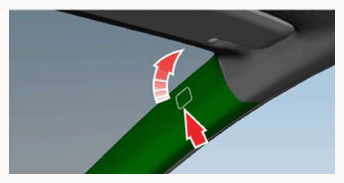
- Install RH upper A pillar trim.
NOTE:
1x screw with washer, 7 mm, 2 N.m, 1x connector, 2x locating tabs, 1x clip, Reinstall A-pillar fastener trim cover after torquing the 7 mm fastener.
 Courtesy of TESLA, INC. Courtesy of TESLA, INC.
|
 Courtesy of TESLA, INC. Courtesy of TESLA, INC.
|
 Courtesy of TESLA, INC. Courtesy of TESLA, INC.
|
- Place center console into vehicle.
NOTE:
Recommend assistance.
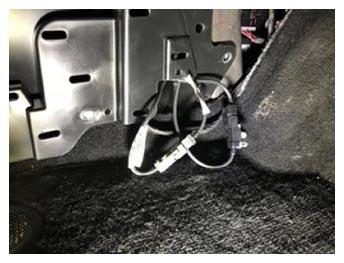
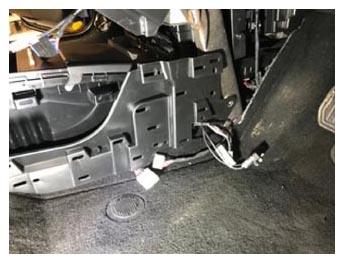
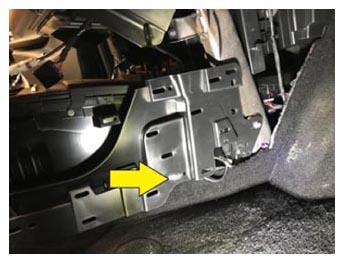
- Make connections at center console harness.
NOTE:
3x connectors, 1x clip.
 Courtesy of TESLA, INC. Courtesy of TESLA, INC.
|
 Courtesy of TESLA, INC. Courtesy of TESLA, INC.
|
 Courtesy of TESLA, INC. Courtesy of TESLA, INC.
|
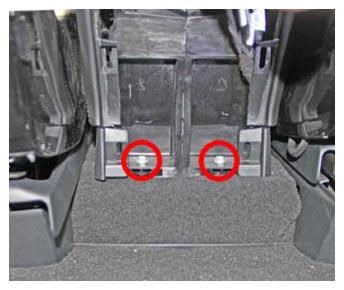
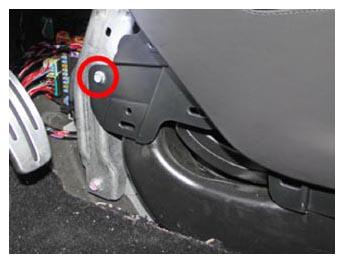
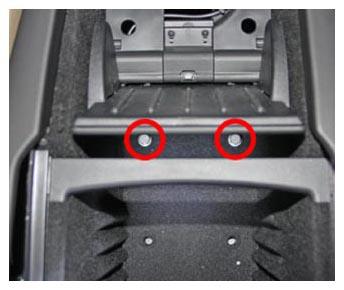
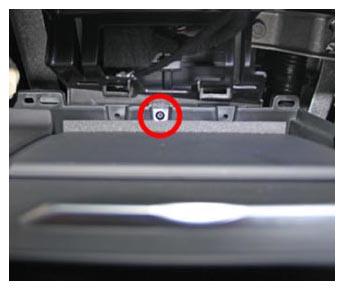
- Install fasteners securing center console assembly.
NOTE:
6x bolts, 10 mm, 7 N.m, 1x screw, T20, 2 N.m.
 Courtesy of TESLA, INC. Courtesy of TESLA, INC.
|
 Courtesy of TESLA, INC. Courtesy of TESLA, INC.
|
 Courtesy of TESLA, INC. Courtesy of TESLA, INC.
|
 Courtesy of TESLA, INC. Courtesy of TESLA, INC.
|
- Install rubber floor mat at the base of the console.
- Install cup holder dividers inside console.
NOTE:
if equipped.
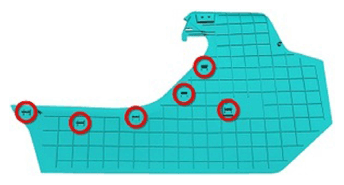
- Install LH and RH center console closeout extensions.
NOTE:
6x clips each side.
 Courtesy of TESLA, INC. Courtesy of TESLA, INC.
|
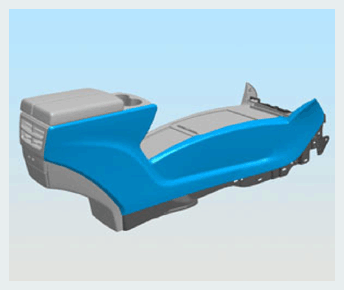
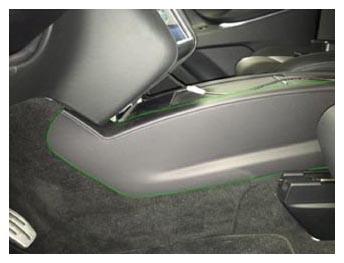
- Secure the center console side trim panels LH and RH.
NOTE:
22x clips per side.
 Courtesy of TESLA, INC. Courtesy of TESLA, INC.
|
 Courtesy of TESLA, INC. Courtesy of TESLA, INC.
|
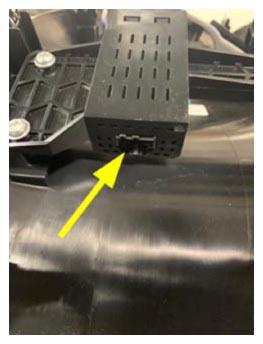
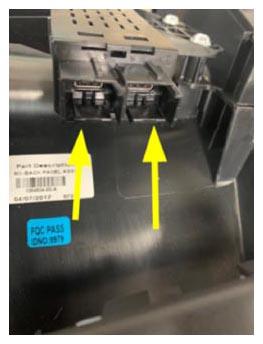
- Make connections to module at rear console panel.
NOTE:
3x connectors.
 Courtesy of TESLA, INC. Courtesy of TESLA, INC.
|
 Courtesy of TESLA, INC. Courtesy of TESLA, INC.
|
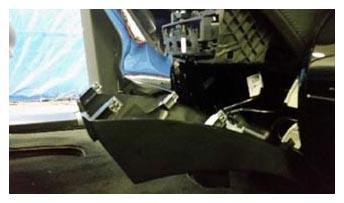
- Install the center console back panel.
 Courtesy of TESLA, INC. Courtesy of TESLA, INC.
|
- Open rear cup holder.
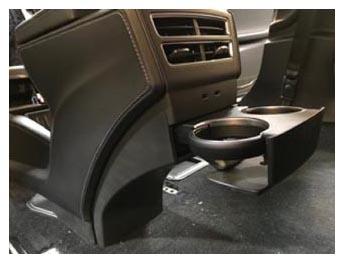 Courtesy of TESLA, INC. Courtesy of TESLA, INC.
|
- Install the rear cup holder trim panel.
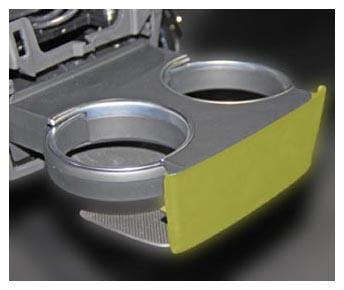 Courtesy of TESLA, INC. Courtesy of TESLA, INC.
|
- Install USB ports into rear air outlet.
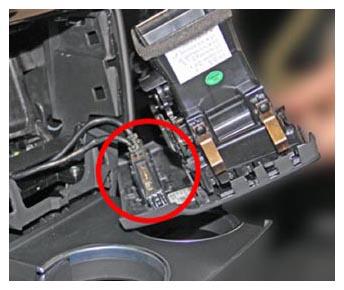 Courtesy of TESLA, INC. Courtesy of TESLA, INC.
|
- Install the center console rear air outlet.
NOTE:
2x USB connections.
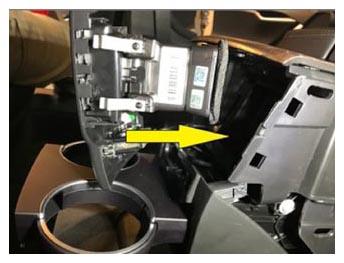 Courtesy of TESLA, INC. Courtesy of TESLA, INC.
|
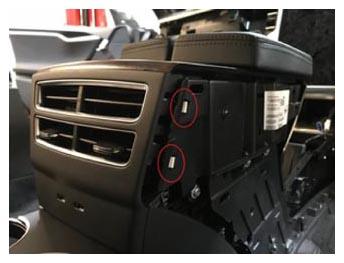 Courtesy of TESLA, INC. Courtesy of TESLA, INC.
|
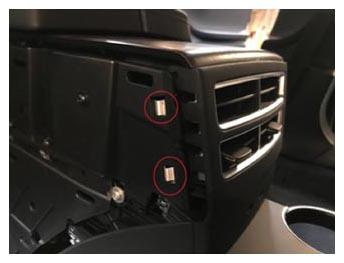 Courtesy of TESLA, INC. Courtesy of TESLA, INC.
|
- Close the rear cup holder.
- Install LH front seat into vehicle.
NOTE:
Recommend Assistance, Take care not to damage surrounding components while lifting the seat into the vehicle.
- Connect the LH seat connectors.
NOTE:
3x connectors, 2x harness clips, Tuck excess harness under carpet to prevent NVH concern.
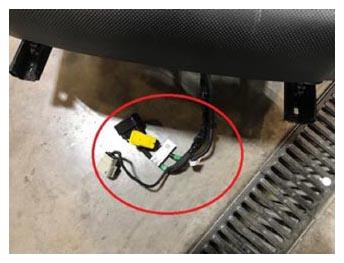 Courtesy of TESLA, INC. Courtesy of TESLA, INC.
|
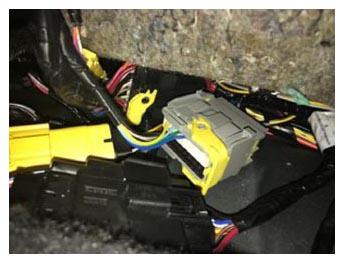 Courtesy of TESLA, INC. Courtesy of TESLA, INC.
|
- Install RH front seat into vehicle.
NOTE:
Recommend Assistance, Take care not to damage surrounding components while lifting the seat into the vehicle.
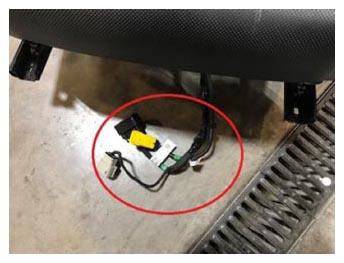
- Connect the RH seat connectors.
NOTE:
3x connectors.
 Courtesy of TESLA, INC. Courtesy of TESLA, INC.
|
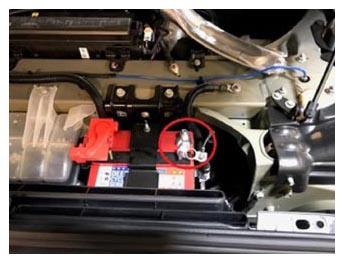
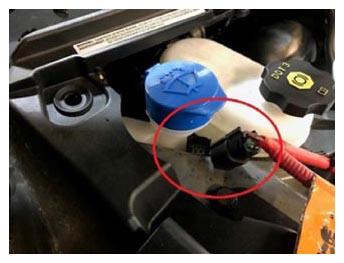
- Connect 12V negative and first responder loop.
NOTE:
1x nut, 10 mm, 5 N.m, 1x connector.
 Courtesy of TESLA, INC. Courtesy of TESLA, INC.
|
 Courtesy of TESLA, INC. Courtesy of TESLA, INC.
|
- Remove vehicle from Tow Mode.
- Remove wheel chocks.
NOTE:
Ensure vehicle is in park before removing wheel chocks.
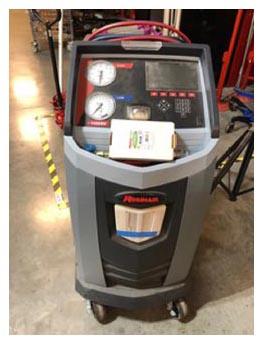
- Set up A/C machine and perform hose flush.
NOTE:
Touch time only.
 Courtesy of TESLA, INC. Courtesy of TESLA, INC.
|
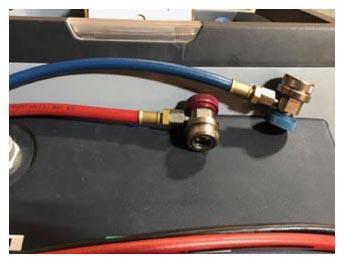 Courtesy of TESLA, INC. Courtesy of TESLA, INC.
|
- Perform A/C vacuum and leak test.
NOTE:
Touch time only. 30 minute vacuum, 10 minute leak test.
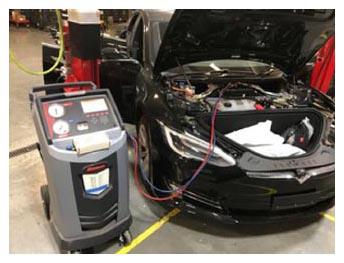 Courtesy of TESLA, INC. Courtesy of TESLA, INC.
|
- Move LH front seat backward.
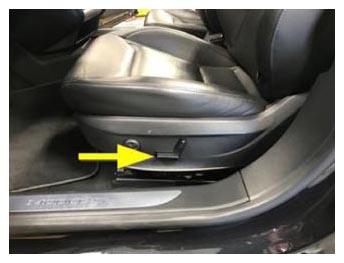 Courtesy of TESLA, INC. Courtesy of TESLA, INC.
|
- Install bolts securing both LH front seat front tracks to vehicle.
NOTE:
1x patch bolt, T40P, 17 N.m, 1x patch bolt, T45P, 34 N.m, Install new bolts.
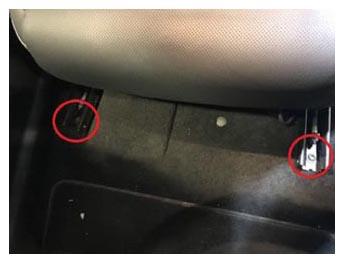 Courtesy of TESLA, INC. Courtesy of TESLA, INC.
|
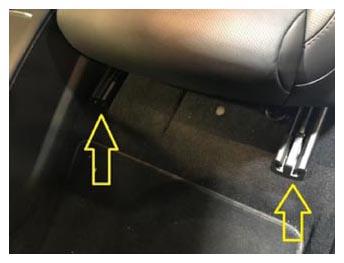
- Install LH front seat front track covers.
NOTE:
2x covers.
 Courtesy of TESLA, INC. Courtesy of TESLA, INC.
|
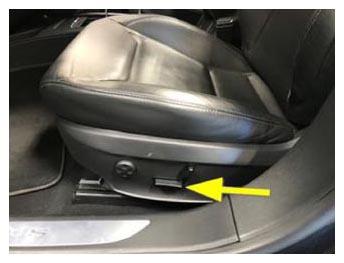
- Move LH front seat forward.
 Courtesy of TESLA, INC. Courtesy of TESLA, INC.
|
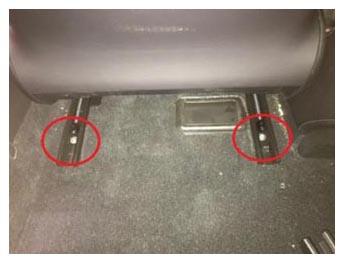
- Install bolts securing both LH front seat rear tracks to vehicle.
NOTE:
1x patch bolt, T40P, 17 N.m, 1x patch bolt, T45P, 34 N.m, Install new bolts.
 Courtesy of TESLA, INC. Courtesy of TESLA, INC.
|
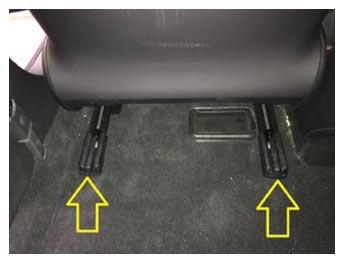
- Install LH front seat rear track covers.
NOTE:
2x covers.
 Courtesy of TESLA, INC. Courtesy of TESLA, INC.
|
- Move LH front seat to original position.
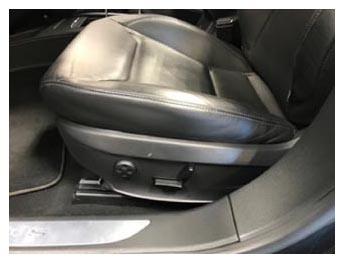 Courtesy of TESLA, INC. Courtesy of TESLA, INC.
|
- Install LH lower A-pillar trim.
NOTE:
4x clips, The number of clips securing the A-pillar sill trim varies depending on vehicle production date, Replace any damaged or missing clips prior to re-installing sill trim.
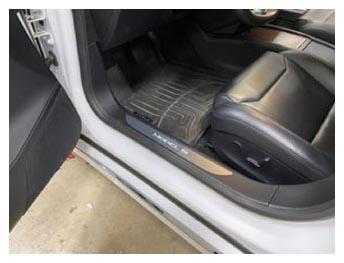 Courtesy of TESLA, INC. Courtesy of TESLA, INC.
|
- Install LH middle A-pillar trim.
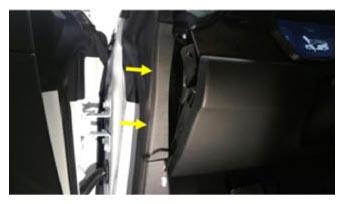 Courtesy of TESLA, INC. Courtesy of TESLA, INC.
|
- Install LH side IP cover.
NOTE:
4x clips, 1x connector.
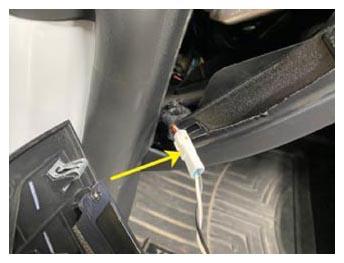 Courtesy of TESLA, INC. Courtesy of TESLA, INC.
|
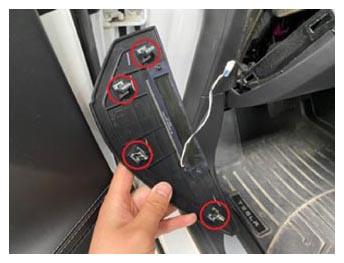 Courtesy of TESLA, INC. Courtesy of TESLA, INC.
|
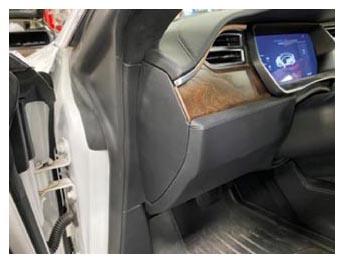 Courtesy of TESLA, INC. Courtesy of TESLA, INC.
|
- Move RH front seat backward.
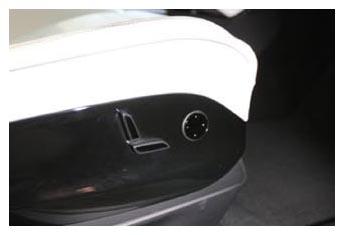 Courtesy of TESLA, INC. Courtesy of TESLA, INC.
|
- Install bolts securing both RH front seat front tracks to vehicle.
NOTE:
1x patch bolt, T40P, 17 N.m, 1x patch bolt, T45P, 34 N.m, Install new bolts.
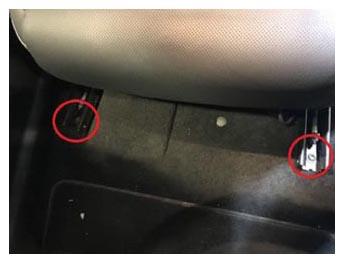 Courtesy of TESLA, INC. Courtesy of TESLA, INC.
|
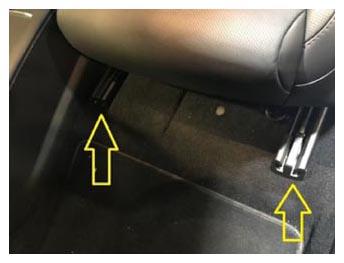
- Install RH front seat front track covers.
NOTE:
2x covers.
 Courtesy of TESLA, INC. Courtesy of TESLA, INC.
|
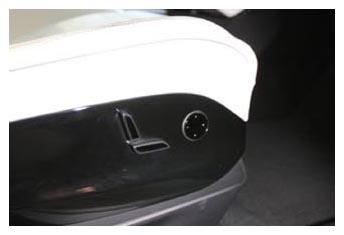
- Move RH front seat forward.
 Courtesy of TESLA, INC. Courtesy of TESLA, INC.
|
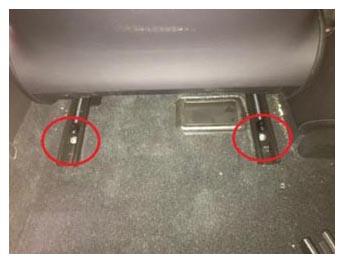
- Install bolts securing both RH front seat rear tracks to vehicle.
NOTE:
1x patch bolt, T40P, 17 N.m, 1x patch bolt, T45P, 34 N.m, Install new bolts.
 Courtesy of TESLA, INC. Courtesy of TESLA, INC.
|
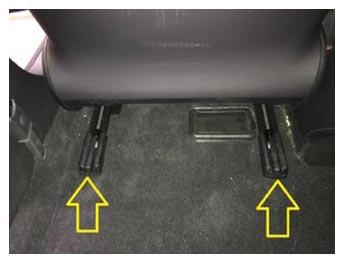
- Install RH front seat rear track covers.
NOTE:
2x covers.
 Courtesy of TESLA, INC. Courtesy of TESLA, INC.
|
- Move RH front seat to original position.
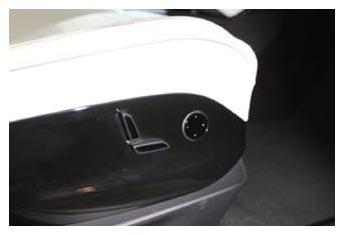 Courtesy of TESLA, INC. Courtesy of TESLA, INC.
|
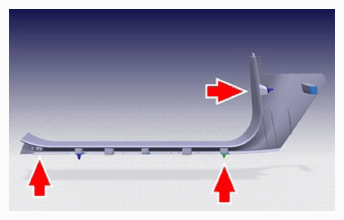
- Install RH lower A-pillar trim.
NOTE:
The number of clips varies based on vehicle production range.
 Courtesy of TESLA, INC. Courtesy of TESLA, INC.
|
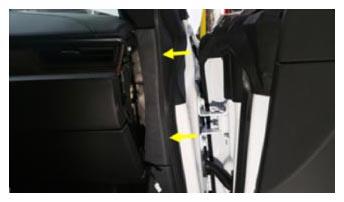
- Install RH middle A-pillar trim.
 Courtesy of TESLA, INC. Courtesy of TESLA, INC.
|
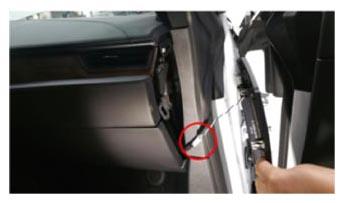
- Install RH IP side cover.
NOTE:
3x clips, 1x connector.
 Courtesy of TESLA, INC. Courtesy of TESLA, INC.
|
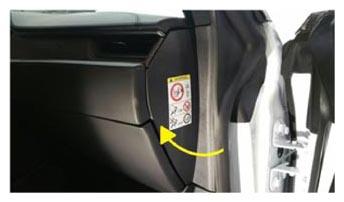 Courtesy of TESLA, INC. Courtesy of TESLA, INC.
|
- Reinstall all floor mats.
- Overlap from A/C vacuum and leak test.
NOTE:
Full run time: 40 minutes.
- Inject oil into the system.
NOTE:
Refill with the amount removed during recovery.
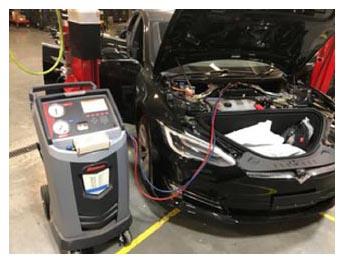 Courtesy of TESLA, INC. Courtesy of TESLA, INC.
|
- Perform A/C refrigerant refill.
NOTE:
Touch time only, per fluid capacity spec.
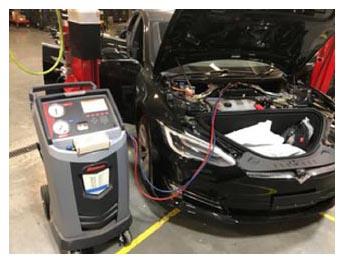 Courtesy of TESLA, INC. Courtesy of TESLA, INC.
|
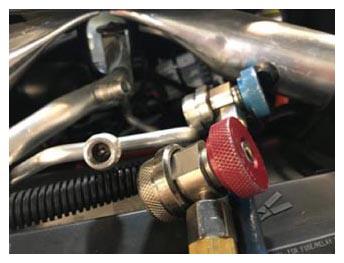
- Remove A/C lines from vehicle.
NOTE:
Press clear lines once lines have been removed.
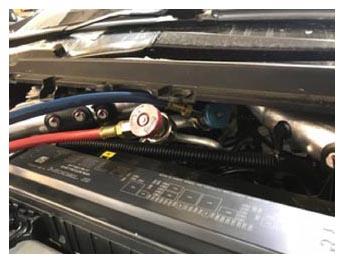 Courtesy of TESLA, INC. Courtesy of TESLA, INC.
|
 Courtesy of TESLA, INC. Courtesy of TESLA, INC.
|
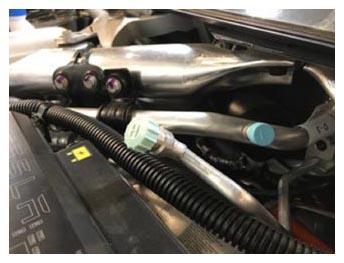
- Install caps onto A/C ports.
NOTE:
2x caps.
 Courtesy of TESLA, INC. Courtesy of TESLA, INC.
|
- Test A/C functions in vehicle to ensure cabin cooling functions as designed.
- Perform A/C hose flush.
NOTE:
Touch time only. No overlap from this since the machine is disconnected from the vehicle.
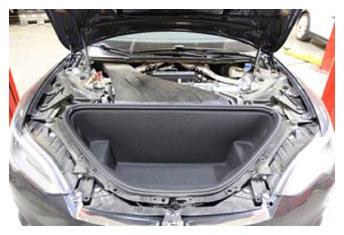
- Install HEPA filter outlet duct.
 Courtesy of TESLA, INC. Courtesy of TESLA, INC.
|
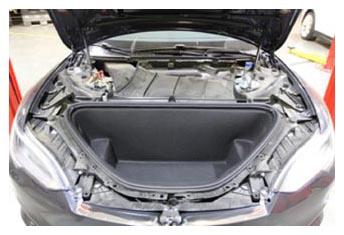
- Install HEPA filter inlet duct.
NOTE:
2x tabs, One on each side.
 Courtesy of TESLA, INC. Courtesy of TESLA, INC.
|
- Install clips securing HEPA filter inlet duct to cowl panel.
NOTE:
3x push clips.
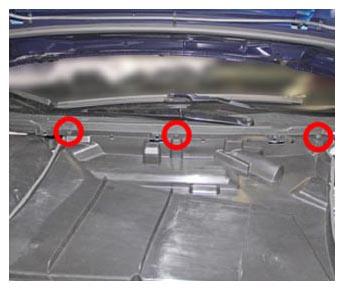 Courtesy of TESLA, INC. Courtesy of TESLA, INC.
|
- Secure drainage hoses to HEPA filter inlet duct.
NOTE:
2x hoses.
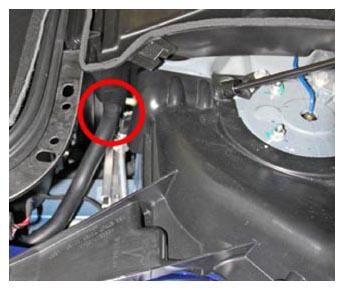 Courtesy of TESLA, INC. Courtesy of TESLA, INC.
|
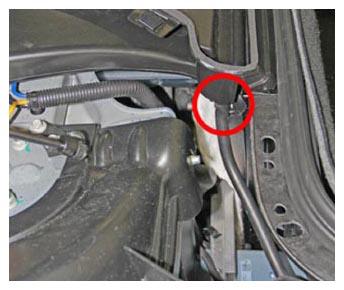 Courtesy of TESLA, INC. Courtesy of TESLA, INC.
|
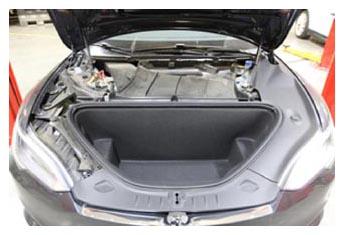
- Install RH underhood apron.
NOTE:
9x clips.
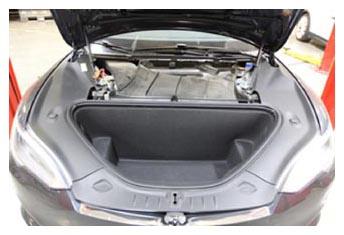 Courtesy of TESLA, INC. Courtesy of TESLA, INC.
|
- Install LH underhood apron.
NOTE:
9x clips.
 Courtesy of TESLA, INC. Courtesy of TESLA, INC.
|
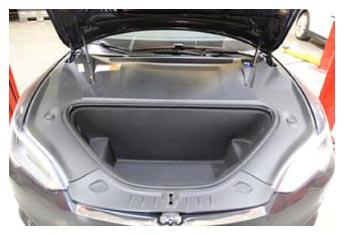
- Install rear underhood apron.
NOTE:
8x clips.
 Courtesy of TESLA, INC. Courtesy of TESLA, INC.
|
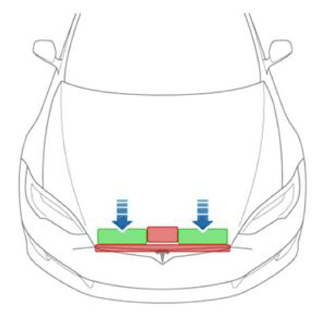
- Close hood.
NOTE:
Press firmly in green highlighted areas (see image), Damage may result from pressure elsewhere on hood.
 Courtesy of TESLA, INC. Courtesy of TESLA, INC.
|
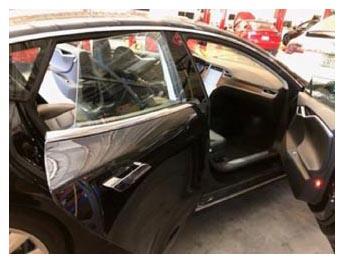
- Close both RH side doors.
NOTE:
Ensure door latches have been released by first pulling the interior releases prior to closing.
 Courtesy of TESLA, INC. Courtesy of TESLA, INC.
|
- Close LH rear door.
NOTE:
Ensure door latch has been released by first pulling the interior release prior to closing.
- Park vehicle on a flat surface.
NOTE:
Set suspension to Standard height and set Jack Mode (if equipped).
- Set up the tripod so that the bottom of the target is 3 ft (90 cm) from the ground.
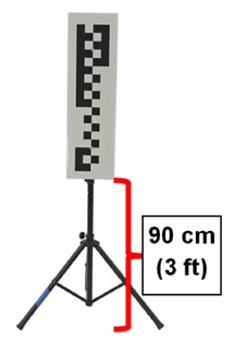 Courtesy of TESLA, INC. Courtesy of TESLA, INC.
|
- Place the target against the front fascia and centered on the T badge.
NOTE:
This is "Location 1" in the Toolbox Panel.
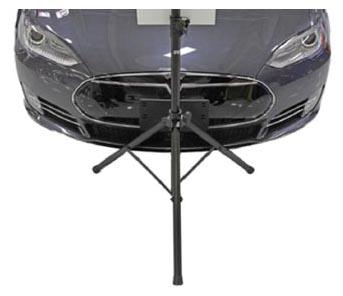 Courtesy of TESLA, INC. Courtesy of TESLA, INC.
|
- Measure 90 cm back from the rear tripod leg and place marker on ground. This will be second location verification.
- Ensure that the target is on flat ground by examining the bubble level on the back of the target.
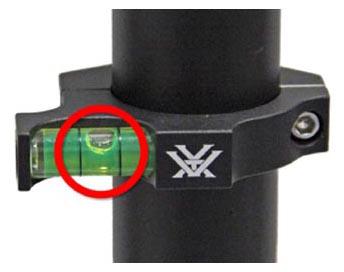 Courtesy of TESLA, INC. Courtesy of TESLA, INC.
|
- Apply a piece of red tape on the target 130 cm from the ground.
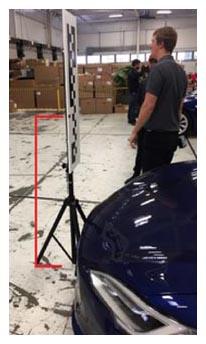 Courtesy of TESLA, INC. Courtesy of TESLA, INC.
|
- Connect laptop running Toolbox to the vehicle.
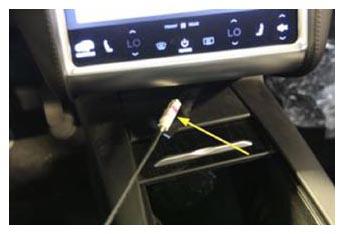 Courtesy of TESLA, INC. Courtesy of TESLA, INC.
|
- Open the "DAS2 Image Viewer" panel.
NOTE:
Pathway is as follows: Panels-> Driver Assist-> DAS2 Image Viewer.
- Click the "Capture Image" button to take an image of the target.
- Zoom in on narrow and main cameras and inspect to see if tape at 130 cm from ground is between the red lines.
NOTE:
If tape at 130 cm from ground is between the red lines, continue to 2nd target location. If tape is not between lines, pitch adjustment may need to be performed.
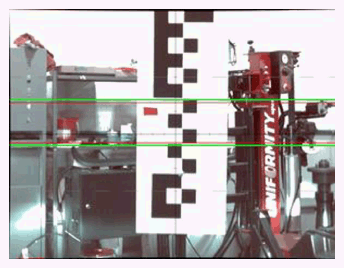 Courtesy of TESLA, INC. Courtesy of TESLA, INC.
|
- Move target to 2nd marker (90 cm away from fascia).
- Click the "Capture Image" button to take an image of the target.
- Zoom in on narrow and main cameras and inspect to verify red tape at 130 cm from ground is between the red lines.
NOTE:
If tape is not between lines, pitch adjustment may need to be performed.
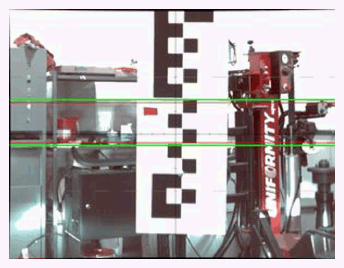 Courtesy of TESLA, INC. Courtesy of TESLA, INC.
|
- Disconnect laptop from vehicle and reinstall storage cubby.
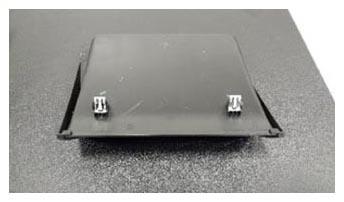 Courtesy of TESLA, INC. Courtesy of TESLA, INC.
|
- Raise all four windows.
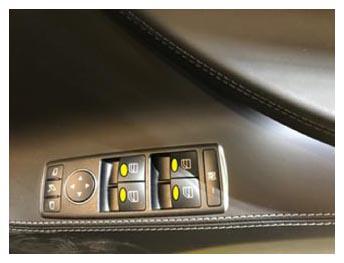 Courtesy of TESLA, INC. Courtesy of TESLA, INC.
|
- Close LH front door.
NOTE:
Ensure door latch has been released by first pulling the interior release prior to closing.
- Perform vehicle road test.
NOTE:
Ensure all vehicle systems function as designed during road test, Ensure steering wheel is level when driving straight, *Per current FRT (00040100) 0.3 hrs.