- Open all doors and lower the windows.
- From the touchscreen, open the hood and trunk.
- On the touchscreen, touch Controls > Service > Jack Mode
to enable Jack Mode.
- On the touchscreen, touch Controls > Service
, and then switch on Tow Mode
.
- Remove the HEPA filter outlet duct. See Duct - HEPA Filter - Outlet (Remove and Replace)
.
- Move the RH front seat forward.
- Disconnect 12V power. See DISCONNECT 12V POWER .
- Remove the mid aero shield. See Panel - Aero Shield - Mid (Remove and Replace)
.
- Remove the bolts (x2) and nut that attach the RH rear valance to the vehicle (torque 4 N.m).
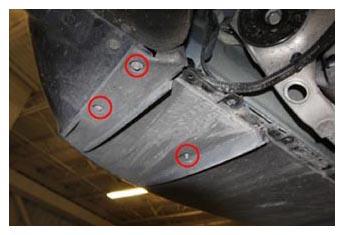 Courtesy of TESLA, INC. Courtesy of TESLA, INC.
|
- Disconnect the subframe harnesses connectors (x3), and then release the harness clip.
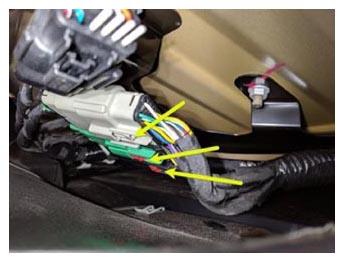 Courtesy of TESLA, INC. Courtesy of TESLA, INC.
|
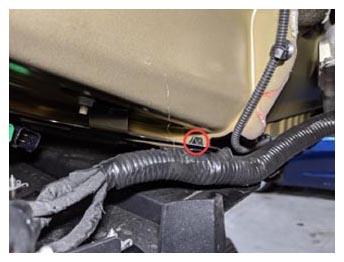 Courtesy of TESLA, INC. Courtesy of TESLA, INC.
|
- Disconnect rear fascia remote keyless entry antenna connector, and then release the antenna harness from the body.
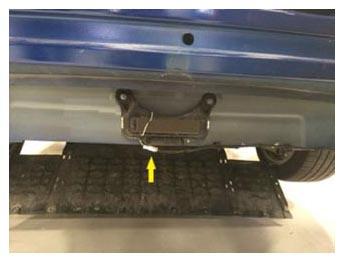 Courtesy of TESLA, INC. Courtesy of TESLA, INC.
|
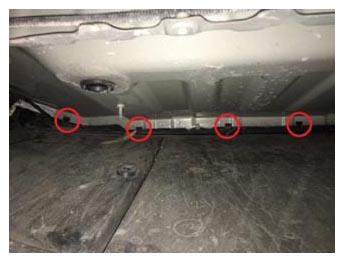 Courtesy of TESLA, INC. Courtesy of TESLA, INC.
|
- Push the RH body grommet through the body, and then route the harness inside the cabin.
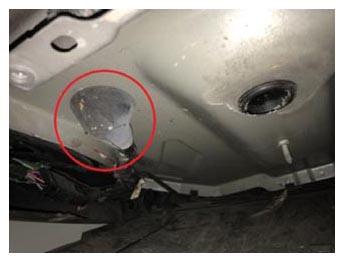 Courtesy of TESLA, INC. Courtesy of TESLA, INC.
|
- Lower the vehicle until the tires are touching the ground.
- Remove the 2nd row seat bottom cushion. See Seat Cushion - Lower - 2nd Row (Remove and Install)
NOTE:
The number of connectors may vary based on vehicle configuration.
- If equipped, remove the NVH padding from underneath the 2nd row seat cushion.
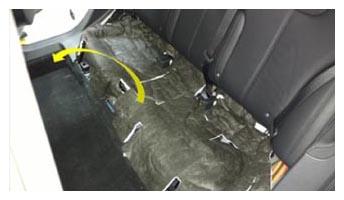 Courtesy of TESLA, INC. Courtesy of TESLA, INC.
|
- Disconnect the 12V logic connector from the charger.
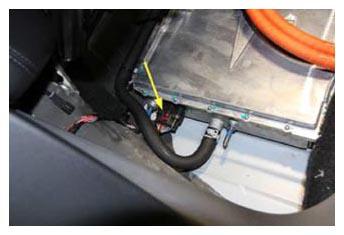 Courtesy of TESLA, INC. Courtesy of TESLA, INC.
|
- Disconnect the inline charger harness connector.
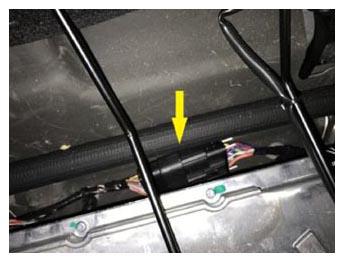 Courtesy of TESLA, INC. Courtesy of TESLA, INC.
|
- Fold the 2nd row seat backs down.
CAUTION:
Protect the seat backs from potential damage caused by the sear frame by placing a fender cover between the seat backs and the frame.
- Remove the parcel shelf.
- Remove the trunk load floor.
- Release the clips (x4) that attach the trunk sill panel to the vehicle, and then remove the trunk sill panel.
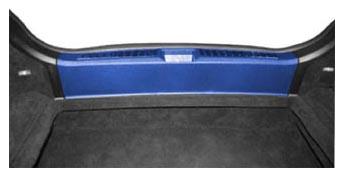 Courtesy of TESLA, INC. Courtesy of TESLA, INC.
|
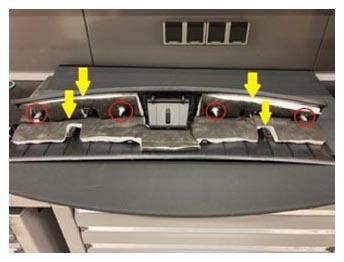 Courtesy of TESLA, INC. Courtesy of TESLA, INC.
|
- Remove the RH rear trunk side trim panel. See Trim - Rear Trunk - Side - RH (Remove and Replace)
.
- Disconnect the RH tail lamp connector.
- Release the clips (x4) that attach the trunk floor carpet, and then remove the carpet from the vehicle.
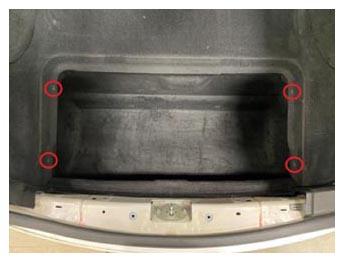 Courtesy of TESLA, INC. Courtesy of TESLA, INC.
|
- Remove the subwoofer assembly. See Subwoofer Assembly (Remove and Replace)
.
- Remove RH 2nd row sear bolster. See Bolster - Side - Seat - 2nd Row - LH (Remove and Replace)
.
- Release the clips (x4) that attach the RH mid C-pillar trim, and then remove the mid C-pillar trim from the vehicle.
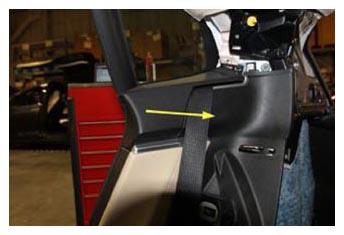 Courtesy of TESLA, INC. Courtesy of TESLA, INC.
|
- Remove the push clips (x2) that attach the RH lower C-pillar trim panel to the vehicle.
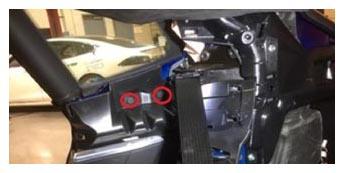 Courtesy of TESLA, INC. Courtesy of TESLA, INC.
|
- Release the clips (x4) that attach the RH lower C-pillar trim, and then remove the trim panel.
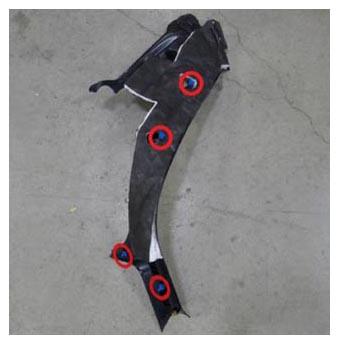 Courtesy of TESLA, INC. Courtesy of TESLA, INC.
|
- Remove the bolts (x4) that attach the RH C-pillar bracket to the vehicle (torque 4 N.m), and then remove the bracket from the vehicle.
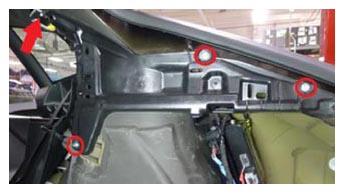 Courtesy of TESLA, INC. Courtesy of TESLA, INC.
|
- Disconnect the connector for the C-pillar impact sensor.
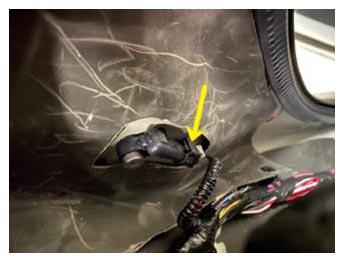 Courtesy of TESLA, INC. Courtesy of TESLA, INC.
|
- Release the TPMS ECU from the vehicle. See Module - TPMS - Continental (Remove and Replace)
.
- Release the tabs (x4) that attach the closeout panel to the body, and then remove the closeout panel.
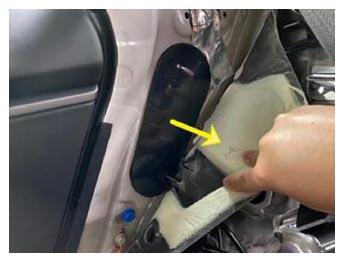 Courtesy of TESLA, INC. Courtesy of TESLA, INC.
|
- Disconnect the connector to the RH rear door latch assembly.
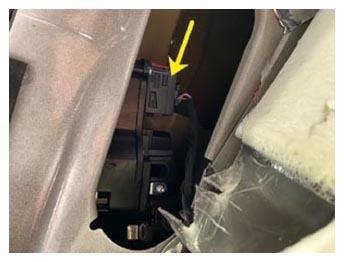 Courtesy of TESLA, INC. Courtesy of TESLA, INC.
|
- Release RH rear body harness and bracket from body
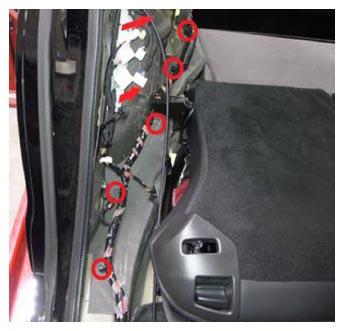 Courtesy of TESLA, INC. Courtesy of TESLA, INC.
|
- Disconnect park assist, parking brake, and liftgate module connectors
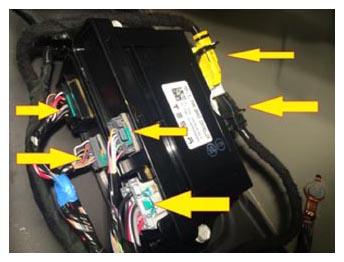 Courtesy of TESLA, INC. Courtesy of TESLA, INC.
|
- Remove the harness clip and testing connector from the module bracket.
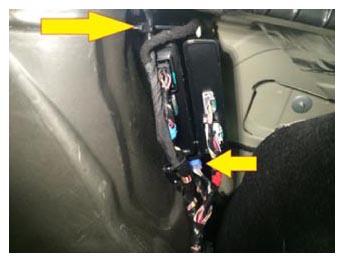 Courtesy of TESLA, INC. Courtesy of TESLA, INC.
|
- Release the bolt (torque 10 N.m) and clips (x5) that attach the RH body harness to the RH quarter panel area.
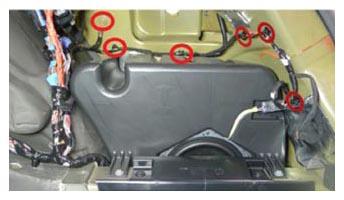 Courtesy of TESLA, INC. Courtesy of TESLA, INC.
|
- Remove the RH instrument panel side cover. See Assembly - Instrument Panel Side Cover - LH (Remove and Replace)
.
- Remove the RH middle A-pillar trim. See Panel - A Pillar Trim - Middle - LH (Remove and Replace)
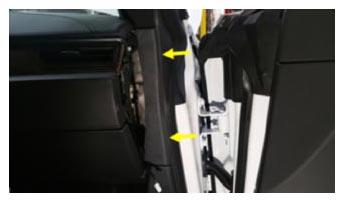 Courtesy of TESLA, INC. Courtesy of TESLA, INC.
|
- Release the clips (x4) that attach the RH lower A-pillar trim, and then remove the RH lower A-pillar trim.
NOTE:
The number of clips varies depending on vehicle production date.
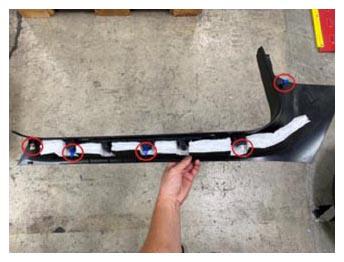 Courtesy of TESLA, INC. Courtesy of TESLA, INC.
|
- Disconnect the RH body harness from the lower A-pillar.
NOTE:
10x connectors
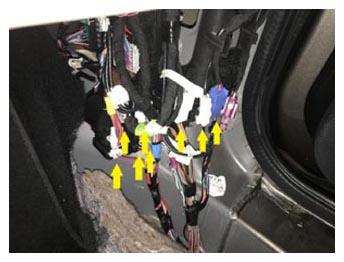 Courtesy of TESLA, INC. Courtesy of TESLA, INC.
|
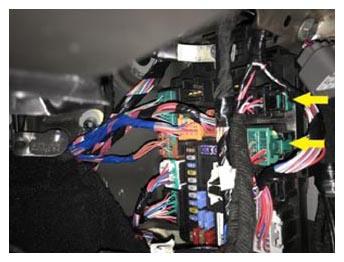 Courtesy of TESLA, INC. Courtesy of TESLA, INC.
|
- Remove the RH upper B-pillar trim. See Trim - B-Pillar - Upper - LH (Remove and Install)
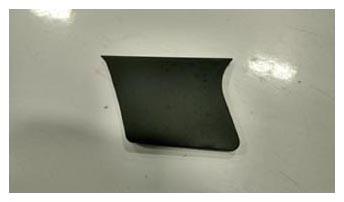
- Remove RH exterior B-pillar finisher
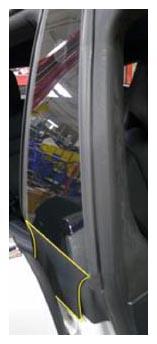 Courtesy of TESLA, INC. Courtesy of TESLA, INC.
|
 Courtesy of TESLA, INC. Courtesy of TESLA, INC.
|
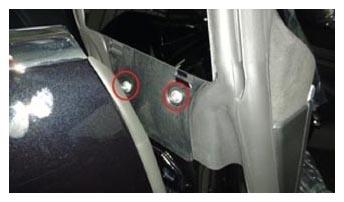
- Remove the bolts (x2) that attach the RH B-pillar applique to the vehicle (torque 4 N.m).
 Courtesy of TESLA, INC. Courtesy of TESLA, INC.
|
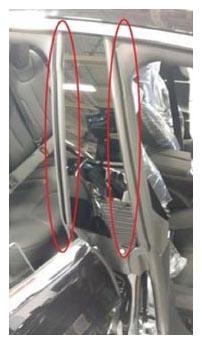
- Release the RH B-pillar seals from the applique and body along the length of the applique.
 Courtesy of TESLA, INC. Courtesy of TESLA, INC.
|
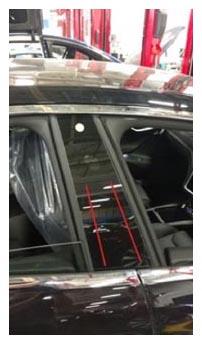
- Pry the RH applique away from the body starting at the bottom.
NOTE:
2 strips of double-sided tape attach the applique to the body.
 Courtesy of TESLA, INC. Courtesy of TESLA, INC.
|
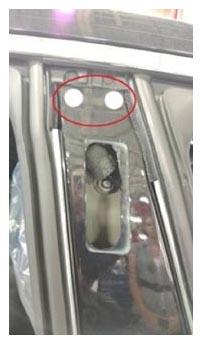
- Pull down to release the RH applique from the upper clips.
CAUTION:
Use caution as the camera harness does not have much slack.
 Courtesy of TESLA, INC. Courtesy of TESLA, INC.
|
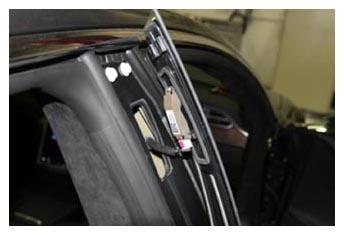
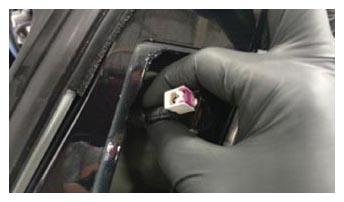
- Hold the RH applique away from the body, disconnect the camera harness connector, and then remove the applique.
 Courtesy of TESLA, INC. Courtesy of TESLA, INC.
|
 Courtesy of TESLA, INC. Courtesy of TESLA, INC.
|
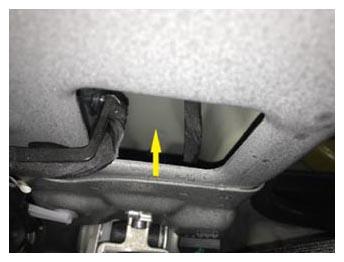
- Pull out the RH rear door harness to reveal the connector.
 Courtesy of TESLA, INC. Courtesy of TESLA, INC.
|
- Disconnect the RH rear door harness connector.
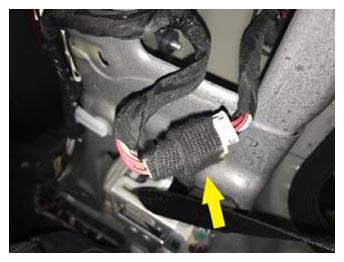 Courtesy of TESLA, INC. Courtesy of TESLA, INC.
|
- Disconnect the B-pillar impact sensor.
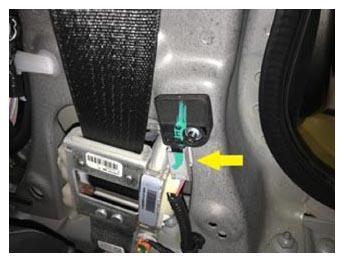 Courtesy of TESLA, INC. Courtesy of TESLA, INC.
|
- Disconnect the RH seat belt reel connector and put the harness aside.
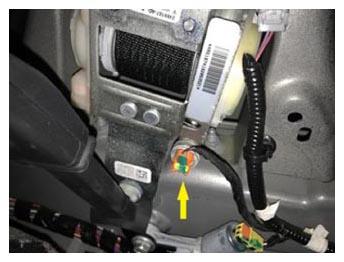 Courtesy of TESLA, INC. Courtesy of TESLA, INC.
|
- Disconnect the RH pretensioner connector.
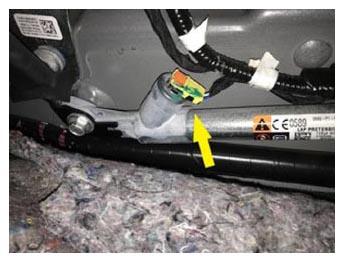 Courtesy of TESLA, INC. Courtesy of TESLA, INC.
|
- Remove the bolt (torque 10 N.m) that attaches the headliner and support strap to the RH C-pillar.
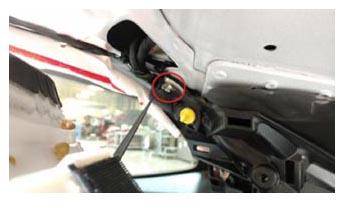 Courtesy of TESLA, INC. Courtesy of TESLA, INC.
|
- Release the rear portion of the headliner and lower it.
NOTE:
5x clips, 3x velcro strips
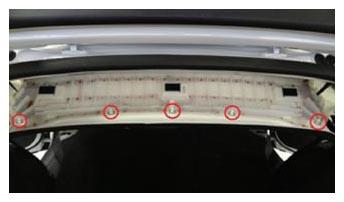 Courtesy of TESLA, INC. Courtesy of TESLA, INC.
|
- Release the headliner at the RH side of the vehicle above the B-pillar area.
NOTE:
1x clip. Recommended to look at the reflection of clip in the roof glass and using a pick tool to release it.
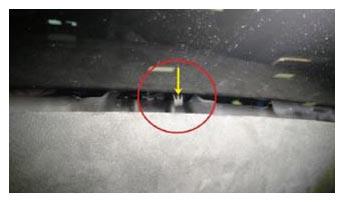 Courtesy of TESLA, INC. Courtesy of TESLA, INC.
|
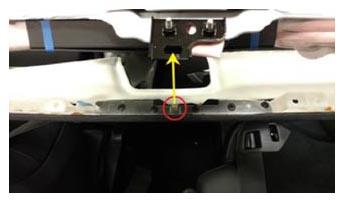 Courtesy of TESLA, INC. Courtesy of TESLA, INC.
|
- Disconnect the RH curtain airbag harness connector.
WARNING:
To avoid personal injury, observe all relevant safety precautions before removing or testing any SRS components.
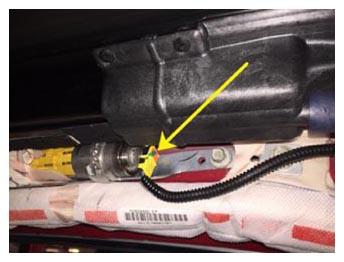 Courtesy of TESLA, INC. Courtesy of TESLA, INC.
|
- Disconnect the power strut electrical harness connector.
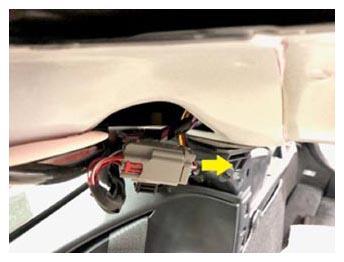 Courtesy of TESLA, INC. Courtesy of TESLA, INC.
|
- Remove the remaining clips and remove the RH body harness from the vehicle.
NOTE:
1x fir tree clip on the lower A-pillar, 4x fir tree clips on the B-pillar, 1x fir tree clip on the lower C-pillar.
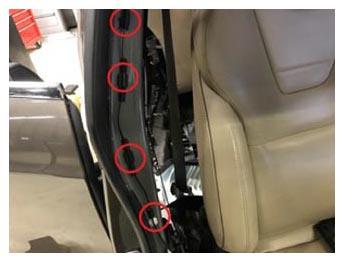 Courtesy of TESLA, INC. Courtesy of TESLA, INC.
|
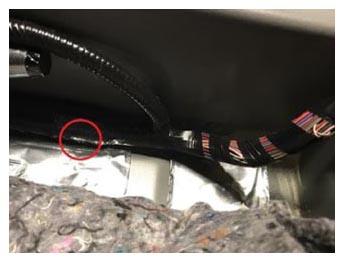 Courtesy of TESLA, INC. Courtesy of TESLA, INC.
|
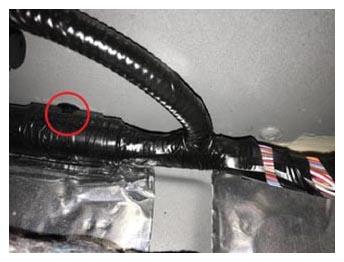 Courtesy of TESLA, INC. Courtesy of TESLA, INC.
|
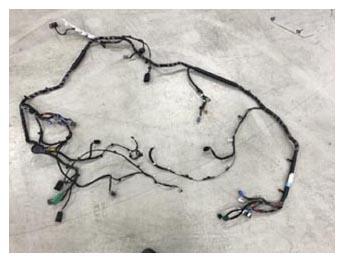 Courtesy of TESLA, INC. Courtesy of TESLA, INC.
|