- Remove the glove box assembly, refer to GLOVE BOX (REMOVE AND REPLACE) .
- In the upper area behind the glove box, remove the 2 screws (torque 10 N.m) that secure the passenger airbag to the crossbar beam.
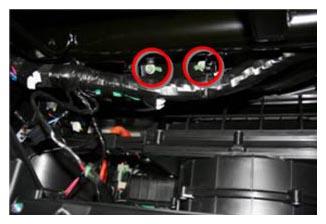 Courtesy of TESLA, INC. Courtesy of TESLA, INC.
|
CAUTION:
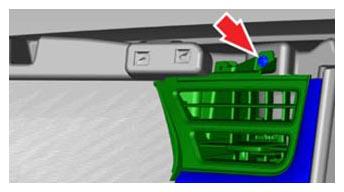
The screws that secure the RH instrument panel are underneath the top pad. It is necessary to release the rightmost and center clips on the top pad in order to access the screw. If possible, use an inflatable wedge. Be very careful not to bend the top pad.
 Courtesy of TESLA, INC. Courtesy of TESLA, INC.
|
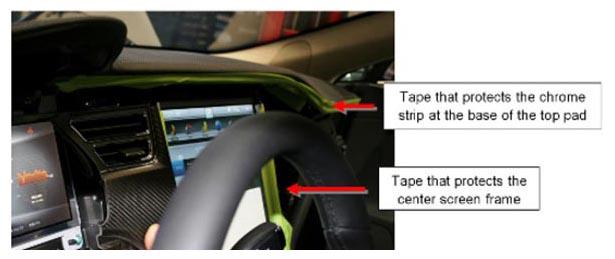
- Cover the chrome strips at the base of the top pad and around the center screen with tape.
 Courtesy of TESLA, INC. Courtesy of TESLA, INC.
|
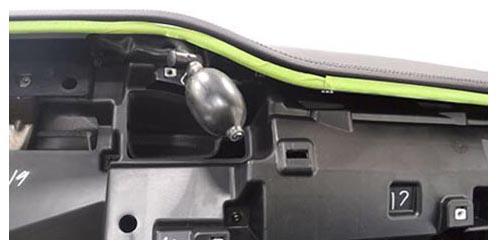
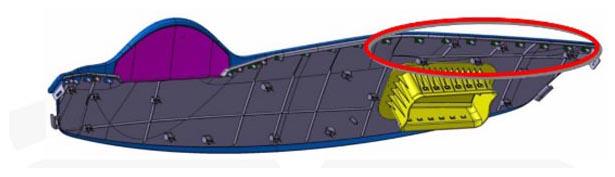
- Gently lift up on the rightmost edge of the instrument panel top pad enough to allow room for a trim pry tool to release the rightmost clip. Repeat this process working from right to left, releasing one trim clip at a time until just to the right of the center screen.
CAUTION:
Take care not to damage component(s).
NOTE:
Lifting with an inflatable wedge is recommended to reduce the risk of bending the top pad. Place the inflatable wedge above the vent outlet at the right side of the touchscreen.
 Courtesy of TESLA, INC. Courtesy of TESLA, INC.
|
 Courtesy of TESLA, INC. Courtesy of TESLA, INC.
|
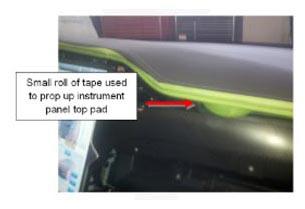
- Gently lift up on the right side of the instrument panel top pad (no more than 15 mm) and use a small wedge or other object to prop up the right side of the top pad.
CAUTION:
Take care not to damage component(s).
 Courtesy of TESLA, INC. Courtesy of TESLA, INC.
|
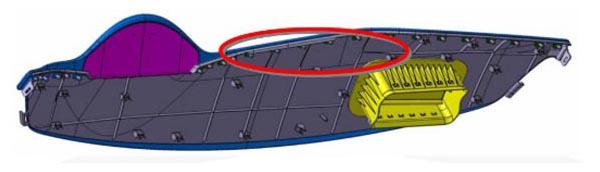
- Use a trim stick to release the trim clips directly above the center screen.
CAUTION:
If possible, use an inflatable wedge. Be very careful not to bend the top pad.
CAUTION:
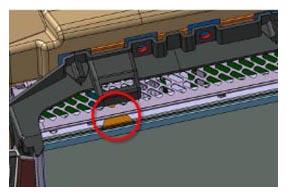
Do not scratch or damage the PFC (printed flexible circuit) when releasing the trim clips above the center screen.
 Courtesy of TESLA, INC. Courtesy of TESLA, INC.
|
 Courtesy of TESLA, INC. Courtesy of TESLA, INC.
|
- Remove the 2 screws that secure the face vents to the carrier (torque 2 N.m).
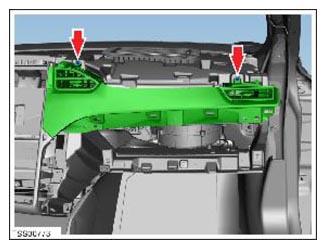 Courtesy of TESLA, INC. Courtesy of TESLA, INC.
|
- Use a suitable trim tool to carefully release the 6 clips that secure the instrument panel finisher to the carrier.
CAUTION:
Take care not to damage component(s).
CAUTION:
Replace any broken clips.
NOTE:
Components have been removed in this graphic to aid clarity.
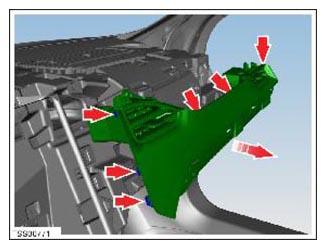 Courtesy of TESLA, INC. Courtesy of TESLA, INC.
|
- Remove the instrument panel finisher assembly.
- Remove the 6 screws that secure the face vents to instrument panel finisher (torque 2 N.m).
- Remove the face vents.
- Remove the clips from the trim panel.
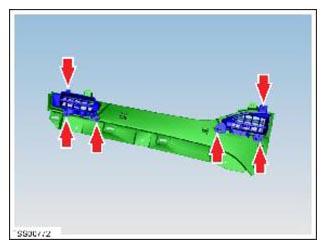 Courtesy of TESLA, INC. Courtesy of TESLA, INC.
|