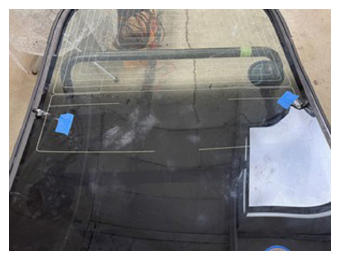
- Use masking tape to tape the backlight glass antenna connectors to the backlight glass.
 Courtesy of TESLA, INC. Courtesy of TESLA, INC.
|
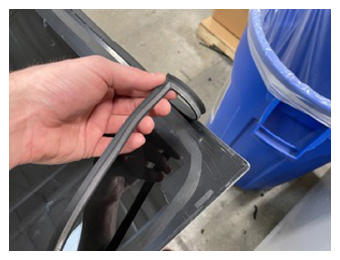
- Peel the adhesive backing off the new seal at the corner and slowly apply the adhesive backing to the adhesive path on the backlight glass.
NOTE:
Firmly press the seal onto the glass during installation. Ensure the adhesive is installed as close to the edge of the glass as possible.
 Courtesy of TESLA, INC. Courtesy of TESLA, INC.
|
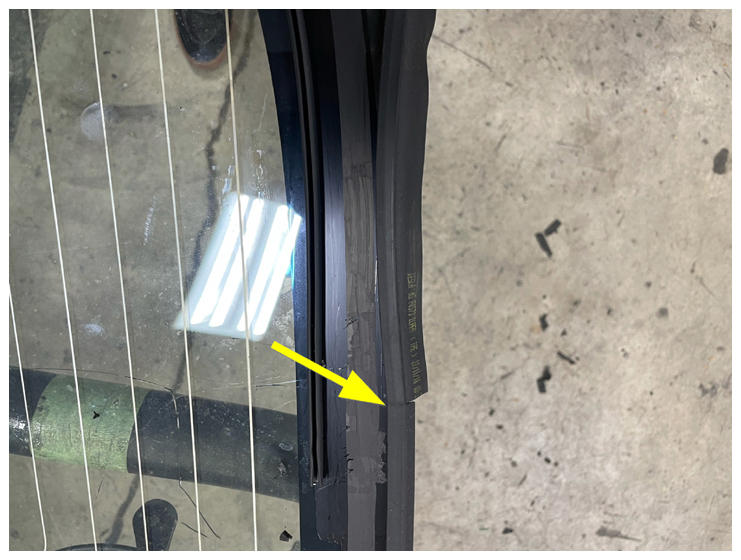
- Peel the adhesive backing off at the end of the new trunk flip seal, and then slowly apply the seal to the old adhesive path on the backlight glass.
NOTE:
Start by installing the trunk flip seal where the backlight glass seal ends. Firmly press the seal onto the glass during installation. Ensure the adhesive is installed as close to the edge of the glass as possible.
NOTE:
There will be overlap at the end of the seal. Cutting the seal is in the next step.
 Courtesy of TESLA, INC. Courtesy of TESLA, INC.
|
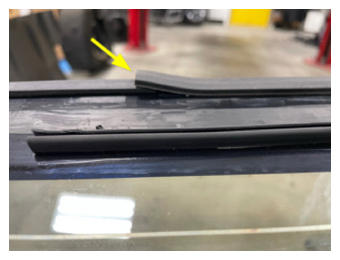
- Cut the trunk flip seal overlap.
 Courtesy of TESLA, INC. Courtesy of TESLA, INC.
|
- Install the new net pads onto the backlight glass.
NOTE:
Side Net Pads Shown Below.
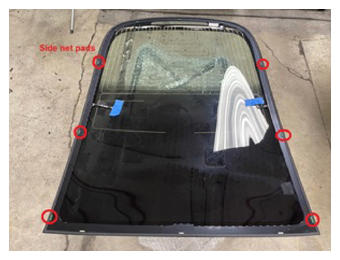 Courtesy of TESLA, INC. Courtesy of TESLA, INC.
|
NOTE:
Upper Net Pads Shown Below.
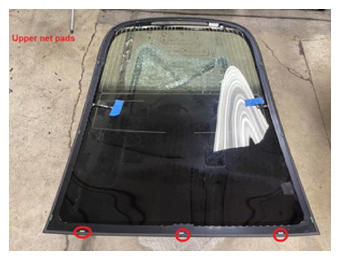 Courtesy of TESLA, INC. Courtesy of TESLA, INC.
|
NOTE:
Rear Net Pads Shown Below.
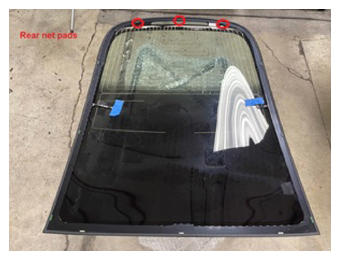 Courtesy of TESLA, INC. Courtesy of TESLA, INC.
|
- With an assistant, position the backlight glass onto the vehicle for a dry fit and note any locations where the net pads need to be adjusted.
- If necessary, perform net pad adjustment.
- Cut teflon tape into rectangles having dimensions 5 mm x 20 mm.
- With an assistant, remove the backlight glass and set it on a stand.
- Apply the teflon tape rectangles to the net pads where adjustment is needed.
NOTE:
Make sure that the edges of the tape rectangles align with the edges of the net pads.
- With an assistant, position the backlight glass onto the vehicle and check the net pads fitment.
- Repeat step 1 through step 4 to adjust the net pads.
- With an assistant, remove the backlight glass and set it on a stand.
- Apply urethane primer to the vehicle along the urethane path and in areas that were damaged during removal of the backlight glass.
NOTE:
Allow the primer to dry for at least 2 minutes before continuing.
- Apply urethane primer to the backlight glass along the urethane path.
NOTE:
Allow the primer to dry for at least 2 minutes before continuing.
- Remove the masking tape from the exterior C-pillars.
- Prepare the caulking gun and urethane.
NOTE:
The opening must be 8 mm wide and 13 mm tall.
- Apply urethane to the body following the original path.
NOTE:
Make sure that the urethane bead has a triangular cross-section of approximate width 8 mm and height 13 mm.
- With an assistant, install the backlight glass to the vehicle.
- Check the gap and flush of the backlight glass to the body before fully seating the backlight glass.
- Close the trunk.
- Fully seat the backlight glass, check the gap and flush, and adjust as necessary.
- Use an IPA wipe to clean any debris or visible urethane from the backlight glass and body.
- Apply masking tape to attach the backlight glass to the body while the urethane cures.
- Remove the suction cups from the backlight glass.
- Connect the antenna harness to the tuner and body harness.
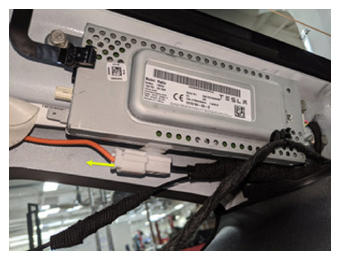 Courtesy of TESLA, INC. Courtesy of TESLA, INC.
|
- Install the antenna harness clip.
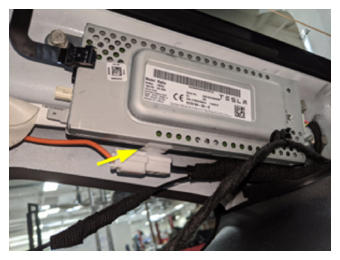 Courtesy of TESLA, INC. Courtesy of TESLA, INC.
|
- Connect the antenna connector to the tuner.
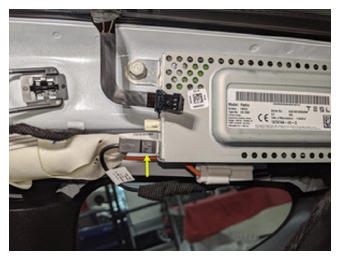 Courtesy of TESLA, INC. Courtesy of TESLA, INC.
|
- Connect the RH harness electrical connector to the heater grid.
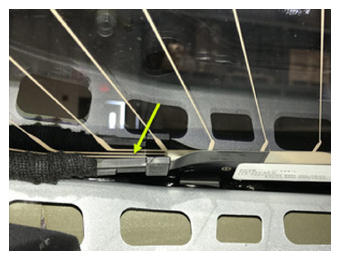 Courtesy of TESLA, INC. Courtesy of TESLA, INC.
|
- Install the RH side antenna harness to the backlight glass.
NOTE:
Apply a small piece of tape at each end of the seal clip.
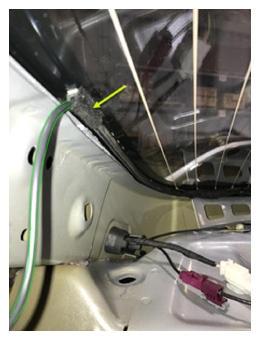 Courtesy of TESLA, INC. Courtesy of TESLA, INC.
|
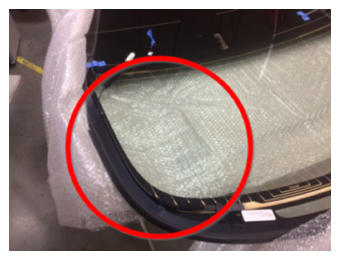 Courtesy of TESLA, INC. Courtesy of TESLA, INC.
|
- Connect the backlight harness electrical connector to the tuner.
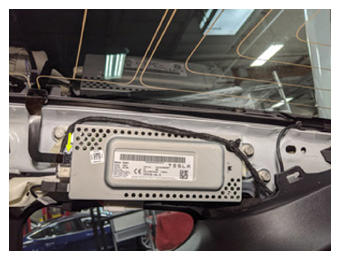 Courtesy of TESLA, INC. Courtesy of TESLA, INC.
|
- Connect the backlight glass heater ground strap to the LH C-pillar.
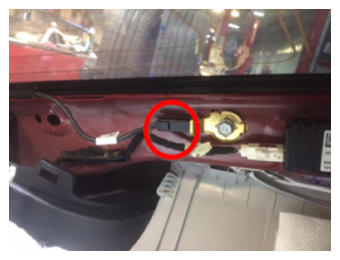 Courtesy of TESLA, INC. Courtesy of TESLA, INC.
|
- Connect the LH harness electrical connector to the heater grid.
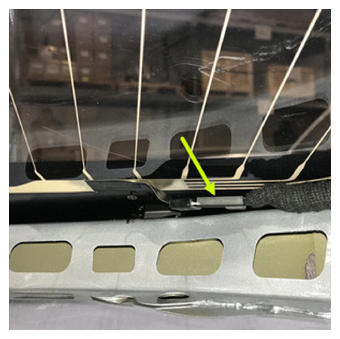 Courtesy of TESLA, INC. Courtesy of TESLA, INC.
|
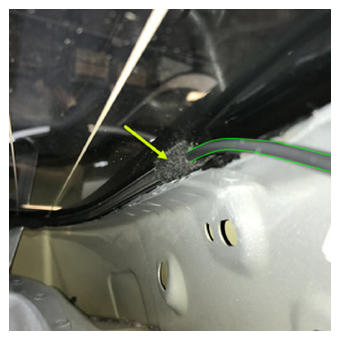
- Install the LH side antenna harness from the backlight glass.
NOTE:
Apply a small piece of tape at each end of the seal clip.
 Courtesy of TESLA, INC. Courtesy of TESLA, INC.
|
- Install the FM antenna amplifier. See AMPLIFIER - ANTENNA - FM (REMOVE AND REPLACE)
.
- Install the package tray trim. See TRIM - PACKAGE TRAY (REMOVE AND REPLACE)
.
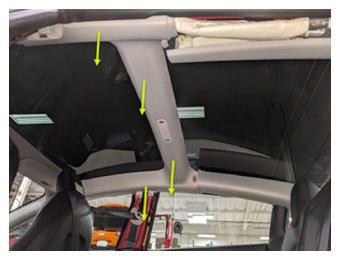
- Install the clips (4) that attach the rear edge of the headliner to the body.
 Courtesy of TESLA, INC. Courtesy of TESLA, INC.
|
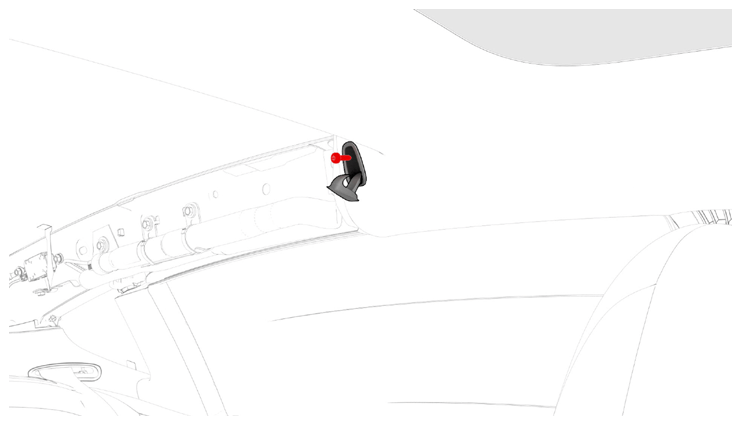
- Install the screws that attach the LH coat hook to the body.
 2.5 N.m (1.8 ft-lbs)
 Courtesy of TESLA, INC. Courtesy of TESLA, INC.
|
- Fasten the clips that attach the screw cover to the LH rear coat hooks, and then push the coat hook to close it.
- Install the LH side rail trim. See TRIM - SIDE RAIL - LH (REMOVE AND INSTALL)
.
- Install the LH 2nd row seat side bolster. See BOLSTER - SIDE - SEAT - 2ND ROW - LH (REMOVE AND REPLACE)
.
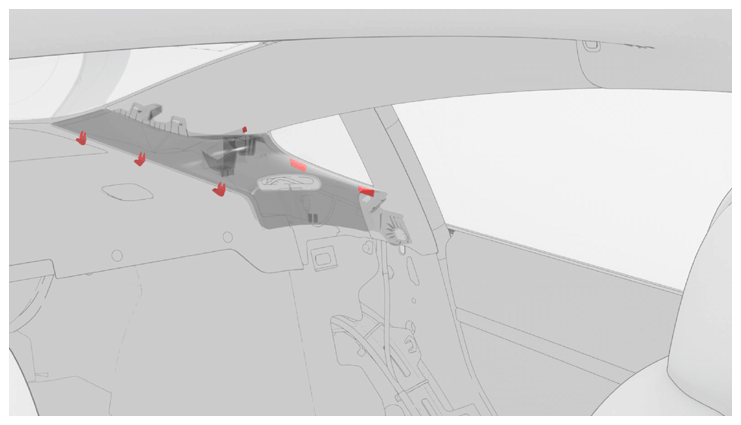
- Install the clip and tabs that attach the LH rear C-pillar trim to the body.
NOTE:
Pull the rear of the trim forward, and then upward to remove it.
 Courtesy of TESLA, INC. Courtesy of TESLA, INC.
|
- Install the LH upper C-pillar trim. See TRIM - C-PILLAR - UPPER - LH (REMOVE AND REPLACE)
.
- Repeat step 33 through step 38 for the RH side of the vehicle.
- Install the 2nd row lower seat cushion. See SEAT CUSHION - LOWER - 2ND ROW (REMOVE AND REPLACE)
.
- Move the front seat to the original positions
- Raise all the windows and close all the doors.
- Remove the masking tape after the urethane has cured.
CAUTION:
Do not drive the vehicle until the adhesive manufacturer's recommended minimum drive-away time has passed. Dow Betaseal Express has a drive-away time of 1 hour minimum in temperatures of 0°F (-18°C) or warmer. If necessary, leave the tape applying pressure to the glass on the vehicle and advise the customer that they can remove it after 24 hours. Additionally, advise the customer that they should avoid high driving speeds and speed bumps for the next 24 hours.