- Open all doors and lower the windows.
NOTE:
Latch the rear doors to prevent accidental closure.
- Move both front seats fully forward.
- Release the clips that attach the screw covers to the LH and RH rear coat hooks.
- Remove the screws that attach the LH and RH rear coat hooks to the body.
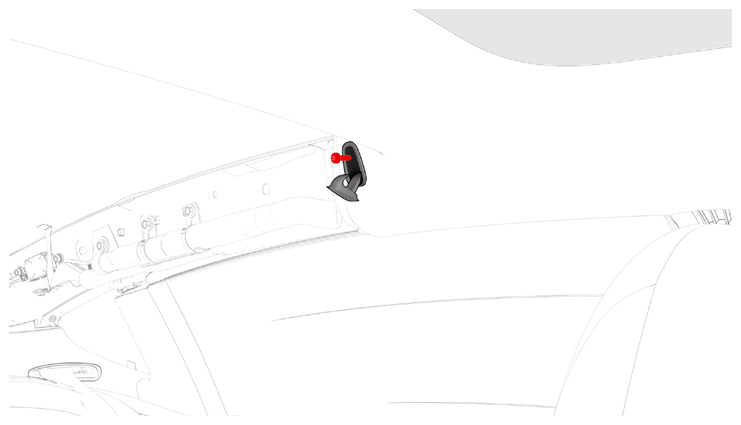 Courtesy of TESLA, INC. Courtesy of TESLA, INC.
|
- Remove the package tray trim. See TRIM - PACKAGE TRAY (REMOVE AND REPLACE)
.
- Release clips (x4) that attach the rear end of the headliner to the body.
NOTE:
If necessary, use an air bladder between the headliner and body for additional clearance.
CAUTION:
Be cautious not to damage the headliner.
- Disconnect the backlight electrical harness connector from the antenna amplifier on the LH side C-pillar.
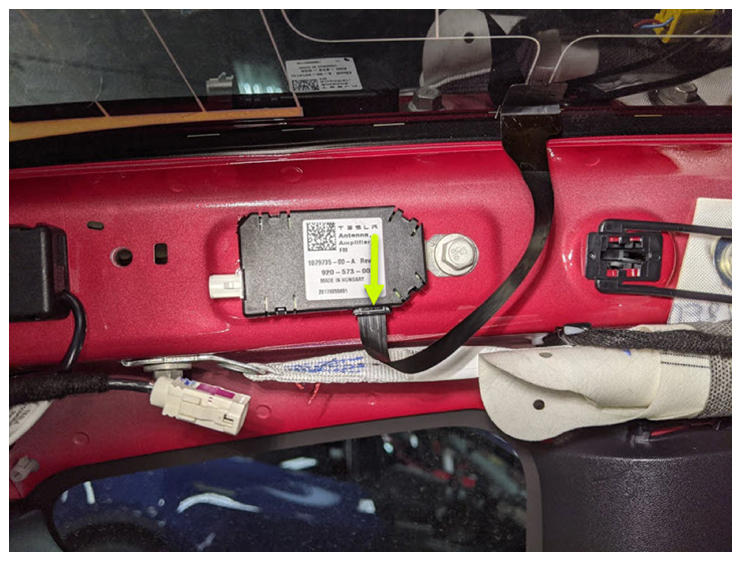 Courtesy of TESLA, INC. Courtesy of TESLA, INC.
|
- Disconnect the ground noise filter antenna connector on the LH side of the vehicle.
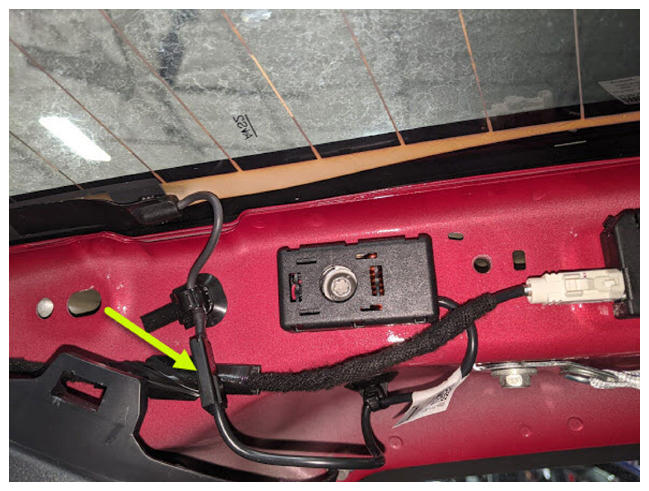 Courtesy of TESLA, INC. Courtesy of TESLA, INC.
|
- Release the LH side backlight busbar harness from the body.
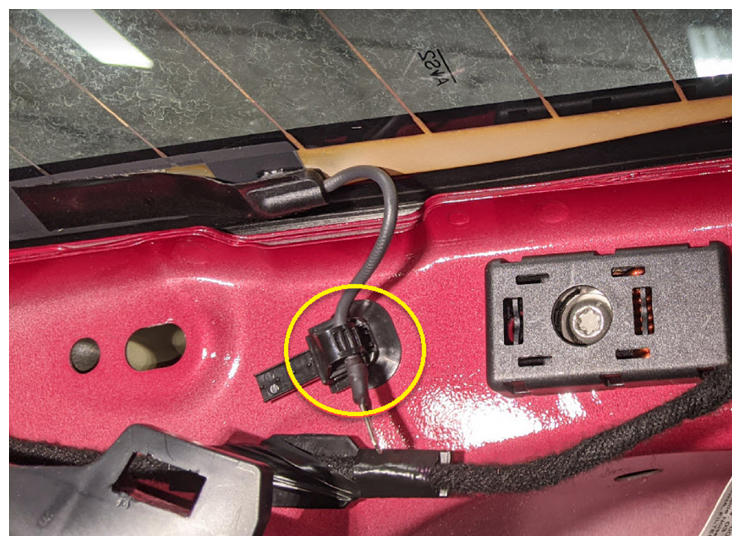 Courtesy of TESLA, INC. Courtesy of TESLA, INC.
|
- Disconnect the 12V noise filter antenna connector on the RH side of the vehicle.
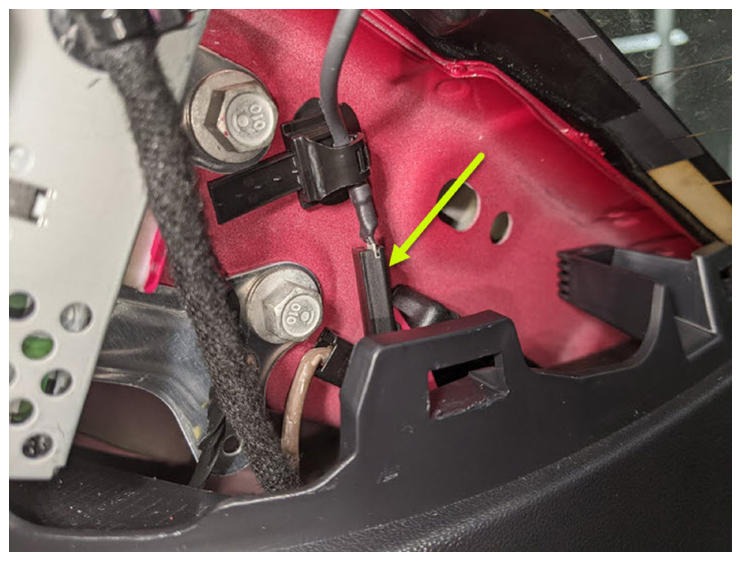 Courtesy of TESLA, INC. Courtesy of TESLA, INC.
|
- Release the RH side backlight busbar harness from the body.
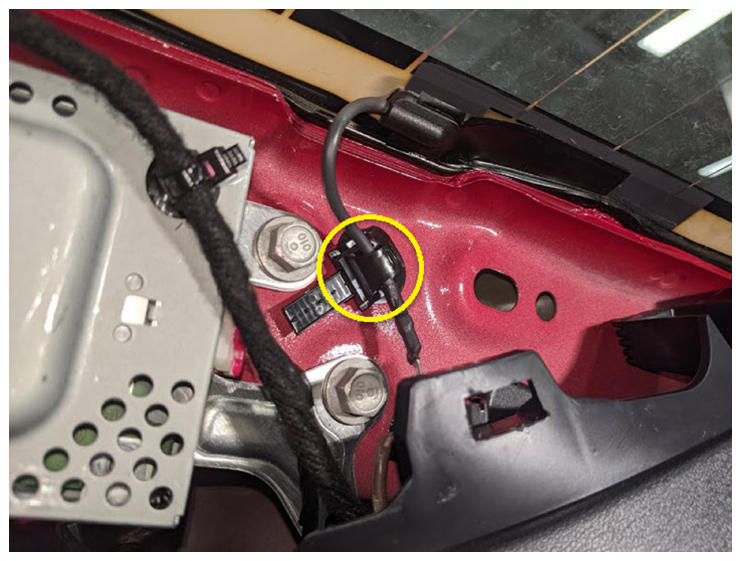 Courtesy of TESLA, INC. Courtesy of TESLA, INC.
|
- Disconnect the backlight electrical harness connector from the tuner on the RH C-pillar.
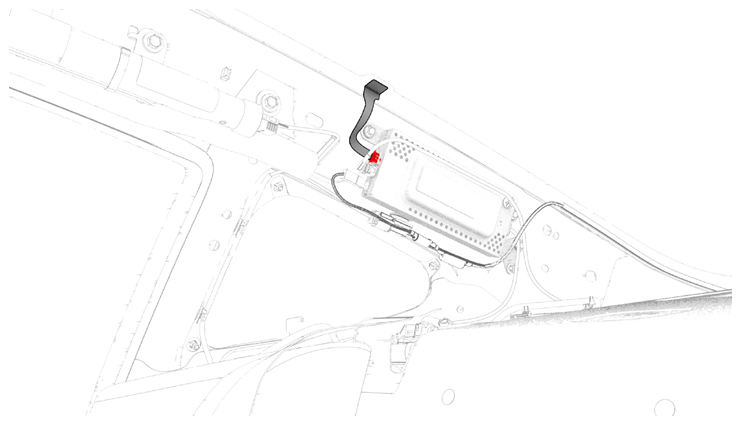 Courtesy of TESLA, INC. Courtesy of TESLA, INC.
|
- Open the trunk.
- Remove and discard the rear seal from the backlight glass.
NOTE:
The new backlight glass comes with a new rear seal preinstalled.
- Remove and discard the front seal from the backlight glass.
NOTE:
The new backlight glass comes with a new rear seal preinstalled.
- Apply masking tape to the exterior of the LH and RH roof pillars to protect the paint from damage.
- Insert the starter tool from inside the vehicle through the adhesive bead at the bottom area of the backlight glass.
- Insert the end of the nylon cord through the eye of the starter tool and pull it into the inside of the vehicle.
- Clean backlight glass roof with isopropyl alcohol.
- Position the python cup assembly in the center of the backlight glass.
- Tie a blowline knot in the end of nylon cord and insert loop through the anchor tab on the python cup assembly.
- Install slither unit to the backlight glass.
- Pull nylon cord from cup assembly around slither unit in the backlight glass.
NOTE:
Turn the python cup assembly handle until the nylon cord is taught.
- Position the nylon cord around backlight glass from the outside of the vehicle.
- Insert the starter tool through the adhesive bead second time of the backlight glass.
- Pull the nylon cord into the backlight glass inside of the vehicle.
- Tie a stopper knot on the loose end of the nylon cord then insert into the notched slot on the python cup assembly.
- Turn the handle bar on the python cup assembly so that reeling the nylon cord to cut the urethane securing backlight glass to body. Cut in a counter-clockwise motion over the top of the backlight glass to the lower side of the LH C-pillar. Return to the starting point in a clockwise motion and continue past the bottom of the backlight glass to the lower side of the LH C-pillar.
CAUTION:
Use caution when working around the headliner area.
- Remove equalizer python from backlight glass.
- Remove the wire from the starter tool and remove the tool from the urethane.
- Attach suction cups to the LH and RH sides of the backlight glass.
- With an assistant, remove the backlight glass from the vehicle.
- Use a razor blade to carefully remove the old urethane from the body.
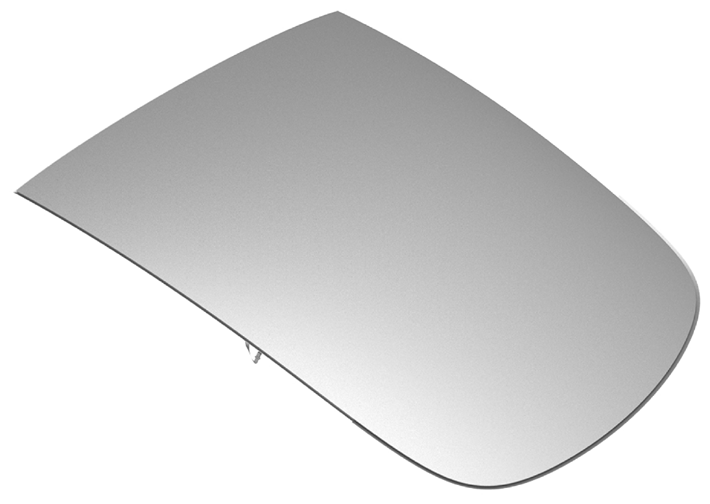 Courtesy of TESLA, INC. Courtesy of TESLA, INC.
|
- Use an IPA wipe to clean the urethane path.