- Raise and support the vehicle. See RAISE VEHICLE - 2 POST LIFT
.
- Remove the rear underhood apron. See UNDERHOOD APRON - REAR (REMOVE AND REPLACE)
.
- Remove the cabin intake duct. See DUCT - CABIN INTAKE (REMOVE AND REPLACE)
.
- Remove the underhood storage unit. See UNDERHOOD STORAGE UNIT (REMOVE AND REPLACE)
.
- Remove the LH and RH wiper arms. See WIPER ARMS (REMOVE AND REPLACE)
.
- Remove the LH and RH shock tower covers. See COVER - SHOCK TOWER - LH (REMOVE AND REPLACE)
.
- Remove the cowl screen panel. See PANEL - COWL SCREEN (REMOVE AND REPLACE)
.
- Remove the wiper module. See WIPER MODULE (REMOVE AND REPLACE)
.
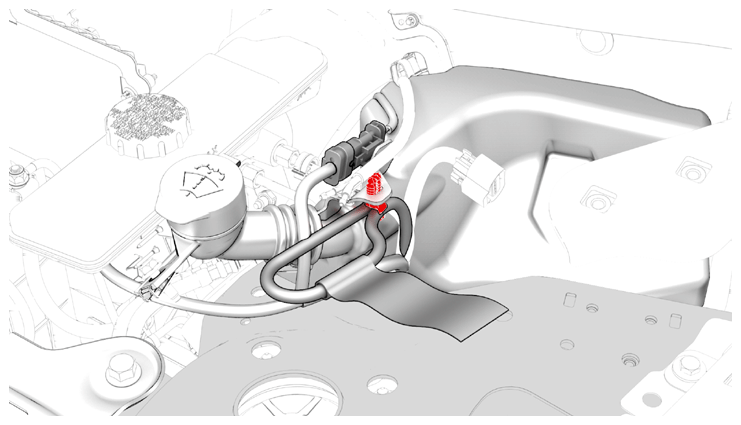
- Release the clip that attaches the electrical harness to the windshield washer reservoir.
 Courtesy of TESLA, INC. Courtesy of TESLA, INC.
|
- Remove the HVAC plenum outer duct. See DUCT - HVAC PLENUM - OUTER (REMOVE AND REPLACE)
.
- Remove the HVAC plenum inner duct. See DUCT - HVAC PLENUM - INNER (REMOVE AND REPLACE)
.
- Remove the LH front wheel. See WHEEL (REMOVE AND INSTALL)
.
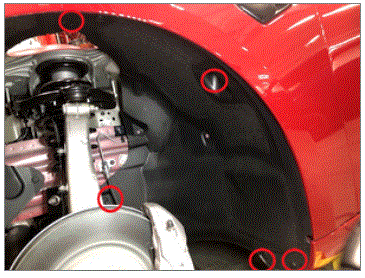
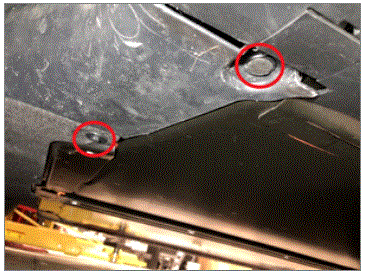
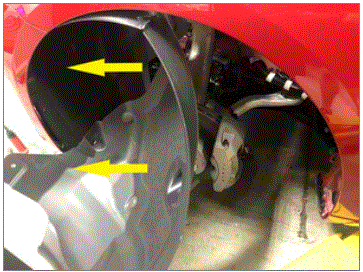
- Remove the bolt and release the clips (x6) that attach the rear portion of the LH front wheel arch liner to the vehicle, and then partially remove the liner from the vehicle.
 5 N.m (3.7 lbs-ft)
NOTE:
Newer vehicles may be equipped with 2x push clips securing the lower portion of the liner to body.
NOTE:
Use of the following tool(s) is recommended:
- 10 mm deep socket
- Flex head ratchet/flex head torque wrench
 Courtesy of TESLA, INC. Courtesy of TESLA, INC.
|
 Courtesy of TESLA, INC. Courtesy of TESLA, INC.
|
 Courtesy of TESLA, INC. Courtesy of TESLA, INC.
|
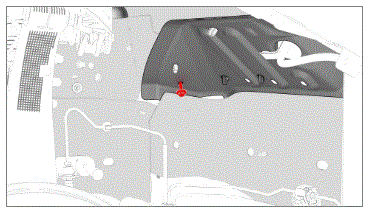
- Remove the lower bolt that attaches the windshield washer reservoir to the body.
NOTE:
Use of the following tool(s) is recommended:
- 2 in extension
- 10 mm socket
- Flex head ratchet/flex head torque wrench
- Cordless Ratchet/Impact Driver
 Courtesy of TESLA, INC. Courtesy of TESLA, INC.
|
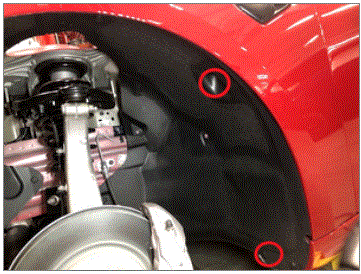
- Partially install the LH front wheel arch liner.
NOTE:
As the wheel arch liner will be removed again later, install only 2 clips to secure LH front wheel liner for now.
 Courtesy of TESLA, INC. Courtesy of TESLA, INC.
|
- Install the LH front wheel. See WHEEL (REMOVE AND INSTALL)
.
- Lower the vehicle until the tires just touch the ground.
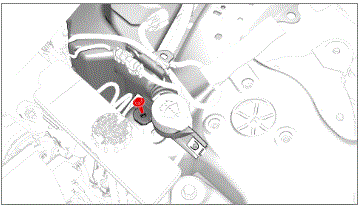
- Remove the upper bolt that attaches the windshield washer reservoir to the body.
NOTE:
Use of the following tool(s) is recommended:
- 2 in extension
- 10 mm socket
- Ratchet/torque wrench
 Courtesy of TESLA, INC. Courtesy of TESLA, INC.
|
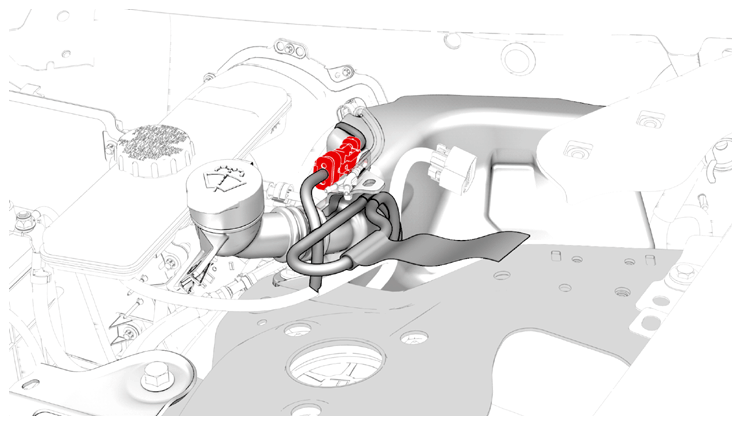
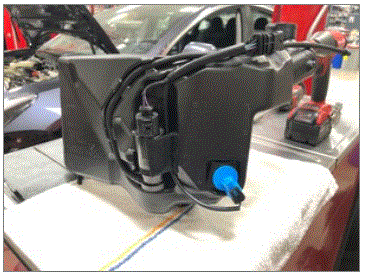
- Disconnect the electrical harness from the windshield washer reservoir connector, and then remove the windshield washer reservoir from the vehicle.
CAUTION:
Keep the washer reservoir upright to keep the contents from spilling.
 Courtesy of TESLA, INC. Courtesy of TESLA, INC.
|
 Courtesy of TESLA, INC. Courtesy of TESLA, INC.
|
- Remove the vehicle from the lift.
- Release the parking brake using Toolbox. See PARKING BRAKE - CALIPER - REAR - LH (RELEASE)
.
- Push the vehicle away from the lift.
CAUTION:
Recommend assistance. Note this vehicle can only be safely pushed for a very short distance and at very slow speed.
- Remove the 2nd row lower seat cushion. See SEAT CUSHION - LOWER - 2ND ROW (REMOVE AND REPLACE)
.
- Remove the LH and RH instrument panel end caps. See END CAP - INSTRUMENT PANEL - LH (REMOVE AND REPLACE) .
- Remove the LH and RH middle A-pillar trim panels. See TRIM - A-PILLAR - MIDDLE - LH (REMOVE AND REPLACE)
.
- Remove the LH and RH lower A-pillar trim panels. See TRIM - A-PILLAR - LOWER - LH (REMOVE AND REPLACE)
.
- Remove the LH and RH upper A-pillar trim panels. See TRIM - A-PILLAR - UPPER - LH (REMOVE AND REPLACE)
.
- Disconnect 12V power. See 12V/LV POWER (DISCONNECT AND CONNECT)
.
- Remove the driver seat. See SEAT ASSEMBLY - 1ST ROW (LH) - REMOVE AND REPLACE
.
- Remove the driver footwell cover. See COVER - FOOTWELL - DRIVER (REMOVE AND REPLACE) .
- Remove the driver knee airbag (if equipped). See AIRBAG - KNEE - DRIVER (REMOVE AND INSTALL)
.
- Remove the LH footwell duct. See DUCT - FOOTWELL - LH (REMOVE AND REPLACE)
.
- Remove the front passenger footwell cover. See COVER - FOOTWELL - PASSENGER (LHD) (REMOVE AND REPLACE) .
- Remove the passenger knee airbag (if equipped). See AIRBAG - KNEE - FRONT PASSENGER (REMOVE AND REPLACE)
.
- Remove the center console. CENTER CONSOLE (REMOVE AND INSTALL)
.
- Remove the steering wheel. See STEERING WHEEL (REMOVE AND INSTALL)
.
- Remove the steering column control module. See MODULE - STEERING COLUMN CONTROL (REMOVE AND REPLACE)
.
- Remove the touchscreen. See TOUCHSCREEN (REMOVE AND REPLACE)
.
- Remove the main instrument panel decor trim. See DECOR TRIM - INSTRUMENT PANEL - MAIN (REMOVE AND REPLACE) .
- Remove the glove box. See GLOVE BOX - WITH KNEE AIRBAGS (REMOVE AND REPLACE) or Glove Box - Without Knee Airbags (Remove and Replace) .
- Remove the RH footwell duct. See DUCT - FOOTWELL - RH (LHD) (REMOVE AND REPLACE)
.
- Remove the RH air wave duct. See DUCT - AIR WAVE - RH (REMOVE AND REPLACE)
.
- Remove the vent finisher. See FINISHER - VENT (REMOVE AND REPLACE) .
- Remove the RH front vent. See VENT - FRONT - RH (REMOVE AND REPLACE) .
- Remove the LH front vent. See VENT - FRONT - LH (REMOVE AND REPLACE) .
- Remove the instrument panel speaker grille. See GRILLE - SPEAKER - INSTRUMENT PANEL (REMOVE AND REPLACE) .
- Remove the LH and RH dash speakers. See SPEAKER - DASH - LH (REMOVE AND REPLACE)
.
- Remove the center dash speaker. See SPEAKER - DASH - CENTER (REMOVE AND REPLACE)
.
- Remove the dash tweeter. See TWEETER - DASH (REMOVE AND REPLACE)
.
- Remove the IP carrier. See IP CARRIER (REMOVE AND INSTALL) .
- Remove the LH air wave duct. See DUCT - AIR WAVE - LH (REMOVE AND REPLACE)
.
- Remove the LH front carpet. See CARPET - FRONT - LH (REMOVE AND REPLACE)
.
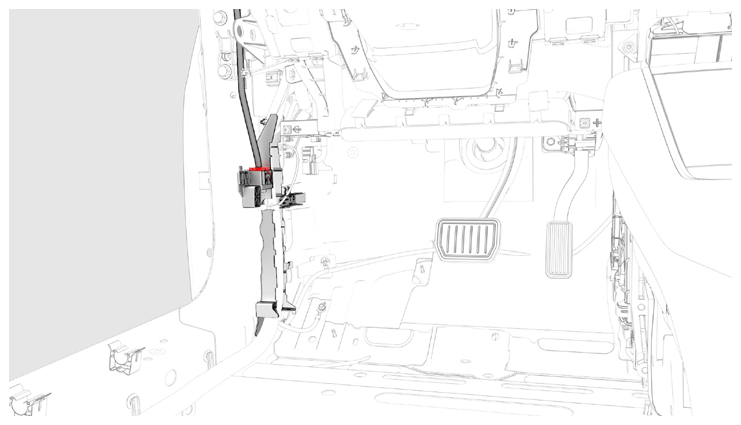
- Disconnect the headliner electrical harness from the LH body controller module connector.
 Courtesy of TESLA, INC. Courtesy of TESLA, INC.
|
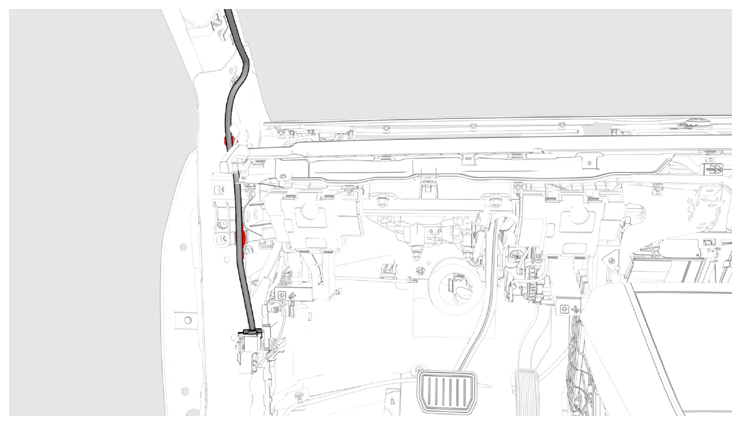
- Release the clips (x2) that attach the headliner electrical harness and move it aside.
 Courtesy of TESLA, INC. Courtesy of TESLA, INC.
|
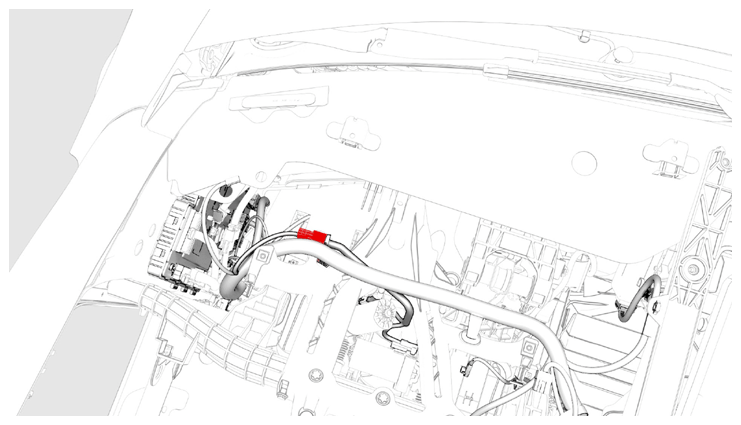
- Disconnect the electrical harness from the steering column control module connector.
 Courtesy of TESLA, INC. Courtesy of TESLA, INC.
|
- Remove the bolts (x2) that attach the steering column to the body.
NOTE:
Use of the following tool(s) is recommended:
- 3 in extension
- 13 mm socket
- Ratchet/torque wrench
- Cordless Ratchet/Impact Driver
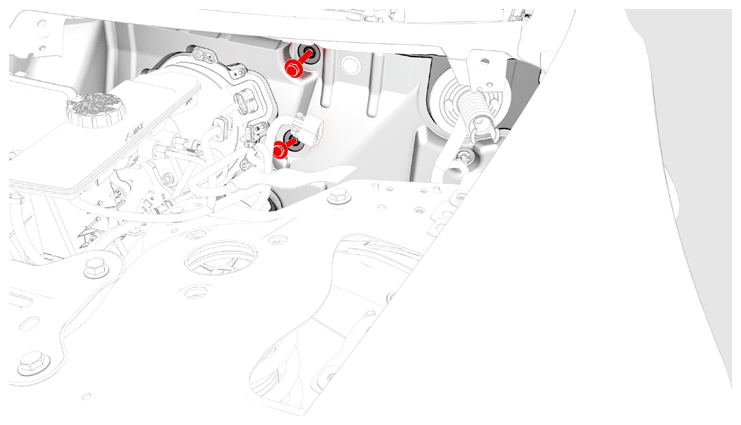 Courtesy of TESLA, INC. Courtesy of TESLA, INC.
|
- Remove the bolt that attaches the HVAC assembly to the RH side of bulkhead.
NOTE:
Recommend assistance to support the HVAC assembly during the removal.
NOTE:
Use of the following tool(s) is recommended:
- 10 mm deep socket
- Cordless Ratchet/Impact Driver
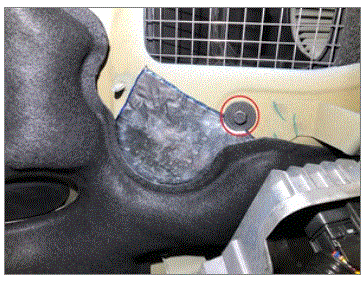 Courtesy of TESLA, INC. Courtesy of TESLA, INC.
|
- Remove the nuts that attach the steering column to the cross car beam.
NOTE:
Use of the following tool(s) is recommended:
- 3 in extension
- 13 mm socket
- Ratchet/torque wrench
- Cordless Ratchet/Impact Driver
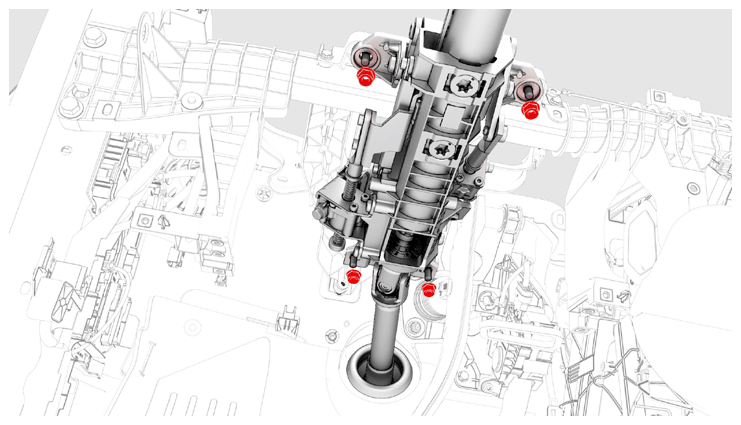 Courtesy of TESLA, INC. Courtesy of TESLA, INC.
|
- Lower the steering column and set it aside.
- Remove the bolts (x4) that attach the touchscreen brackets, and remove the brackets from the vehicle.
NOTE:
Use of the following tool(s) is recommended:
- 2 in extension
- Torx T30 socket
- Ratchet/torque wrench
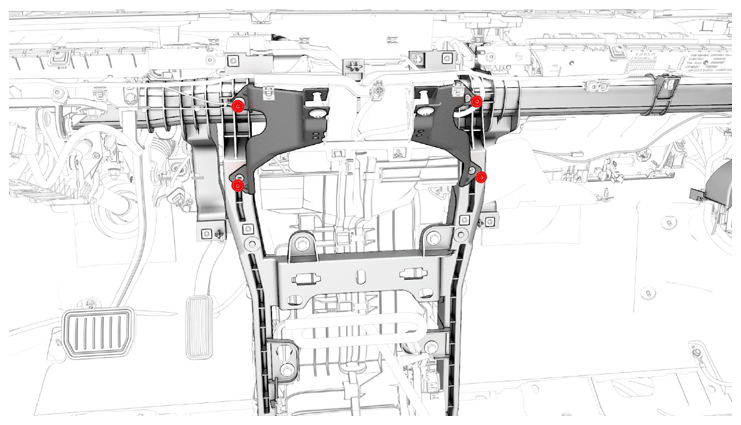 Courtesy of TESLA, INC. Courtesy of TESLA, INC.
|
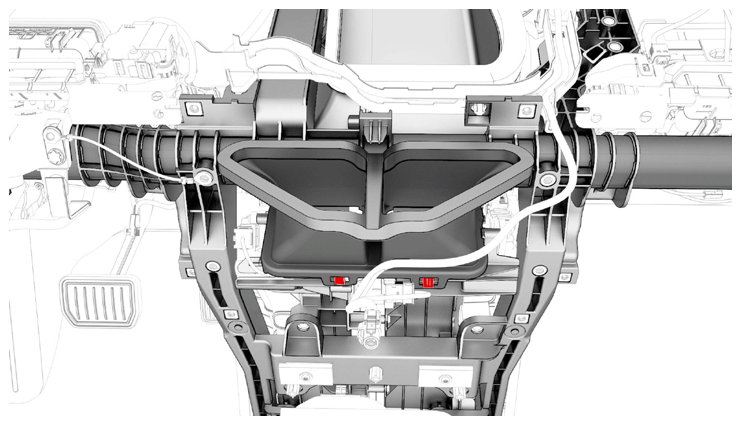
- Release the clips that attach the bleeder duct adapter to the HVAC assembly, and remove the bleeder duct from the vehicle.
 Courtesy of TESLA, INC. Courtesy of TESLA, INC.
|
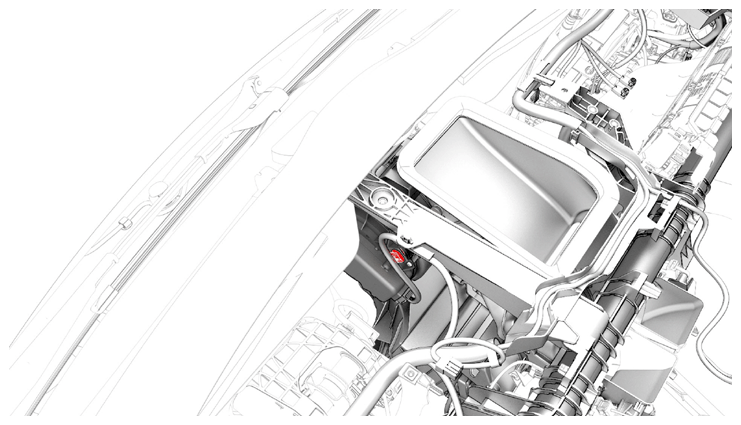
- Release the clip that attaches the instrument panel electrical harness to the HVAC fan assembly.
 Courtesy of TESLA, INC. Courtesy of TESLA, INC.
|
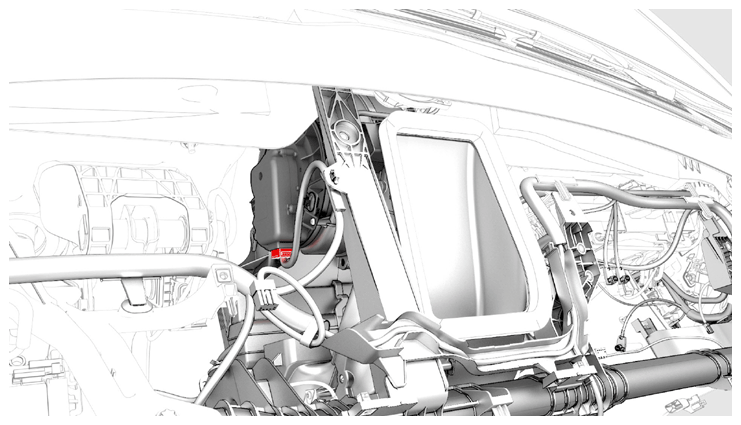
- Disconnect the instrument panel electrical harness from the HVAC fan assembly motor connector.
 Courtesy of TESLA, INC. Courtesy of TESLA, INC.
|
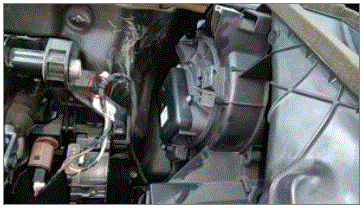
- Release the clip that attaches the brake pedal electrical harness to the brake pedal assembly.
 Courtesy of TESLA, INC. Courtesy of TESLA, INC.
|
- Release the clips that attaches the instrument panel electrical harness to the RH side of the HVAC assembly.
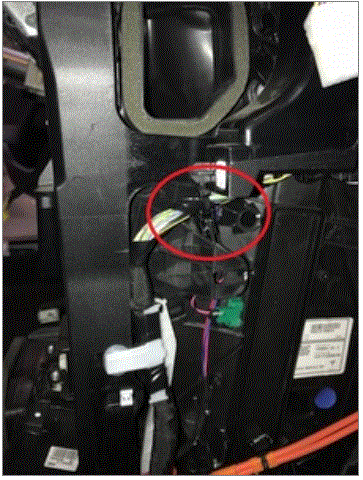 Courtesy of TESLA, INC. Courtesy of TESLA, INC.
|
- Remove and discard the bolt that attaches the instrument panel electrical harness ground strap to the body.
NOTE:
Inspect the bolt: if it is a self tapping tri-lobular bolt (1128269-00-A), discard the bolt. If it is a normal bolt (1447438-00-A), then it can be reused.
NOTE:
Use of the following tool(s) is recommended:
- 2 in extension
- 10 mm socket
- Ratchet/torque wrench
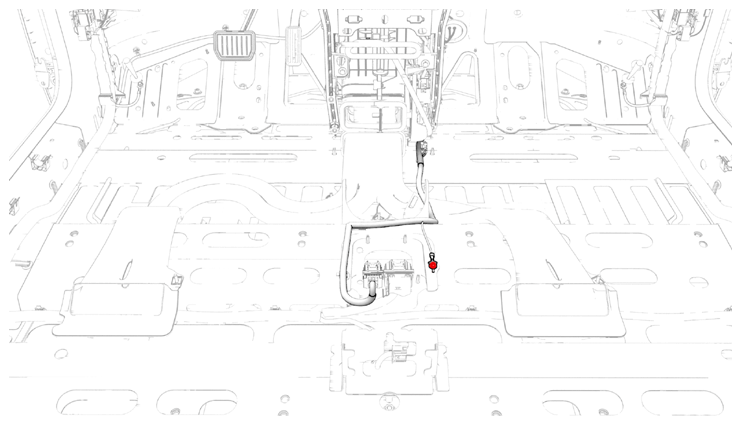 Courtesy of TESLA, INC. Courtesy of TESLA, INC.
|
- Disconnect the instrument panel electrical harness from the passive safety restraint module (RCM) connector.
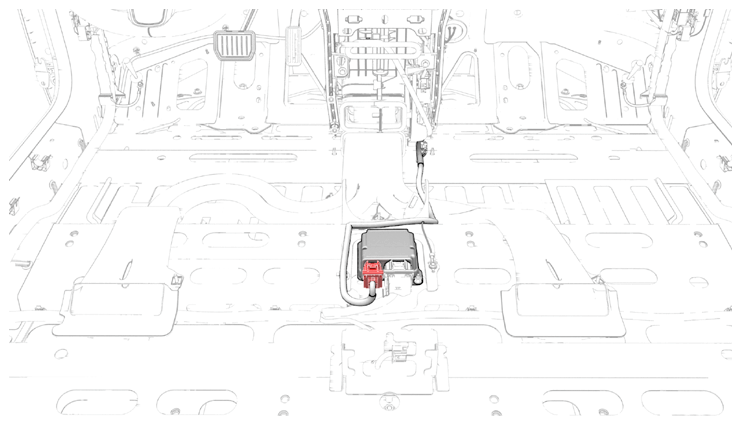 Courtesy of TESLA, INC. Courtesy of TESLA, INC.
|
- Release the clips that attach the instrument panel electrical harness to the body.
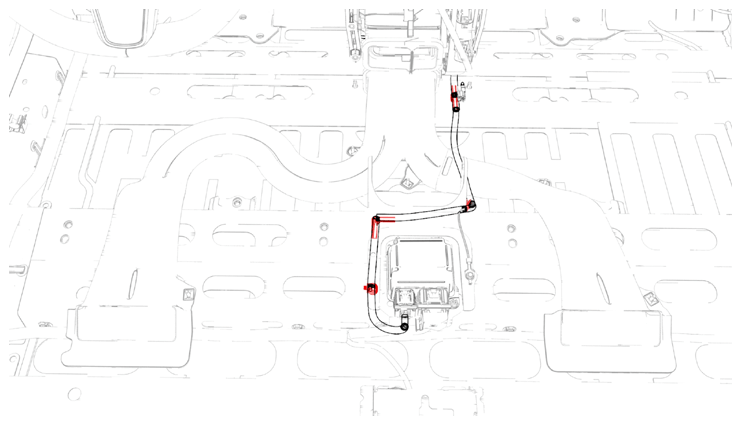 Courtesy of TESLA, INC. Courtesy of TESLA, INC.
|
- Remove the instrument panel electrical harness from the center console area and move it aside.
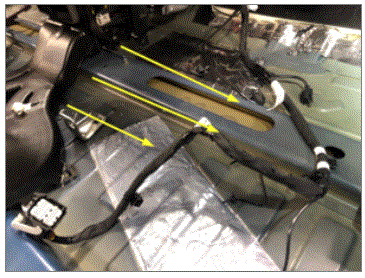 Courtesy of TESLA, INC. Courtesy of TESLA, INC.
|
- Release the HVAC harness from the instrument panel electric harness holders on the RH side of IP harness.
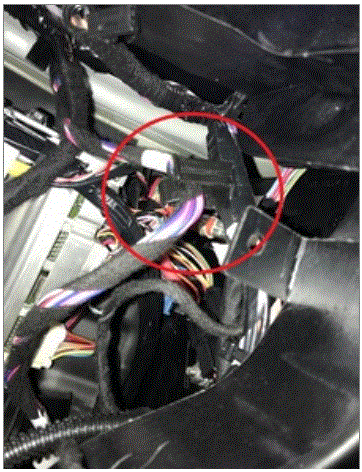 Courtesy of TESLA, INC. Courtesy of TESLA, INC.
|
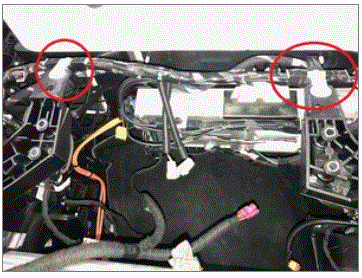 Courtesy of TESLA, INC. Courtesy of TESLA, INC.
|
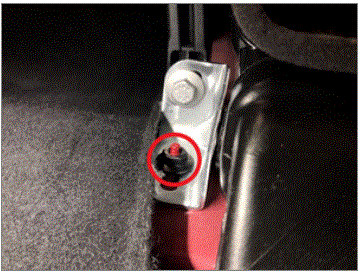
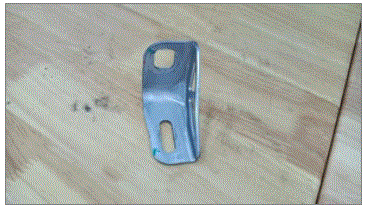
- Remove the bolt and nut that attach the LH cross car beam bracket to the cross car beam, and then remove the cross car beam bracket from the vehicle.
NOTE:
Use of the following tool(s) is recommended:
- 3 in extension
- 13 mm socket
- Ratchet/torque wrench
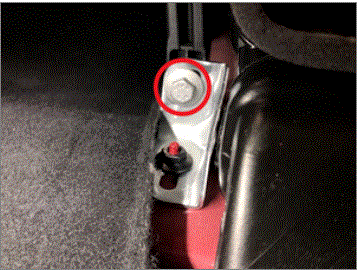 Courtesy of TESLA, INC. Courtesy of TESLA, INC.
|
 Courtesy of TESLA, INC. Courtesy of TESLA, INC.
|
 Courtesy of TESLA, INC. Courtesy of TESLA, INC.
|
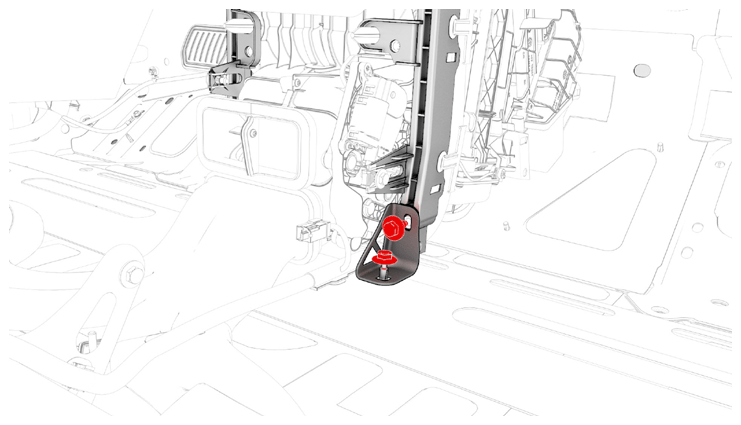
- Remove the bolt and nut that attach the RH cross car beam bracket to the cross car beam, and remove the bracket from the vehicle.
NOTE:
Use of the following tool(s) is recommended:
- 3 in extension
- 13 mm socket
- Ratchet/torque wrench
 Courtesy of TESLA, INC. Courtesy of TESLA, INC.
|
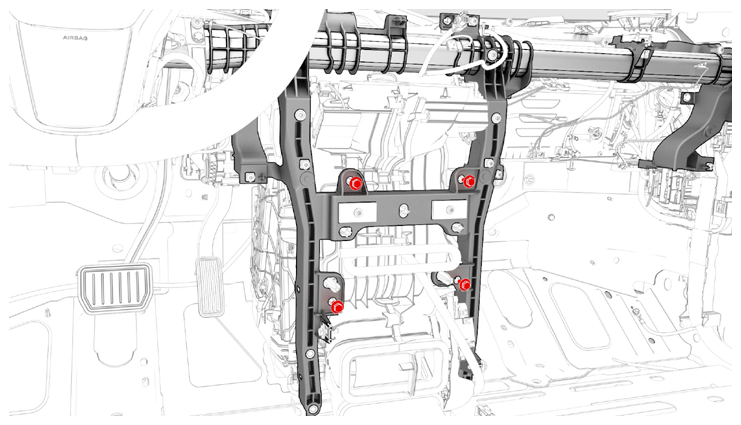
- Remove the bolts (x5) that attach the cross car beam to the HVAC assembly.
NOTE:
Use of the following tool(s) is recommended:
- 3 in extension
- 10 mm socket
- Ratchet/torque wrench
- Cordless Ratchet/Impact Driver
 Courtesy of TESLA, INC. Courtesy of TESLA, INC.
|
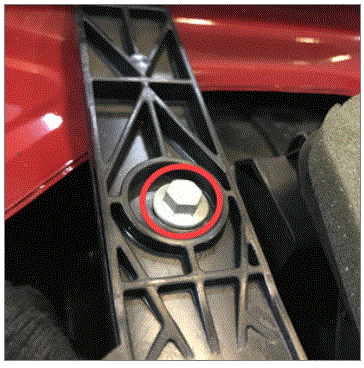 Courtesy of TESLA, INC. Courtesy of TESLA, INC.
|
- Loosen the bolt that attaches the cross car beam to the upper side of the cowl.
 25 N.m (18.4 lbs-ft)
NOTE:
Use of the following tool(s) is recommended:
- 13mm 12pt combination wrench
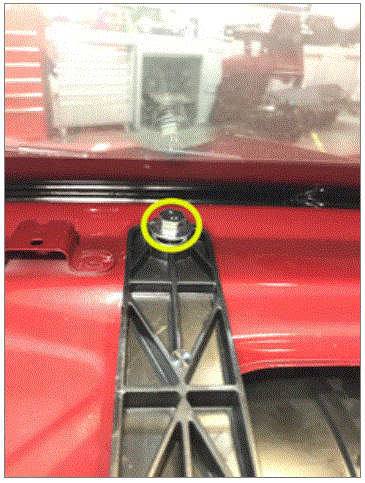 Courtesy of TESLA, INC. Courtesy of TESLA, INC.
|
- Remove the bolts (x4) that attach the cross car beam to the body.
NOTE:
Use of the following tool(s) is recommended:
- 3 in extension
- 15 mm socket
- Ratchet/torque wrench
- Cordless Ratchet/Impact Driver
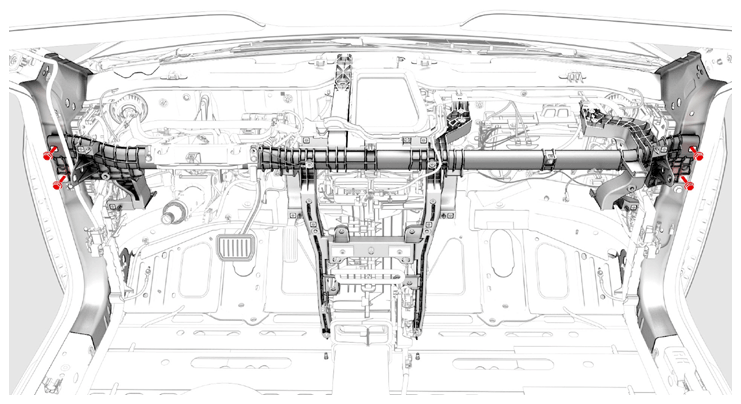 Courtesy of TESLA, INC. Courtesy of TESLA, INC.
|
- With an assistant, remove the cross car beam from the vehicle and place it on a support stand or table.
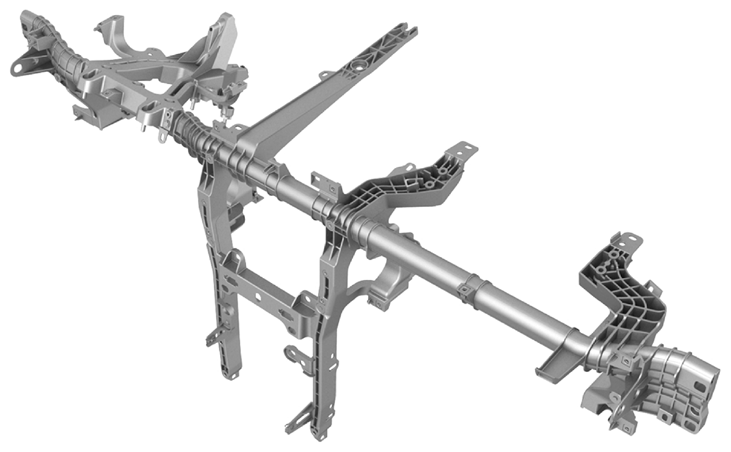 Courtesy of TESLA, INC. Courtesy of TESLA, INC.
|
- Release the clips that attach the instrument panel electrical harness to the cross car beam, and then remove the electrical harness from the cross car beam.
NOTE:
Remember the instrument panel electrical harness routing for the installation later.
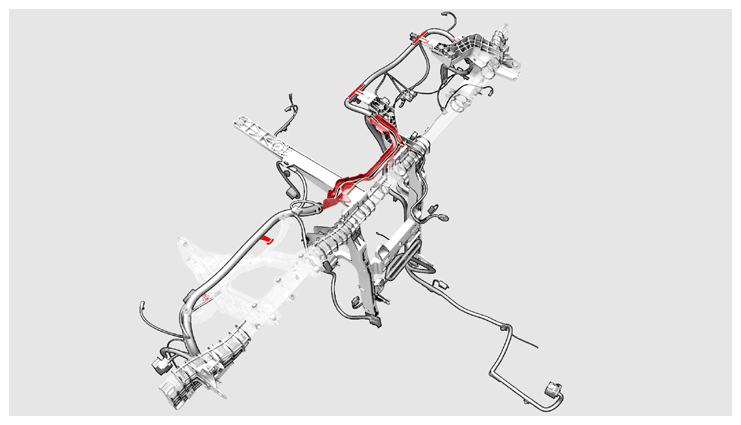 Courtesy of TESLA, INC. Courtesy of TESLA, INC.
|