- Clean the roof rack installation locations with isopropyl alcohol (IPA) wipes, and allow to dry for 1 minute before continuing.
- Use the icon on the top of the pads to determine which corner of the vehicle that the pad and matching anti-abrasion tape should be applied to.
- Install the anti-abrasion tape on the front LH side of the vehicle:
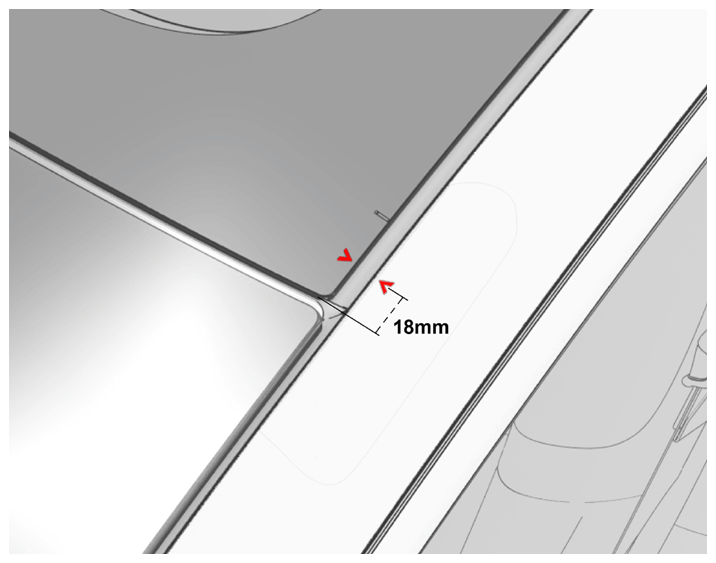
- Measure 18 mm back from the front edge of the glass roof to locate the arrow on the glass.
CAUTION:
The measurement for the front and rear crossbar locations are different.
- Align the arrow on the glass with the arrow on the anti-abrasion tape, then apply the anti-abrasion tape to the vehicle so that it follows the trim line.
 Courtesy of TESLA, INC. Courtesy of TESLA, INC.
|
- Perform the previous step on the front RH side of the vehicle.
- Install the anti-abrasion tape on the rear LH side of the vehicle:
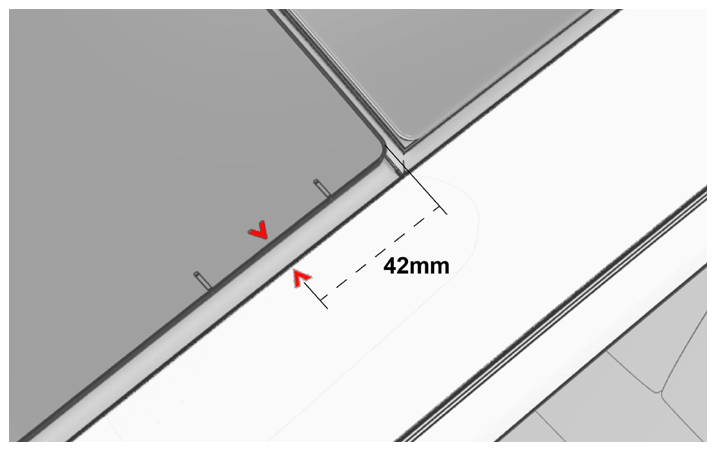
- Measure 42 mm forward from the rear edge of the glass roof to locate the arrow on the glass.
- Align the arrow on the glass with the arrow on the anti-abrasion tape, then apply the anti-abrasion tape to the vehicle so that it follows the trim line.
 Courtesy of TESLA, INC. Courtesy of TESLA, INC.
|
- Perform the previous step on the rear RH side of the vehicle.
- Install the roof rack rail clips and pads on all corners of the vehicle:
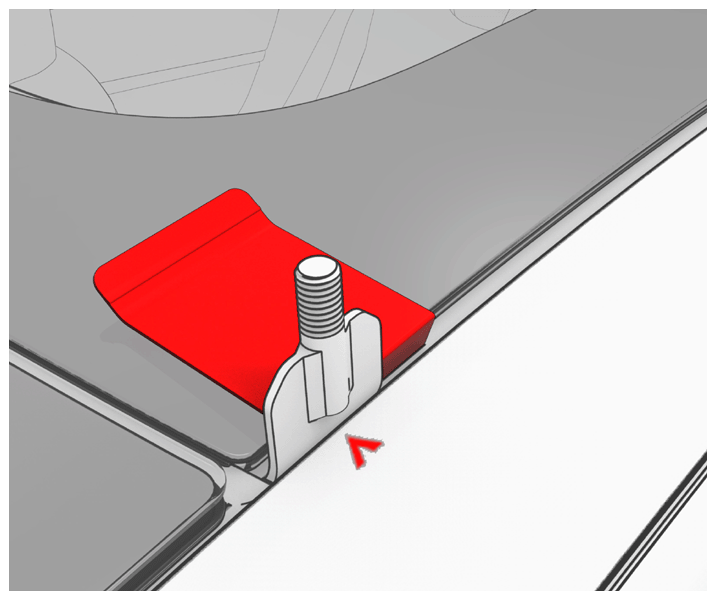
- Use the supplied trim tool to carefully lift the seal at the arrow location then insert a rail clip so that it is aligned with the arrow on the anti-abrasion tape.
 Courtesy of TESLA, INC. Courtesy of TESLA, INC.
|
- Ensure that the rail clip is properly secured to the J-hook under the roof glass then remove the trim tool. Make sure the clip is centered on the arrow.
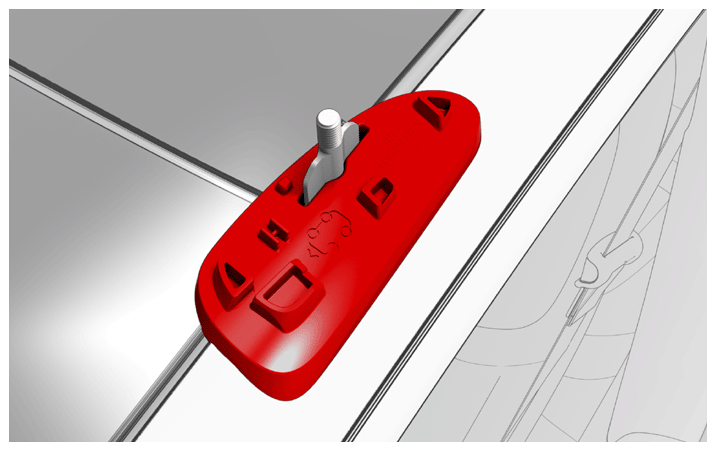
- Using the icon on the pad to identify which corner of the vehicle it goes to, place the appropriate pad over the rail clip so that the clip and threads are exposed.
 Courtesy of TESLA, INC. Courtesy of TESLA, INC.
|
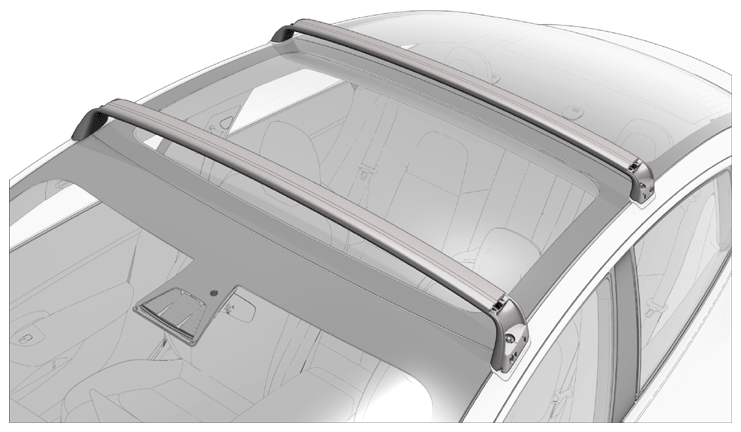
- Place the front and rear crossbars onto the front and rear pads so that the threads on the clips are exposed in the opening of the ends of the crossbars.
NOTE:
The front crossbar is longer than the rear crossbar.
 Courtesy of TESLA, INC. Courtesy of TESLA, INC.
|
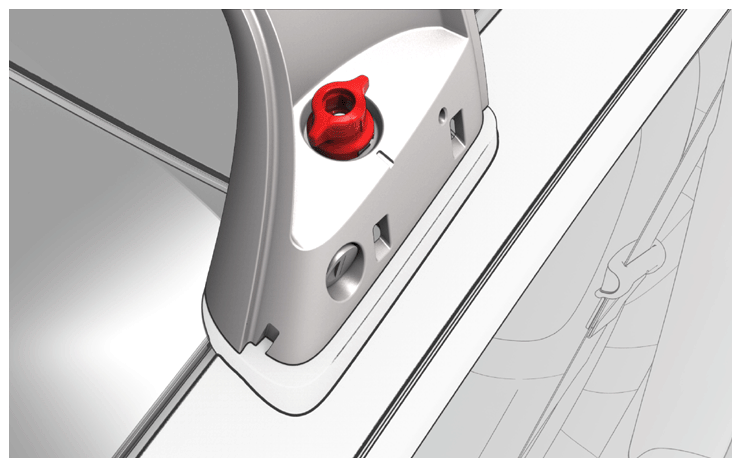
- Hand tighten the wingnuts onto the clips on all four corners of the vehicle; do not torque a wingnut until the wingnut on the other side of the vehicle is already hand tightened.
 Courtesy of TESLA, INC. Courtesy of TESLA, INC.
|
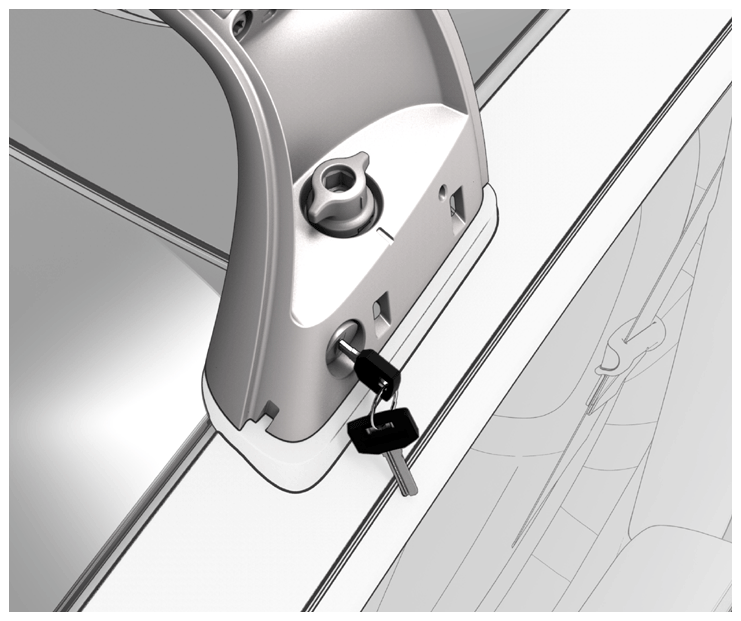
- Torque all wingnuts to their proper specification. Ensure the marking on the wingnuts align with the markings on the crossbars (the notch faces outboard) to lock the crossbars using the provided keys.
CAUTION:
To avoid damaging the roof glass, do not overtorque the fasteners.
 3.5 N.m (2.6 ft-lbs)
- Use the provided keys to lock (rotate clockwise on LH side locks, rotate counter-clockwise on RH side locks) both crossbars in place.
 Courtesy of TESLA, INC. Courtesy of TESLA, INC.
|
- Push and pull on both crossbars to ensure that they are fully secured and locked in place.
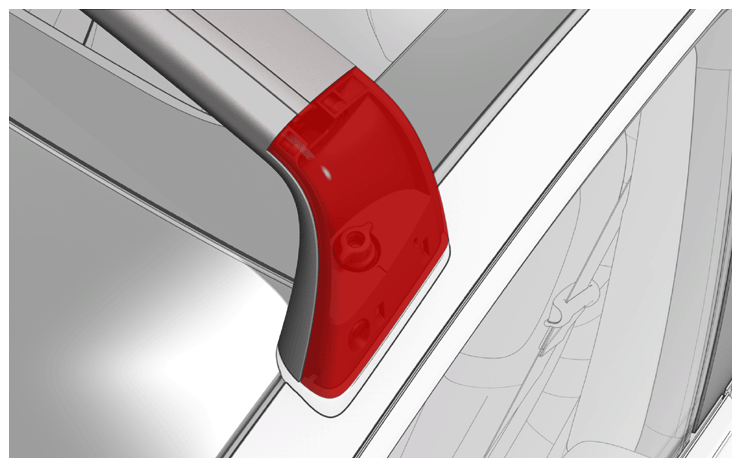
- Starting from the bottom and working up, install the roof rack side cover on each side of both crossbars.
NOTE:
The bottom of the side covers have guiding tabs that insert into the crossbar.
 Courtesy of TESLA, INC. Courtesy of TESLA, INC.
|
- Ensure the customer receives the locking key(s) when they take delivery of the vehicle.