- Open LH front door
- Lower LH front window
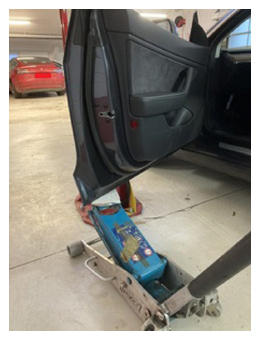
- Support the left front door from the bottom
NOTE:
Make sure to use soft material to protect door paint
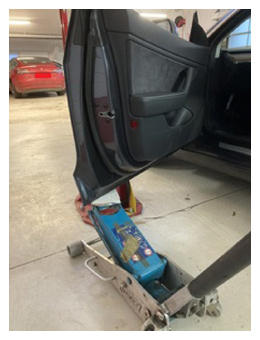 Courtesy of TESLA, INC. Courtesy of TESLA, INC.
|
- Loosen and remove front left door side upper hinge bolts
NOTE:
2x bolts, 10 mm, 27 N.m
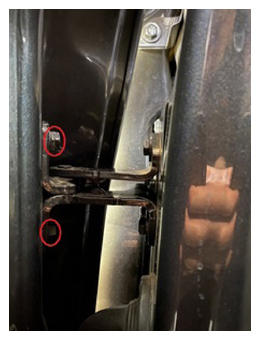 Courtesy of TESLA, INC. Courtesy of TESLA, INC.
|
- Loosen and remove front left body side upper hinge bolts
NOTE:
3x bolts, 13 mm, 27 N.m
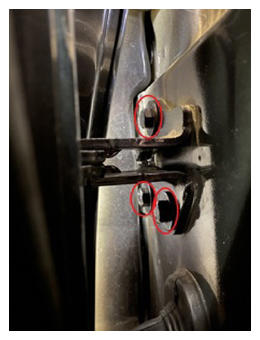 Courtesy of TESLA, INC. Courtesy of TESLA, INC.
|
- Remove upper hinge
NOTE:
Push outward on the top of the door near the speaker with one hand then feed the hinge up and then out toward the back of the car
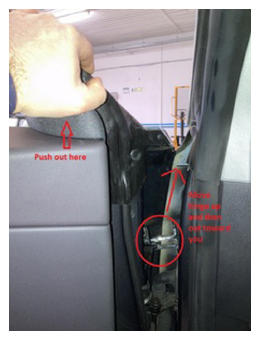 Courtesy of TESLA, INC. Courtesy of TESLA, INC.
|
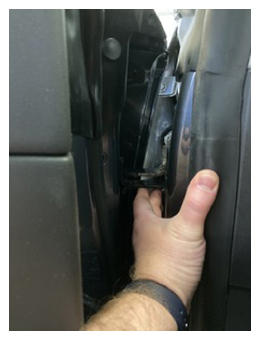
- Install new upper hinge in original position
 Courtesy of TESLA, INC. Courtesy of TESLA, INC.
|
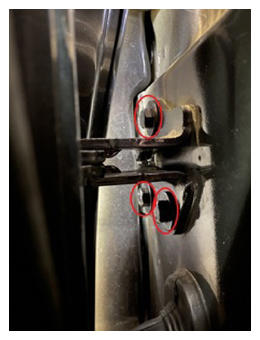
- Install front left body side upper hinge bolts
NOTE:
3x bolts, 13 mm, 27 N.m
 Courtesy of TESLA, INC. Courtesy of TESLA, INC.
|
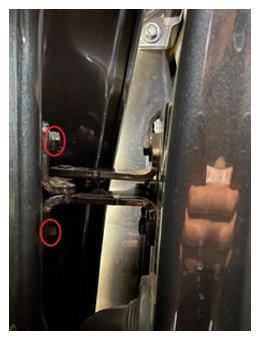
- Install front left door side upper hinge bolts
NOTE:
2x bolts, 10 mm, 27 N.m
 Courtesy of TESLA, INC. Courtesy of TESLA, INC.
|
- Remove support for the left front door
 Courtesy of TESLA, INC. Courtesy of TESLA, INC.
|
- Close left front door and check gap and flush are within specification
NOTE:
Adjust if necessary
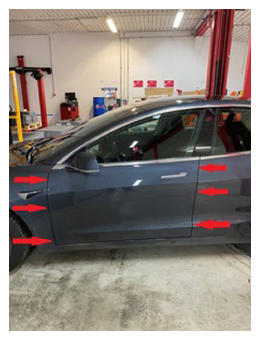 Courtesy of TESLA, INC. Courtesy of TESLA, INC.
|
- Torque front left body side upper hinge bolts to specification
NOTE:
3x bolts, 13 mm, 27 N.m
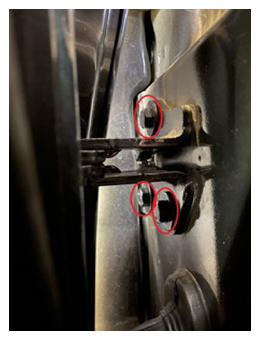 Courtesy of TESLA, INC. Courtesy of TESLA, INC.
|
- Torque front left door side upper hinge bolts to specification
NOTE:
2x bolts, 10 mm, 27 N.m
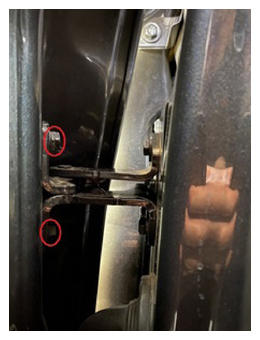 Courtesy of TESLA, INC. Courtesy of TESLA, INC.
|
- Clean upper hinge bolt heads with IPA
NOTE:
Allow 1 minute to dry before continuing with next step
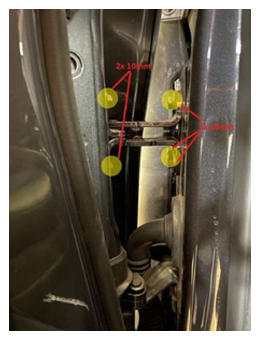 Courtesy of TESLA, INC. Courtesy of TESLA, INC.
|
- Apply touch up paint to bolt heads as needed
NOTE:
Make sure to shake touch up paint before applying, Refer to label for dry time instructions
- Raise LH front window
- Close LH front door