- Remove driver side lower dash trim, refer to TRIM - DASH - DRIVER'S SIDE - LOWER (REMOVE AND REPLACE)
- Remove the instrument panel side covers, refer to ASSEMBLY - INSTRUMENT PANEL SIDE COVER - LH (REMOVE AND REPLACE)
- Remove the A-pillar middle trim panels, refer to PANEL - A PILLAR TRIM - MIDDLE - LH (REMOVE AND REPLACE)
- Remove the A-pillar upper trim panels Trim - A-Pillar - LH (Remove And Install)
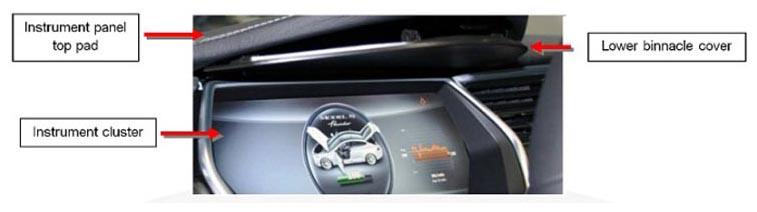
- Remove the lower binnacle cover.
 Courtesy of TESLA, INC. Courtesy of TESLA, INC.
|
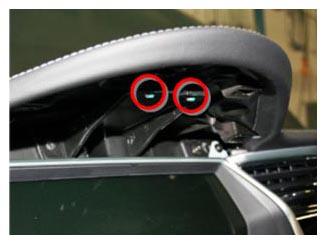
- Remove the 2 screws beneath the lower binnacle cover that secure the IP top pad to the IP carrier
 Courtesy of TESLA, INC. Courtesy of TESLA, INC.
|
- Remove the lower right instrument panel cover, refer to ASSEMBLY - INSTRUMENT PANEL LOWER - RH (REMOVE AND REPLACE)
- Remove the glove box, refer to GLOVE BOX (REMOVE AND REPLACE)
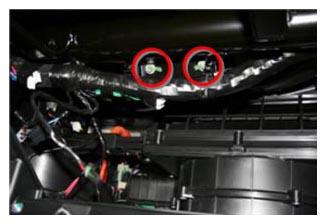
- In the upper area behind the glove box, remove the 2 screws (10 N.m) that secure the passenger airbag to the crossbar beam.
 Courtesy of TESLA, INC. Courtesy of TESLA, INC.
|
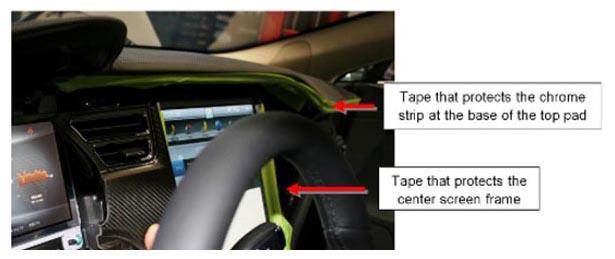
- Cover the chrome strips at the base of the top pad and around the center screen with tape.
CAUTION:
If the aluminum strips are not covered with tape, they may be damaged when the top pad is removed in later steps.
 Courtesy of TESLA, INC. Courtesy of TESLA, INC.
|
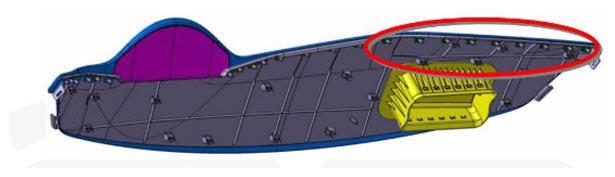
- Gently lift up on the rightmost edge of the instrument panel top pad enough to allow room for a trim pry tool to release the rightmost clip. Repeat this process working from right to left, releasing one trim clip at a time until just to the right of the center screen.
CAUTION:
Take care not to damage component(s).
 Courtesy of TESLA, INC. Courtesy of TESLA, INC.
|
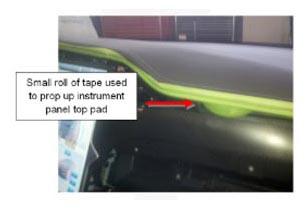
- Gently lift up on the right side of the instrument panel top pad (no more than 15 mm) and use a small wedge or other object to prop up the right side of the top pad.
CAUTION:
Take care not to damage component(s).
 Courtesy of TESLA, INC. Courtesy of TESLA, INC.
|
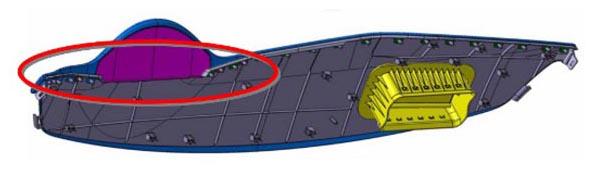
- Gently lift up on the leftmost edge of the instrument panel top pad to allow room for a prying trim stick to release the leftmost clip. Repeat this process working from left to right, releasing one trim clip at a time until just to the left of the center screen.
CAUTION:
Take care not to damage component(s).
 Courtesy of TESLA, INC. Courtesy of TESLA, INC.
|
- Gently lift up on the left side of the instrument panel top pad (no more than 15 mm) and use a small wedge or other object to prop up the left side of the top pad.
CAUTION:
Take care not to damage component(s).
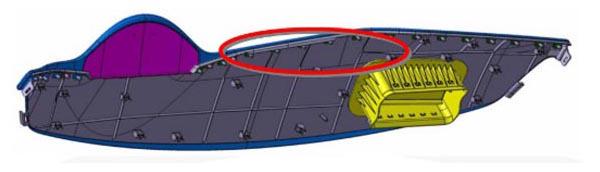
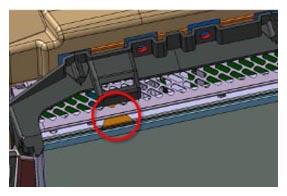
- Use a prying trim stick to release the trim clips directly above the center screen.
CAUTION:
Do not scratch or damage the PFC (printed flexible circuit) when releasing the trim clips above the center screen.
 Courtesy of TESLA, INC. Courtesy of TESLA, INC.
|
 Courtesy of TESLA, INC. Courtesy of TESLA, INC.
|
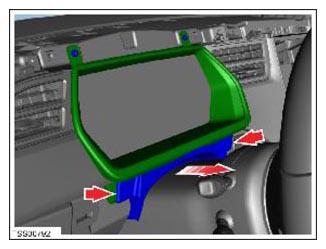
- Lower steering column tilt for access.
- Release clips (x2) and remove steering cowl trim.
CAUTION:
Take care not to damage component(s).
 Courtesy of TESLA, INC. Courtesy of TESLA, INC.
|
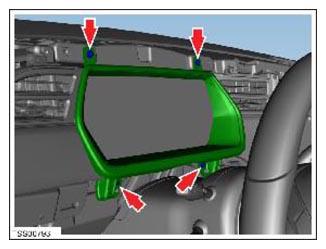
- Remove screws (x4) securing instrument cluster frame to dash. (torque 2 N.m).
 Courtesy of TESLA, INC. Courtesy of TESLA, INC.
|
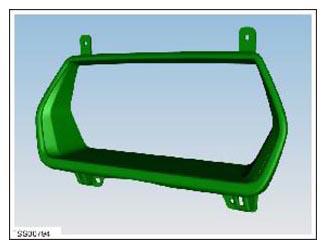
- Remove instrument cluster frame.
 Courtesy of TESLA, INC. Courtesy of TESLA, INC.
|