- Place an MCU foam ESD container on the right side of the ESD mat.
CAUTION:
Improper use of the ESD kit can result in damage to the instrument cluster.
- Remove the instrument cluster, refer to INSTRUMENT CLUSTER (REMOVE AND REPLACE) .
NOTE:
Transition the ESD equipment as necessary from the vehicle to the ESD mat once removed.
- Place instrument cluster on the foam container and set up the ESD kit per TN-14-92-003.
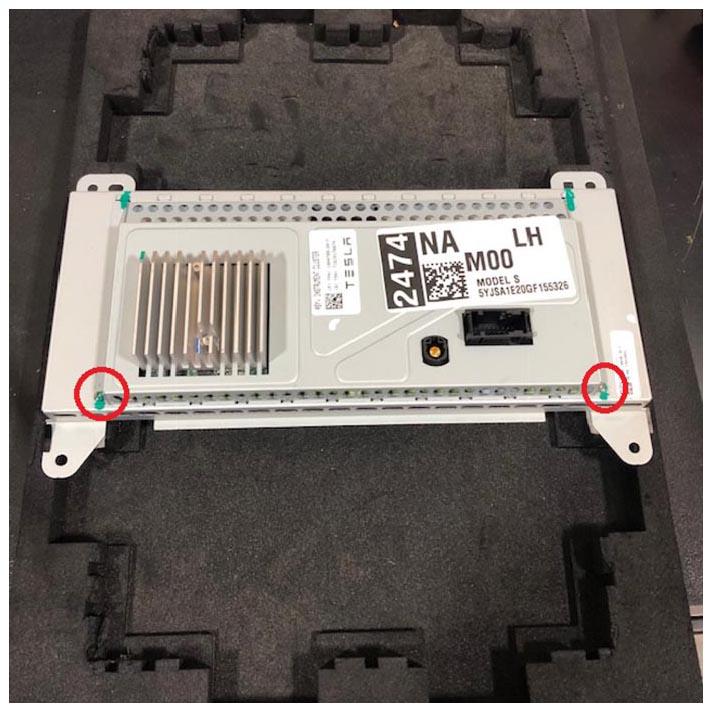
- Remove and discard the screws (x2) that attach the bottom of the rear cover to the housing assembly (torque 0.5 N.m).
 Courtesy of TESLA, INC. Courtesy of TESLA, INC.
|
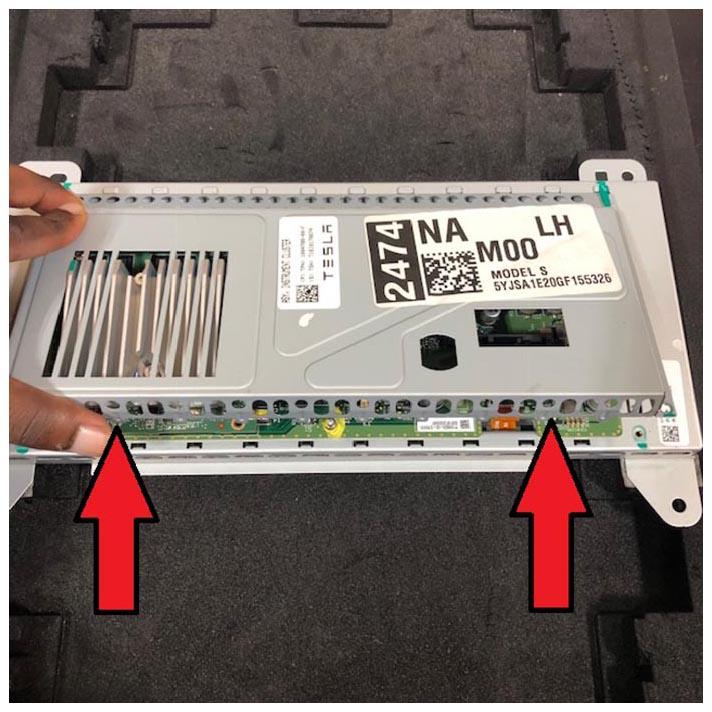
- Remove the rear cover from the instrument cluster by lifting the bottom, tilting it towards the top, then releasing the retaining tabs.
 Courtesy of TESLA, INC. Courtesy of TESLA, INC.
|
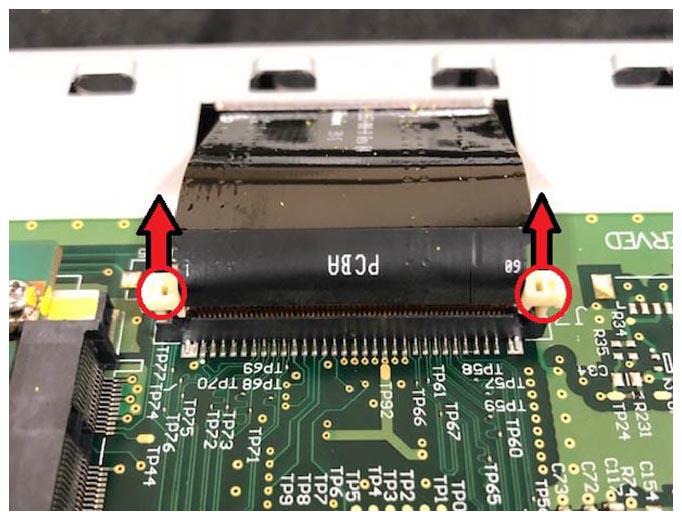
- Carefully release the locking tabs on each side of the larger ribbon cable by pulling them up, and then carefully release the larger ribbon cable from the circuit board.
CAUTION:
The ribbon cable is reused. Avoid scratching, bending, or damaging the ribbon cable or connection.
 Courtesy of TESLA, INC. Courtesy of TESLA, INC.
|
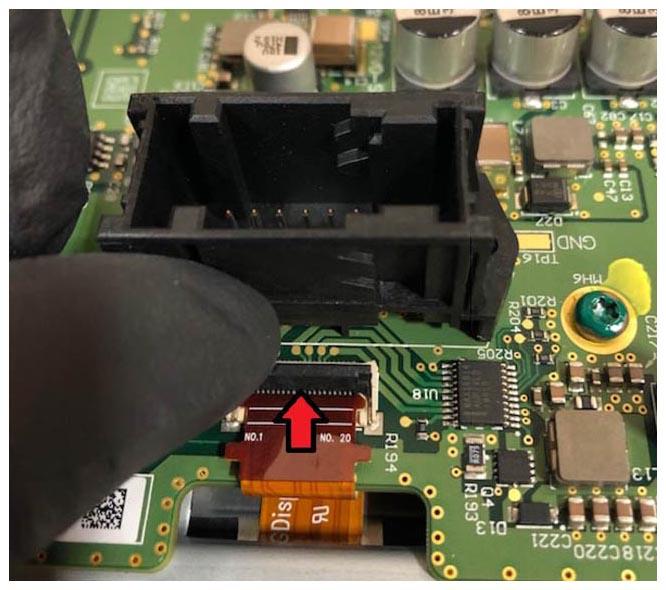
- Carefully release the smaller ribbon cable by flipping the locking latch and gently sliding the ribbon cable away.
CAUTION:
The ribbon cable is reused. Avoid scratching, bending, or damaging the ribbon cable or connection.
 Courtesy of TESLA, INC. Courtesy of TESLA, INC.
|
- Remove and discard the screws (x6) that attach the circuit board to the housing assembly (torque 0.5 N.m).
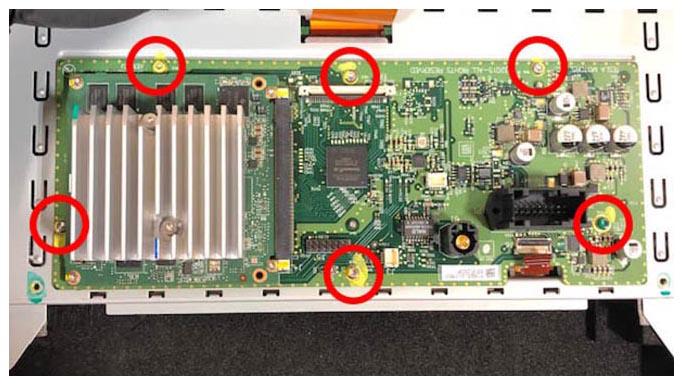 Courtesy of TESLA, INC. Courtesy of TESLA, INC.
|
- Carefully remove the circuit board from the housing assembly by holding it as shown. Place the circuit board on the ESD mat.
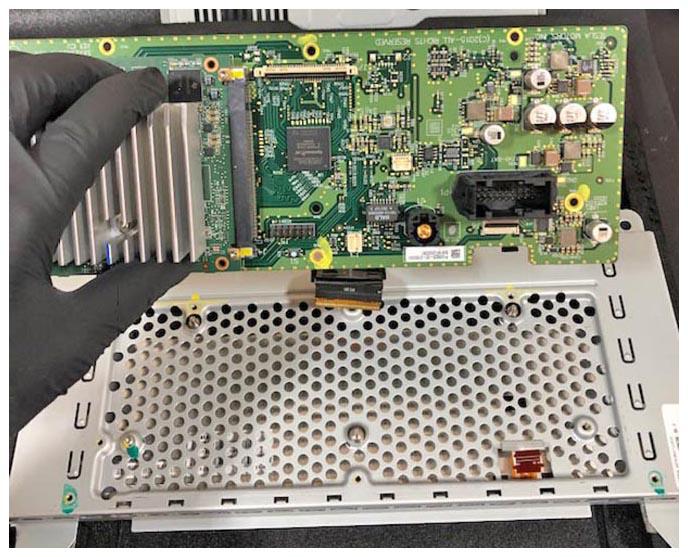 Courtesy of TESLA, INC. Courtesy of TESLA, INC.
|
- Remove and discard the screw that attaches the display to the housing assembly (torque 0.5 N.m).
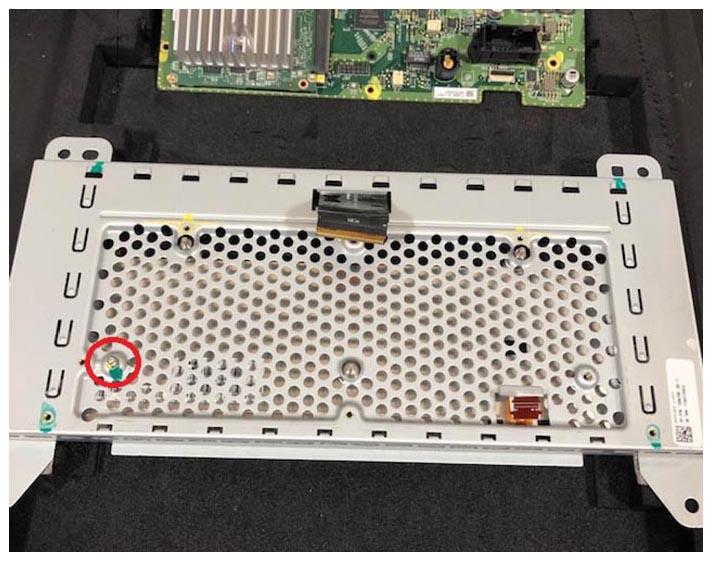 Courtesy of TESLA, INC. Courtesy of TESLA, INC.
|
- Carefully lift the housing assembly to release it from the display. Take care in guiding the ribbon cables through the openings in the housing.
CAUTION:
The ribbon cables are reused. Avoid scratching, bending, or damaging the ribbon cable or connection.
- Inspect the housing assembly to determine if it needs to be cleaned. If necessary, use IPA wipes to clean the housing assembly and allow to fully dry before continuing.
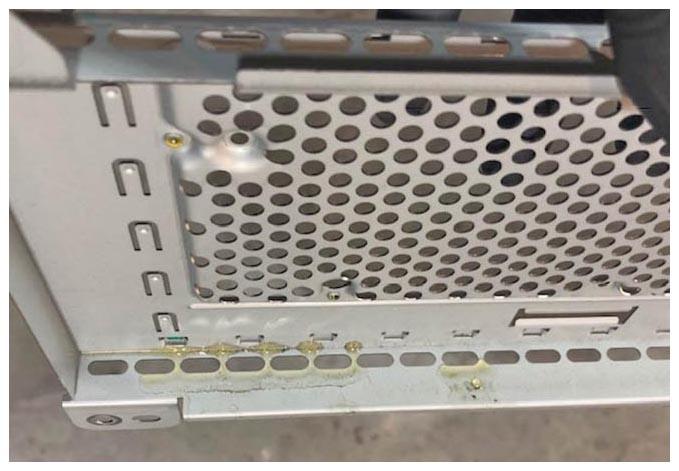 Courtesy of TESLA, INC. Courtesy of TESLA, INC.
|
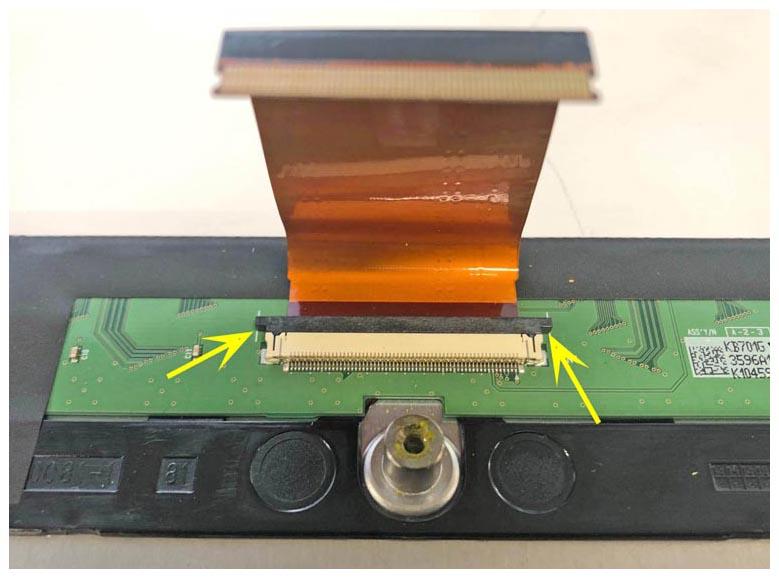
- Carefully release the larger ribbon cable from the original display by sliding the latches and then pulling the ribbon cable up.
CAUTION:
The ribbon cable is reused. Avoid scratching, bending, or damaging the ribbon cable or connection.
 Courtesy of TESLA, INC. Courtesy of TESLA, INC.
|