Front Drive Shaft Assembly Removal and Installation: Removal
- Undo caulking (1) and remove drive shaft nut (2).
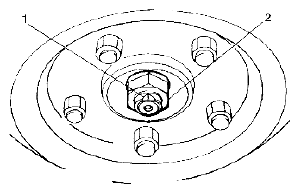 Courtesy of SUZUKI OF AMERICA CORP.
- Hoist vehicle and remove wheel.
- Drain transaxle oil and transfer oil (4WD model).
- Disconnect tie-rod end (1) from steering knuckle (2) using puller (3).
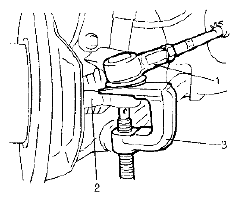 Courtesy of SUZUKI OF AMERICA CORP.
- Remove stabilizer joint referring to FRONT SUSPENSION FRAME, STABILIZER BAR AND/OR BUSH REMOVAL AND INSTALLATION (2WD MODEL)
or FRONT SUSPENSION FRAME, STABILIZER BAR AND/OR BUSH REMOVAL AND INSTALLATION (4WD MODEL)
.
- Remove brake hose mounting bolt.
- Remove wheel speed sensor and suspension control arm ball joint bolt (1).
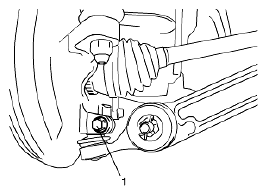 Courtesy of SUZUKI OF AMERICA CORP.
- Disconnect front suspension control arm ball joint stud from steering knuckle.
- Using tire lever (1) or plastic hammer (3), pull out drive shaft joint (2) so as to release snap ring fitting of joint spline at differential side or at center shaft.
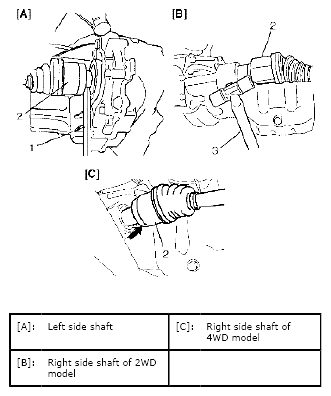 Courtesy of SUZUKI OF AMERICA CORP.
- Remove drive shaft assembly.
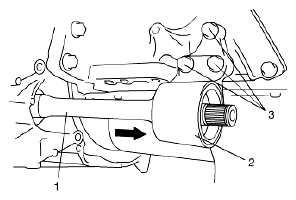
- Remove center bearing support bolts (3) and remove center bearing support (2) with center shaft (1) from differential side gear, if equipped.
 Courtesy of SUZUKI OF AMERICA CORP.