Radio Assembly Removal And Installation: Removal
- Disconnect negative (-) cable at battery.
- Remove center lower garnish (1).
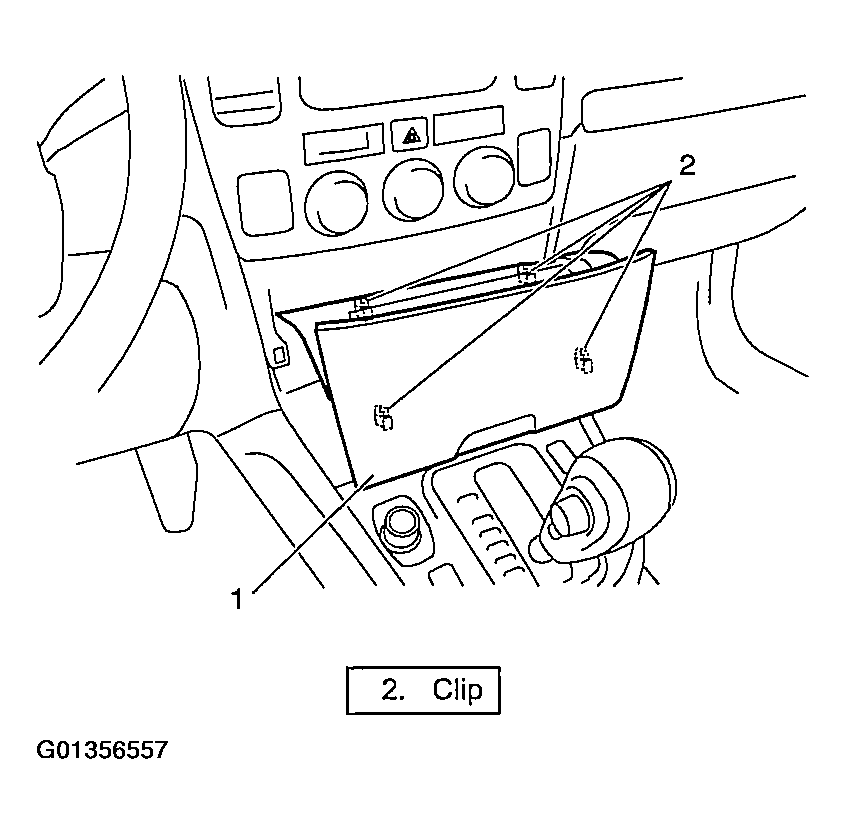 Courtesy of SUZUKI OF AMERICA CORP.
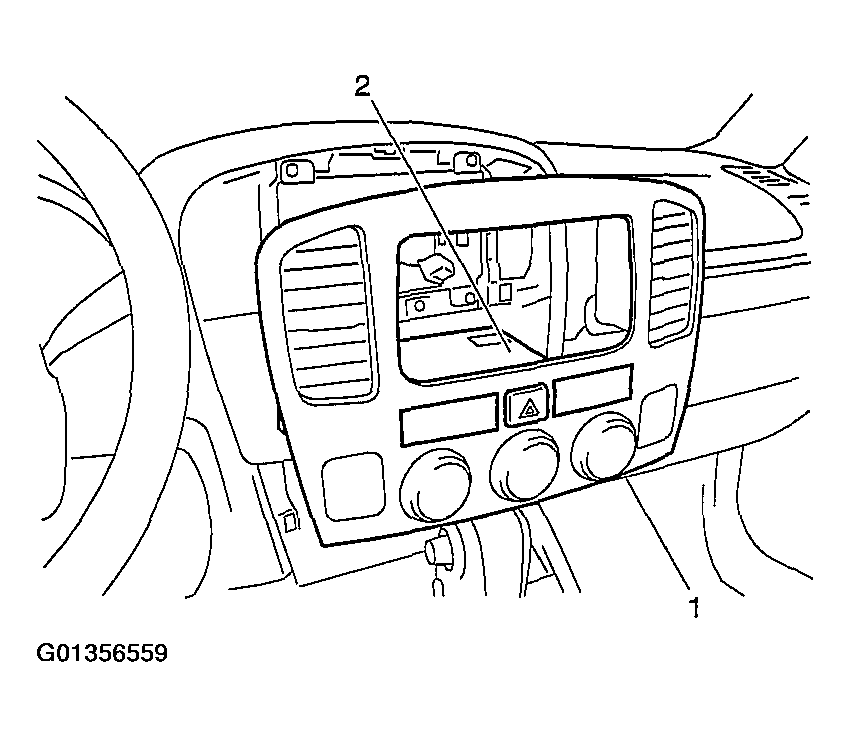
- Remove center garnish mounting screw (1) and then pull off center garnish.
- Remove harness and controller cover (2).
 Courtesy of SUZUKI OF AMERICA CORP.
- Disconnect BCM connectors and HVAC control module connector from each controller.
- Remove center garnish (1) with BCM (2) and HVAC control module.
 Courtesy of SUZUKI OF AMERICA CORP.
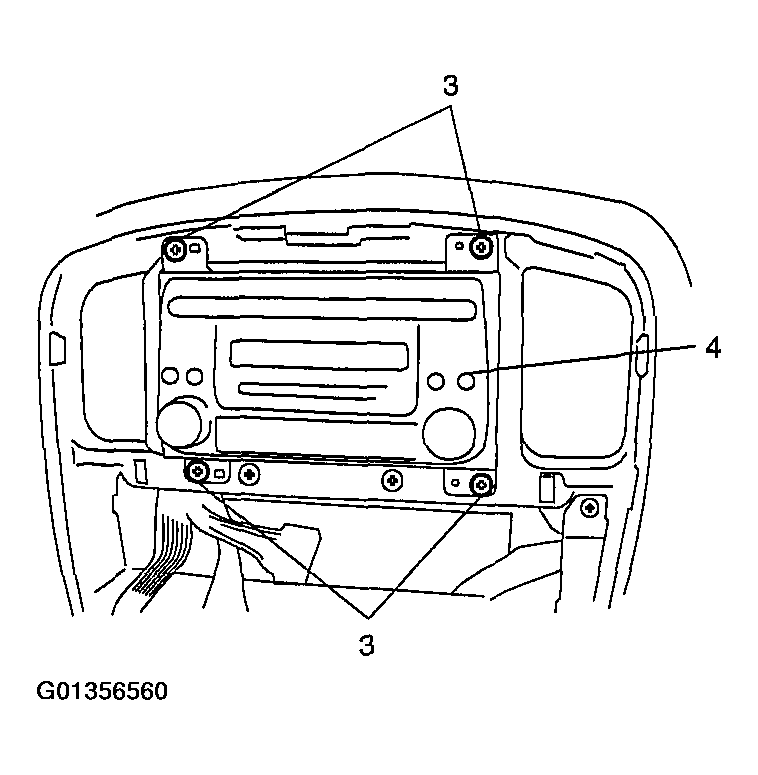
- Remove 4 mounting screws (3) of radio assembly (4).
- Remove radio assembly (4) from instrument panel.
- Disconnect radio assembly coupler and antenna feeder from radio assembly (4).
 Courtesy of SUZUKI OF AMERICA CORP.