Timing Belt (DOHC): Installation
- Install timing belt tensioner, tensioner plate and spring (if removed). DO NOT
tighten bolt. Ensure sprocket timing marks are aligned.
- Position bolts with flanged nuts to hold camshaft on timing mark during belt installation. (if necessary). See Fig 1
. Install timing belt. Adjust tensioner to remove timing belt slack and hand tighten bolt.
- Turn crankshaft 2 revolutions to seat timing belt and readjust tensioner. Tighten tensioner bolt and stud. Ensure drive side of belt is free of slack.
- Ensure timing marks are aligned. Install timing belt outer cover and tighten to specification. Reverse removal procedure to complete installation.
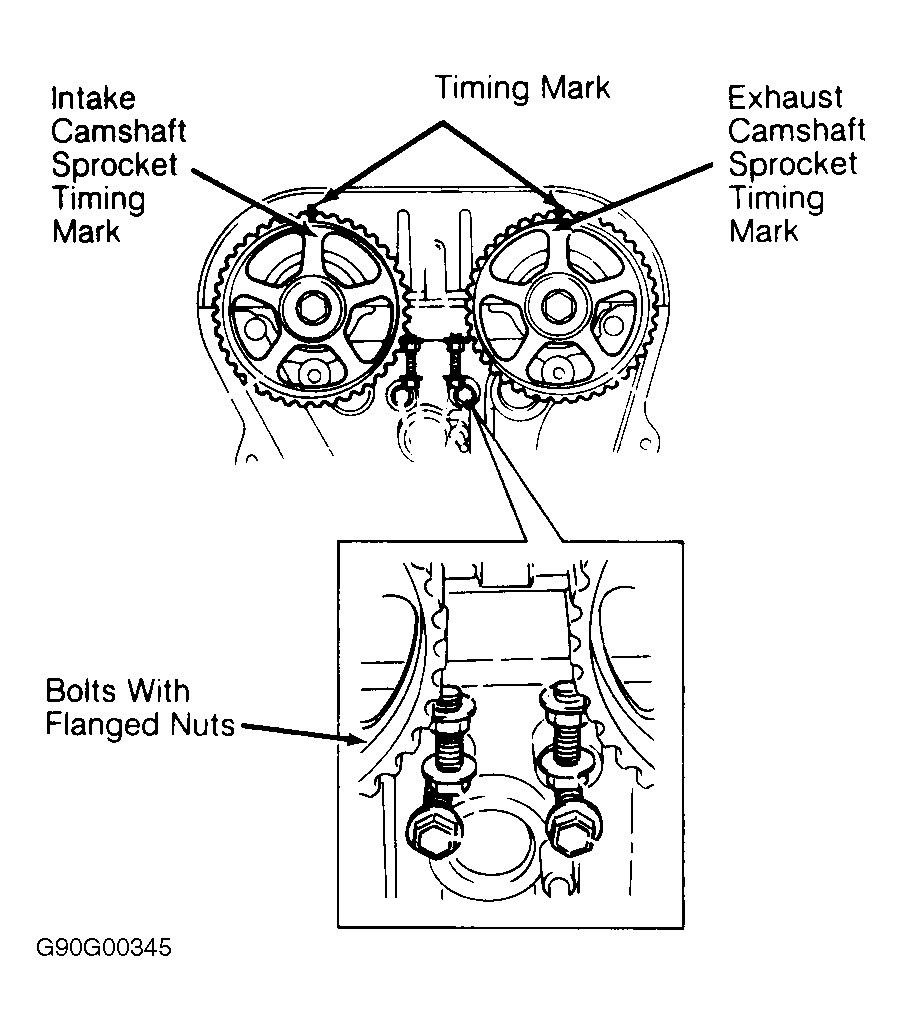 Courtesy of SUZUKI OF AMERICA CORP.