Intake Duct No. 1
- Disconnect the ground terminal from battery sensor. <Ref. to
BATTERY
, NOTE, Note.>
- Remove the air intake duct. <Ref. to
REMOVAL , Air Intake Duct.>
- Lift up the vehicle.
- Remove the under cover. <Ref. to
REMOVAL
, Front Under Cover.>
- Disconnect the blow-by diagnosis connector (A) from the engine wiring harness, and disconnect the vacuum hose (B) from the vacuum pipe assembly.
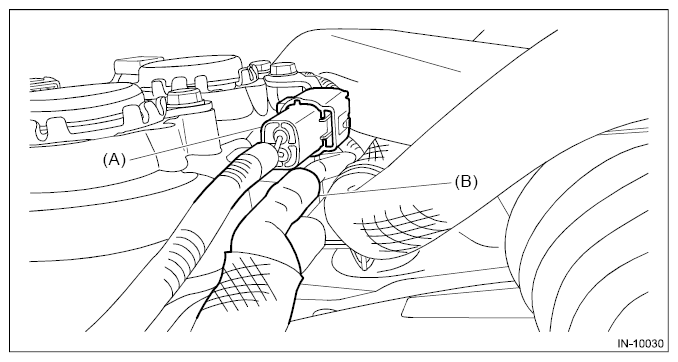 Courtesy of SUBARU OF AMERICA, INC.
- Disconnect the connector from the wastegate control solenoid valve.
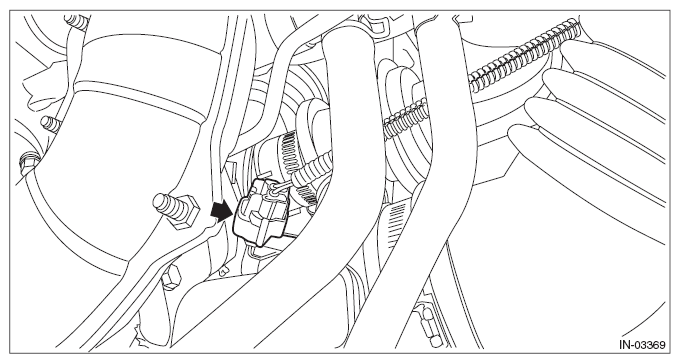 Courtesy of SUBARU OF AMERICA, INC.
- Unlock the blow-by diagnosis connector, and disconnect the PCV pipe assembly from the intake duct No. 1.
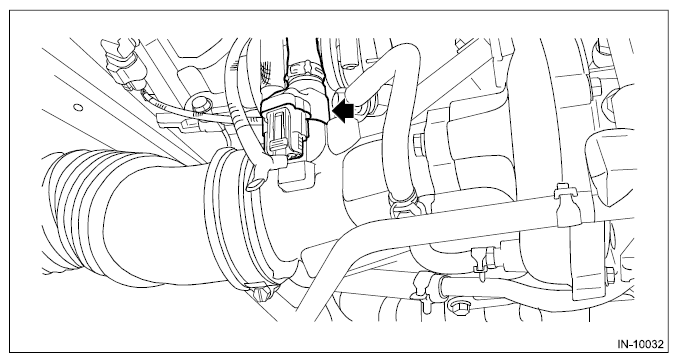 Courtesy of SUBARU OF AMERICA, INC.
- Disconnect the vacuum control hose from the wastegate control solenoid valve.
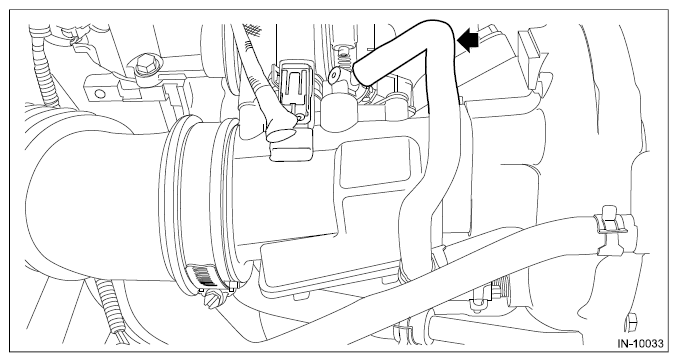 Courtesy of SUBARU OF AMERICA, INC.
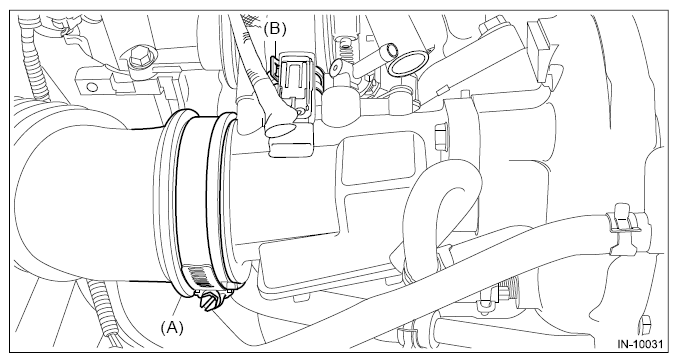
- Remove the air intake boot (A) from the intake duct No. 1, and disengage the clip (B) which secures the air by-pass valve to the intake duct No. 1.
 Courtesy of SUBARU OF AMERICA, INC.
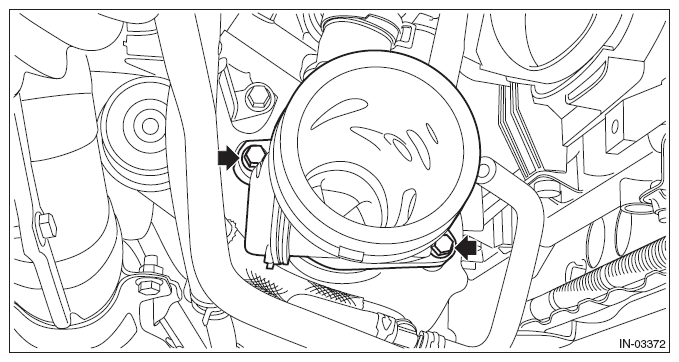
- Remove the bolts which secure the intake duct No. 1 to the turbocharger, and remove the intake duct No. 1.
 Courtesy of SUBARU OF AMERICA, INC.