Rear Disc Rotor: Removal
- Lift up the vehicle, and then remove the rear wheels.
- Release the lever assembly - hand brake.
- Remove the caliper body assembly from the housing assembly - rear axle.
- Remove the bolt from the brake hose bracket.
- Remove the mounting bolt, and remove the caliper body assembly.
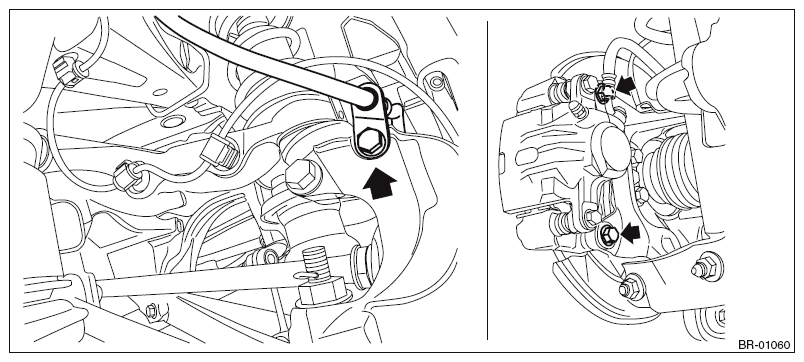 Courtesy of SUBARU OF AMERICA, INC.
- Prepare wiring harnesses etc. to be discarded, and suspend the caliper body assembly from the shock absorber with the harnesses.
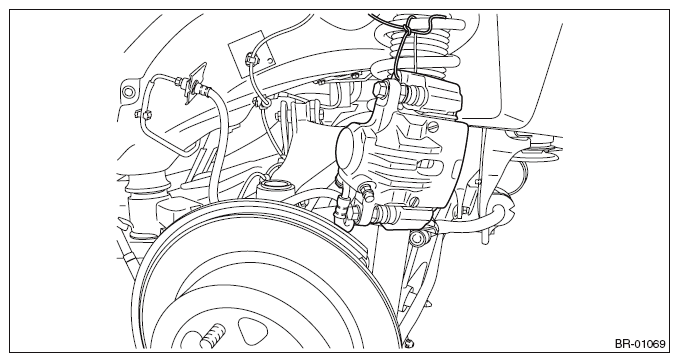 Courtesy of SUBARU OF AMERICA, INC.
- Remove the rear disc rotor.
NOTE:
If it is difficult to remove the disc rotor, perform the following two methods in order.
- Remove the adjusting hole cover (A), insert the flat tip screwdriver, and rotate the adjuster assembly - rear brake until the brake shoe moves far enough to remove the disc rotor.
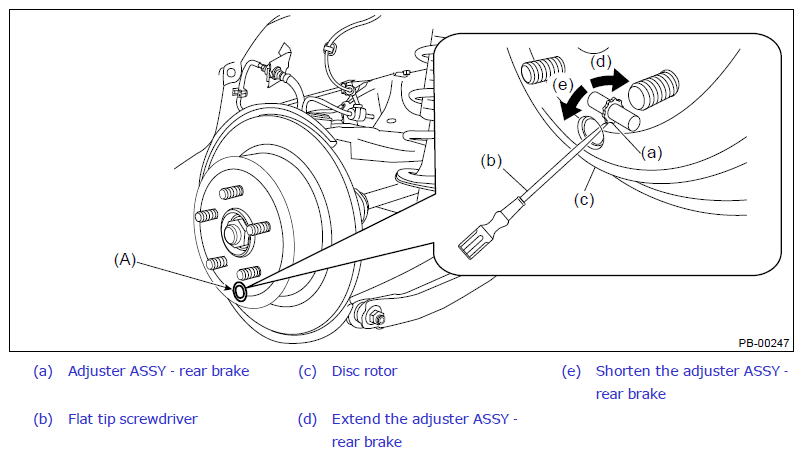 Courtesy of SUBARU OF AMERICA, INC.
- If the disc rotor is not removed after performing above step, screw in an 8 mm (0.31 in) bolt to the threaded part (A) of the disc rotor, and remove the disc rotor.
 Courtesy of SUBARU OF AMERICA, INC.