- Disconnect the ground cable from battery. < Ref. to
BATTERY
, NOTE, Note. >
NOTE:
For the 12 volt engine restart battery of HEV model, disconnect the ground terminal from 12V engine restart battery sensor.
- Remove the bumper face - front.
- Remove the screw and clips, and turn over the mud guard - front.
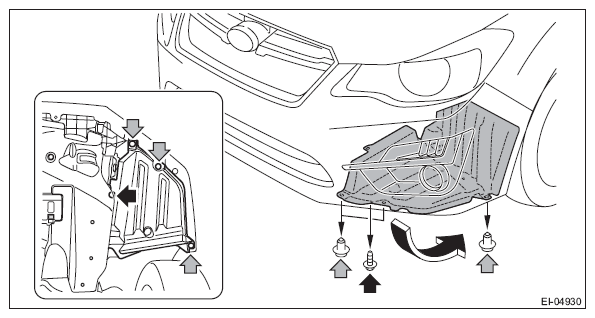 Courtesy of SUBARU OF AMERICA, INC.
- Disconnect the connectors of the left and right fog light assembly - front. (Model with fog light)
- Remove the clips at the upper side of the bumper face - front.
- Remove the clips from the fender.
- Remove the clips at the lower side of the bumper face - front.
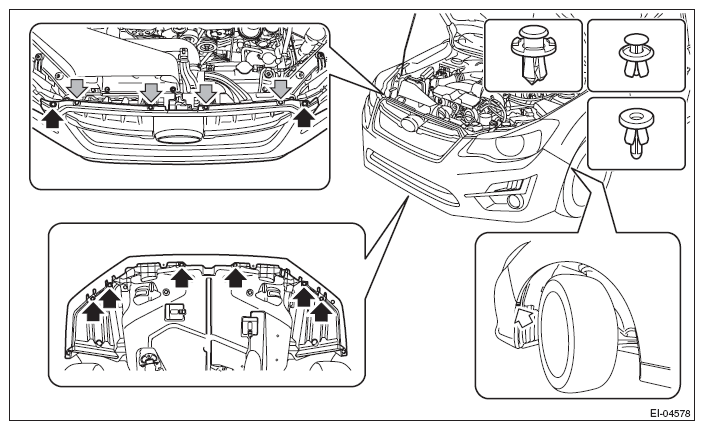 Courtesy of SUBARU OF AMERICA, INC.
- Apply protective tape (A) to the light assembly - head.
- Detach the flange section on the bumper face side from the bracket - front bumper side.
CAUTION:
Do not pull forcibly. It may damage the flange section on the bumper face - front side when it comes off from the claws of the bracket - front bumper.
NOTE:
Remove the bumper face - front according to the following procedures.
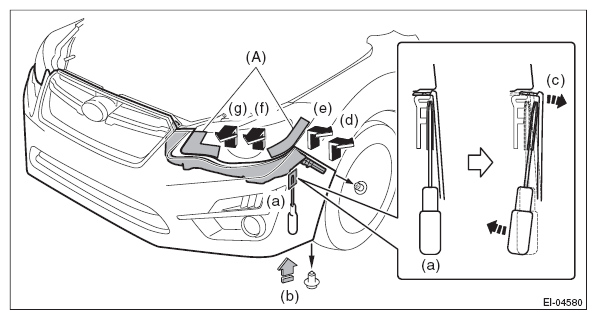 Courtesy of SUBARU OF AMERICA, INC.
- Remove the clips, turn over the mud guard, and insert a flat tip screwdriver with protection for damage prevention into the clearance between bumper and bracket. (a)
- Push out the bumper with the flat tip screwdriver while pushing up the bumper from below. (b), (c)
- Release the engagement of clips in the order of (d) to (g) while pushing up the bumper from below.
- Perform the same procedures to remove the opposite side.
- Remove the active grille shutter. (HEV model) < Ref. to
REMOVAL
, Active Grille Shutter. >
- Remove the bolts, and remove the bumper beam COMPL - front.
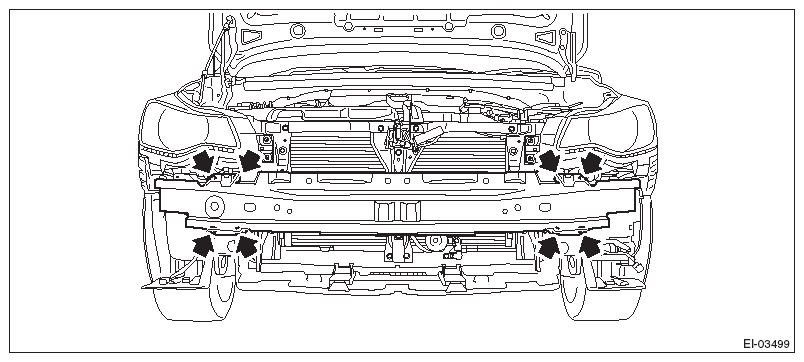 Courtesy of SUBARU OF AMERICA, INC.
- Remove the clip, and remove the bracket - grille.
CAUTION:
To prevent damage to the bracket - grille, make sure to remove all clips.
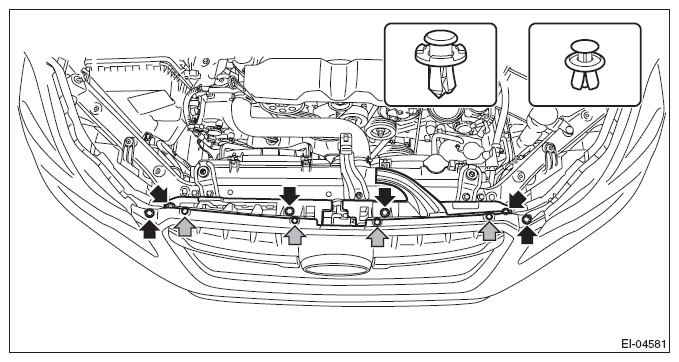 Courtesy of SUBARU OF AMERICA, INC.
NOTE:
The bracket - grille can be removed without removing the bumper face - front.
- Remove the bracket - front center LWR.
- Remove the bolts and clips, and turn over the under cover - front.
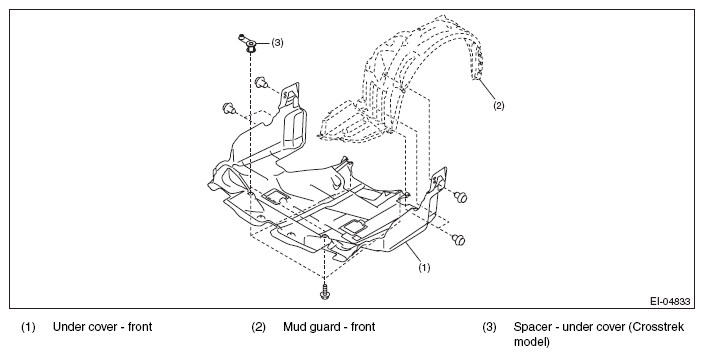 Courtesy of SUBARU OF AMERICA, INC.
- Remove the bolts, and remove the bracket - front center LWR.
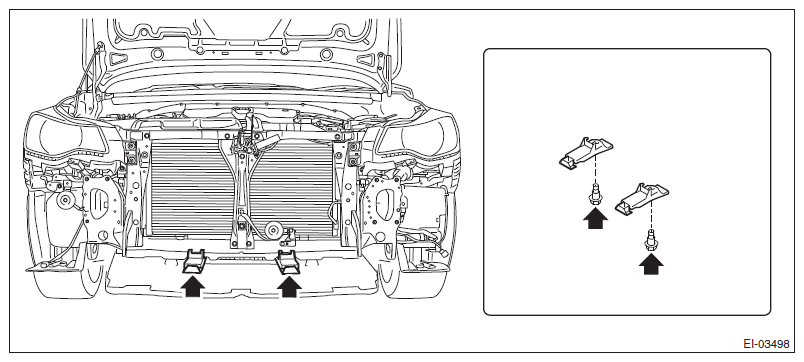 Courtesy of SUBARU OF AMERICA, INC.
- Remove the bolts and clips, and remove the bracket - front bumper corner.
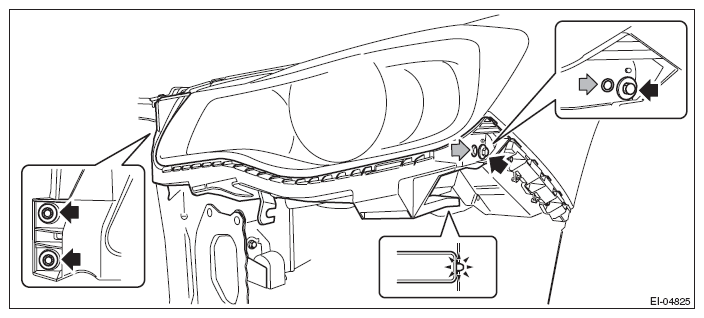 Courtesy of SUBARU OF AMERICA, INC.
NOTE:
When removing the bracket - front bumper corner only, do not remove the light assembly - head.
- Remove the bracket - front bumper side.
- Remove the bolts and clips, and remove the light assembly - head and the bracket - front bumper corner.
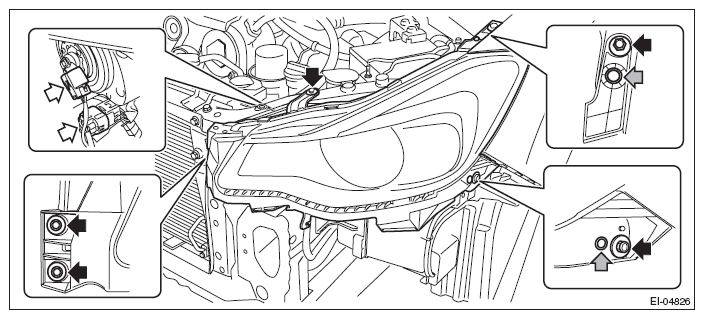 Courtesy of SUBARU OF AMERICA, INC.
- Remove the screws.
- Remove the claws from behind the fender COMPL - front, and remove the bracket - front bumper side.
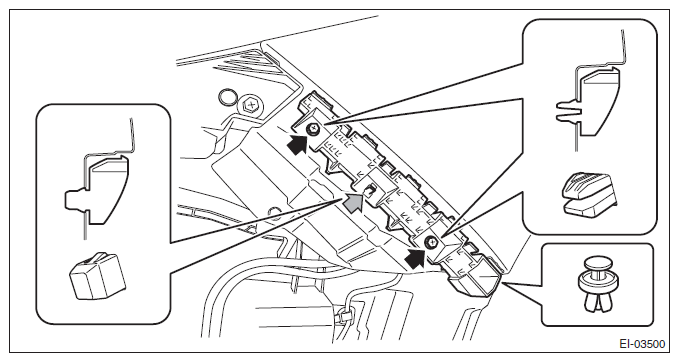 Courtesy of SUBARU OF AMERICA, INC.
- Remove the bolts and clips, and remove the fog light assembly - front.