Rear Gate Trim: Removal
- Remove the trim panel - rear gate UPR.
- Remove the claws on the trim edge.
- Release the claws in the center of trim, and remove the trim panel - rear gate UPR.
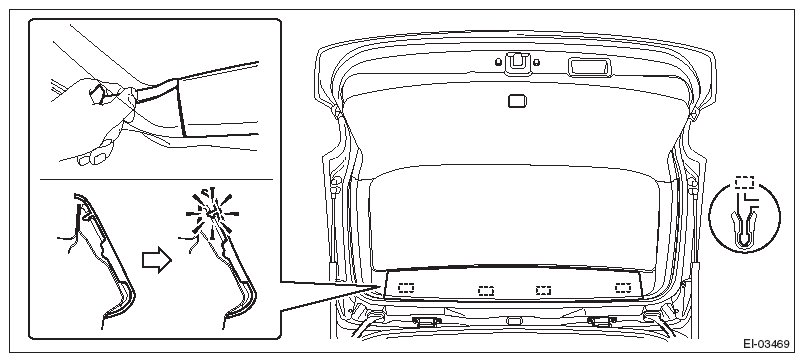 Courtesy of SUBARU OF AMERICA, INC.
- Remove the trim panel - rear gate pillar side.
- Release the claws.
- Remove the claws on the bottom of trim, and remove the trim panel - rear gate pillar side.
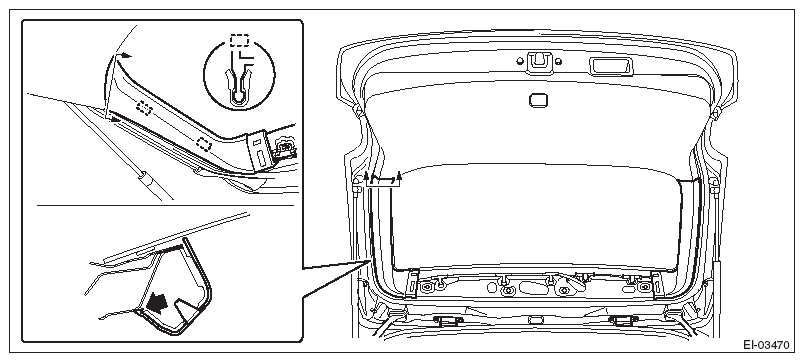 Courtesy of SUBARU OF AMERICA, INC.
- Remove the trim panel - rear gate LWR.
- Remove the clips on both ends.
- Release the clips, and remove the trim panel - rear gate LWR.
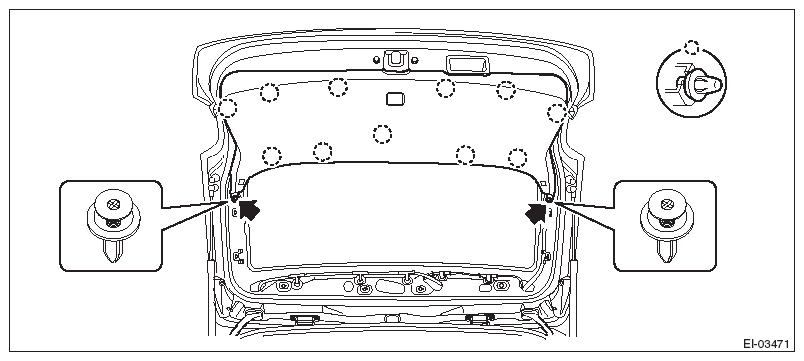 Courtesy of SUBARU OF AMERICA, INC.