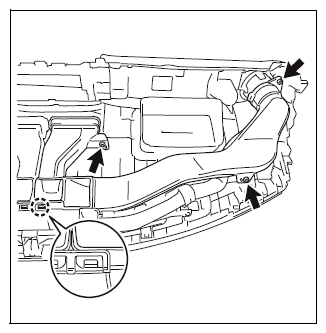
- Removal of heater-to-resistor duct No. 2
- Remove the 3 screws.
- Release the claw and remove heater-to-resistor duct No. 2.
 Courtesy of SUBARU OF AMERICA, INC.
- Removal of heater-to-resistor duct No. 1
NOTE:
Remove the part in the same manner as RH side.
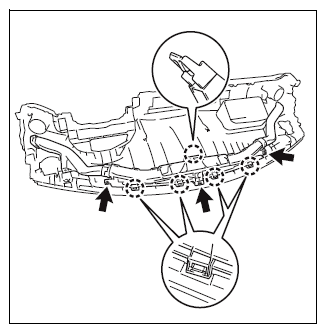
- Removal of defroster nozzle assembly
- Remove the 5 screws.
- Release the 5 claws and remove the defroster nozzle assembly as an assembly with side defroster nozzle ducts No. 1 and No. 2.
 Courtesy of SUBARU OF AMERICA, INC.
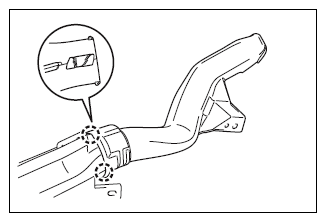
- Removal of side defroster nozzle duct No. 1
- Release the 2 claws and remove side defroster nozzle duct No. 1.
 Courtesy of SUBARU OF AMERICA, INC.
- Removal of side defroster nozzle duct No. 2
NOTE:
Remove the part in the same manner as RH side.
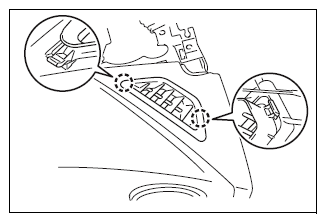
- Removal of defroster nozzle garnish No. 2
- Release the 2 claws and remove defroster nozzle garnish No. 2.
 Courtesy of SUBARU OF AMERICA, INC.
- Removal of defroster nozzle garnish No. 3
NOTE:
Remove the part in the same manner as RH side.
- Removal of instrument panel register assembly center
- Remove the 2 screws.
- Release the 2 clips and remove the instrument panel register assembly center.
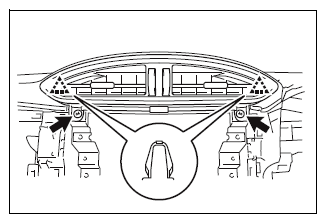 Courtesy of SUBARU OF AMERICA, INC.
- Removal of instrument panel register sub-assembly No. 1
- Release the 3 claws and remove instrument panel register sub-assembly No. 1.
 Courtesy of SUBARU OF AMERICA, INC.
- Removal of instrument panel register bezel (installed on the RH side)
- Release the 3 claws and remove the instrument panel register bezel.
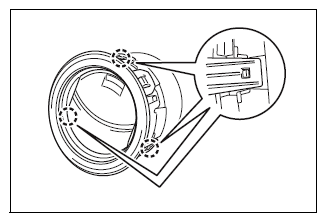 Courtesy of SUBARU OF AMERICA, INC.
- Removal of instrument panel register sub-assembly No. 2
NOTE:
Remove the part in the same manner as RH side.
- Removal of instrument panel register bezel (installed on the LH side)
NOTE:
Remove the part in the same manner as RH side.
- Removal of defroster nozzle garnish No. 1
- Release the 16 claws and 8 guides and remove defroster nozzle garnish No. 1.
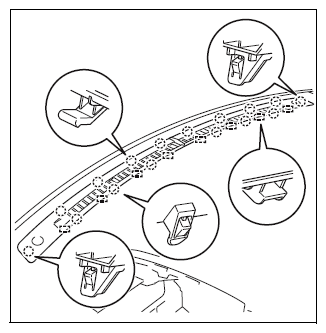 Courtesy of SUBARU OF AMERICA, INC.
- Removal of instrument panel cushion
- Remove the instrument panel cushion.
CAUTION:
Be sure to replace the instrument panel cushion with a new cushion.
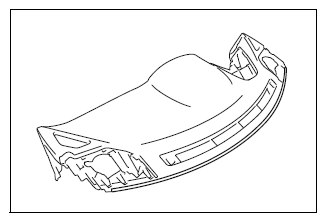 Courtesy of SUBARU OF AMERICA, INC.