- Move the seat all the way forward, from which the airbag sensor is to be removed.
NOTE:
This is to remove the seat belt retractor assembly.
- Turn the ignition switch to OFF.
- Disconnect the ground cable from battery and wait for at least 60 seconds before starting work.
- Release the claws, and then remove the side sill cover - front INN. (On the side where airbag sensor is removed)
CAUTION:
Do not pull with excessive force. Doing so may damage the claws of the side sill cover INN.
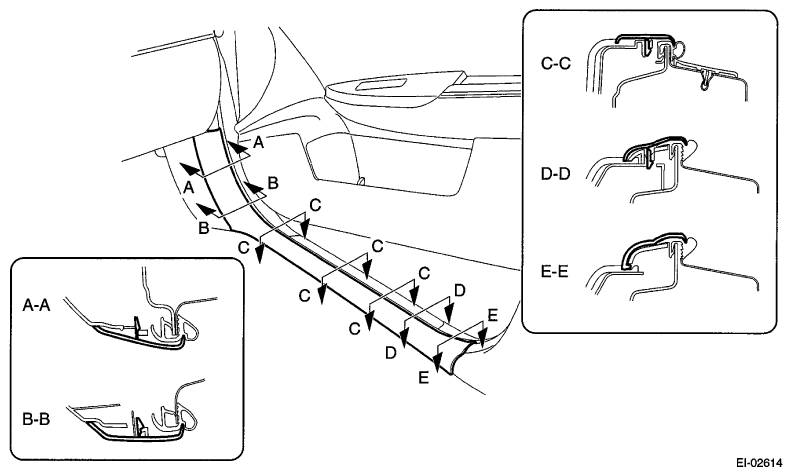 Courtesy of SUBARU OF AMERICA, INC.
NOTE:
To release the claws of the side sill cover INN, the following steps are recommended.
- Take out the weather strip from under the side sill cover INN.
- Turn over the floor mat and release the claw (C-C) by accessing from behind the side sill cover INN.
- Remove the rear seat cushion assembly.
- Pull up the seat cushion and release the hook.
CAUTION:
If the hook is disconnected from the vehicle body, replace the hook with the new part to prevent the decline of the fixed force of the seat.
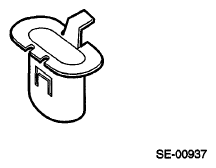 Courtesy of SUBARU OF AMERICA, INC.
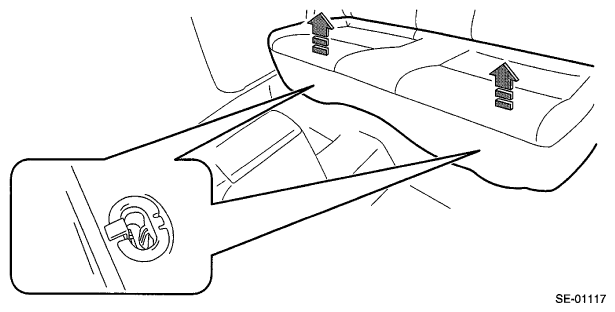 Courtesy of SUBARU OF AMERICA, INC.
- Remove the hook (A) by pushing it back while lifting the front side of the seat cushion, and remove the seat cushion assembly.
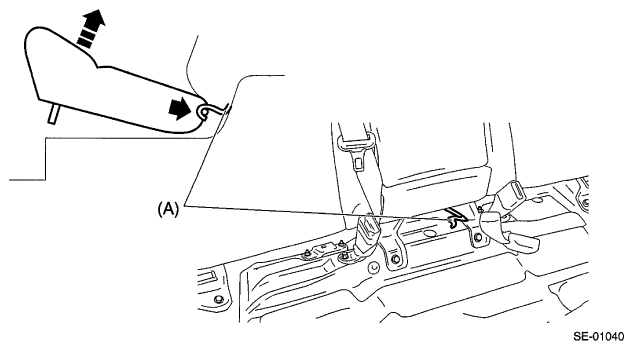 Courtesy of SUBARU OF AMERICA, INC.
- Release the clips and claws, and then remove the side sill cover - rear INN. (On the side where airbag sensor is removed)
CAUTION:
Do not pull with excessive force. Doing so may damage the claws of the side sill cover INN.
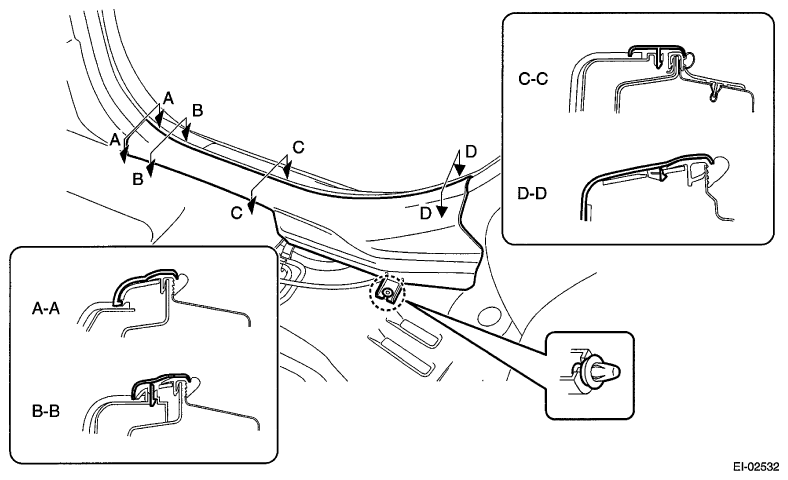 Courtesy of SUBARU OF AMERICA, INC.
NOTE:
To release the claws of the side sill cover INN, the following steps are recommended.
- Take out the weather strip from under the side sill cover INN.
- Turn over the floor mat and release the claw (C-C and D-D) by accessing from behind the side sill cover INN.
- Remove the center pillar trim LWR. (On the side where airbag sensor is removed)
- Release the clip by pulling the center pillar trim LWR toward you.
- Expand the claws of center pillar trim LWR outward and remove it from the center pillar trim UPR.
CAUTION:
Do not expand the center pillar trim LWR excessively. Doing so may damage the trim.
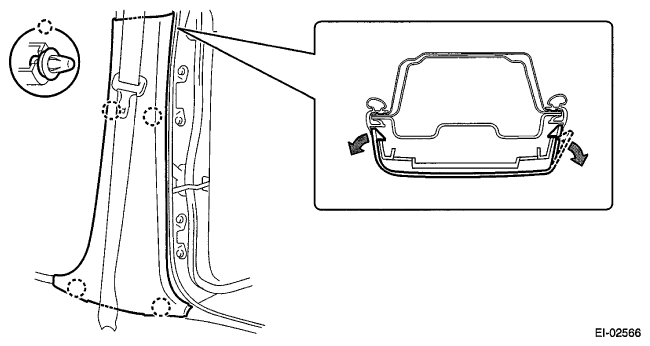 Courtesy of SUBARU OF AMERICA, INC.
NOTE:
First release the claw located to the rear of the vehicle.
- Remove the seat belt retractor. (On the side where airbag sensor is removed)
- Turn over the floor mat and disconnect the connectors of pretensioner and lap seat belt pretensioner.
- Remove the bolt to remove the seat belt retractor.
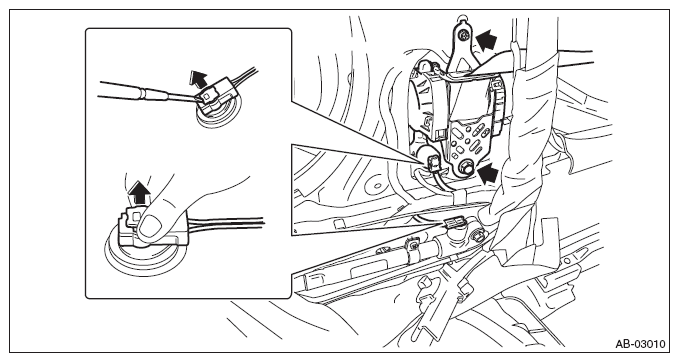 Courtesy of SUBARU OF AMERICA, INC.
- Remove the nuts and then remove the side airbag sensor assembly.
CAUTION:
- Do not separate the side airbag sensor and bracket. It causes the airbag system malfunction.
- If the sensor is removed from the bracket, be sure to replace with a new part.
- Push the lock arm.
- Holding outer part, pull it one step in the direction of arrow.
- Push the lock arm again.
- Holding outer part, pull it in the direction of arrow to disconnect the connector.
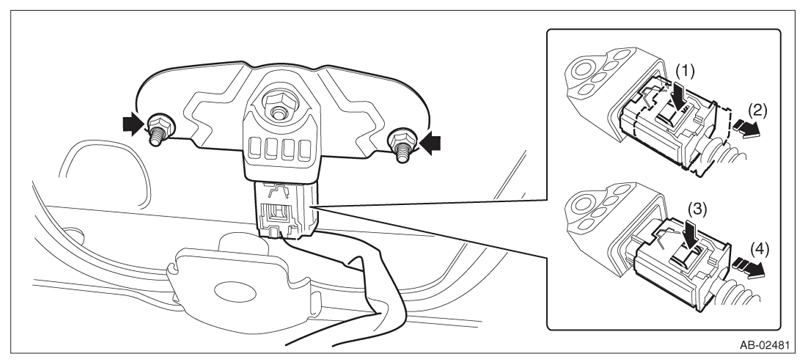 Courtesy of SUBARU OF AMERICA, INC.