LEMON Manuals: Even more car manuals for everyone
Home >> Subaru >> 2013 >> Legacy Premium, Automatic CVT Trans >> Repair and Diagnosis >> Brakes >> Mechanical - Hydraulic >> Brake System >> Rear Disc Rotor >> Removal

Rear Disc Rotor: Removal

  1. Lift up the vehicle, and then remove the rear wheels.
  2. Release the parking brake.
  3. Remove the caliper body assembly from the rear axle housing.
    1. Remove the bolt from the brake hose bracket.
    2. Remove the mounting bolt, and remove the caliper body assembly.
      Fig 1: Locating Caliper Body Assembly And Brake Hose Bracket Mounting Bolts
      G08583530Courtesy of SUBARU OF AMERICA, INC.
    3. Prepare wiring harnesses etc. to be discarded, and suspend the caliper body assembly from the shock absorber with the harnesses.
      Fig 2: Securing Caliper Body Assembly
      G08583531Courtesy of SUBARU OF AMERICA, INC.
  4. Remove the rear disc rotor.
    NOTE: If it is difficult to remove the disc rotor, perform the following two methods in order.
    1. Remove the adjusting hole cover (A), insert the flat tip screwdriver, and rotate the adjusting screw until the brake shoe moves far enough to remove the disc rotor.
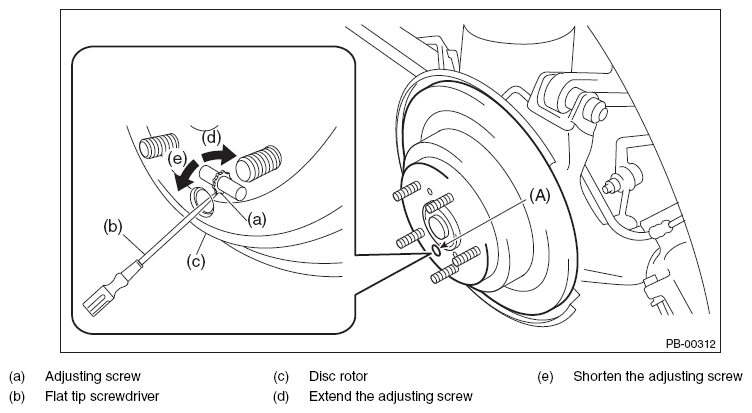
      Fig 3: Removing Adjusting Hole Cover Mounting Screw
      G08583532Courtesy of SUBARU OF AMERICA, INC.
    2. When the disc rotor is difficult to be removed from the rear hub unit bearing, screw in 8 mm (0.31 in) bolt to the threaded part of the disc rotor (A), and remove the disc rotor.
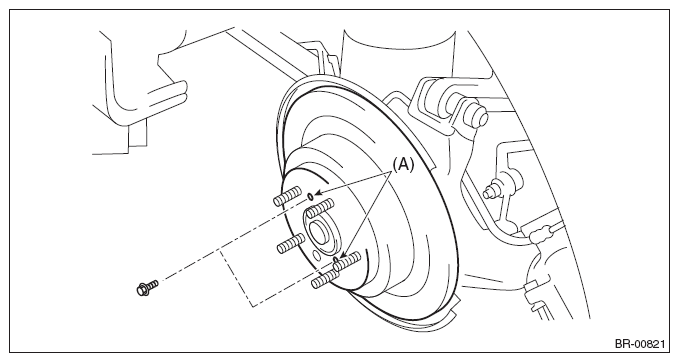
      Fig 4: Identifying Disc Rotor And Mounting Screws
      G08583533Courtesy of SUBARU OF AMERICA, INC.