At Models And CVT Models
- Disconnect the ground cable from battery.
- Remove the instrument panel lower cover.
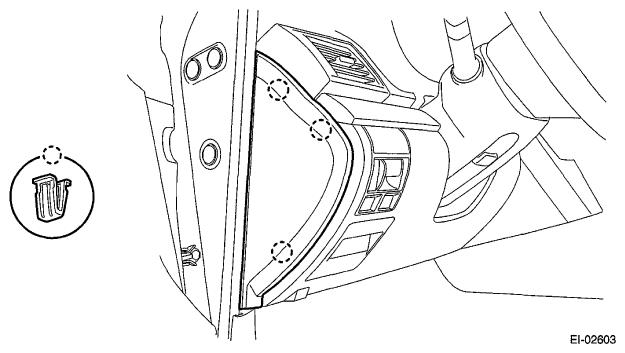
- Remove the clips, and remove the instrument panel side cover LH.
 Courtesy of SUBARU OF AMERICA, INC.
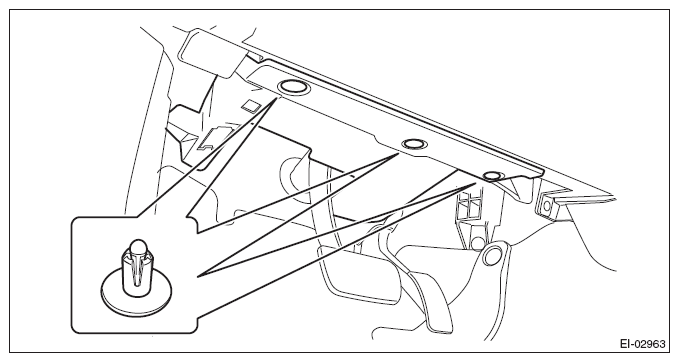
- Remove the clips and data link connector, and remove the instrument panel lower cover under.
 Courtesy of SUBARU OF AMERICA, INC.
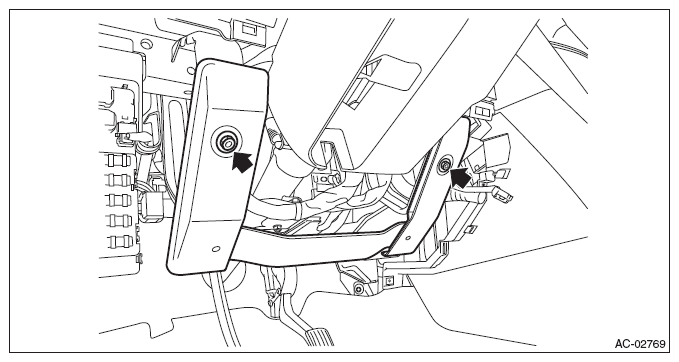
- Remove the bolts, and remove the knee guard panel.
 Courtesy of SUBARU OF AMERICA, INC.
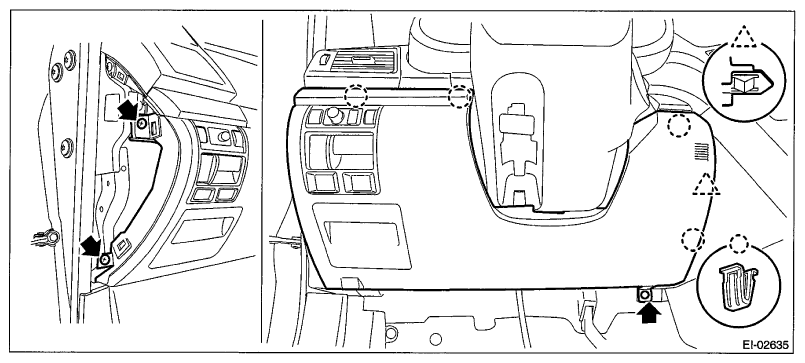
- Remove the screws and clips and release the claws, and remove the instrument panel lower cover while disconnecting the harness connectors.
 Courtesy of SUBARU OF AMERICA, INC.
- Remove the brake pedal assembly.
- Disconnect the stop light switch connector.
- Remove the snap pin (a) and clevis pin (b), and remove the operating rod from the brake pedal.
NOTE:
- Use special care when handling the operating rod. If excessive force is applied to the operating rod, the angle may change by ±3°, and it may result in damage to power piston cylinder.
- Do not change the push rod length.
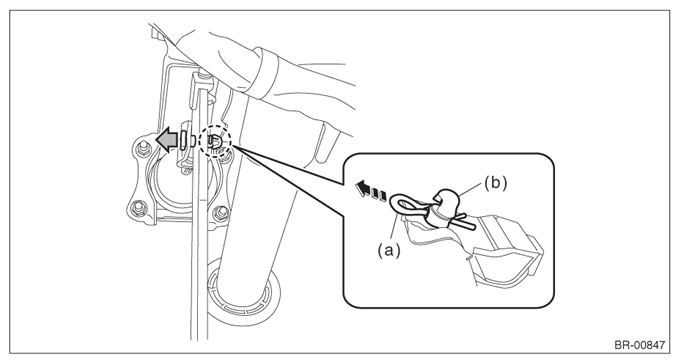 Courtesy of SUBARU OF AMERICA, INC.
- Remove the bolt and nut, and then detach the brake pedal assembly.
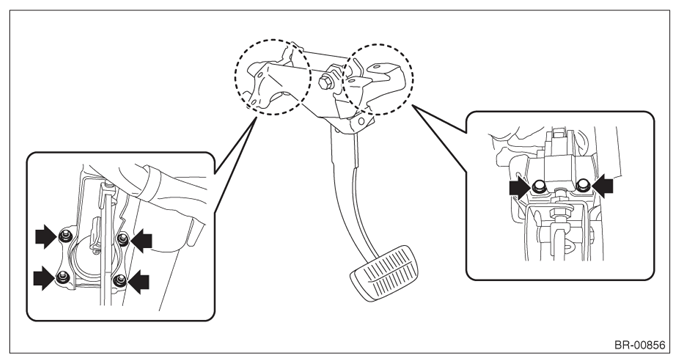 Courtesy of SUBARU OF AMERICA, INC.