Rear Gate Trim: Removal
- Remove the rear gate upper trim.
- Remove the claws on the trim edge.
- Disconnect the claws in the center of trim, and remove the rear gate upper trim.
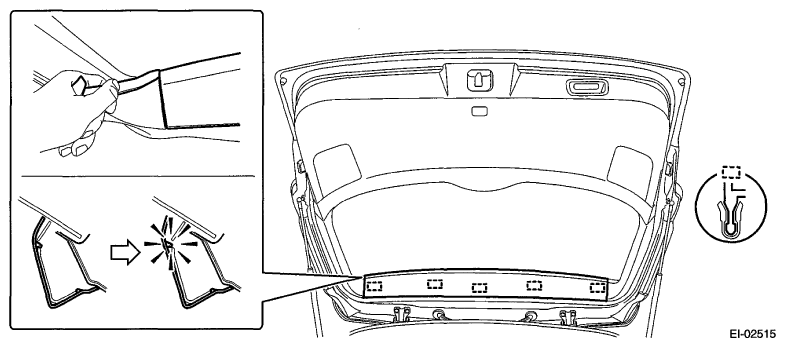 Courtesy of SUBARU OF AMERICA, INC.
- Remove the rear gate pillar trim.
- Release the claws.
- Remove the claws on the bottom of trim, and remove the rear gate pillar trim.
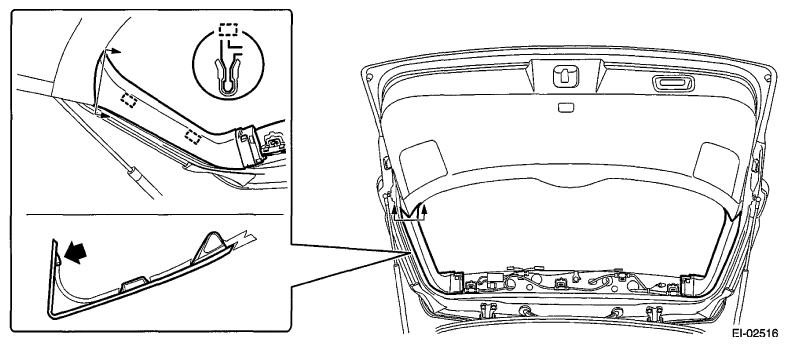 Courtesy of SUBARU OF AMERICA, INC.
- Remove the hand grip of rear gate.
CAUTION:
- Be careful not to scratch the trim.
- To protect the trim from damage, attach a protective tape to the tool in use.
- Insert a precision screwdriver (a).
- With the screwdriver inserted, move the precision screwdriver toward the claw and open the cap.
- Remove the screws and detach the hand grip.
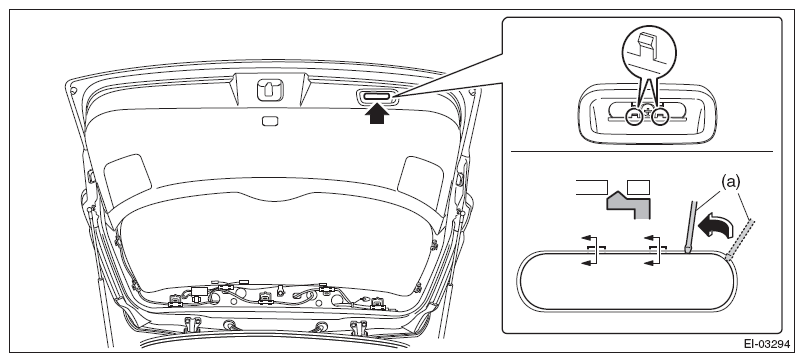 Courtesy of SUBARU OF AMERICA, INC.
- Remove the clips, and then remove the rear gate lower trim.
- Remove the clips on both ends.
- Release the clips and remove the rear gate lower trim.
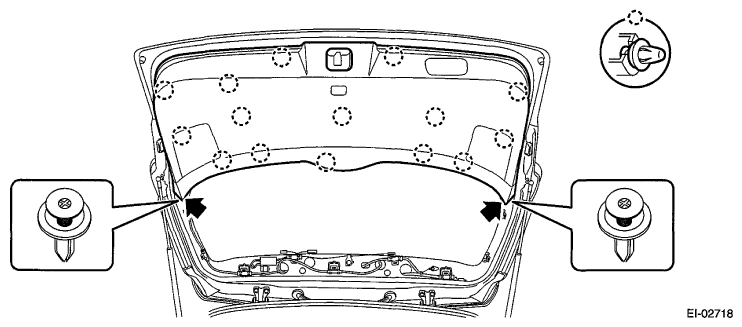 Courtesy of SUBARU OF AMERICA, INC.