Brake Booster: Removal
- Remove or disconnect the following parts in the engine compartment.
- Remove the brake master cylinder.
- Disconnect the vacuum hose from brake booster.
- Remove the following parts from the pedal bracket.
- Snap pin and clevis pin
- Four brake booster installation nuts
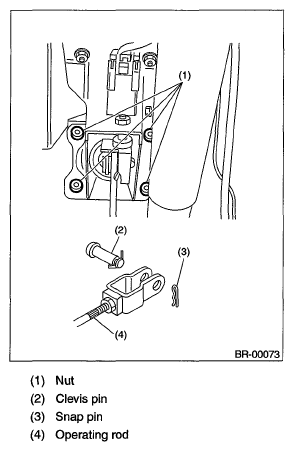 Courtesy of SUBARU OF AMERICA, INC.
- Remove the brake booster while avoiding the brake pipe.
NOTE:
- Make sure that the booster shell and vacuum pipe are not subject to strong impacts.
- Be careful not to drop the brake booster. If the booster is dropped, replace it.
- Use special care when handling the operating rod. If excessive force is applied to the operating rod, the angle may change by ±3°, and it may result in damage to power piston cylinder.
- Be careful when placing the brake booster on floor.
- Do not change the push rod length.
CAUTION:
- Do not disassemble the brake booster.
- If external force is applied from above when brake booster is placed in this position, the resin portion as indicated by "P" may become damaged.
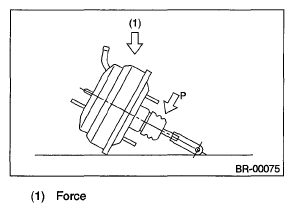 Courtesy of SUBARU OF AMERICA, INC.