Removal & Installation
- Lift-up vehicle.
- Remove rear tires and wheels.
- Remove rear seat cushion.
- Remove console box.
- Remove shift knob (MT model) and front cover.
- Remove tray and console cover.
- Remove console box.
- Loosen parking cable adjusting nut and console bracket.
- Remove parking brake lever. See Figure
.
- Unbend the parking brake lever pawls and remove cable. See Figure
.
- Roll up floor mat and remove clamps. See Fig 1
.
- Remove equalizer cover.
- Remove inner cable end from equalizer. See Fig 2
.
- Pull out parking brake cable from rear brake. See PARKING BRAKE ASSEMBLY
.
- Pull out clamp from rear brake.
- Remove bolt and bracket from trailing link bracket.
- Remove bolt and clamp from rear floor. See Fig 3
.
- Detach grommet from rear floor.
- Remove cable assembly from cabin by forcibly pulling it backward.
- Detach parking brake cable from cable guide at rear trailer link.
- Inspect parking brake cable and replace it if damaged, rusty or malfunctioning.
- Check that cable operates smoothly.
- Check inner cable for damage and rust.
- Check outer cable for damage, bends or cracks.
- Check boot for damage, cracks or deterioration.
- Install NEW parking brake assembly in reverse order of removal.
- Be sure to pass cable through the cable guide inside tunnel. Adjust the lever stroke. See LEVER ADJUSTMENT
under PARKING BRAKE under ADJUSTMENTS.
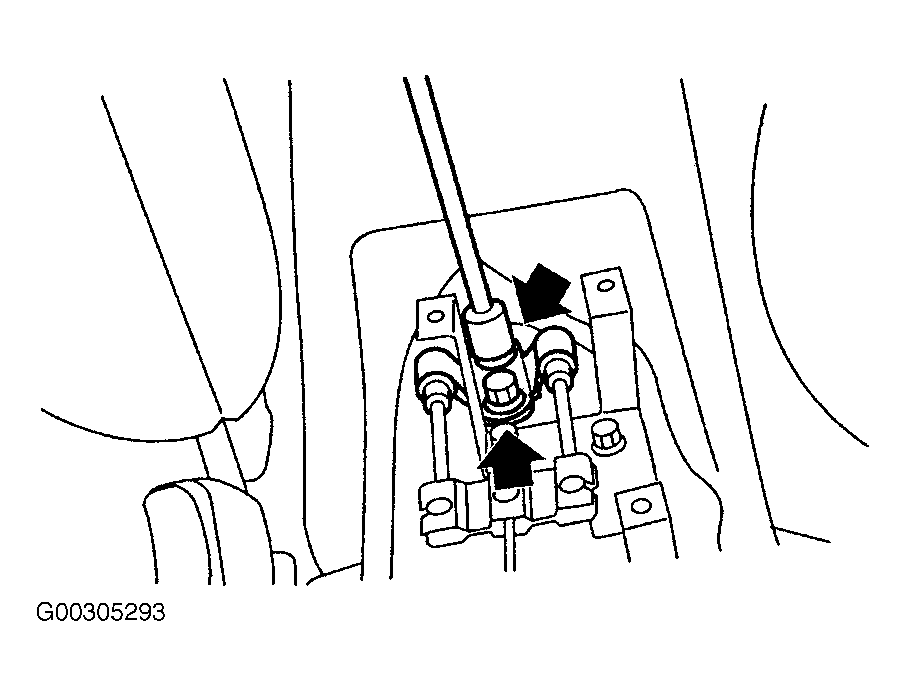 Courtesy of SUBARU OF AMERICA, INC.
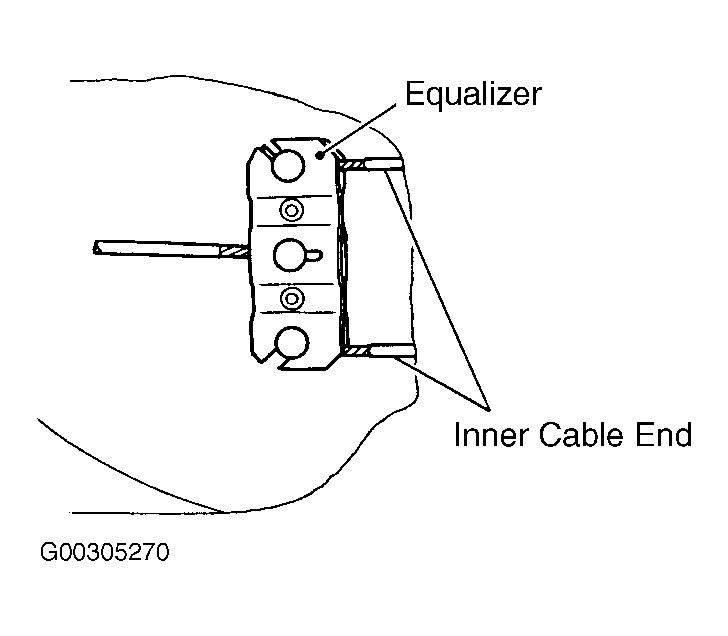 Courtesy of SUBARU OF AMERICA, INC.
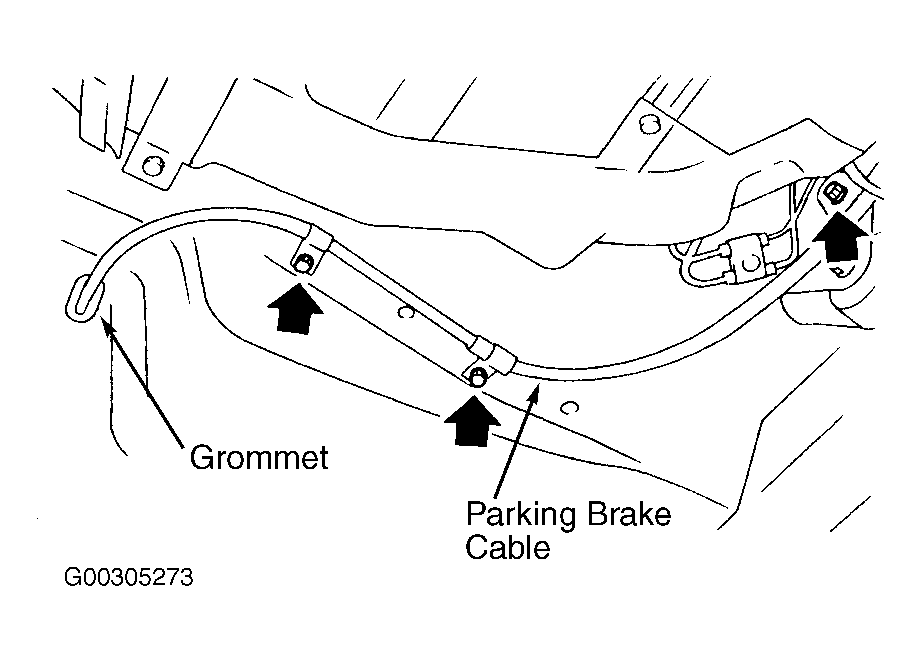 Courtesy of SUBARU OF AMERICA, INC.