Parking Brake Assembly (Rear Disc Brake): Removal
- Set vehicle on a lift.
- Disconnect ground terminal from battery.
- Loosen wheel nuts.
- Jack-up vehicle and remove wheel.
- Remove 2 mounting bolts and remove disc brake assembly. See Figure
.
- Suspend disc brake assembly so that the hose is not stretched.
- Pull down and release the parking brake.
- Remove disc rotor.
NOTE:
If the disc rotor is difficult to remove, perform the following procedures:
- Turn the adjusting screw using a slot-type screw driver until the brake shoe gets away enough from the disc rotor. See Figure
.
- If disc rotor seizes up within the hub, drive the disc rotor out by installing an 8 mm bolt in the side holes on the rotor. See Figure
.
- Remove the primary and secondary return spring from the parking brake assembly.
- Remove the front shoe hold down spring and pin with pliers.
- Remove strut and strut spring.
- Remove rear shoe hold down spring and pin with pliers. See Fig 1
.
- Remove adjuster assembly and adjusting spring from the parking brake assembly.
- Remove parking cable from parking lever. See Fig 2
.
- Remove brake shoe.
- Using a standard screwdriver, raise the retainer. Remove the parking lever and washer from the brake shoe.
- Measure the brake disc inside diameter. See DISC BRAKE SPECIFICATIONS
. If the disc is scored or worn, replace the brake disc.
- Measure the lining thickness. See DISC BRAKE SPECIFICATIONS
. If it exceeds the limit, replace the shoe assembly.
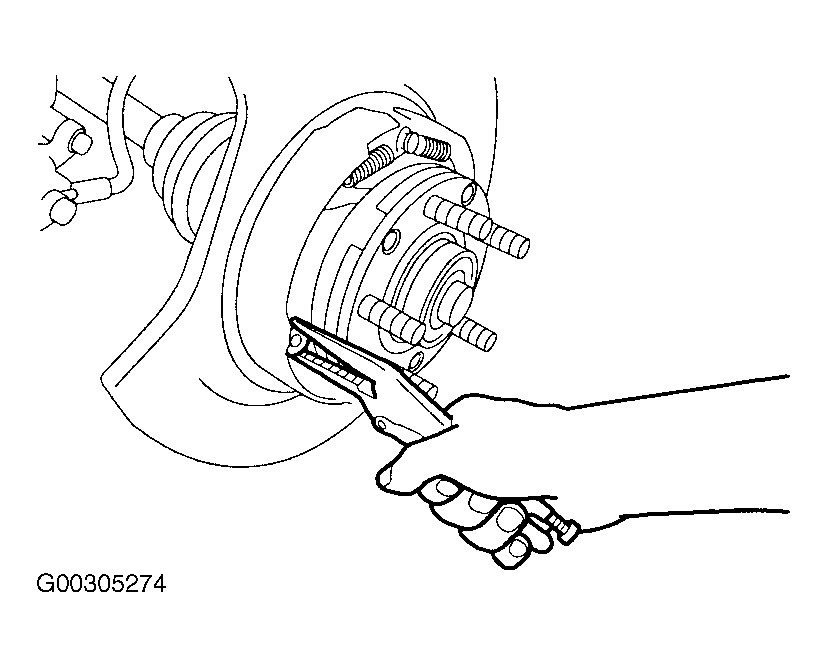 Courtesy of SUBARU OF AMERICA, INC.
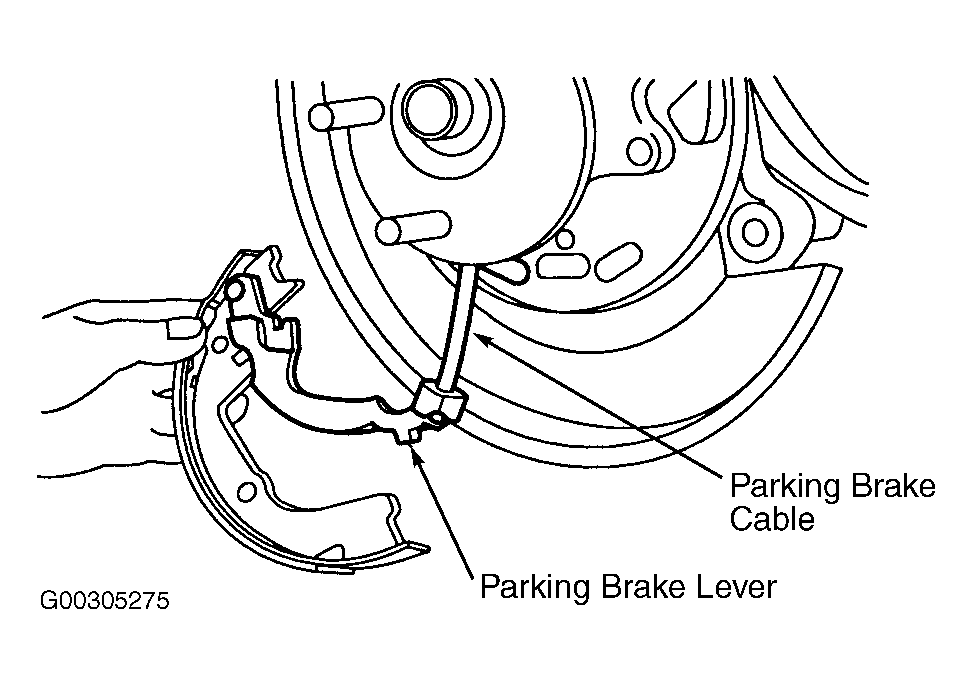 Courtesy of SUBARU OF AMERICA, INC.