Valve Guides
- Check clearance between valve guide and stem. Clearance is checked by measuring outside diameter of valve stem and inside diameter of valve guide using a small hole gauge and an outside micrometer.
- If clearance is not as specified, replace valve guide and/or valve. See CYLINDER HEAD table under ENGINE SPECIFICATIONS. To replace valve guide, position cylinder head with combustion chamber facing upward. Insert Valve Guide Remover (499767400) into valve guide and press down to remove valve guide.
- To install, position cylinder head with combustion chamber facing downward. Coat NEW valve guide with oil and position in bore in cylinder head. For intake valve guides, place Valve Guide Adjuster (498267700) on cylinder head over valve guide. See Fig 1. For exhaust valves, use Valve Guide Adjuster (499767800). Insert Valve Guide Remover (499767400) into NEW valve guide. Press in until valve guide upper end is flush with upper surface of Valve Guide Adjuster.
- Ensure valve guide installation height is within specification. Valve guide protrusion should be .787-.807" (20.0-20.5 mm) for intake valves and .650-.669" (16.5-17.0 mm) for exhaust valves. After installation, measure valve stem-to-valve guide clearance. If clearance is less than specification, ream inside of valve guide using Valve Guide Reamer (499767400). Ensure all chips and metal particles are cleaned from valve guide.
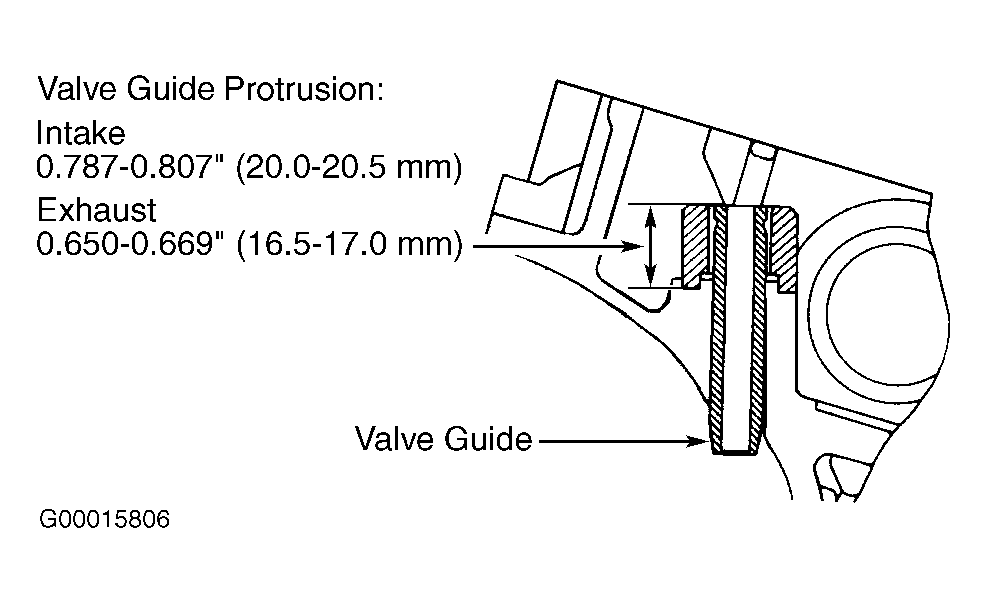 Courtesy of SUBARU OF AMERICA, INC.