Timing Belt: Removal
- Remove accessory drive belt. Remove A/C belt and tensioner, if equipped. Remove crankshaft pulley bolt and crankshaft pulley. If engine is removed from vehicle, crankshaft can be held using Crankshaft Pulley Wrench (499977100). Remove crankshaft pulley bolt, then remove crankshaft pulley.
- Remove left and front timing belt covers. On vehicles with manual transaxle, remove timing belt guide. On all models, if timing belt is to be reused, mark belt to indicate original direction of rotation before removal, if original marks are worn away or faded. Also mark belt to indicate belt-to-sprocket alignment, if original marks are worn away or faded. See Fig 1.
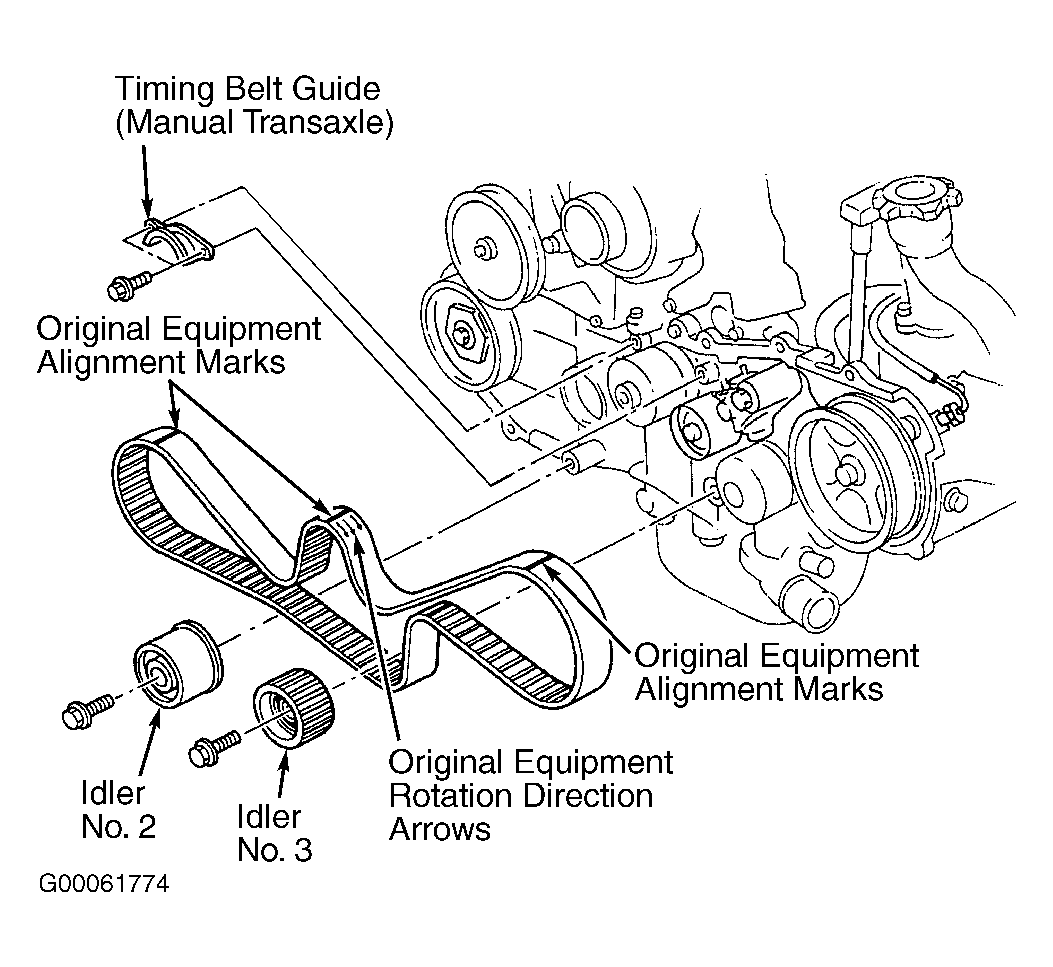 Courtesy of SUBARU OF AMERICA, INC.
- To mark belt, turn crankshaft with Crankshaft Socket (499987500) to align marks on crankshaft sprocket and left and right camshaft sprockets with notches on timing belt cover and engine block. See Fig 2.
 Courtesy of SUBARU OF AMERICA, INC.
- Use White paint to mark direction of rotation and to mark timing belt in relation to sprocket timing marks. When marks are properly aligned, 44 teeth should be on right side of crankshaft sprocket and 40.5 teeth should be on left side of crankshaft sprocket. See Fig 3.
 Courtesy of SUBARU OF AMERICA, INC.
- Loosen tensioner adjuster mounting bolts. Remove belt idler No. 2 and belt idler No. 3. Remove timing belt. Remove belt idler No. 1 (upper belt idler). Remove belt tensioner adjuster. See Fig 4.
 Courtesy of SUBARU OF AMERICA, INC.