Installing rear crankshaft radial sealing ring - AR03.20-P-3063-01MMB
WARNING: This page does not describe the selected car, but rather 33 other vehicles, including the 2016 Mercedes-Benz E63 S AMG, 2016 Mercedes-Benz E400, 2016 Mercedes-Benz E350, 2016 Mercedes-Benz E300, and 2016 Mercedes-Benz E250. However, it is still accessible from the selected car via links, so may be relevant.
ENGINE 152.9, 157, 278
CRANKCASE, TIMING CASE COVER, END COVER
| Number |
Designation |
Engine 152 |
| BA01.40-P-1002-01K |
Screw/bolt, rear end cover to crankcase |
Nm |
9 |
CRANKCASE, TIMING CASE COVER, END COVER
| Number |
Designation |
Engine 157 |
Engine 278 |
| BA01.40-P-1002-01K |
Screw/bolt, rear end cover to crankcase |
Nm |
9 |
9 |
OIL PAN
| Number |
Designation |
Engine 278 |
| BA01.45-P-1001-01E |
Screw/bolt, oil pan to cylinder crankcase/timing case cover/rear end cover |
M6 |
Nm |
9 |
OIL PAN
| Number |
Designation |
Engine 152 |
Engine 157 |
| BA01.45-P-1001-01E |
Screw/bolt, oil pan to cylinder crankcase/timing case cover/rear end cover |
M6 |
Nm |
11 |
9 |
 Courtesy of MERCEDES-BENZ USA
 REPAIR MATERIALS
| Number |
Designation |
Order number |
| BR00.45-Z-1013-01A |
Loctite 5970 sealant |
A 003 989 98 20 |
| BR00.45-Z-1028-04A |
Cleaner from package |
Adolf Wurth GmbH & Co. KG |
| BR00.45-Z-1038-04A |
Loctite 7200 |
Henkel Loctite Deutschland GmbH |
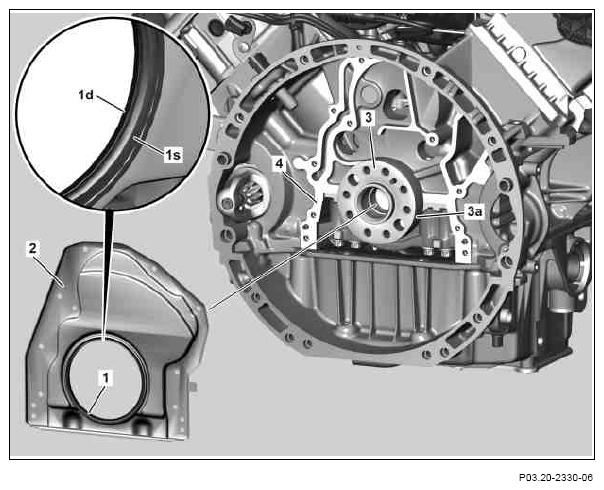
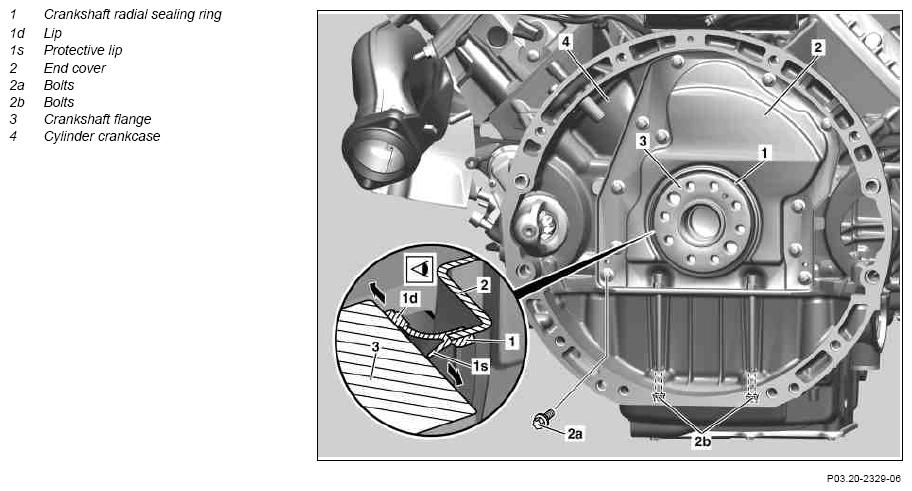
 The crankshaft radial sealing ring (1) is vulcanized into the end cover (2) and can, therefore, only be replaced together with the end cover (2). Do not reuse the end cover (2) with the rear crankshaft radial sealing ring (1) after removal.
The crankshaft radial sealing ring (1) has a protective lip (1s) in addition to the sealing lip (1d). The sealing lip (1d), protective lip (1s) and contact surface (3a) at the crankshaft flange (3) must not be lubricated for assembly!
 Courtesy of MERCEDES-BENZ USA
 Clean and degrease crankcase (4) and oil pan in the area of the applied sealant as well as contact surface (3a) on the crankshaft flange (3).
-
Clean and degrease sealing surface of new end cover (2).
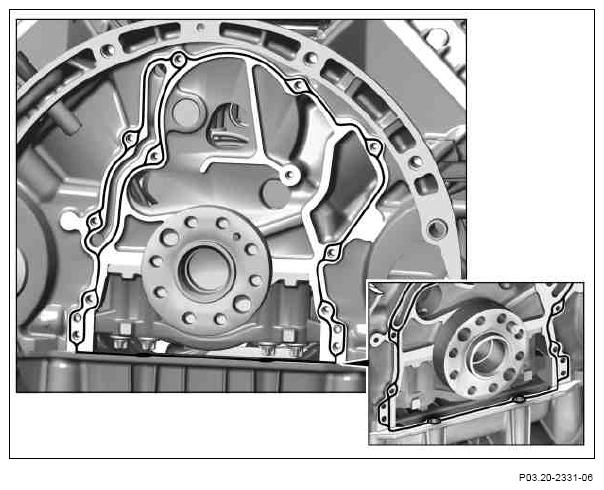
- Apply sealant in the form of a bead with a height and width of 2.0 mm (± 0.5 mm) to the crankcase (4) and oil pan.
Use exclusively approved sealants. Do not spread bead. Mount end cover (2) within 5 minutes after applying sealant.
 Courtesy of MERCEDES-BENZ USA
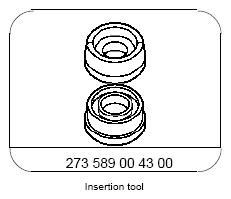
- Mount end cover (2) with crankshaft radial sealing ring (1) on insertion tool (6).
 Make sure that protective lip (1s) faces towards the side applying the force and sealing lip (1d) faces in the direction of the crankcase (4). Leakage could occur otherwise at rear crankshaft radial sealing ring (1).
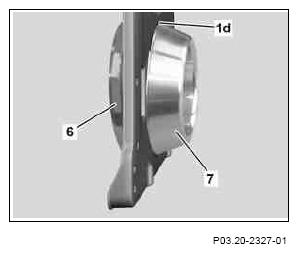
The crankshaft radial sealing ring (1) can only be mounted on the insertion tool (6), if insertion tool (6) is fitted together with insertion tool (7).
 Courtesy of MERCEDES-BENZ USA
- Separate insertion tool (7) from insertion tool (6).
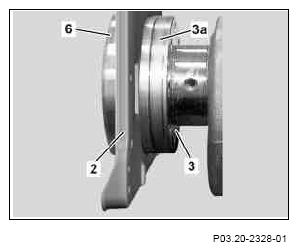
- Mount end cover (2) with crankshaft radial shaft sealing ring (1) and insertion tool (6) onto contact surface (3a) on crankshaft flange (3).
The contact surface (3a) must not be removed with emery board as this can destroy the surface of the crankshaft and render the crankshaft unusable.
 Courtesy of MERCEDES-BENZ USA
 Courtesy of MERCEDES-BENZ USA
- Tighten bolts (2a) gradually in crosswise pattern, then tighten the bolts (2b). Observe tightening torque.
- Detach insertion tool (6) from crankshaft flange (3).
 Carefully lift protective lip (1s) and check the correct installation position of sealing lip (1d).
A wrong installation position leads to leakage.
The sealing lip (1d) must point towards crankcase (4) all around its circumference.
-
Check for correct installation position of the protective lip (1s).
An incorrect installation position leads to premature wear of crankshaft radial sealing ring (1).
The protective lip (1s) must point towards transmission housing around its entire circumference.