Quarter Lower Rear Trim Panel Replacement (Coupe)
Quarter Lower Rear Trim Panel Replacement (Coupe)
Removal Procedure
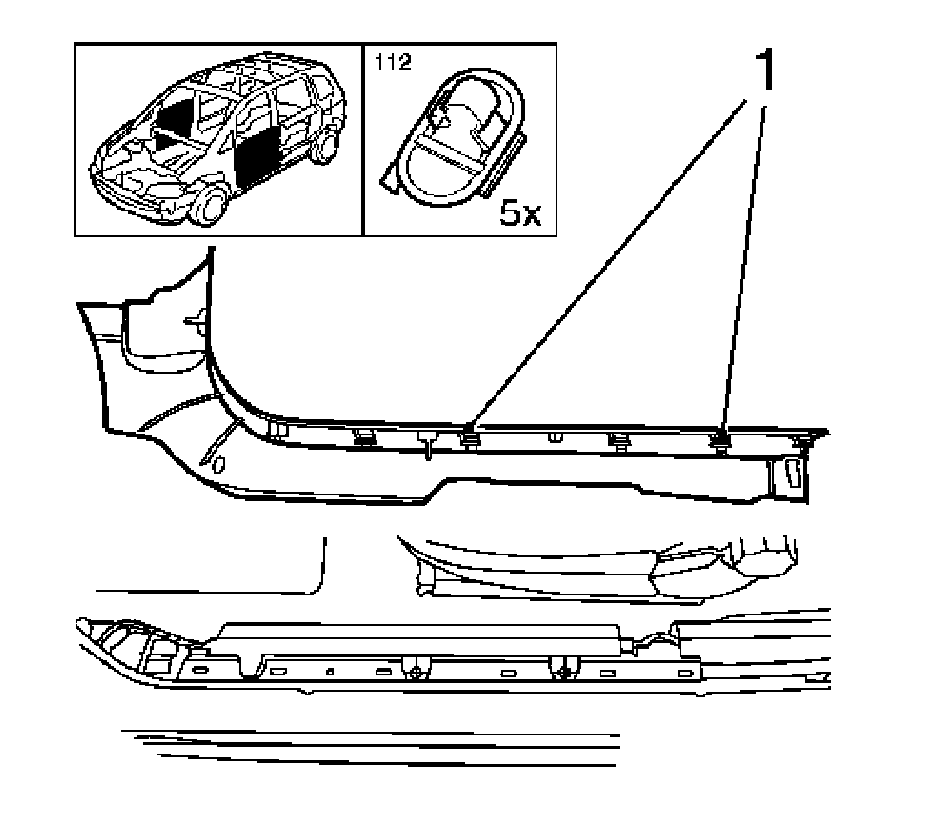
1. Remove the door sill trim panel.
Release the 5 clips (1).
2. Remove the luggage shade.
* Disconnect the 2 retaining cords from the liftgate.
* Unlatch the cover from the side support 2.
3. Remove the rear compartment carpet.
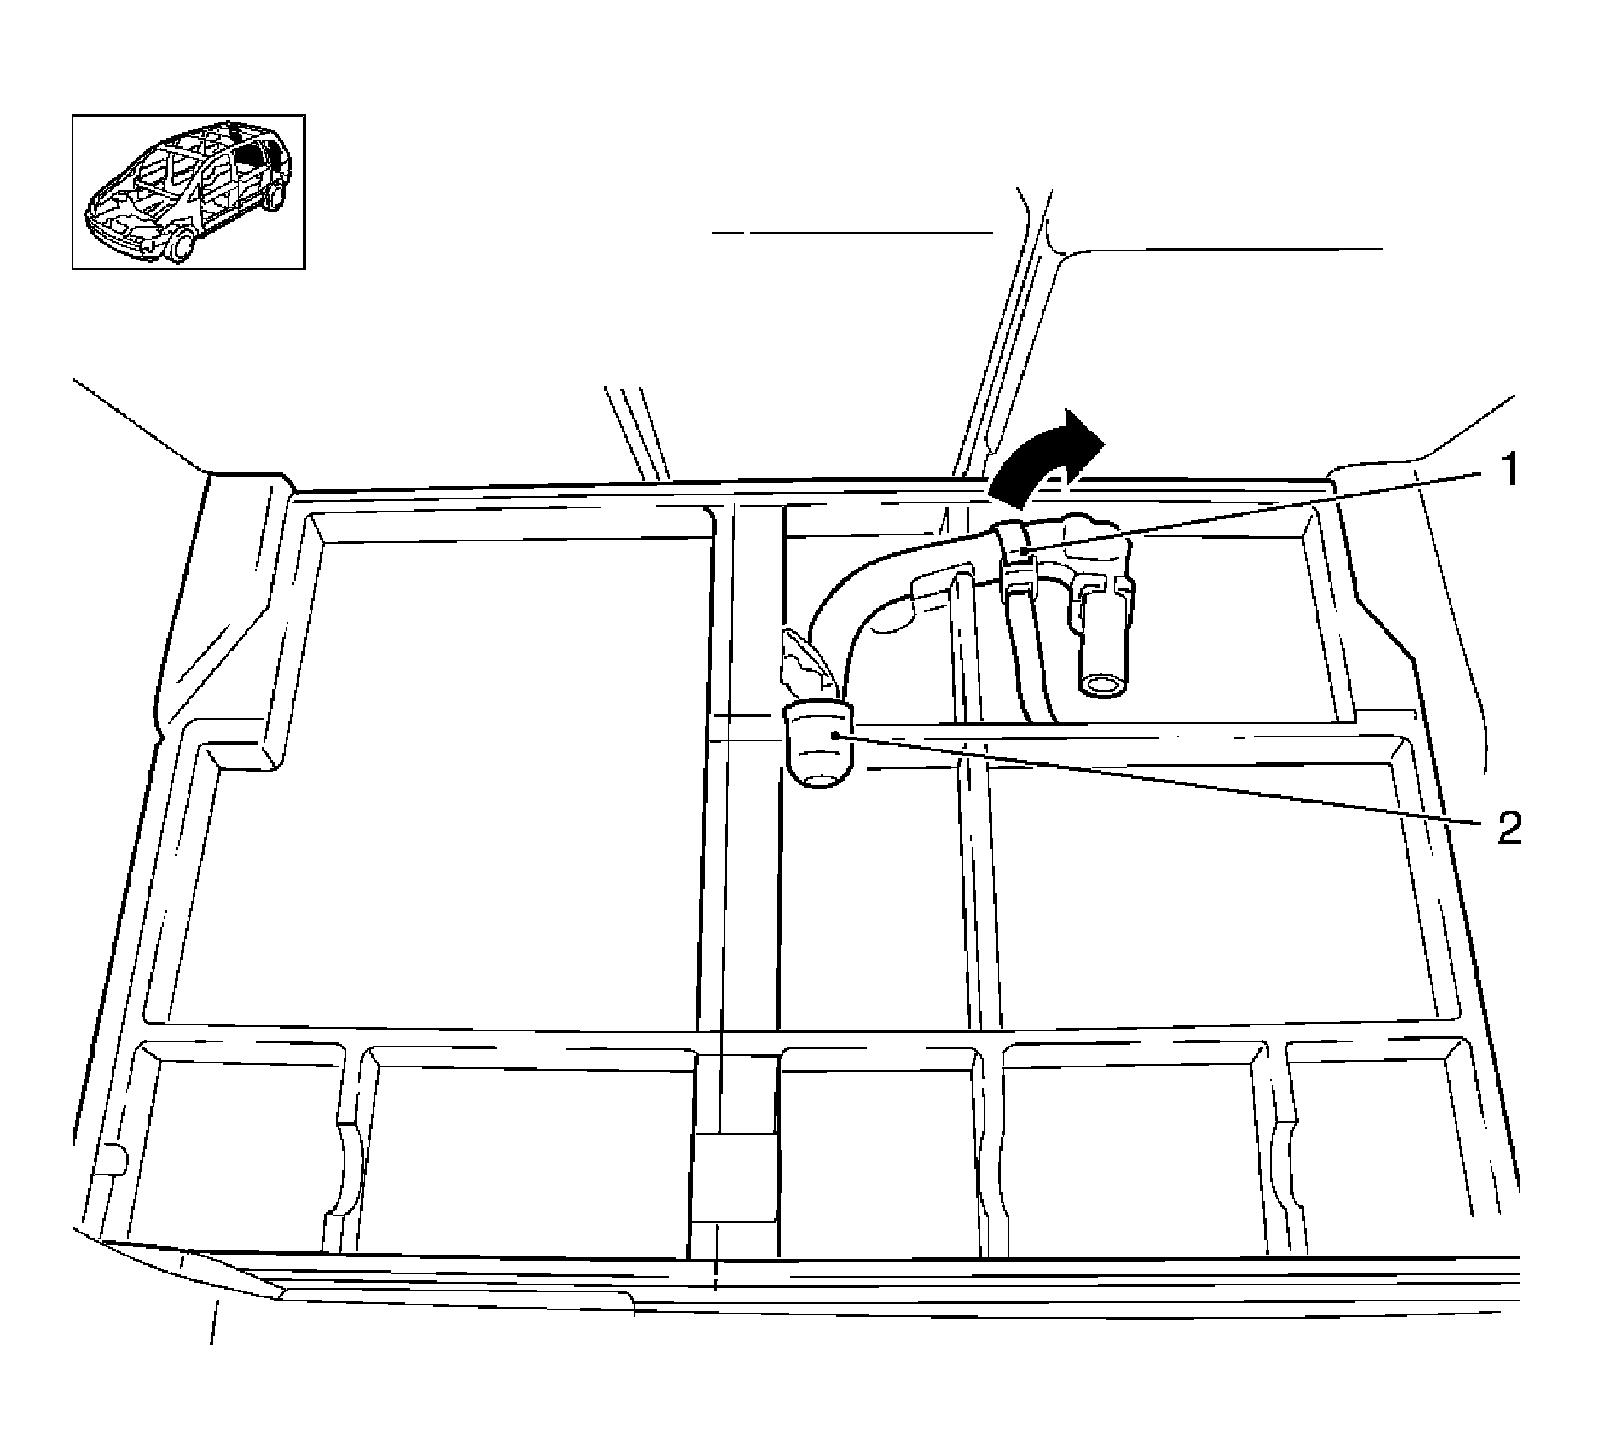
4. Remove the trailer hitch ball head.
* Loosen the fastening belt (1).
* Remove the ball head (2).
5. Remove the additional storage trays under the load compartment carpet.
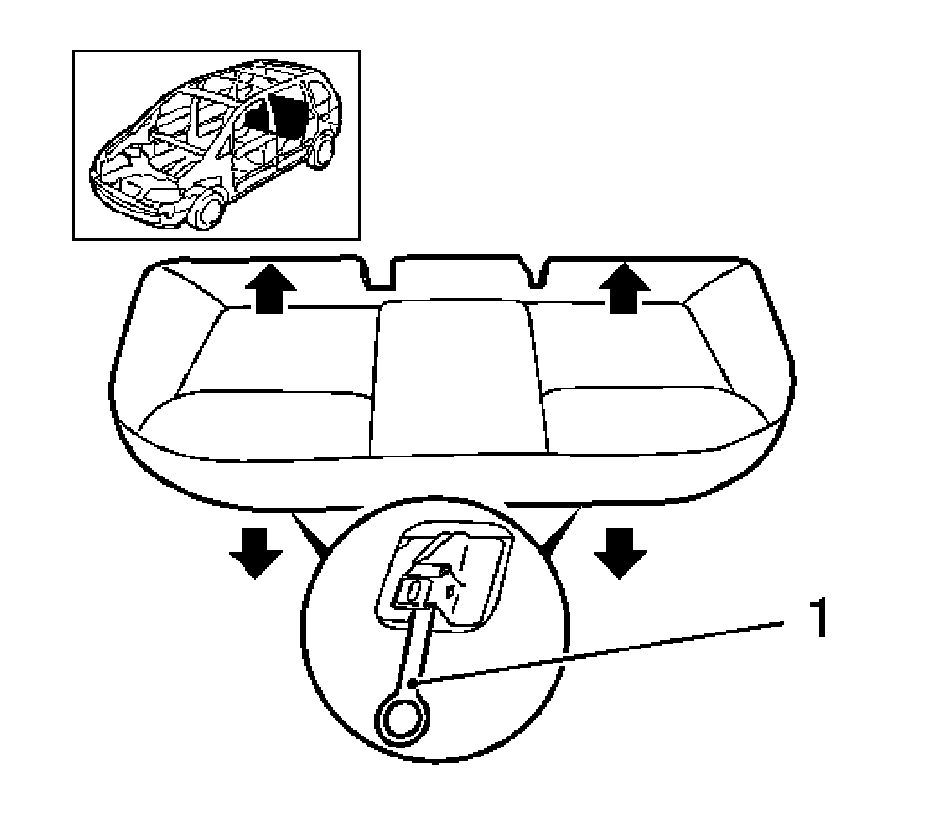
6. Remove the bench seat.
* Disconnect the front 2 brackets (1).
* Support the 2 bench seat from the rear bracket.
* Push the seat simultaneously backwards and upward.
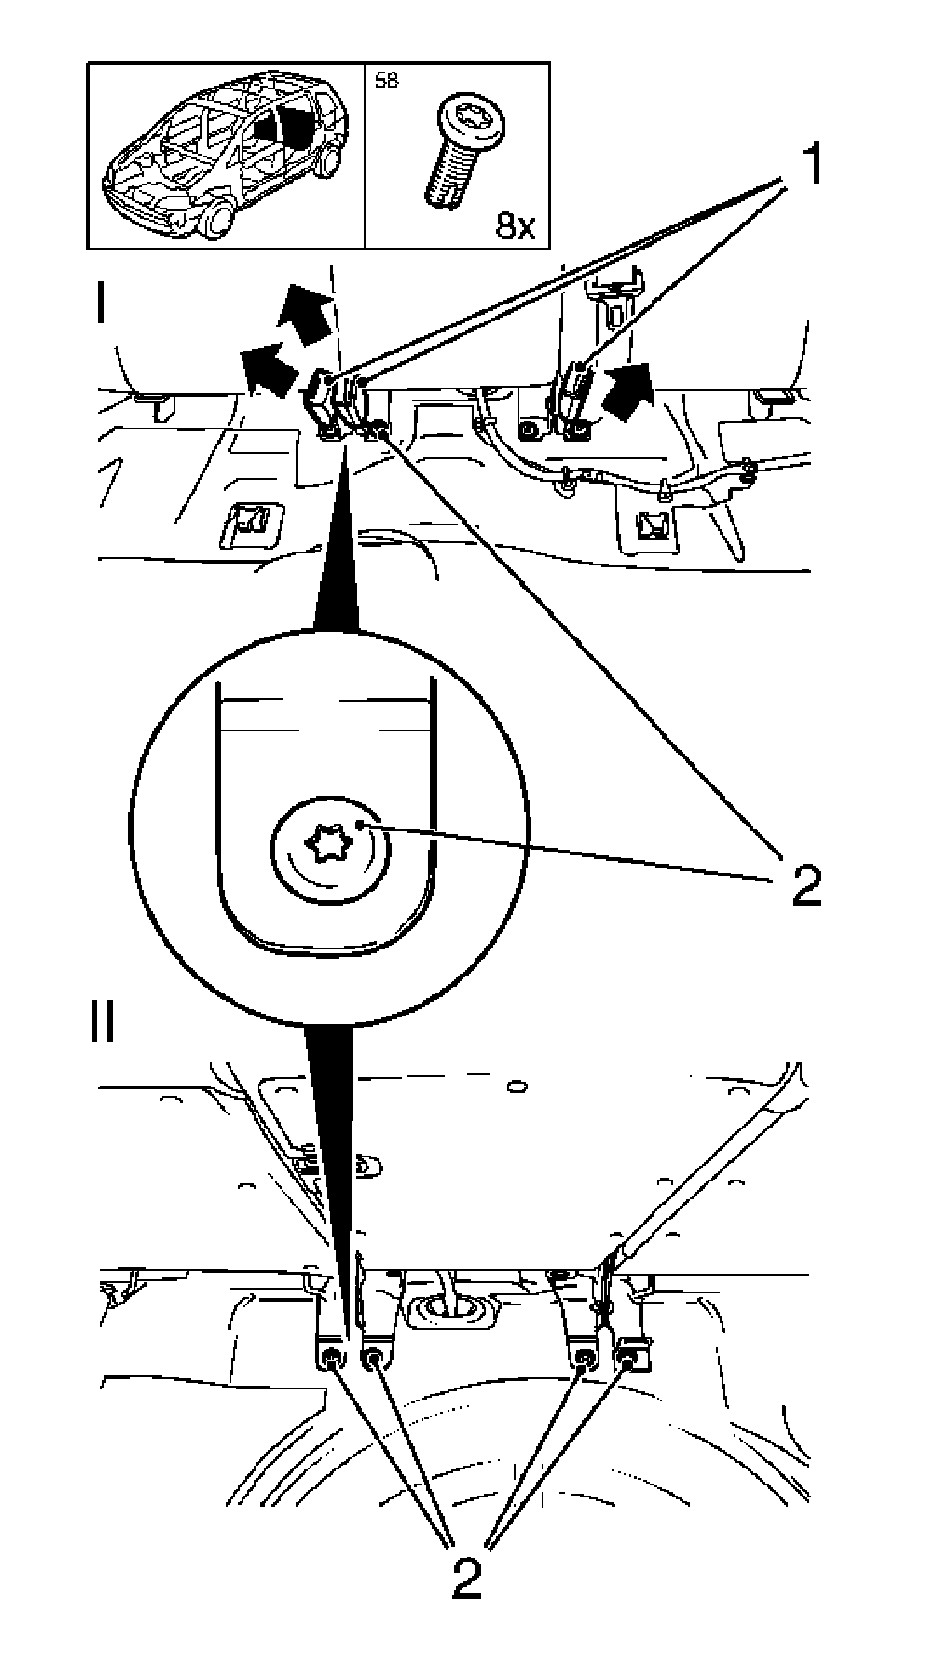
7. Remove the rear seat backrest (l).
* Remove the 4 bolts (2) at the front.
* Remove the 3 belt buckles (1).
* Fold down the rear seat backrest (II).
* Remove the 4 rear bolts (2).
8. Remove the rear seat backrest.
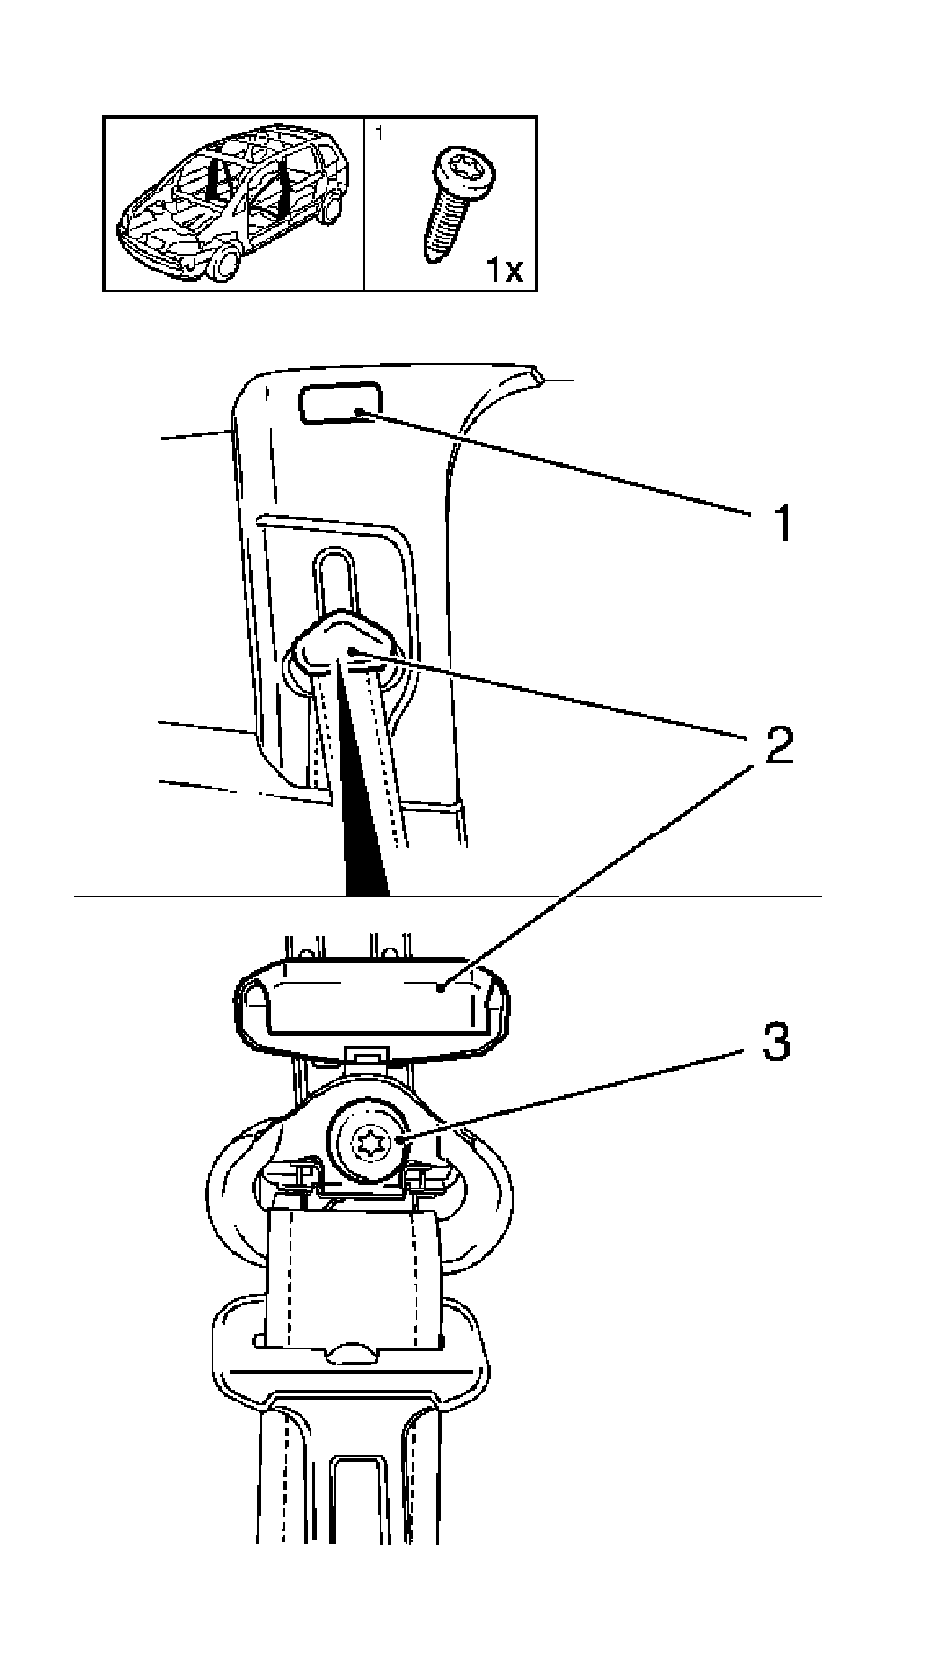
9. Remove the upper center pillar garnish molding.
* Pull out the plastic rivet (1) from the upper center pillar.
* Remove the molding from the seat with a plastic wedge.
* Remove the seat belt bolts (3) from the upper center pillar.
* Remove the cap (2).
* Remove the upper center pillar upwards.
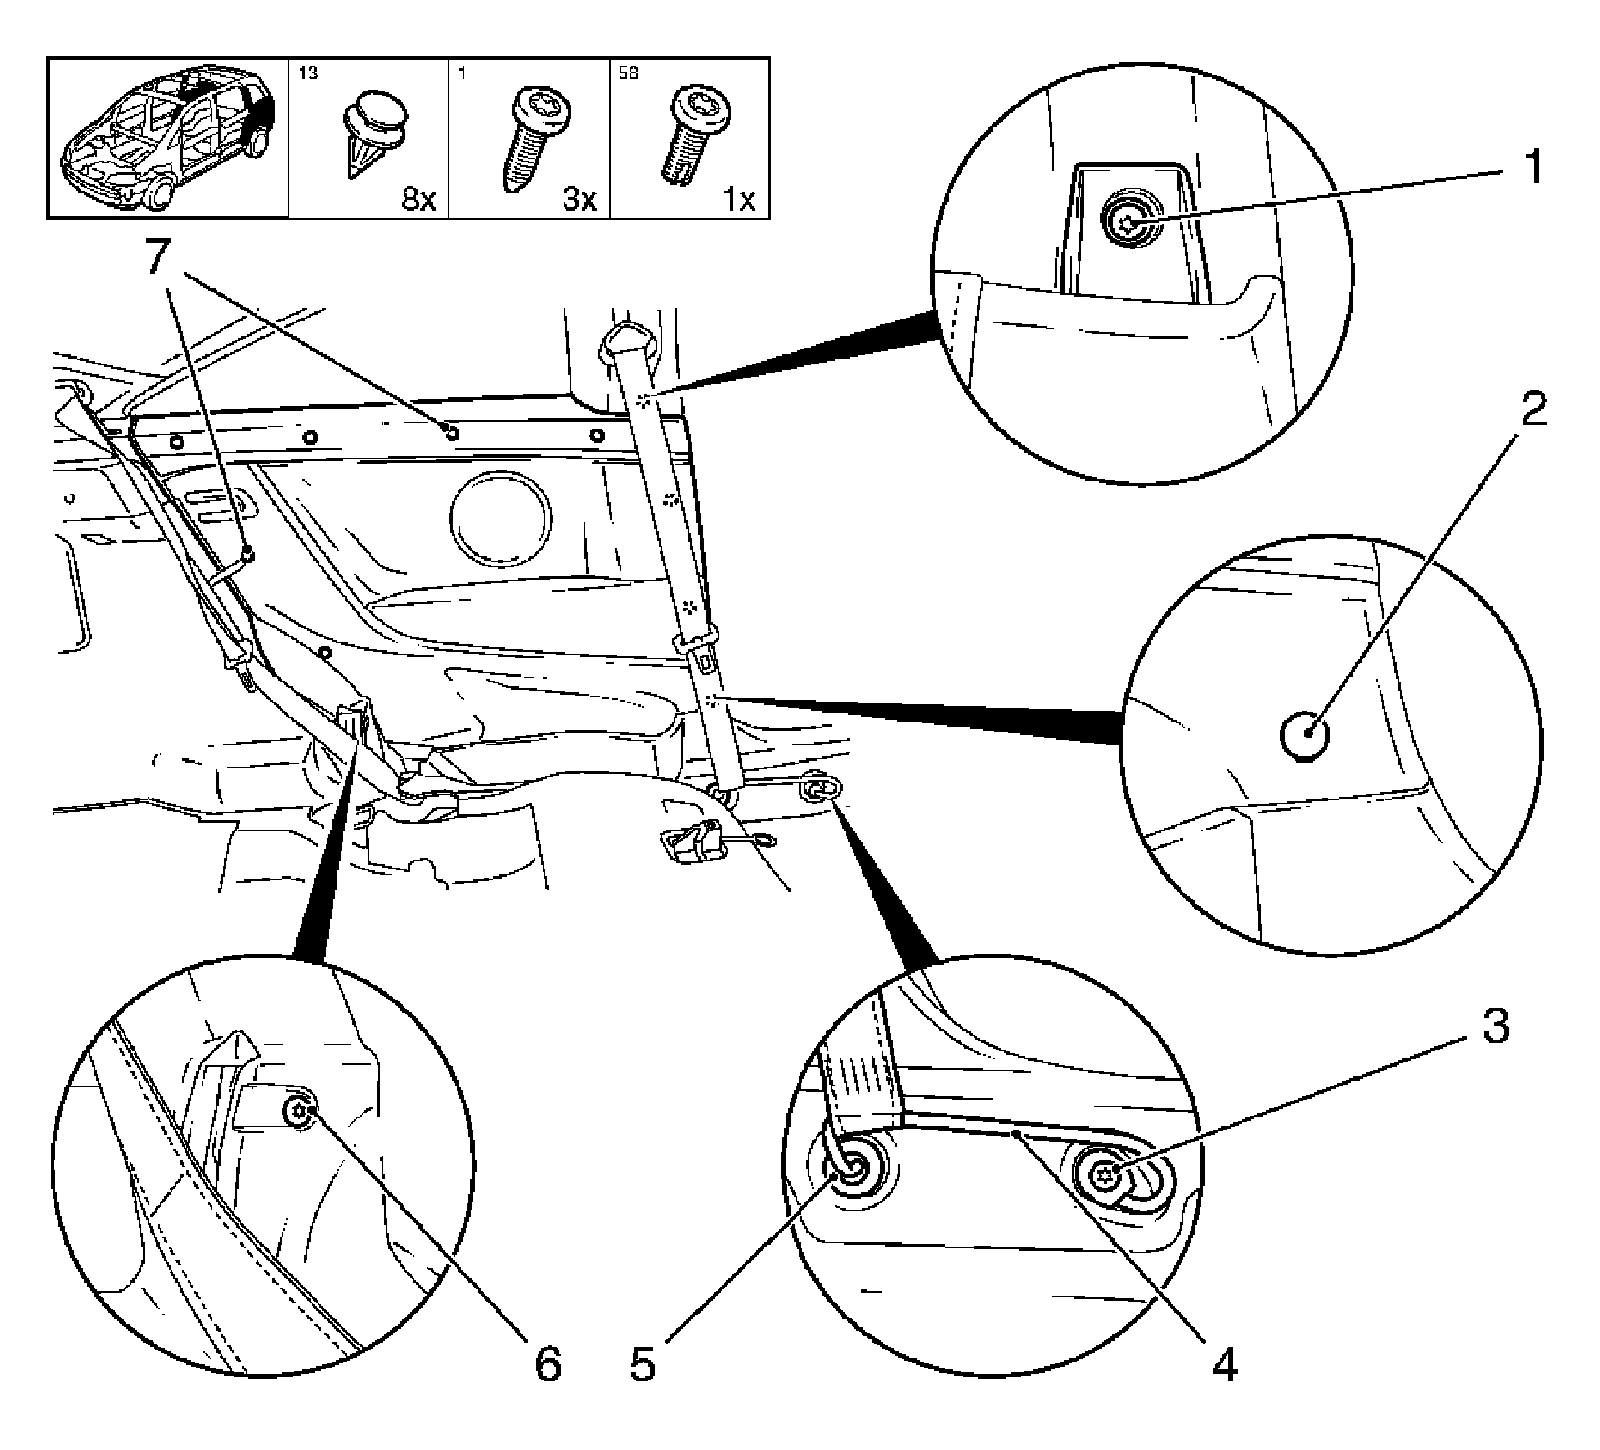
10. Remove the lower rear quarter panel.
* Remove the lower seat belt fastening (3).
* Remove the lower seat belt anchor bar (4).
* Remove the seat belt with striker.
* Remove the seat belt striker guide bushing (5) from the lower rear quarter panel.
* Remove the lower rear quarter panel cover cap (2).
* Remove the bolt.
* Remove the bolts (6) from the rear seat backrest.
* Remove bolt (1) from the upper center pillar.
* Release the lower rear quarter trim panel.
* Release the 8 clips (7).
Installation Procedure
Caution: Refer to Fastener Caution (Fastener Caution).
1. Install the rear quarter lower trim panel.
* Install the 8 rear quarter panel clips.
- Tighten the bolt on the lower rear quarter trim.
- Tighten the bolt to rear seat backrest.
- Tighten the lower rear quarter trim.
* Install the rear quarter panel cover cap front.
* Install the seat belt striker guide bushing to the rear quarter panel front.
* Install the seat belt with striker.
* Install the lower seat belt striker.
Tighten the lower belt striker to 35 Nm (26 lb ft).
2. Install the upper center pillar garnish molding.
* Guide the upper center pillar from above in the inner paneling guide front of the rear quarter panel.
* Install the upper center pillar.
* Press in the expanding bolt.
Tighten the seat belt bolt to 35 Nm (26 lb ft).
* Install the cover cap.
3. Insert the rear seat backrest.
4. Install the rear seat backrest.
* Guide in and position the rear seat backrest with the guide pins right and left in the rear quarter panel.
Tighten the 4 rear bolts to 20 Nm (15 lb ft).
* Fold down rear the seat backrest.
* Insert the 3 seat belt buckles.
Tighten the 3 front bolts to 20 Nm (15 lb ft).
5. Install the bench seat.
* Support the 2 seats in the rear bracket.
* Push the seat simultaneously backwards and down.
* Bolt the 2 front brackets.
6. Install the additional storage trays under the load compartment carpet.
7. Install the trailer hitch ball head.
* Thread the belt through the eye.
* Insert the ball.
* Tighten the belt.
8. Install the rear compartment carpet.
9. Install the luggage shade.
* Engage the cover in the side support 2,.
* Install the 2 retaining cords to the liftgate.
10. Install the sill door panel.
Install the 5 clips.